Category: Flat Refurb
Flat Refurbishment – Part 8
flat refurbishment – part 8
So now that the flat is finished, what more could there possibly be to add to this journey? Well the answer to that rather unusually is to sell it! When I bought the flat my partner was amazing for letting me stay with her for nearly 3 months whilst I got to the point where the flat was liveable. During that time it became quite obvious that the both of us enjoyed living together which made it difficult when I moved back to the flat. I continued to spend most of my time at her house, and then in march the first lockdown came. We made the decision for me to stay with her again as we did not want to be apart for the duration of the lockdown and this further cemented our desire to live together.
So in August 2020 I decided to sell the flat and put it on the market. I discussed it with the boy just to make sure that it was a decision he was comfortable with too which thankfully he was. My partners place had a bedroom that would be his and like me he felt quite at home there.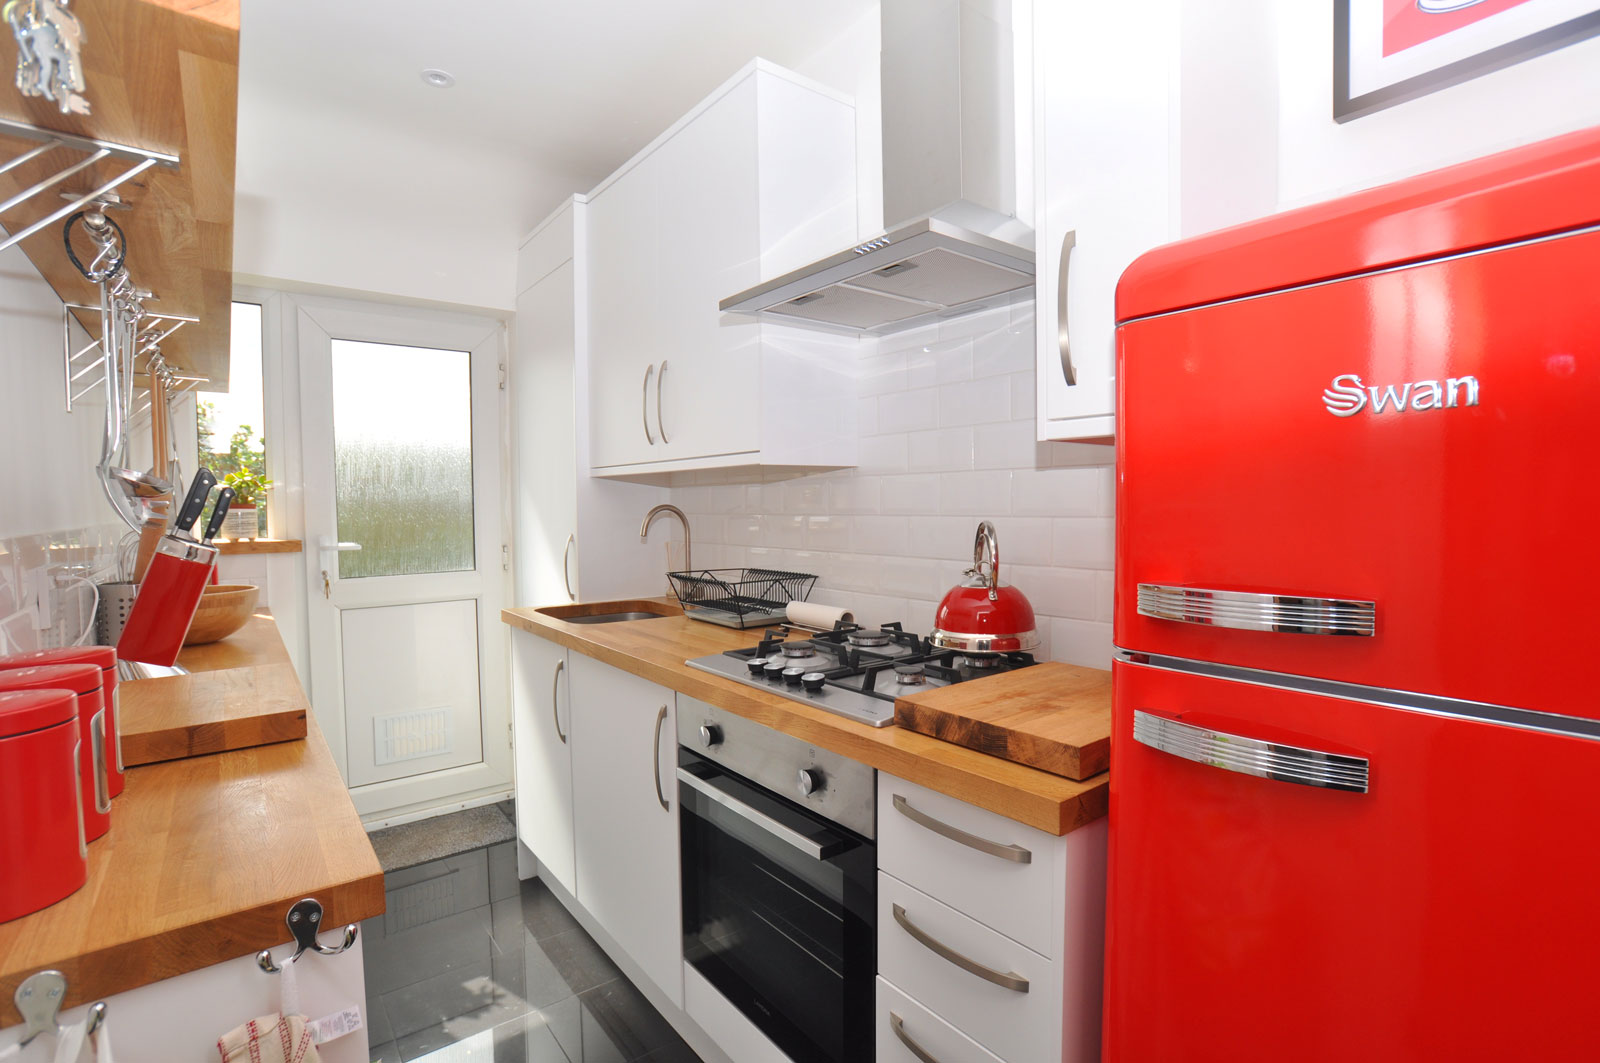
Every inch of space made to measure!
I thought about keeping and renting the flat but I didn’t want the hassle of being a landlord and I wouldn’t have been able to change my mortgage to a buy-to-let which legally I would have to had done. It did cross my mind that selling the flat during a pandemic might not be the wisest decision but I couldn’t have been more wrong. I enlisted the help of Belvoir Estate Agents in Hitchin who were brilliant throughout the whole process. At the time the Government had just introduced a relief on stamp duty which I think was a big help in selling, along with the obvious fact that the whole place had just been completely refurbed!
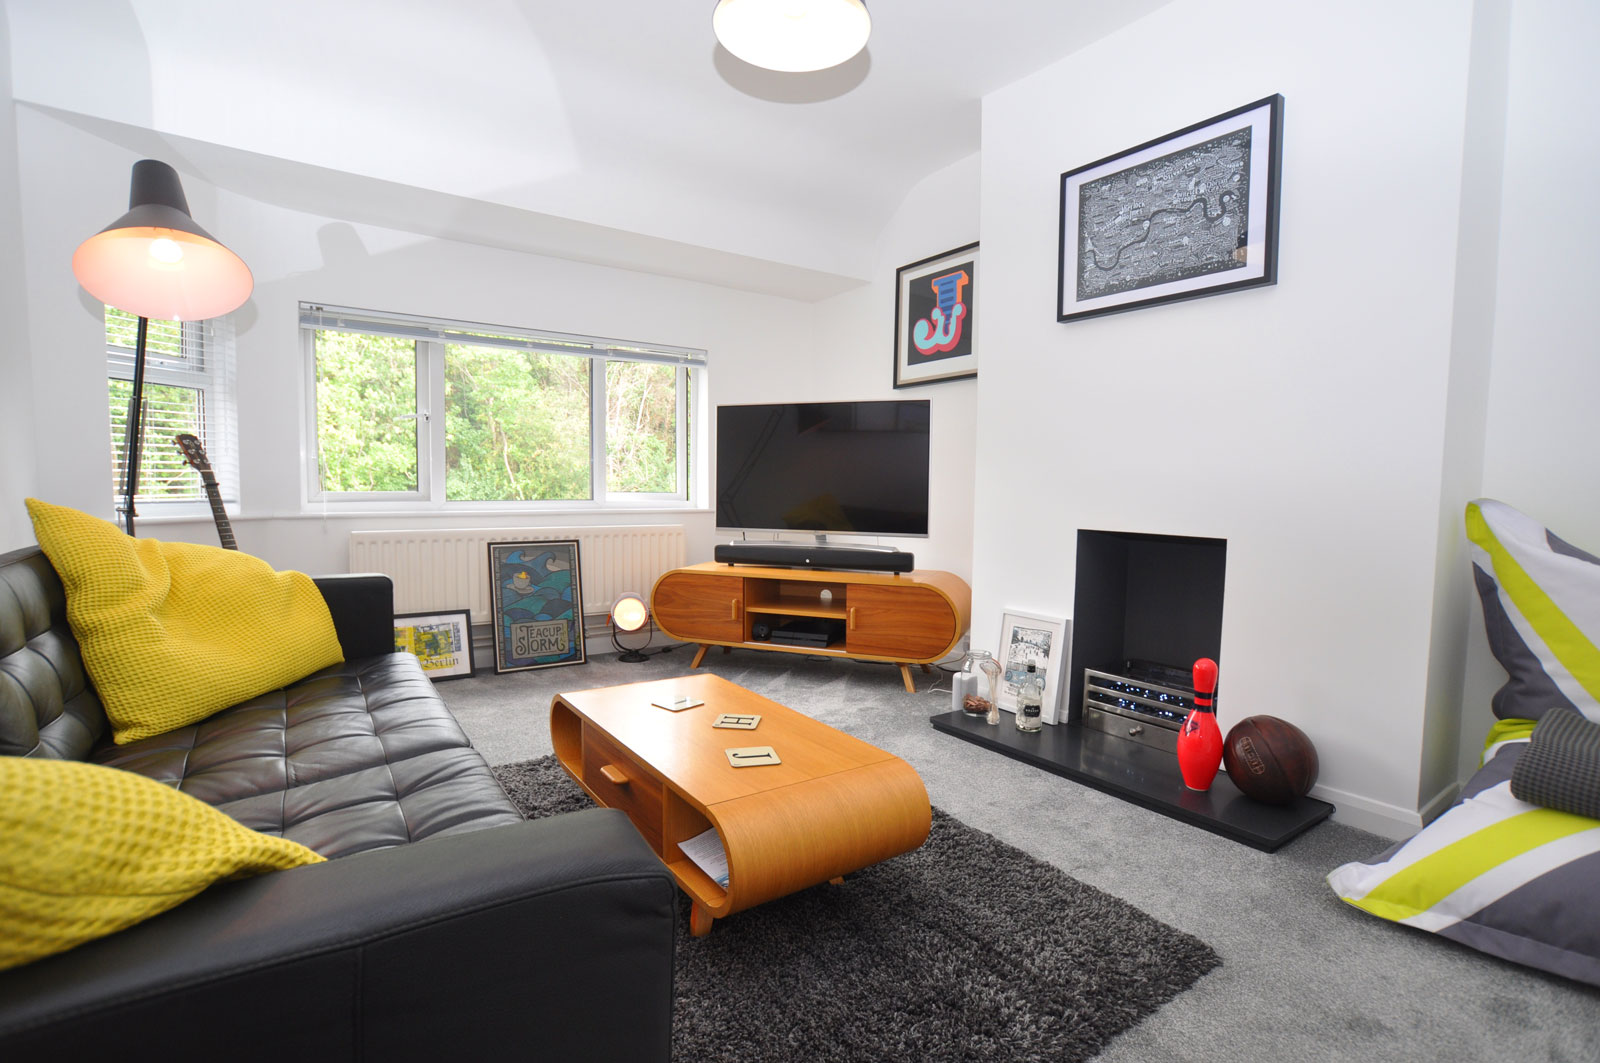
The photos on this post are the ones Belvoir took and used to promote and sell the flat on their website. Within days of the flat going online I had a viewing and shortly after that an offer was made and a sale price was agreed. So by the end of October the flat was sold and with quite a nice profit considering the amount of work it took to make the flat look as good as it did. I had heard quite a lot of horror stories relating to people selling property but this went through relatively smoothly which I have to say I am very thankful for.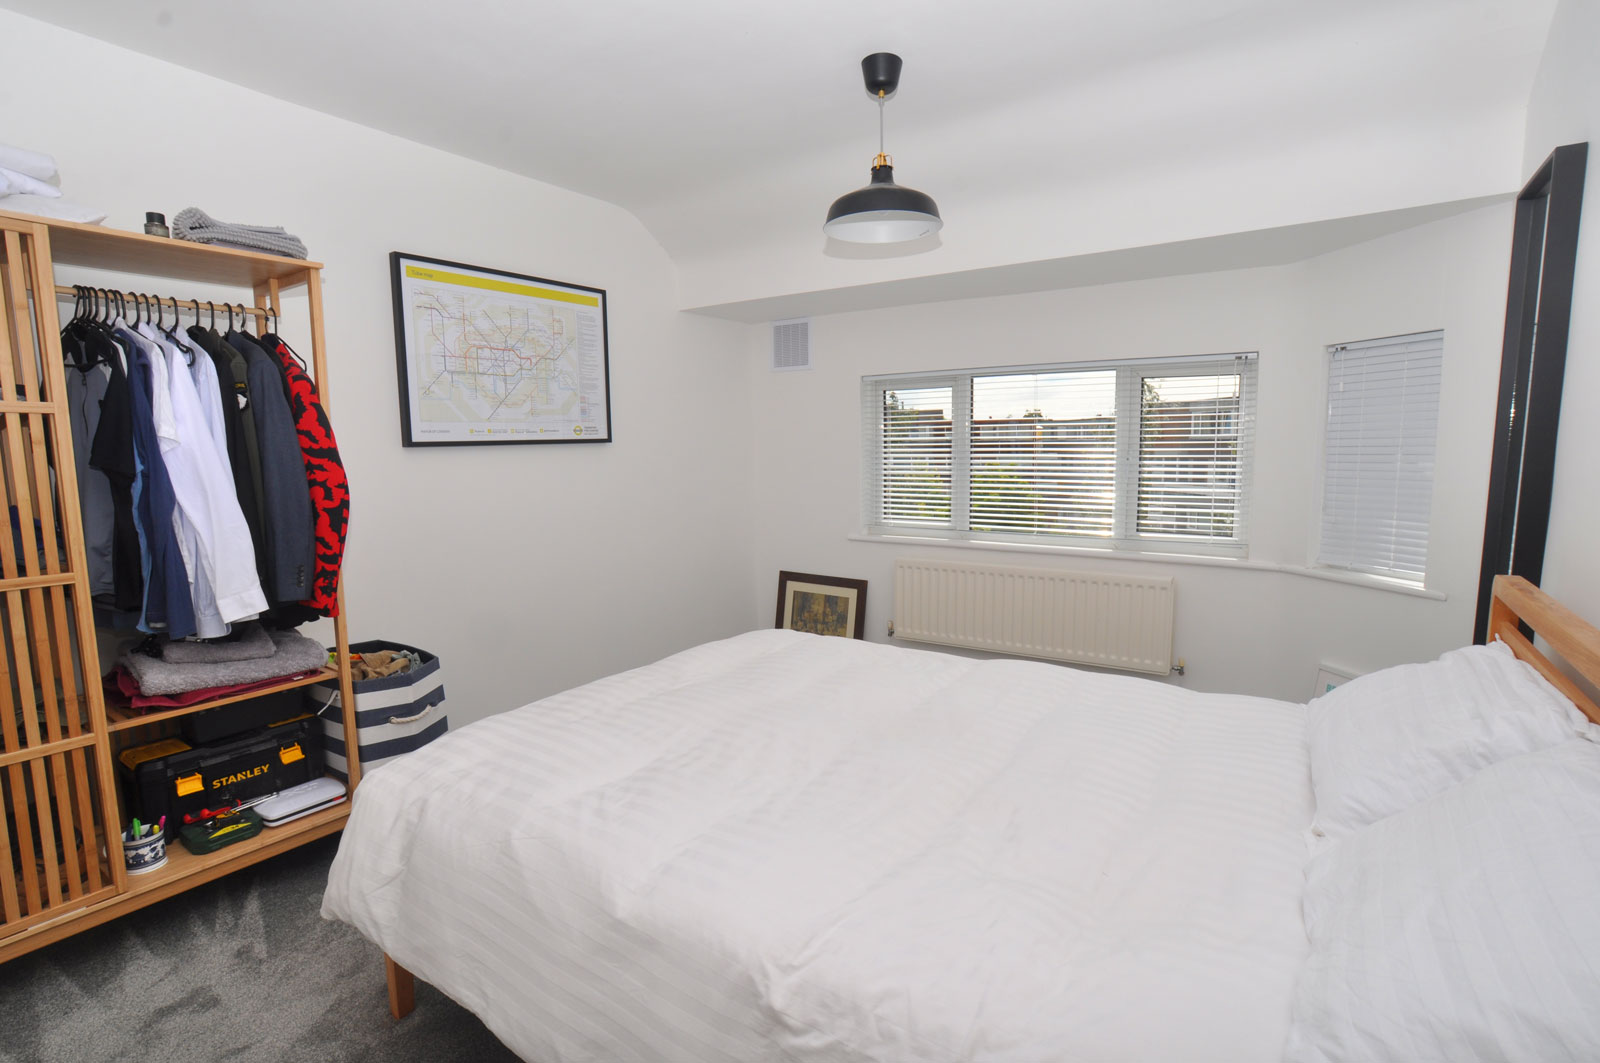
I now have this bed at my new home, so comfy!
Looking back on the journey I have had with the flat it does feel like a proper accomplishment. To see the transformation through looking at the photos on these blogs it doesn’t seem possible that I managed to do all that I did. As good as it looked in the end I think the reason it was quite easy for me to let go of it is because I didn’t really get emotionally attached to it. The time I spent living with my partner showed me a different direction that my life wanted to go in. A direction that made me happy and at the same time kept the flat as an isolated project outside of that. I’m sure if I had lived there I would have been quite happy, but I know with no uncertainty that I am a lot happier with where I am now.
Which just leaves me to say that if you ever find you self in a position to do a project like this then do it. I was full of uncertainty and self doubt at the start, there were ups and downs, joys and heartbreaks throughout and knowing what I know now there are some things I would have done differently. Ultimately it’s a journey I feel privileged to have had. One I have learnt a lot from and that will benefit me further on in my life and it’s been an experience that I will never forget!
Looking back on my finished blog I think it will serve as a great reminder for my future self. If ever I find myself in a situation feeling like I can’t do something, all I will have to do is just look at this and I will know!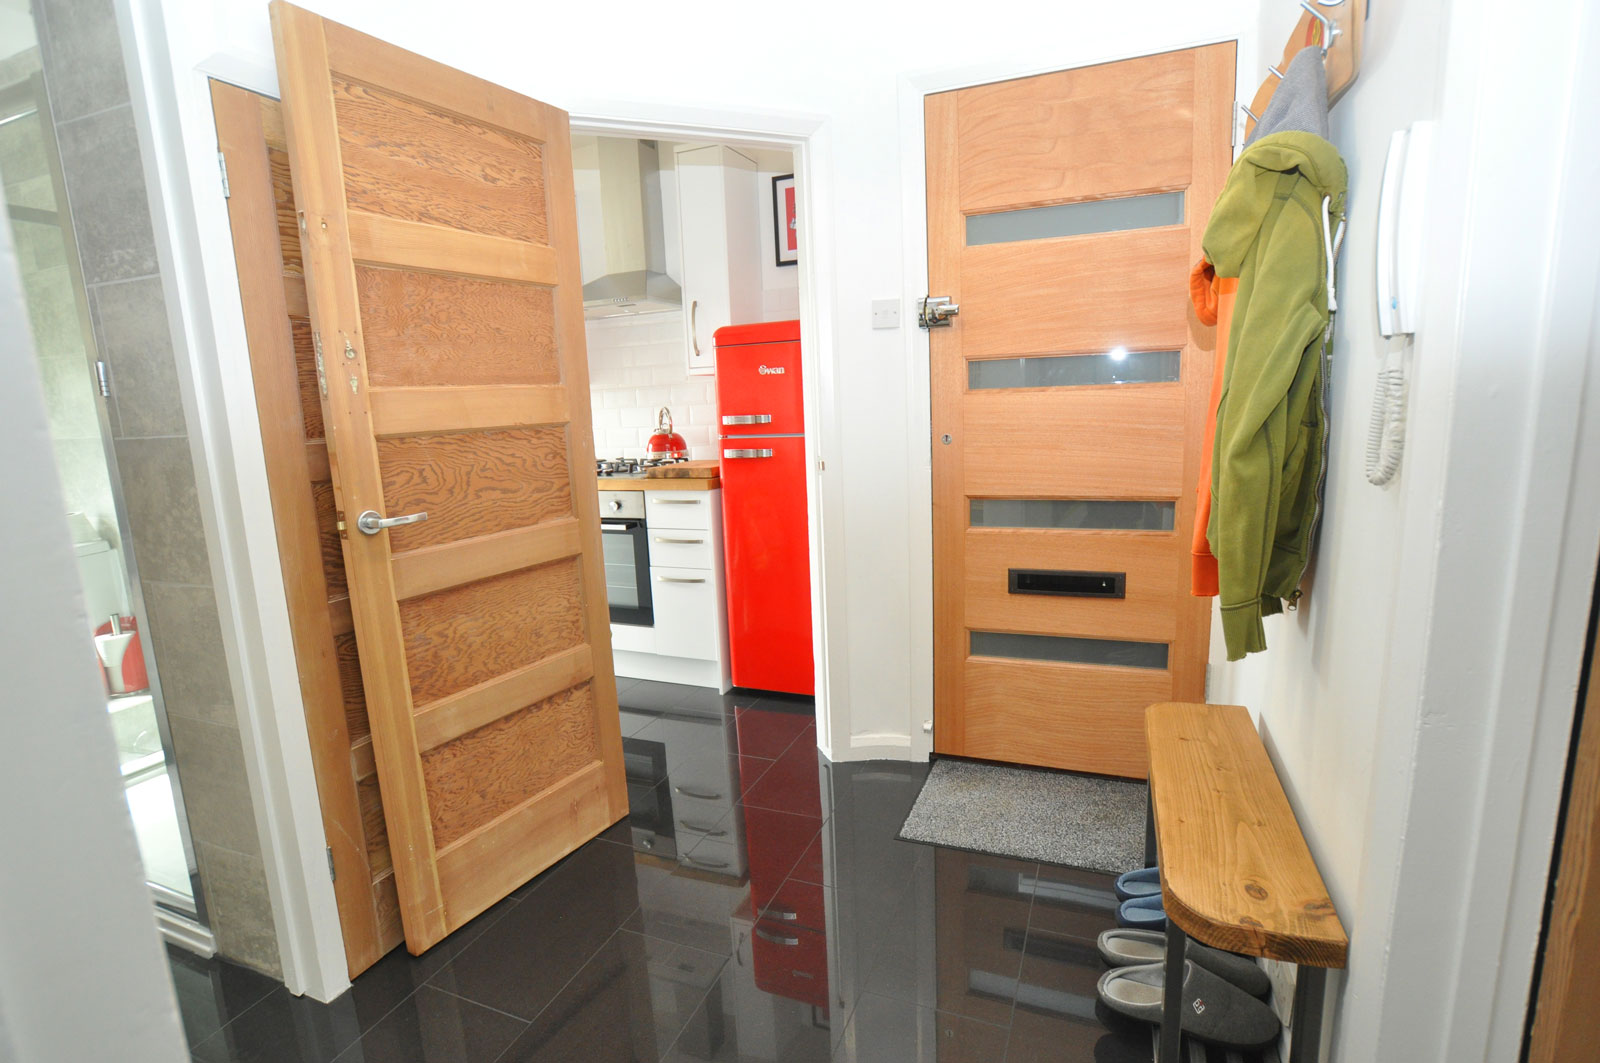
A small flat feeling very spacious.
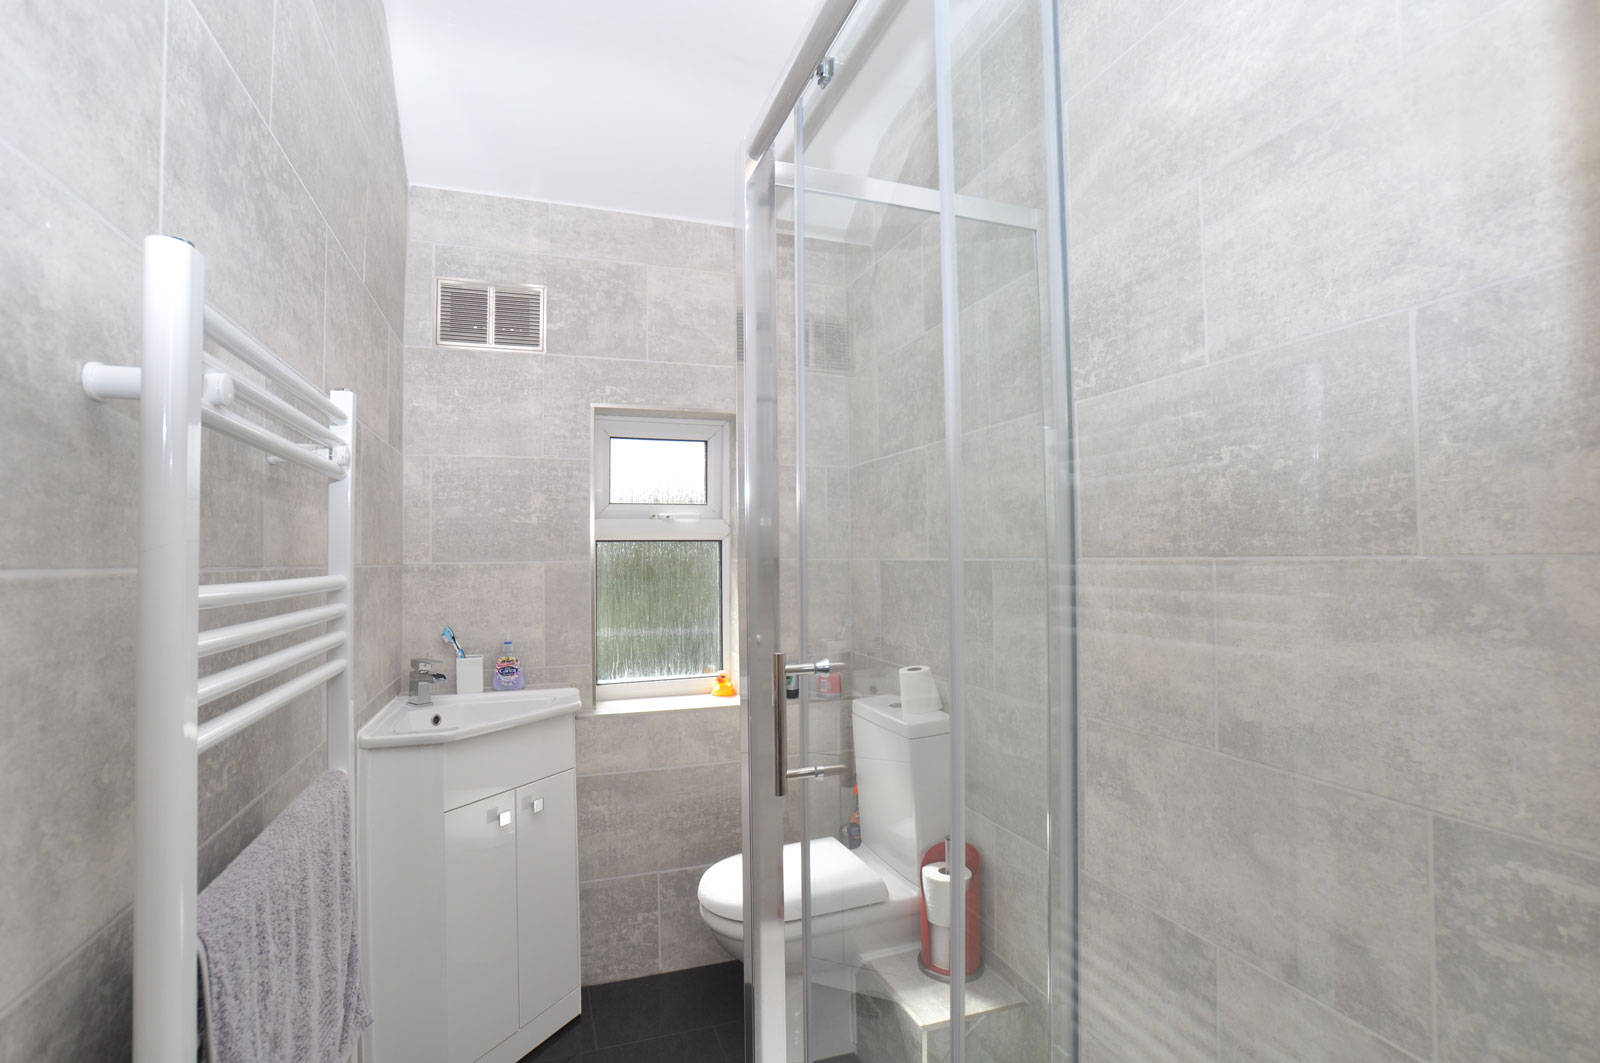
I will miss the rain shower. 🙁
Flat Refurbishment – Part 7
flat refurbishment – part 7
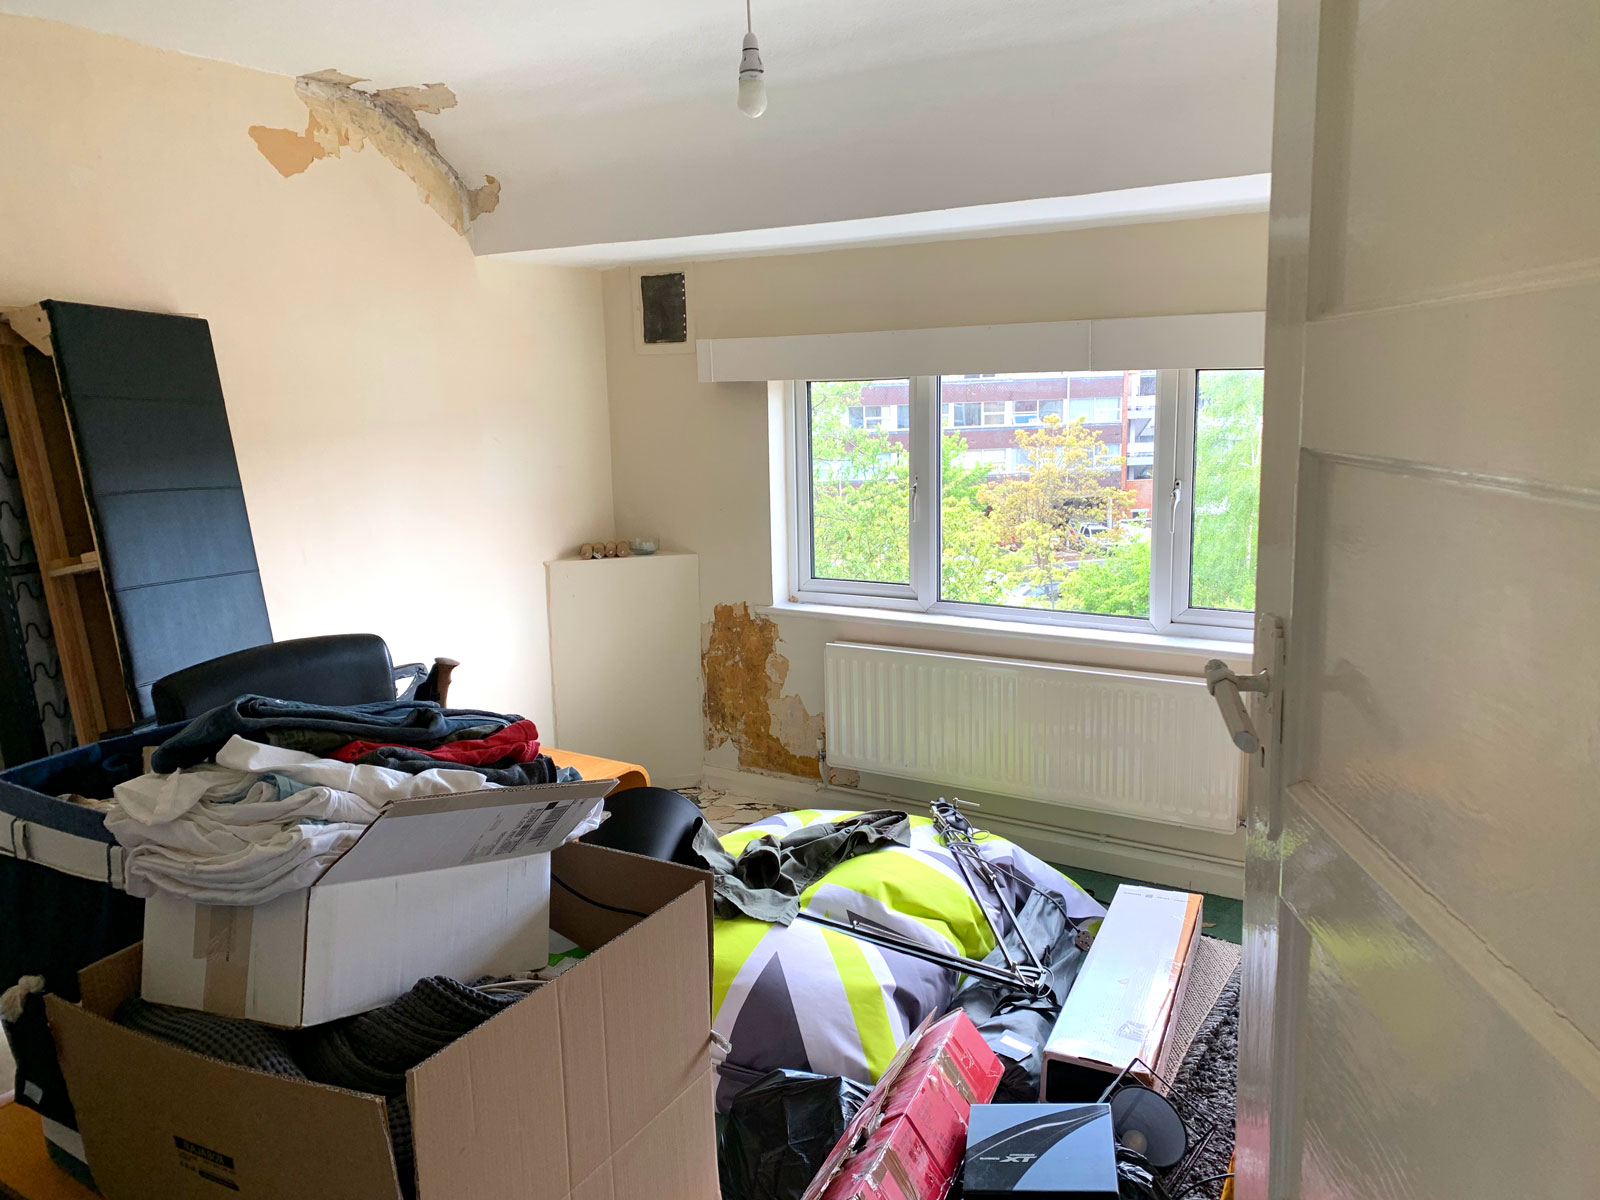
So here it is, the final room to be tackled and the journey’s end for my flat refurbishment project! As you can see from the cover pic, this room was used as storage whilst the rest of the flat was being sorted out. Once everything was out, this was a relatively simple room to do.
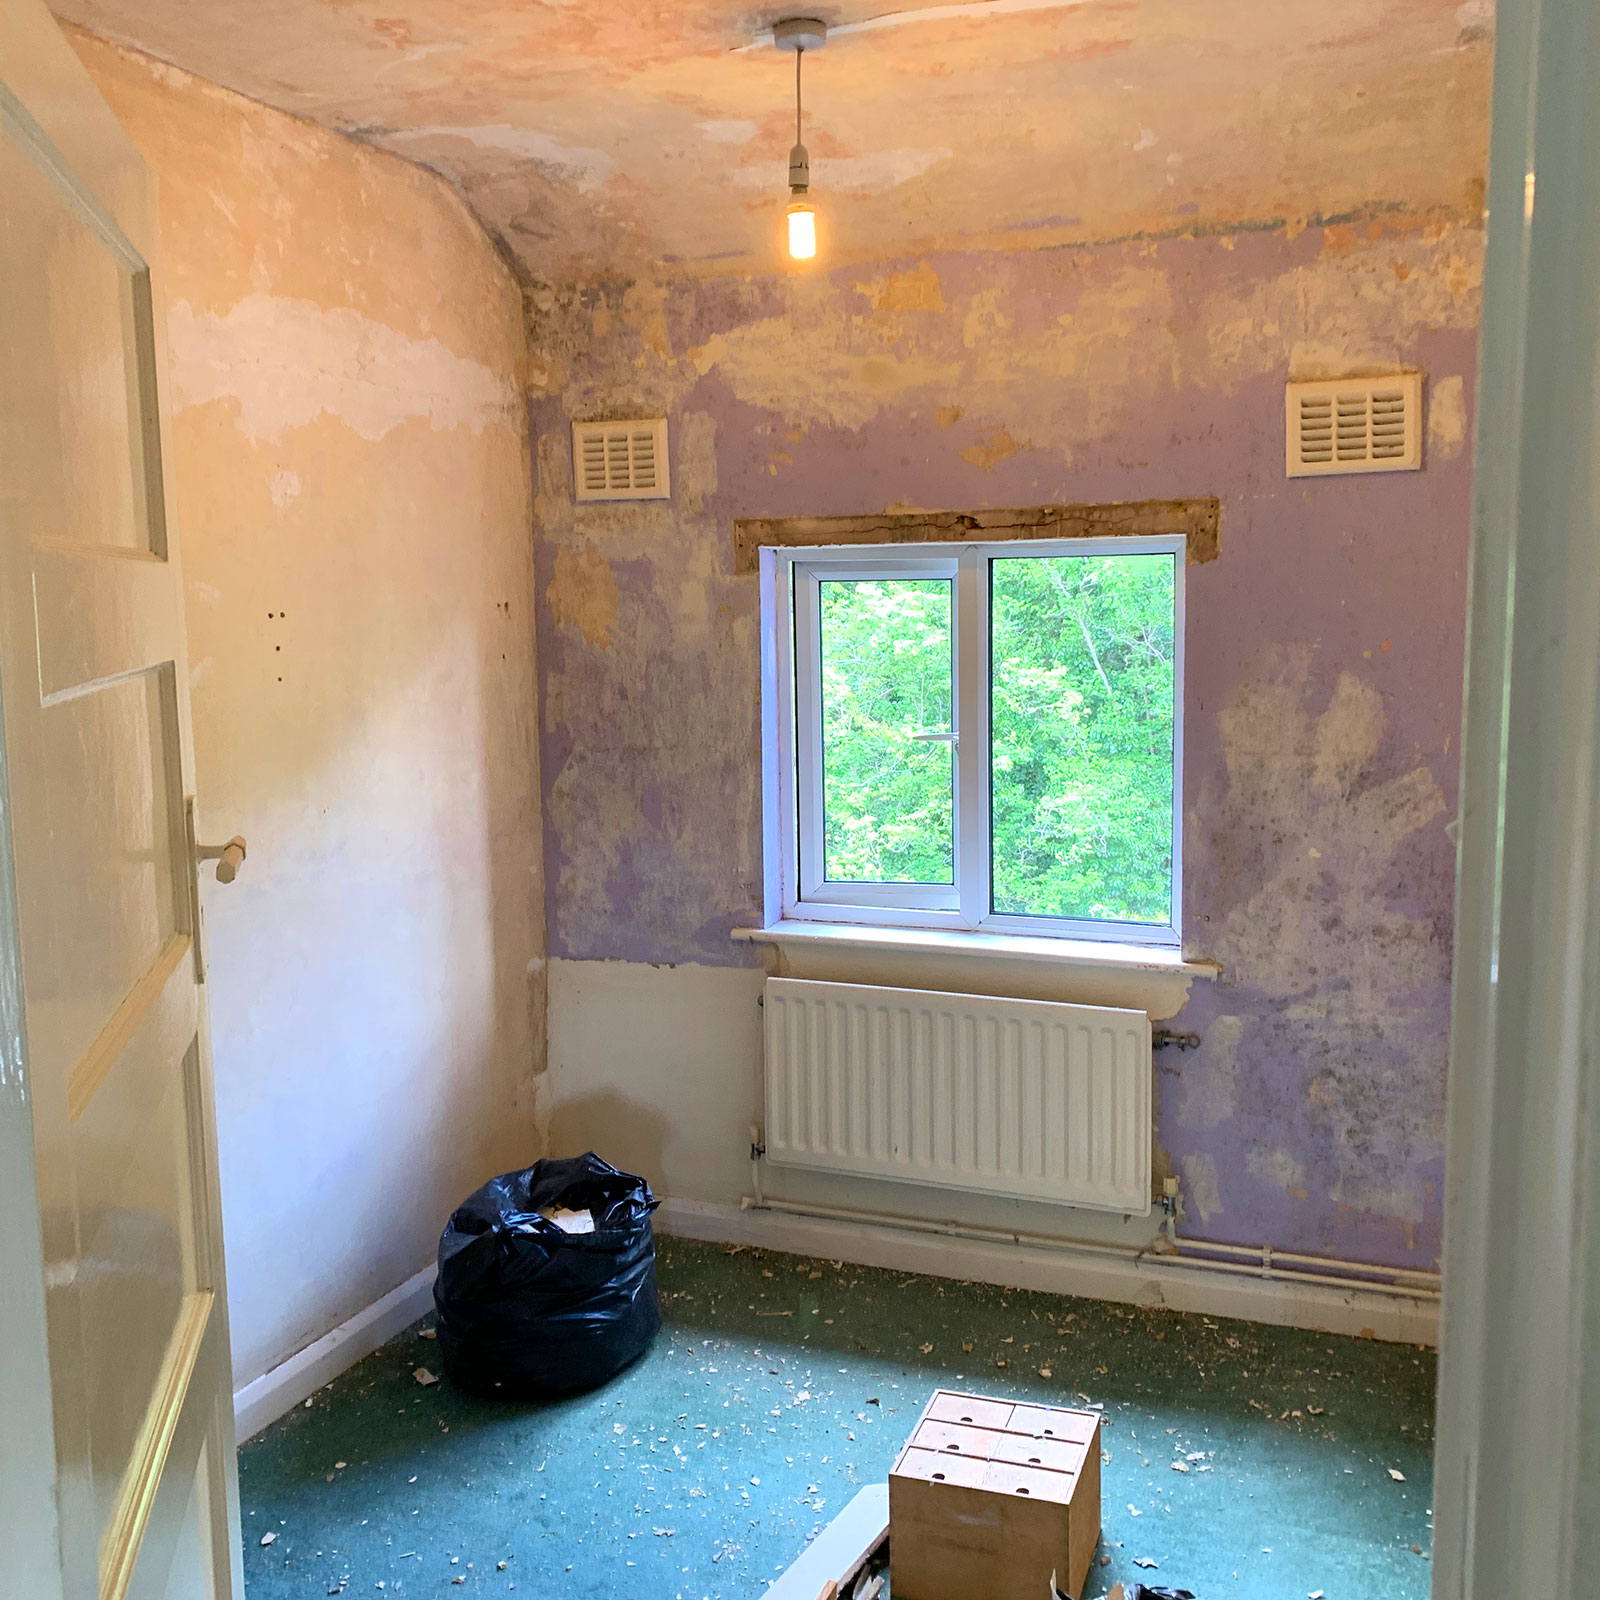
Like the other rooms it was covered in wood chip, both the walls and ceiling (I mean really, who does this!). It took a good few days to get it all off as the paper separated from the glue which meant I had to strip the whole room twice!
Again like the other rooms it needed a complete re-skim as well as the windowsill stripping back and repainting. It also needed new pipework for the radiator to be installed. This was because we changed how the pipework was routed in the bathroom to fit the new towel rack radiator. The pipework for the radiator in the main bedroom came through the wall from the bathroom and looked quite unsightly. So this was a great opportunity to have the pipework hidden away in the wall and under the floorboards which worked out incredibly well.
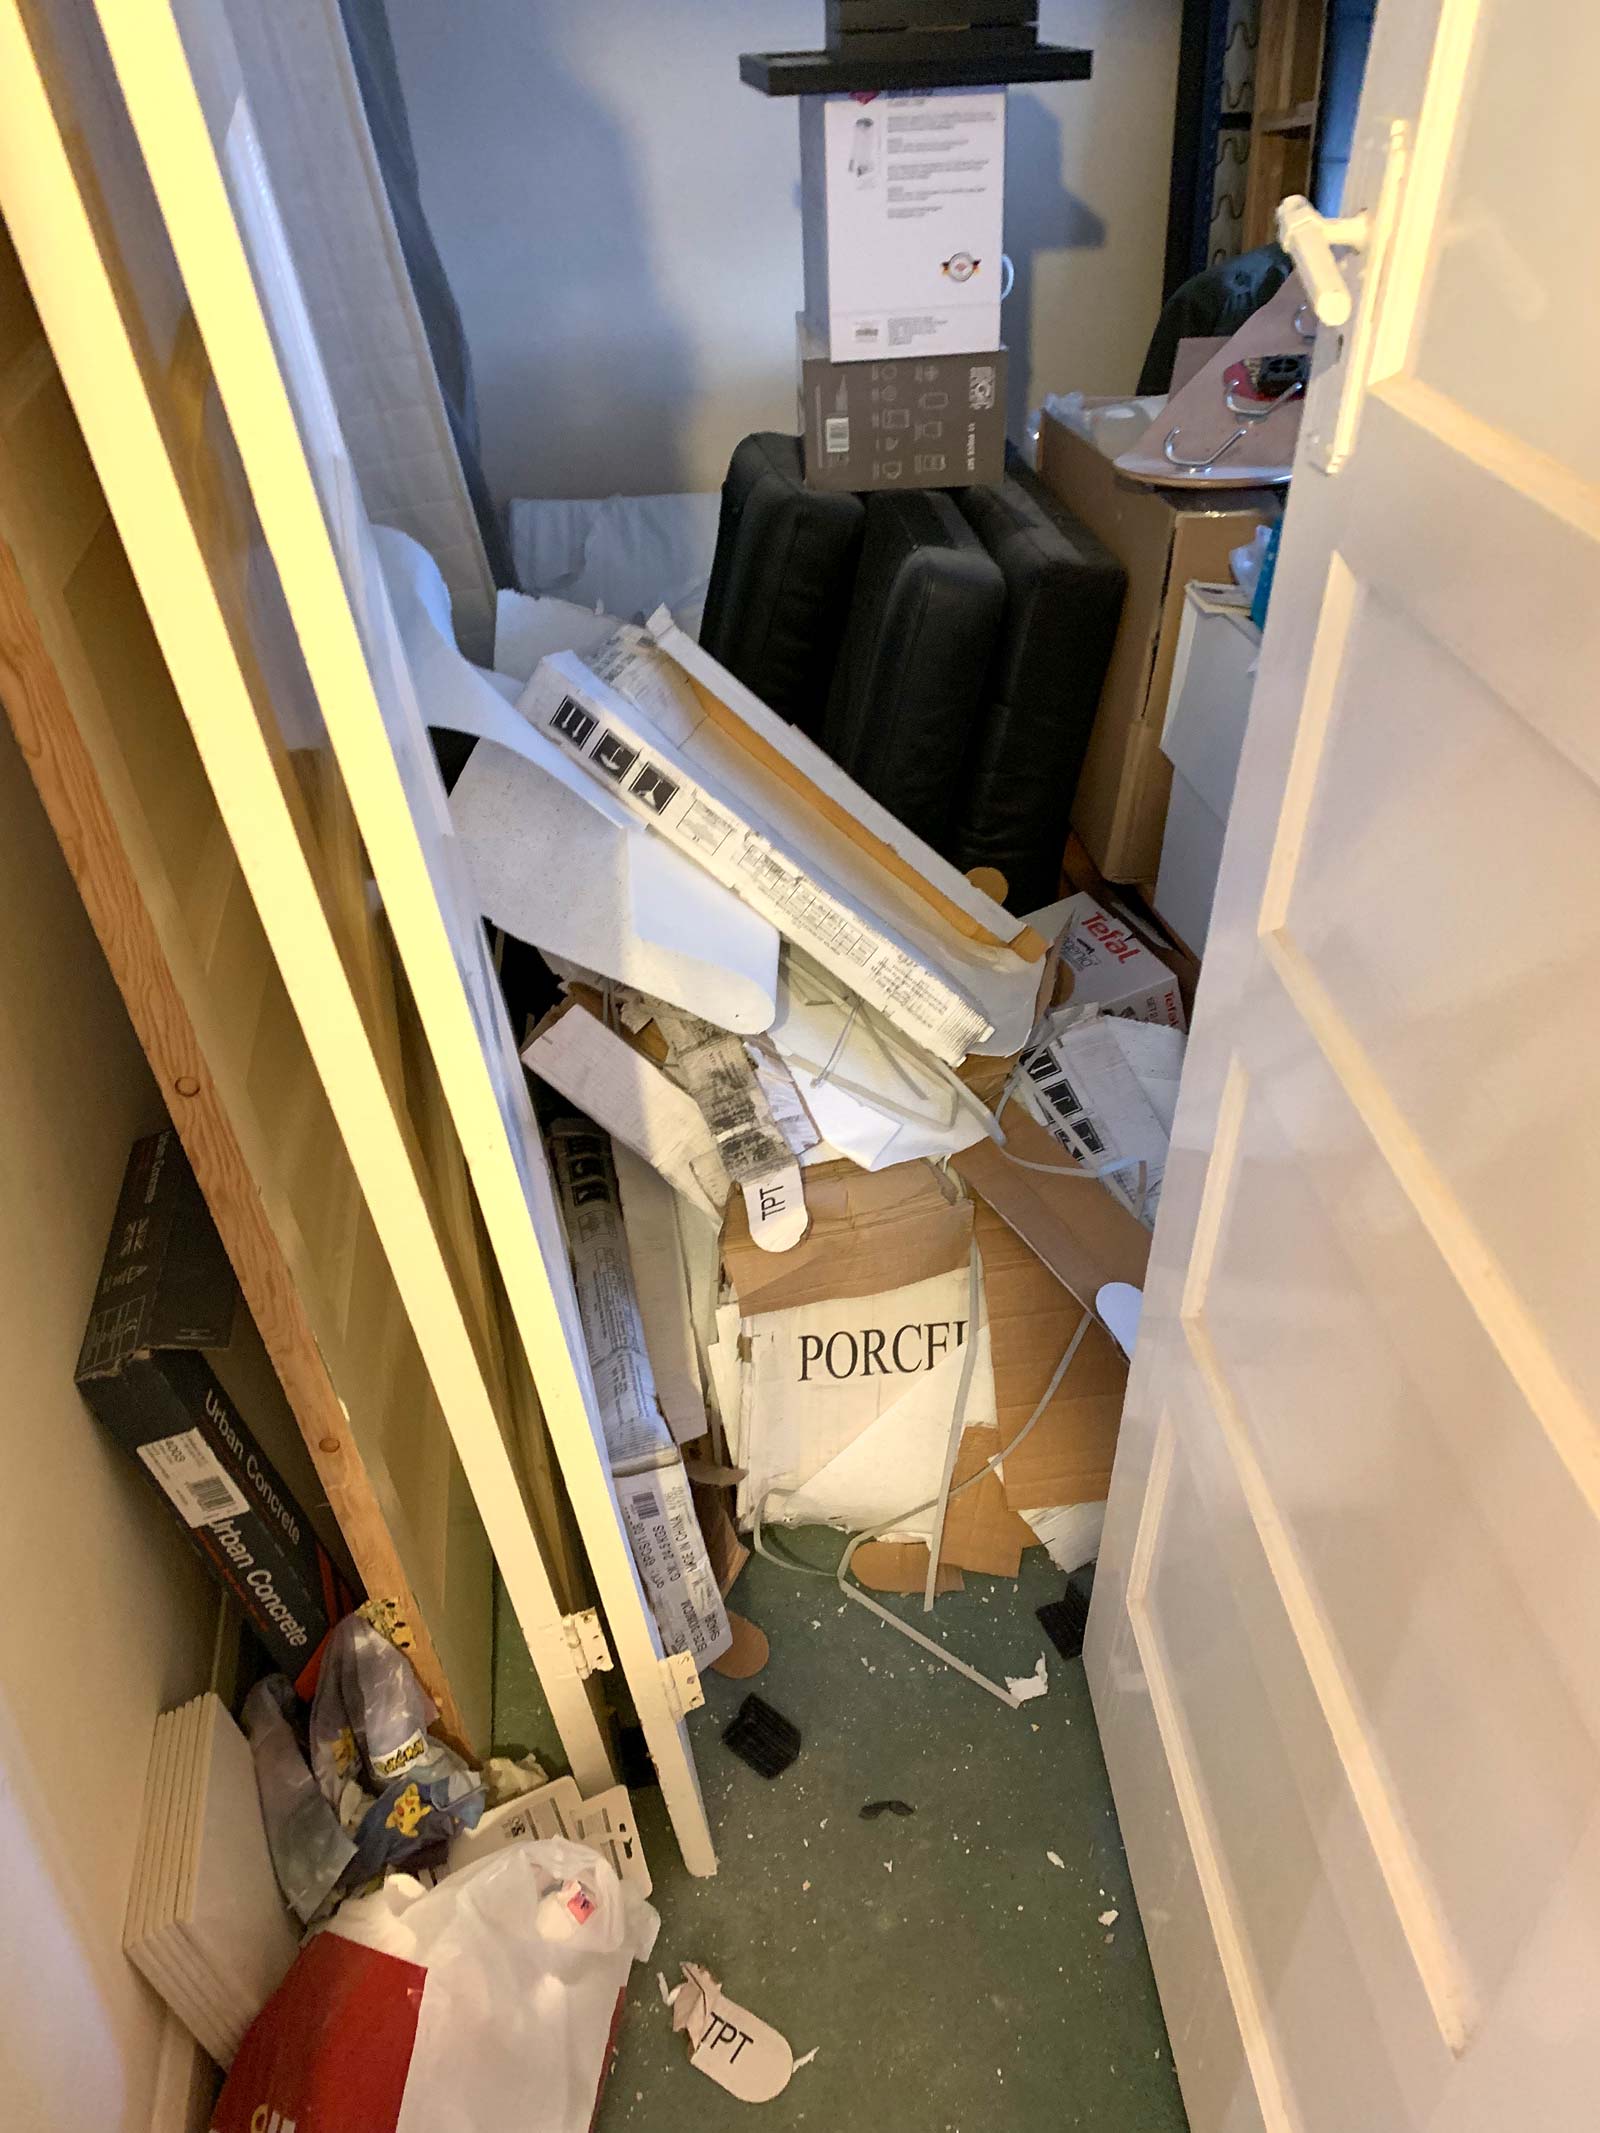
What a mess!
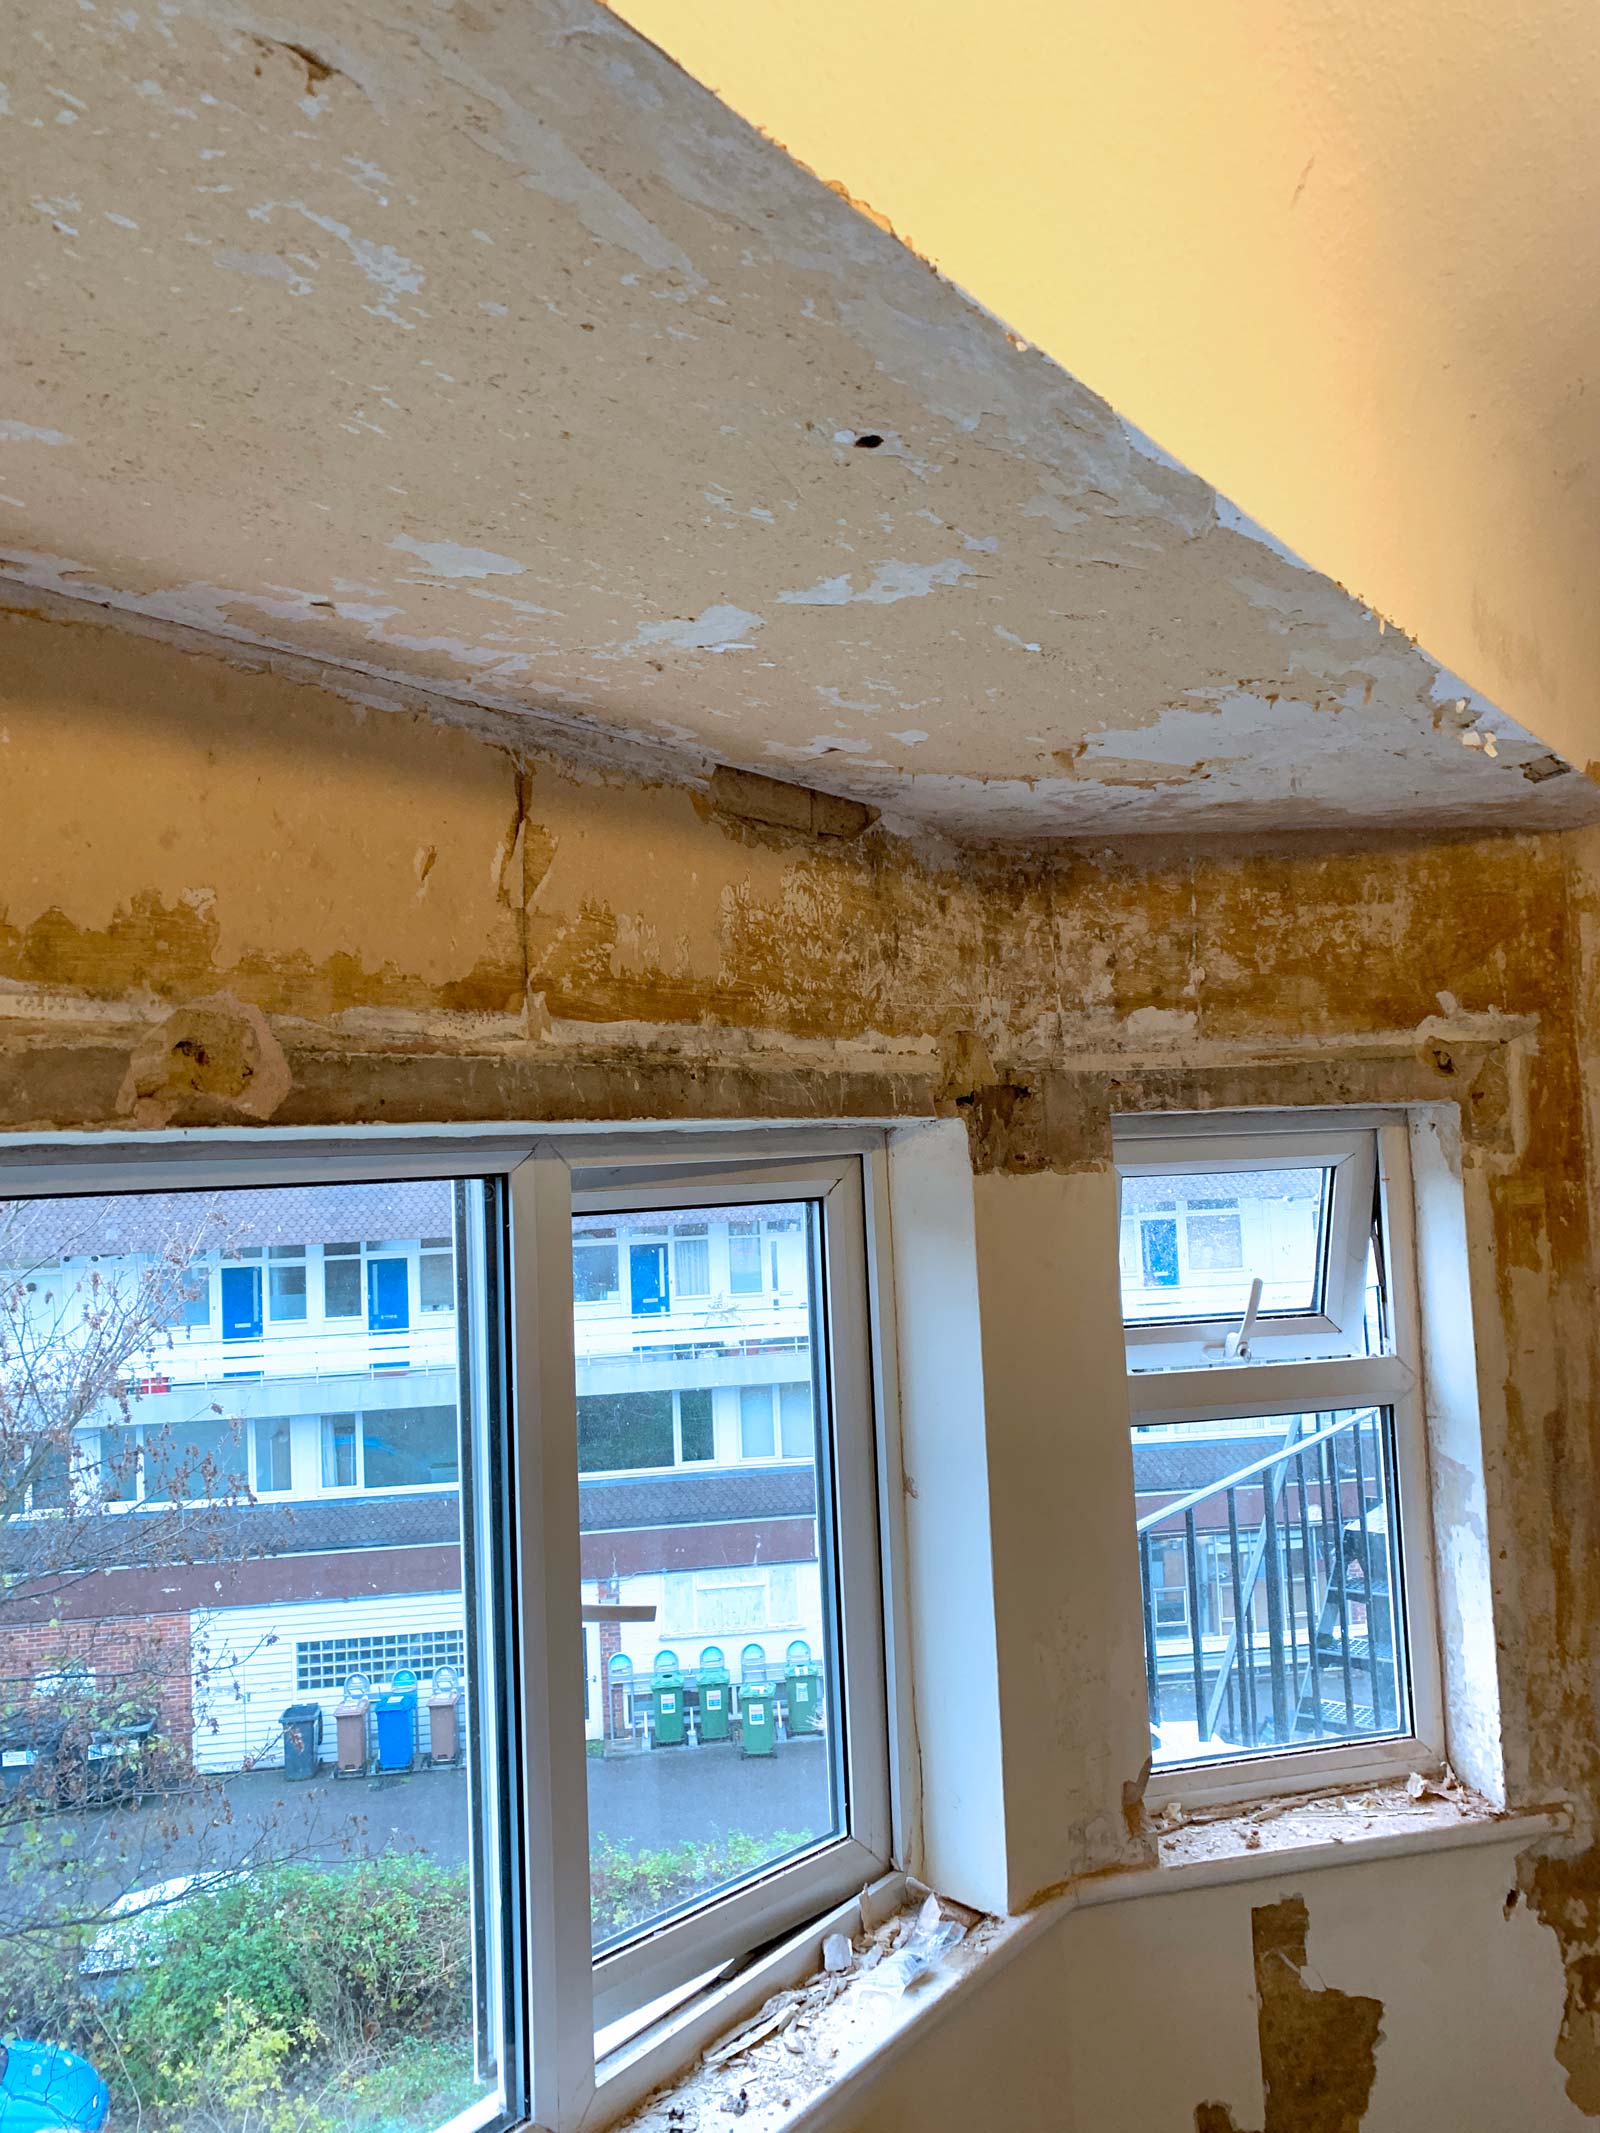
Hard work getting back to bare plaster!
So all in all one of the more uncomplicated rooms in the flat really… apart from the mystery cupboard/box in the corner! This really was a mystery as there was no obvious way to get inside it. I really didn’t want to keep it as it served no purpose other than being a mysterious eyesore and to be honest a little bit creepy. So I took the decision to remove it and hoped that whatever was inside would be easily removed as well.
This took some doing with a crowbar and a large hammer but eventually I broke inside. To my surprise, what I found was a corner heater and even more surprising is that it was electric! These flats were built in the 1930’s and this heater must have been part of the original spec.
The reason I say this is because when I removed it there was bare brickwork behind it where they obviously couldn’t plaster due to the heater already being in place. The electrical cable coming from it had been disconnected long ago and was very brittle in my hands so there was no worry when taking it out.
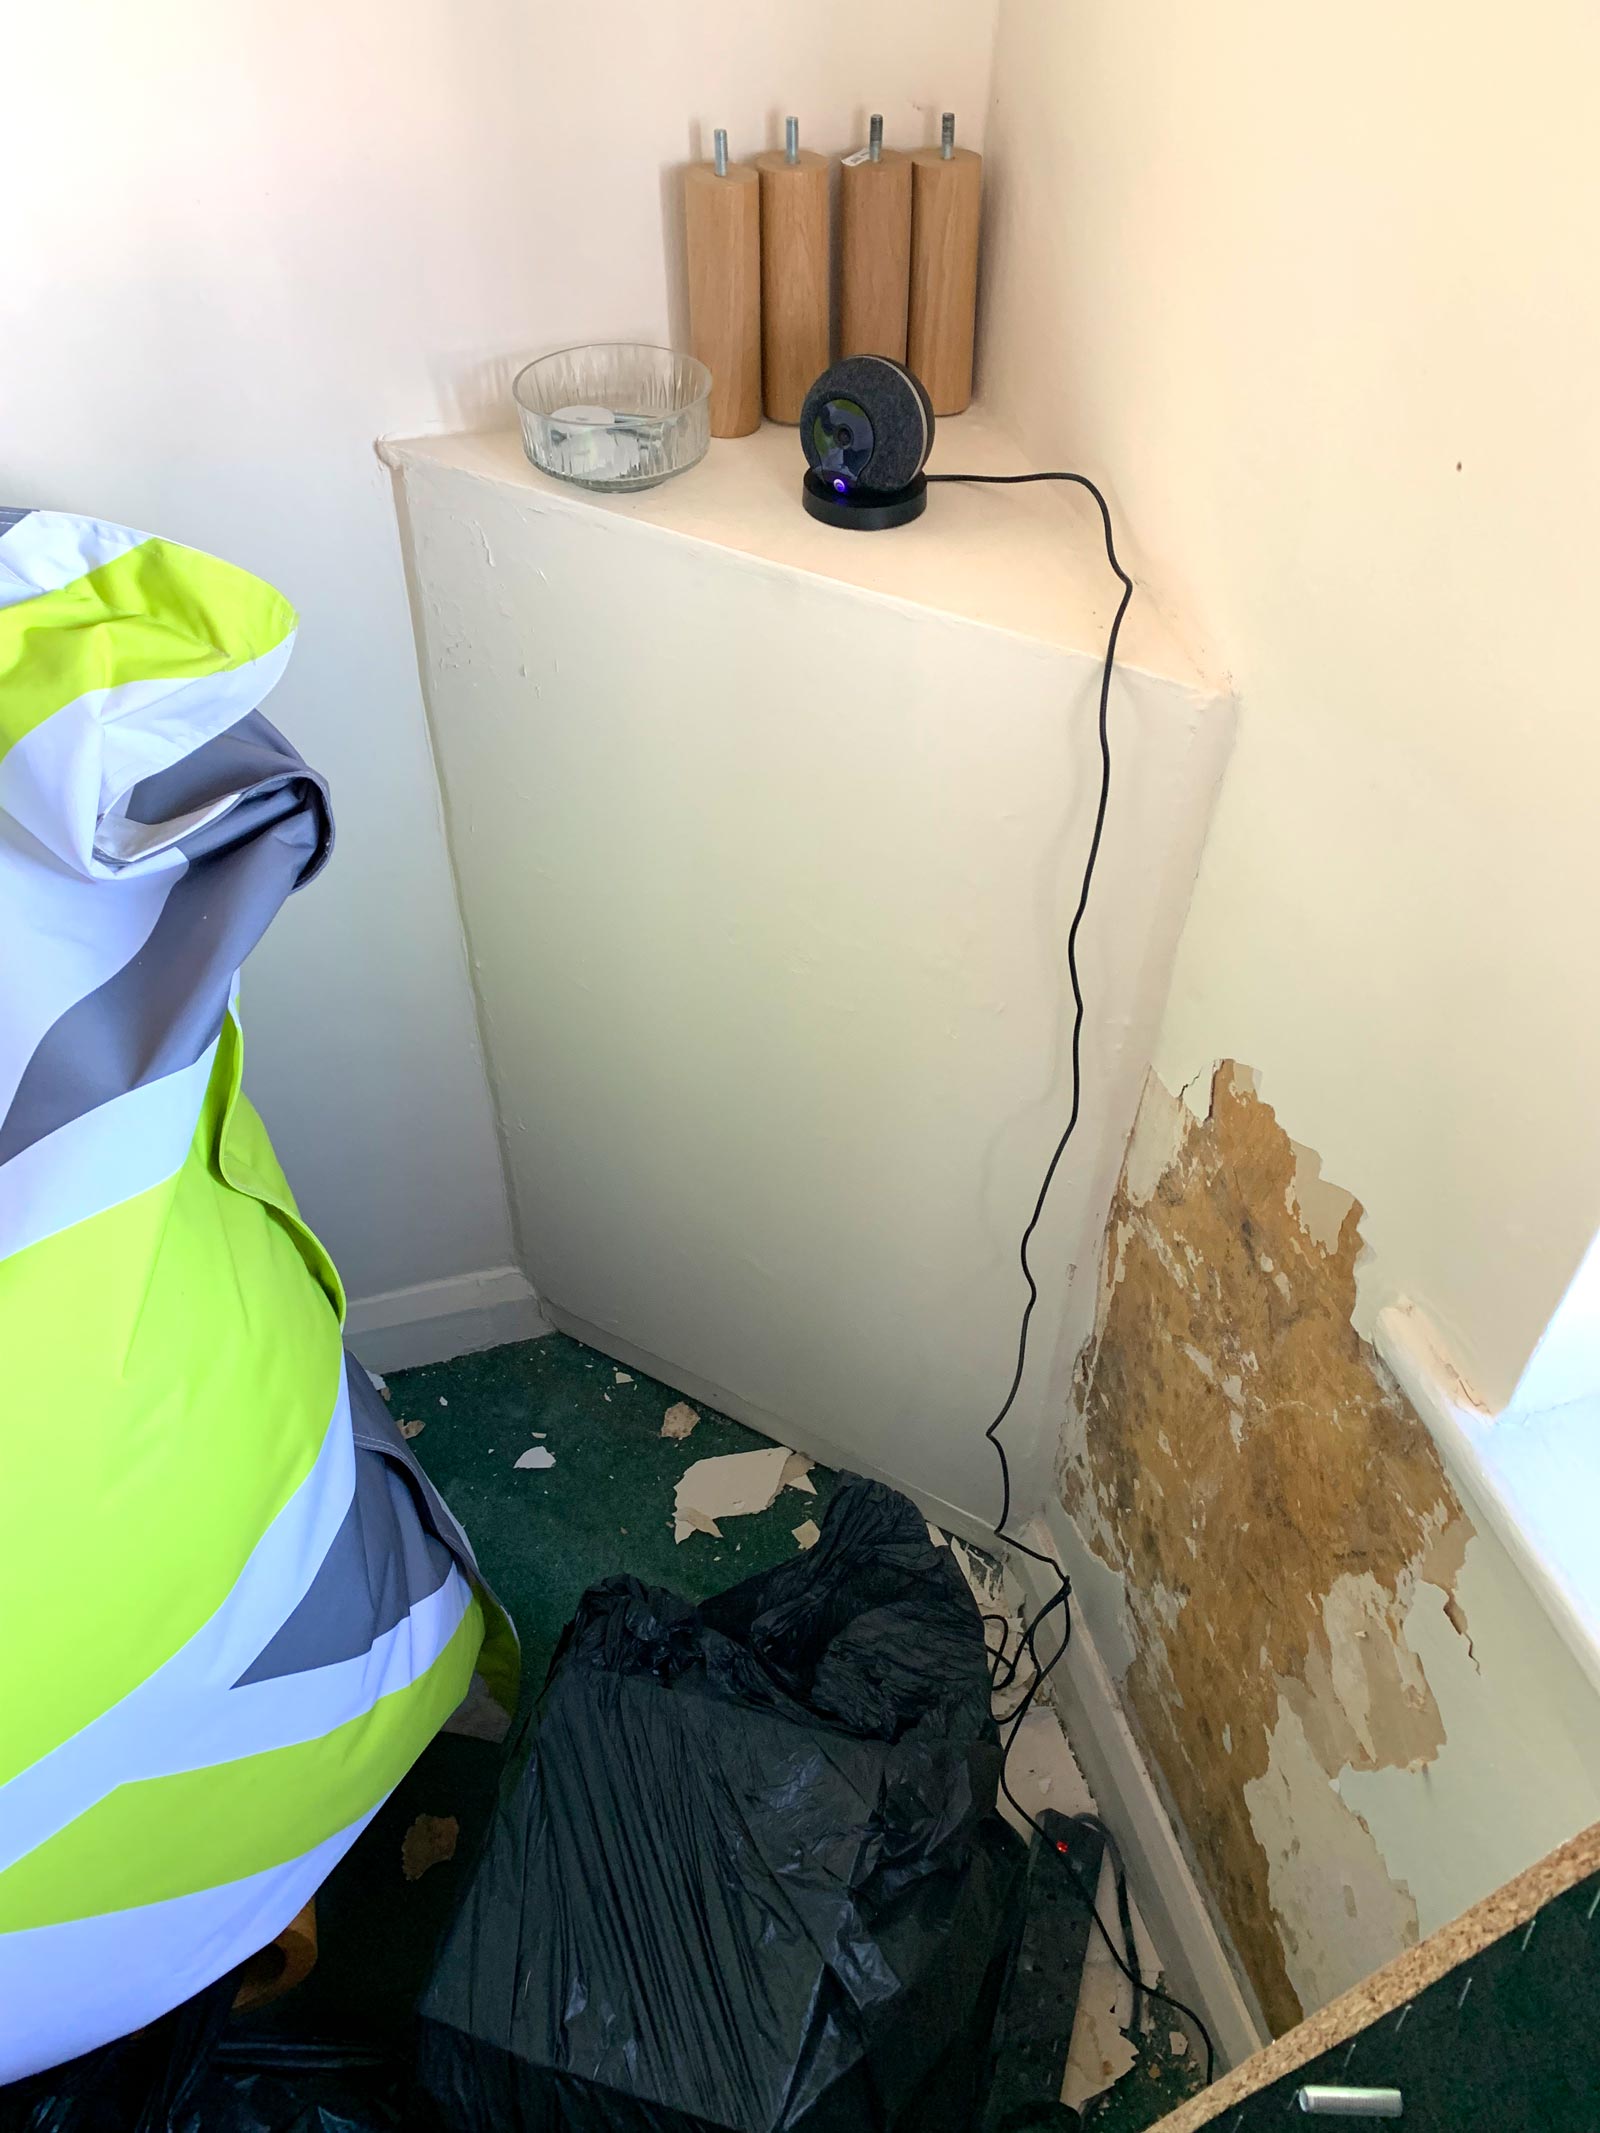
What’s in the box?
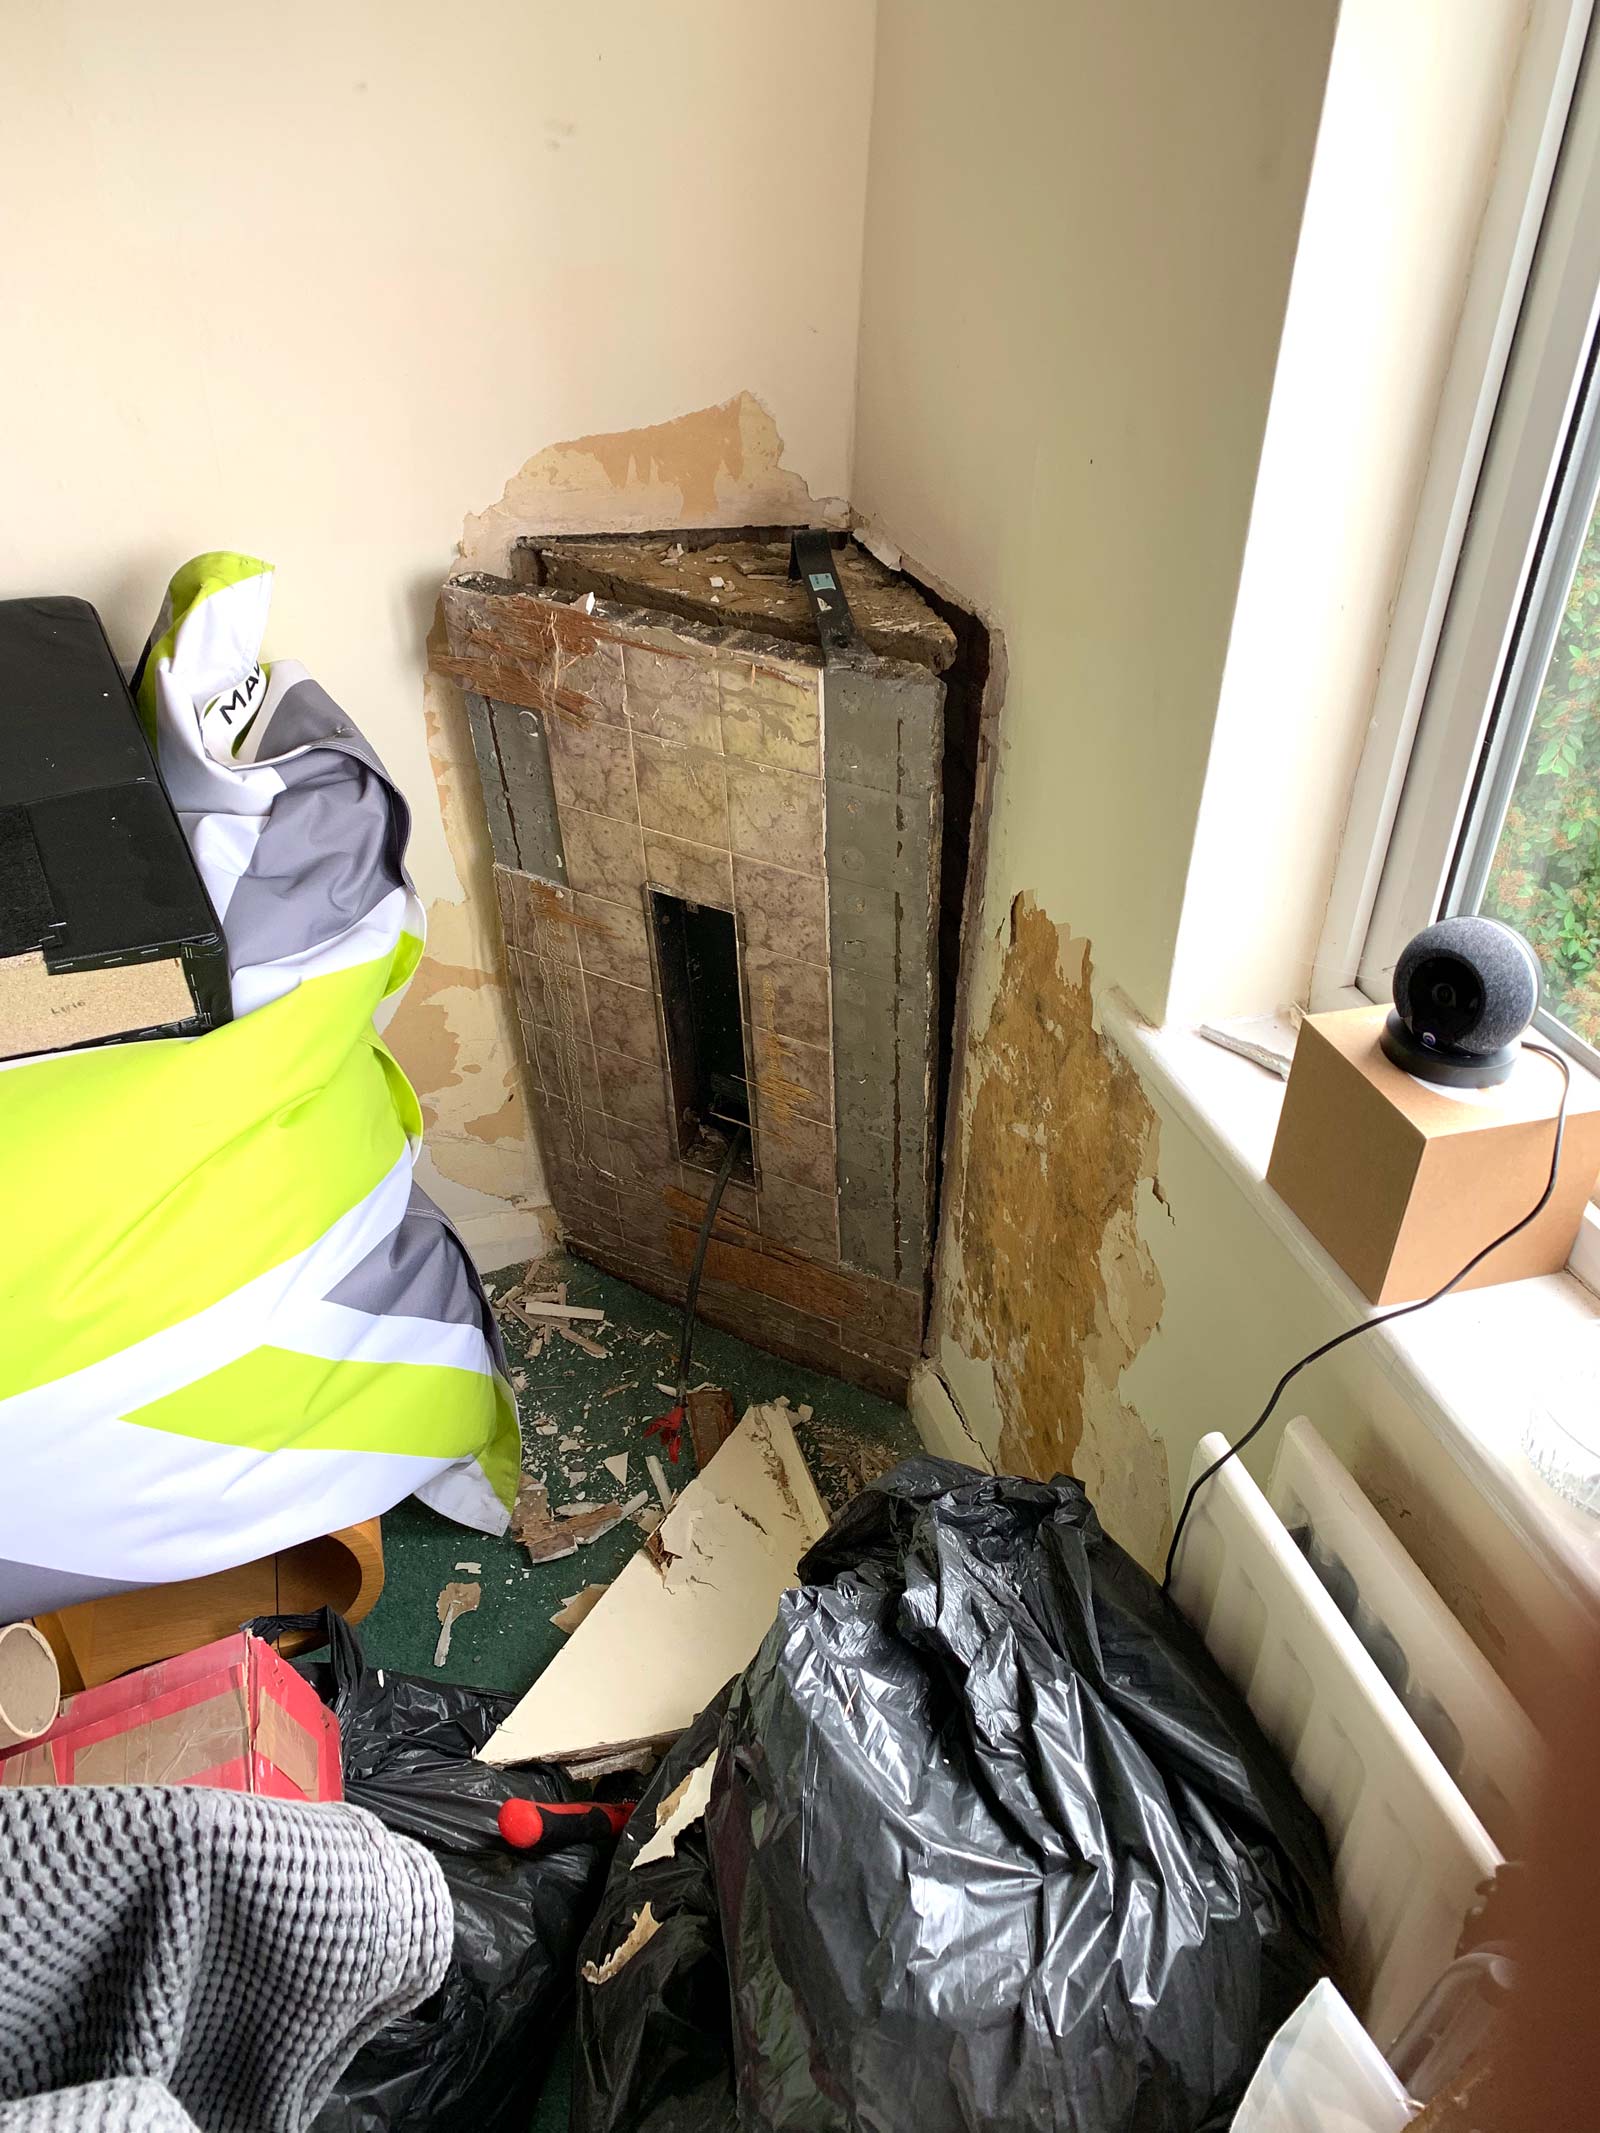
Luckily not a severed head, just an old heater.
Once I removed the heater the hole left behind was plastered over before being skimmed with the rest of the room. After this all that was left for me to do was paint the walls, ceiling and woodwork before the carpet was fitted. Once I had put my bed and other minimal bits of furniture back together it was job done, I was now the proud owner of a fully refurbished two bedroom flat!
In total this journey has taken 9 months, and what a journey it has been. I feel very privileged to have had the opportunity to take on a project like this and be able to see it through to the end. It’s been an emotional experience which happened at a time when I think I needed it most, but there is more to come which I will talk about in the final blog on what I feel has been a really epic journey for me!
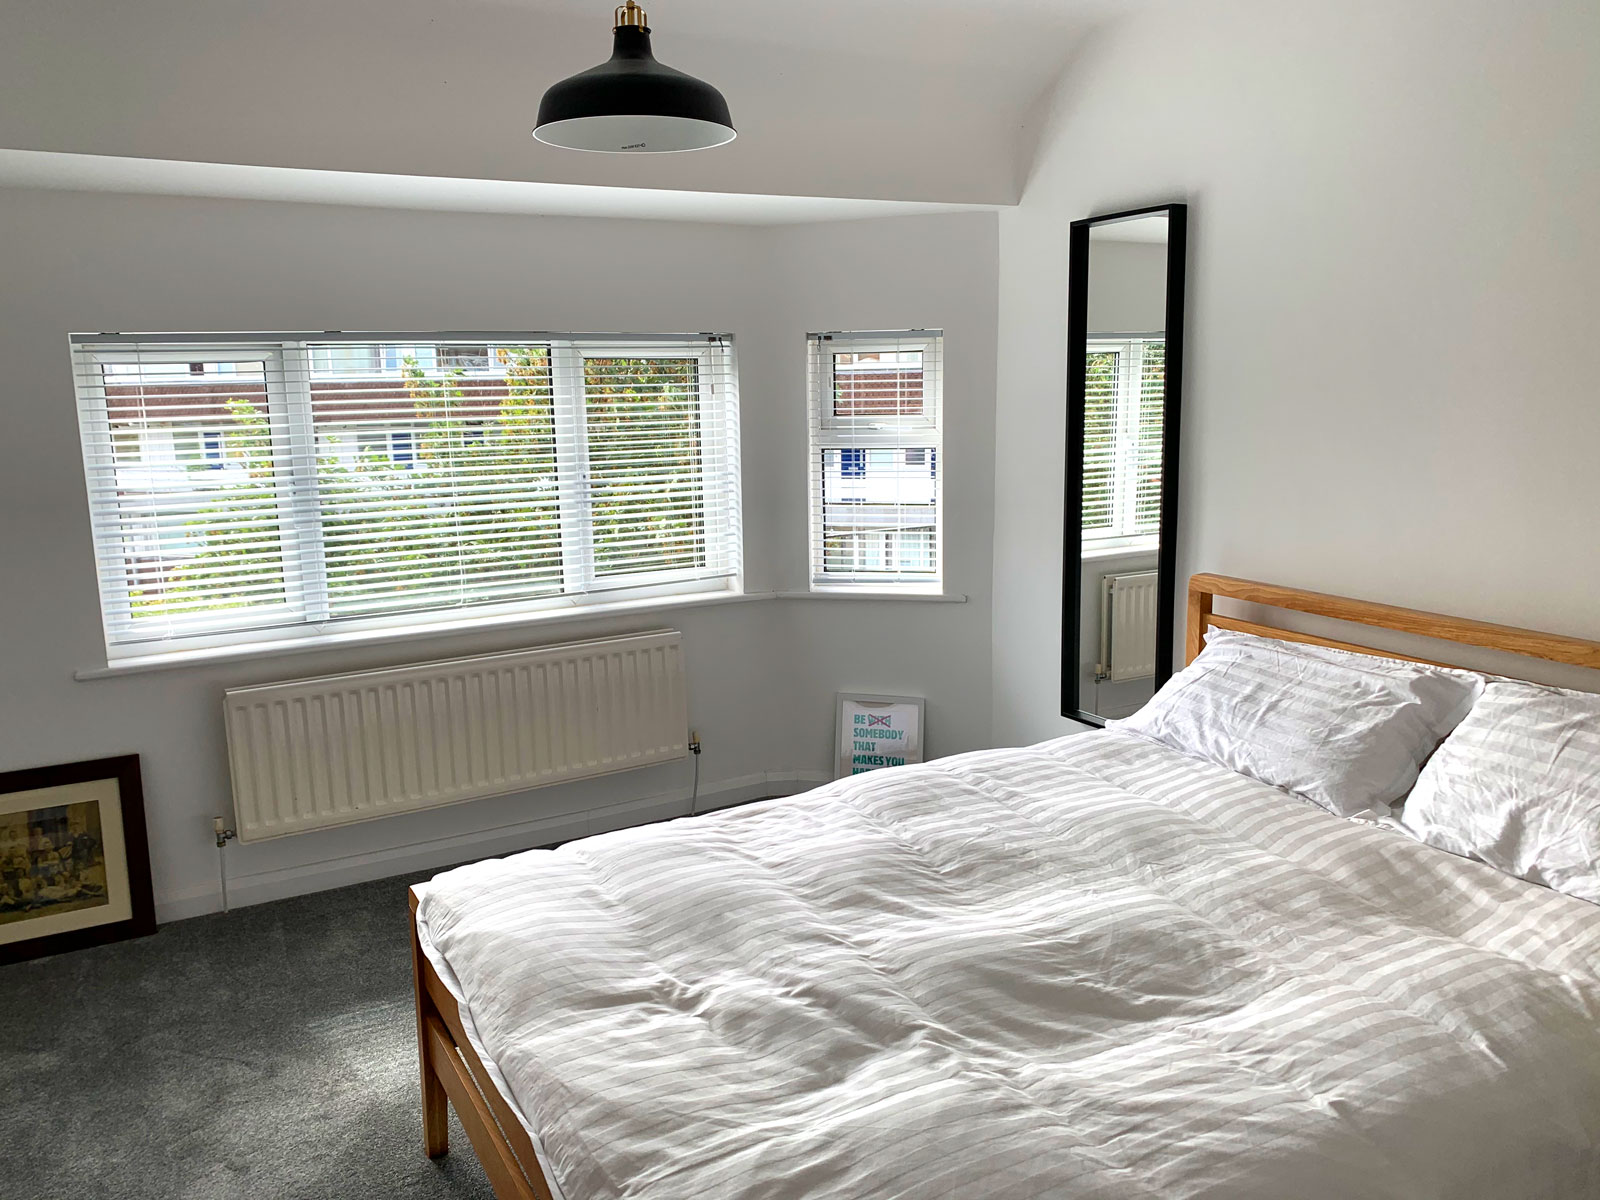
Soooooo nice to have a bed again!
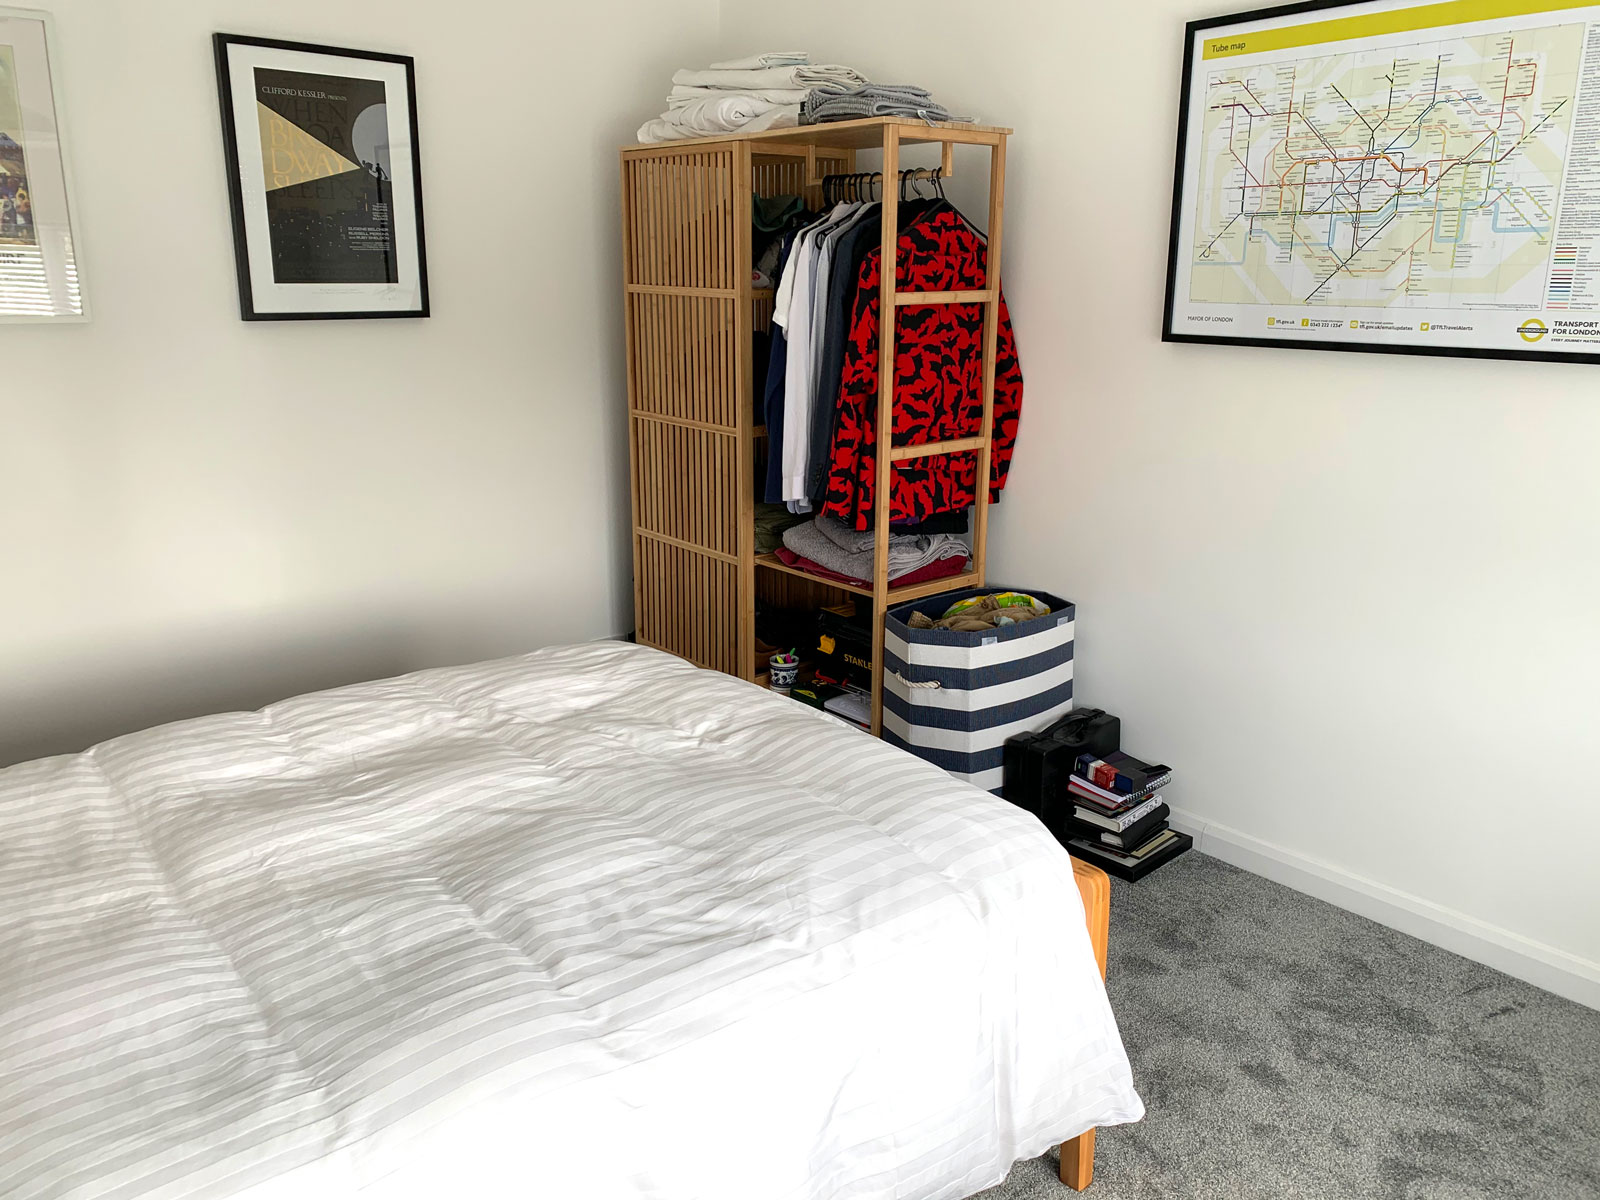
I did say my furniture was minimal.
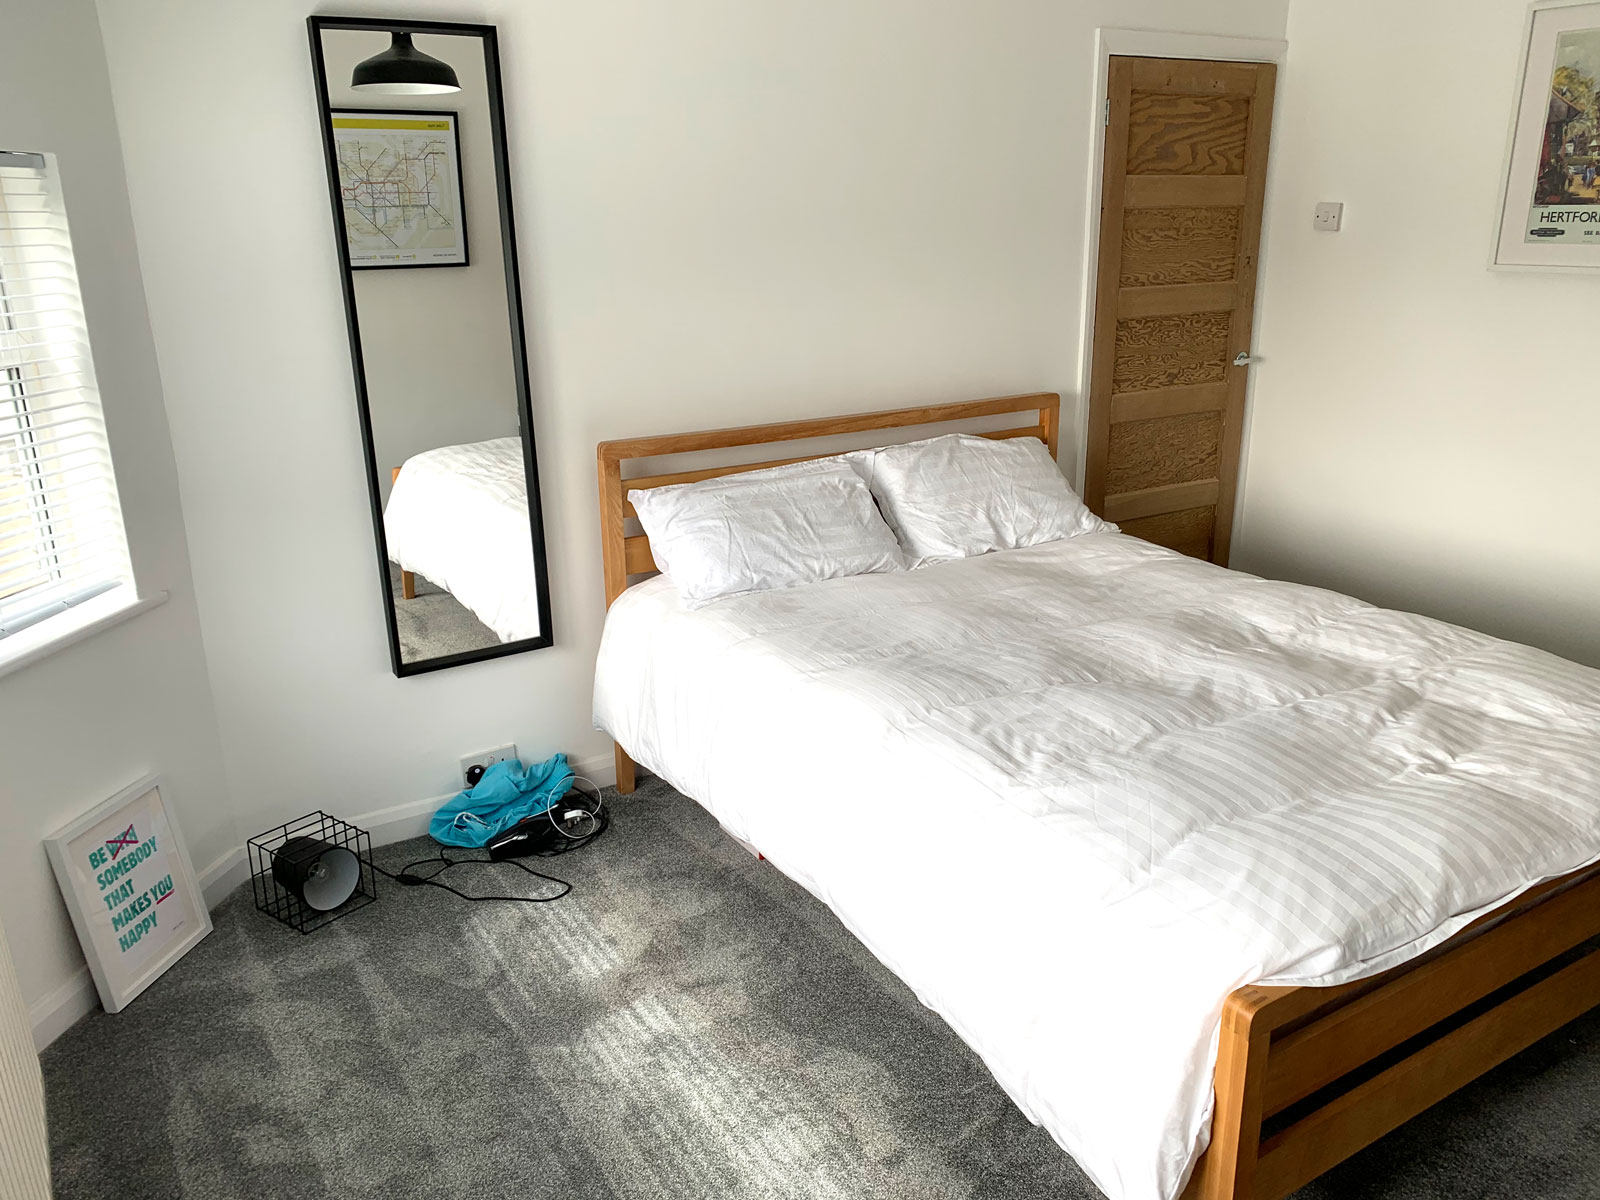
Still space for more pictures.
Flat Refurbishment – Part 6
flat refurbishment – part 6
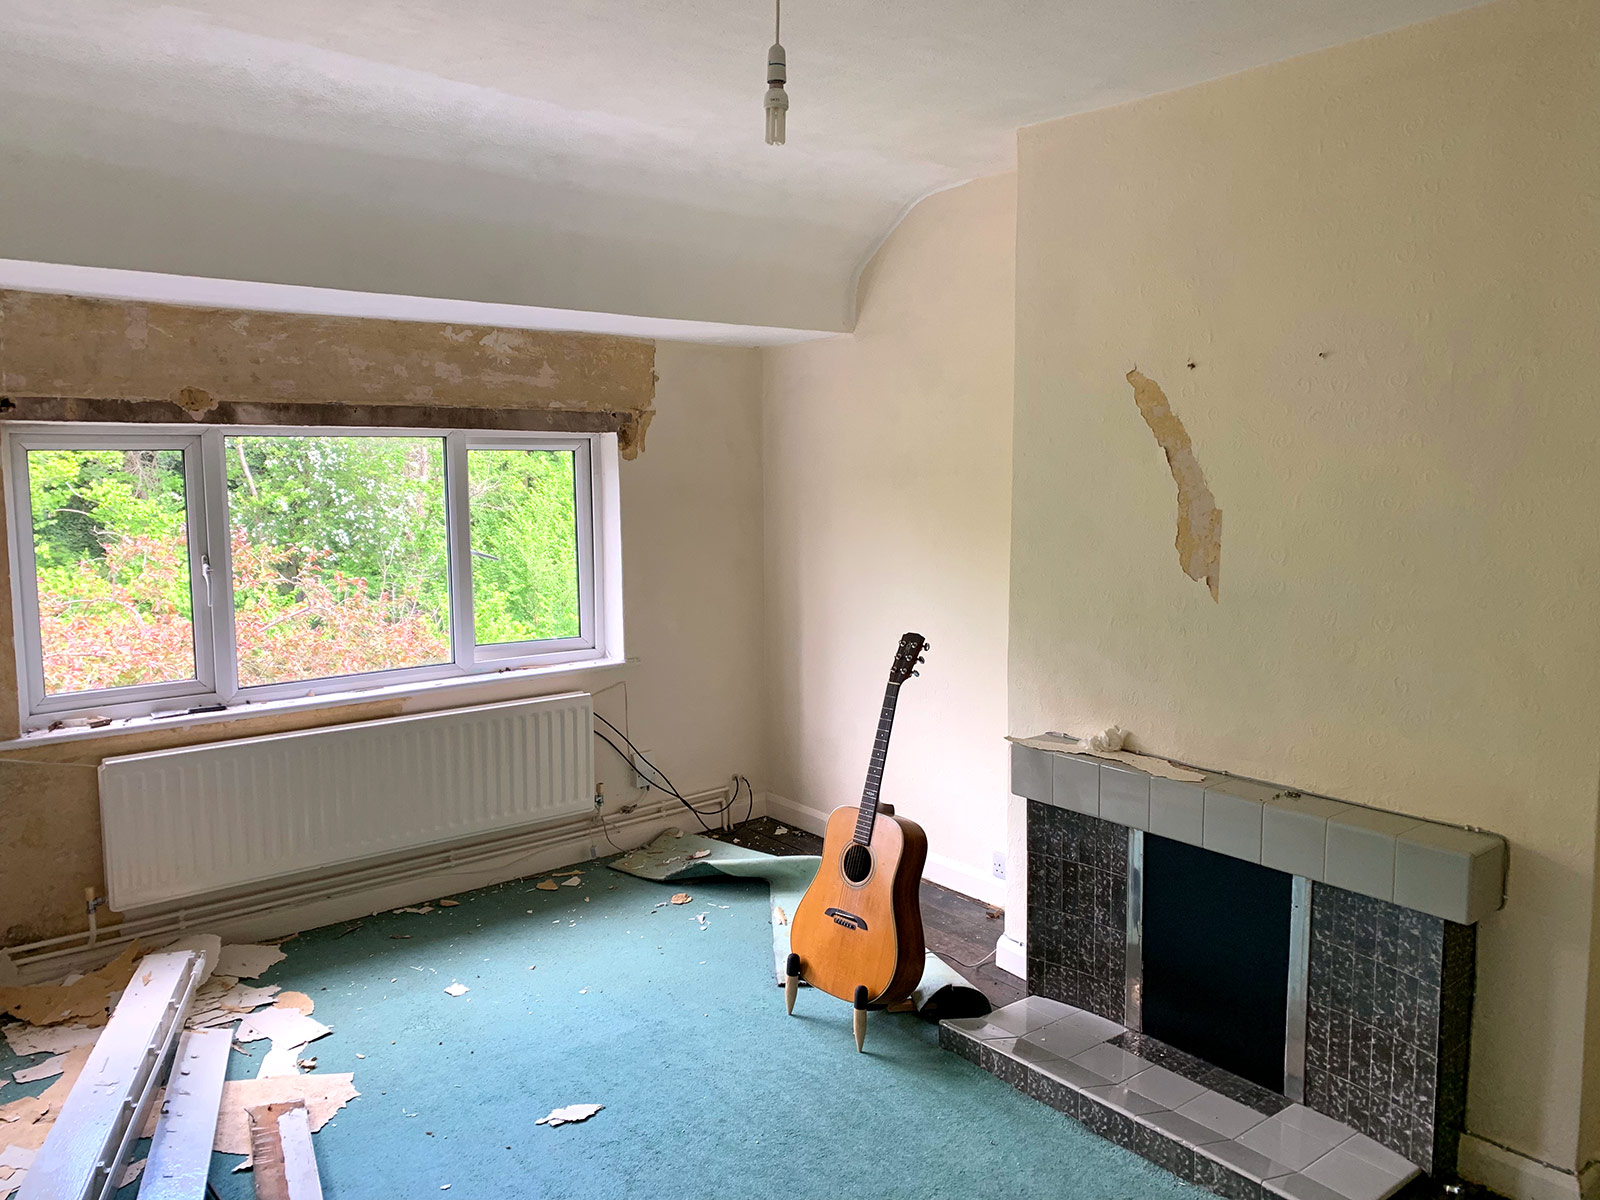
In my first blog about the flat I described sitting in the living room and feeling despair at the decision I had made to buy a place that needed complete renovation. It was a feeling that stuck with me for a few weeks but it started to subside once I could see that things were coming together and taking shape. The living room was going to be an important room to get right, after all it is where I would be spending most of my time.
Two things in the living room had to go which were the old enclosed wooden curtain rail and the bulky 1960’s gas fireplace surround. The curtain rail was easy to remove with a little help from a crow bar. The fireplace on the other hand needed a little more elbow grease and a hefty sledge hammer! The surround came away quite easily but it was made of solid concrete so it needed a little help from friends to get it out of the flat.
Removing the surround revealed the original brick fireplace which had been blocked up by the heat shield needed for the gas fire. This is where the sledge hammer came in handy, it took a while to smash it out and there was a lot of rubble filling up the gap behind it. Whilst clearing this out I also found an old newspaper from March 1966!
By the side of the fireplace was the old gas fitting which had been left showing above the floor. I hired a qualified gas plumber who soon cut it back and capped it off under the floor boards.
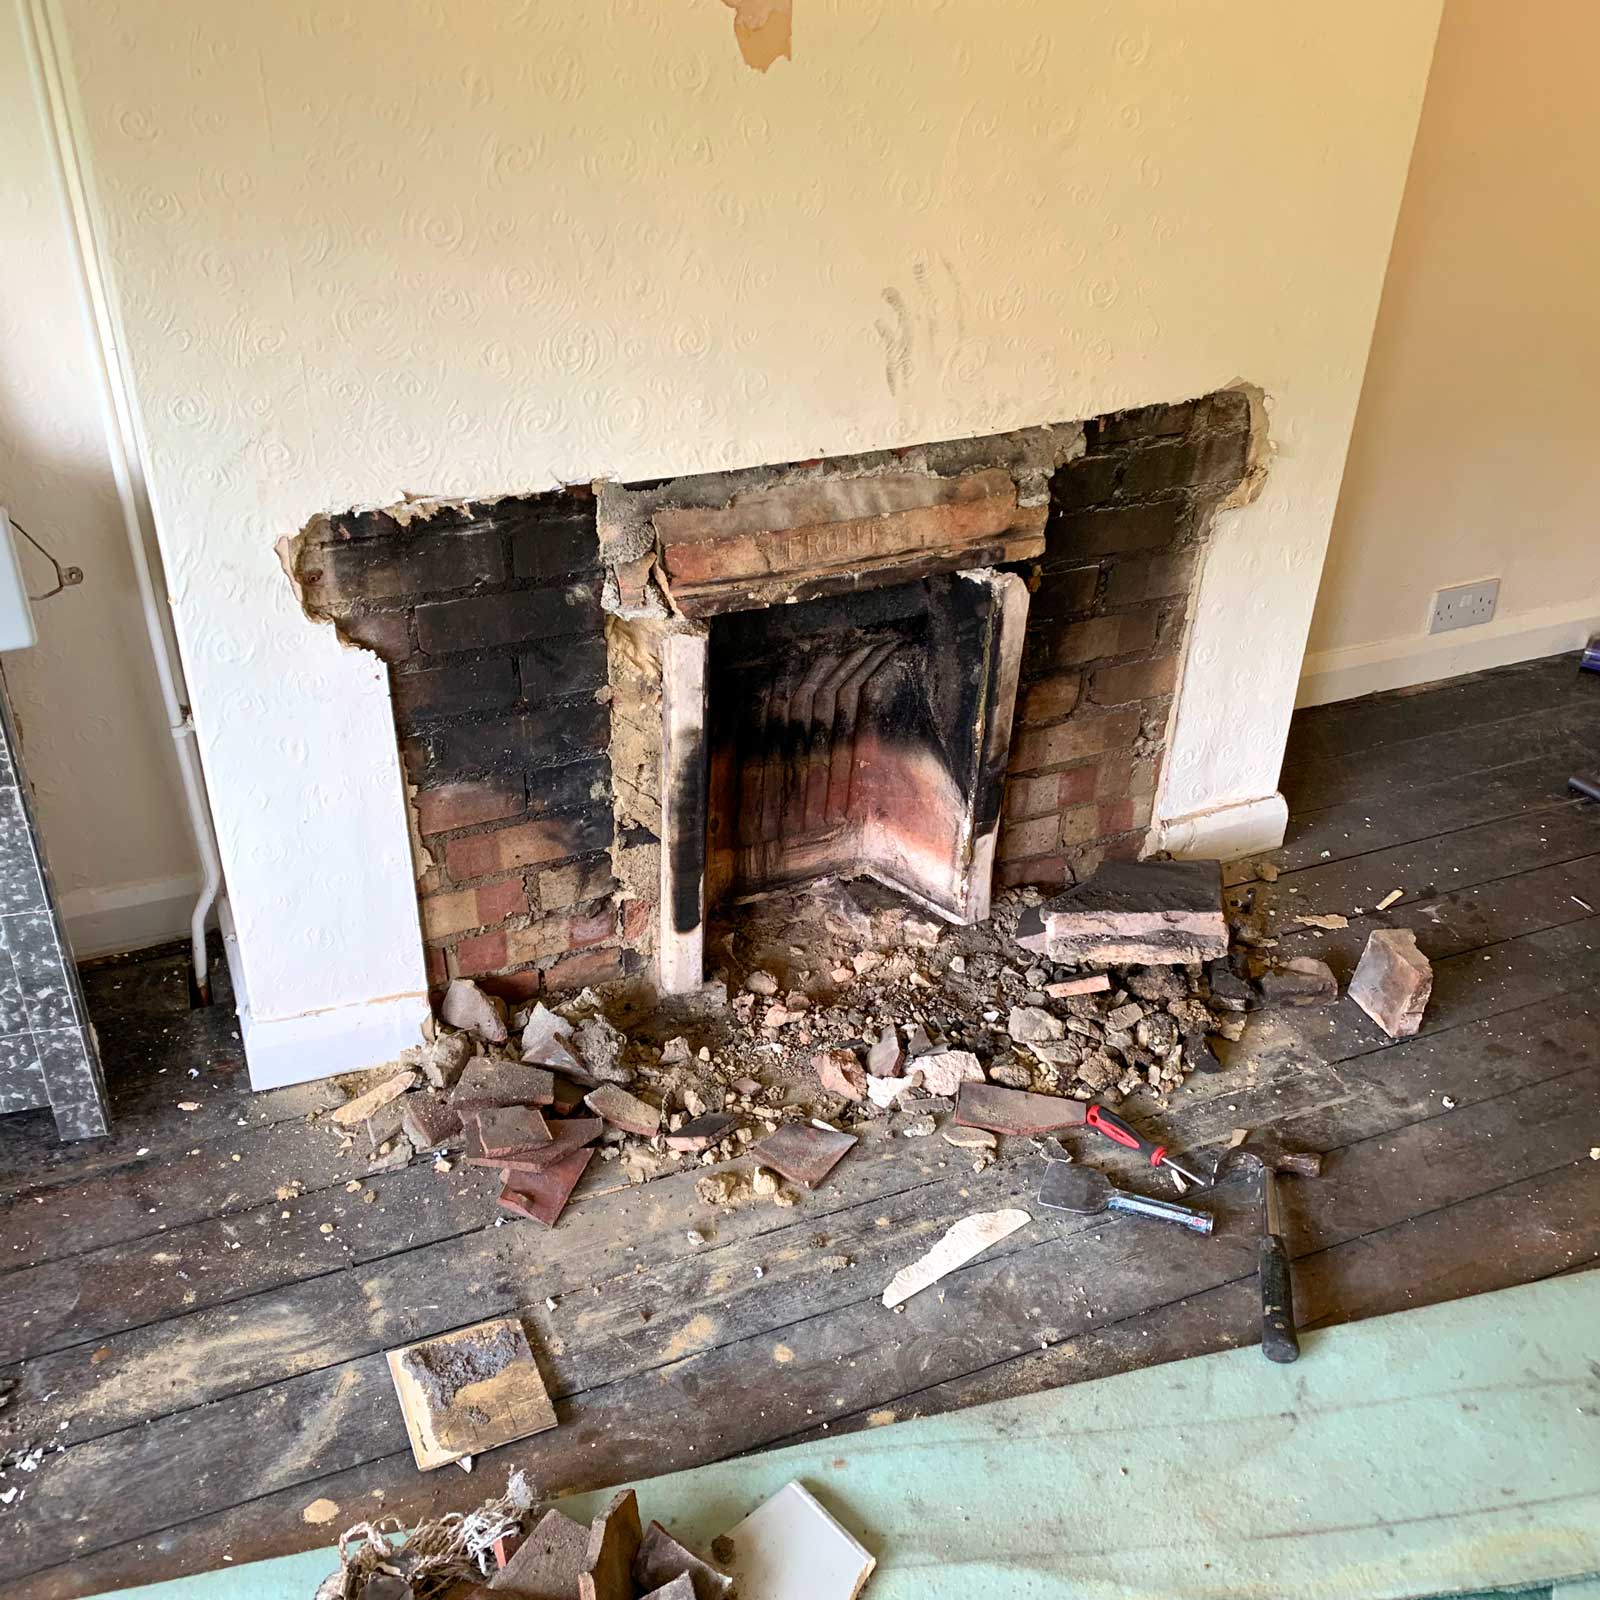
Old fire surround gone!
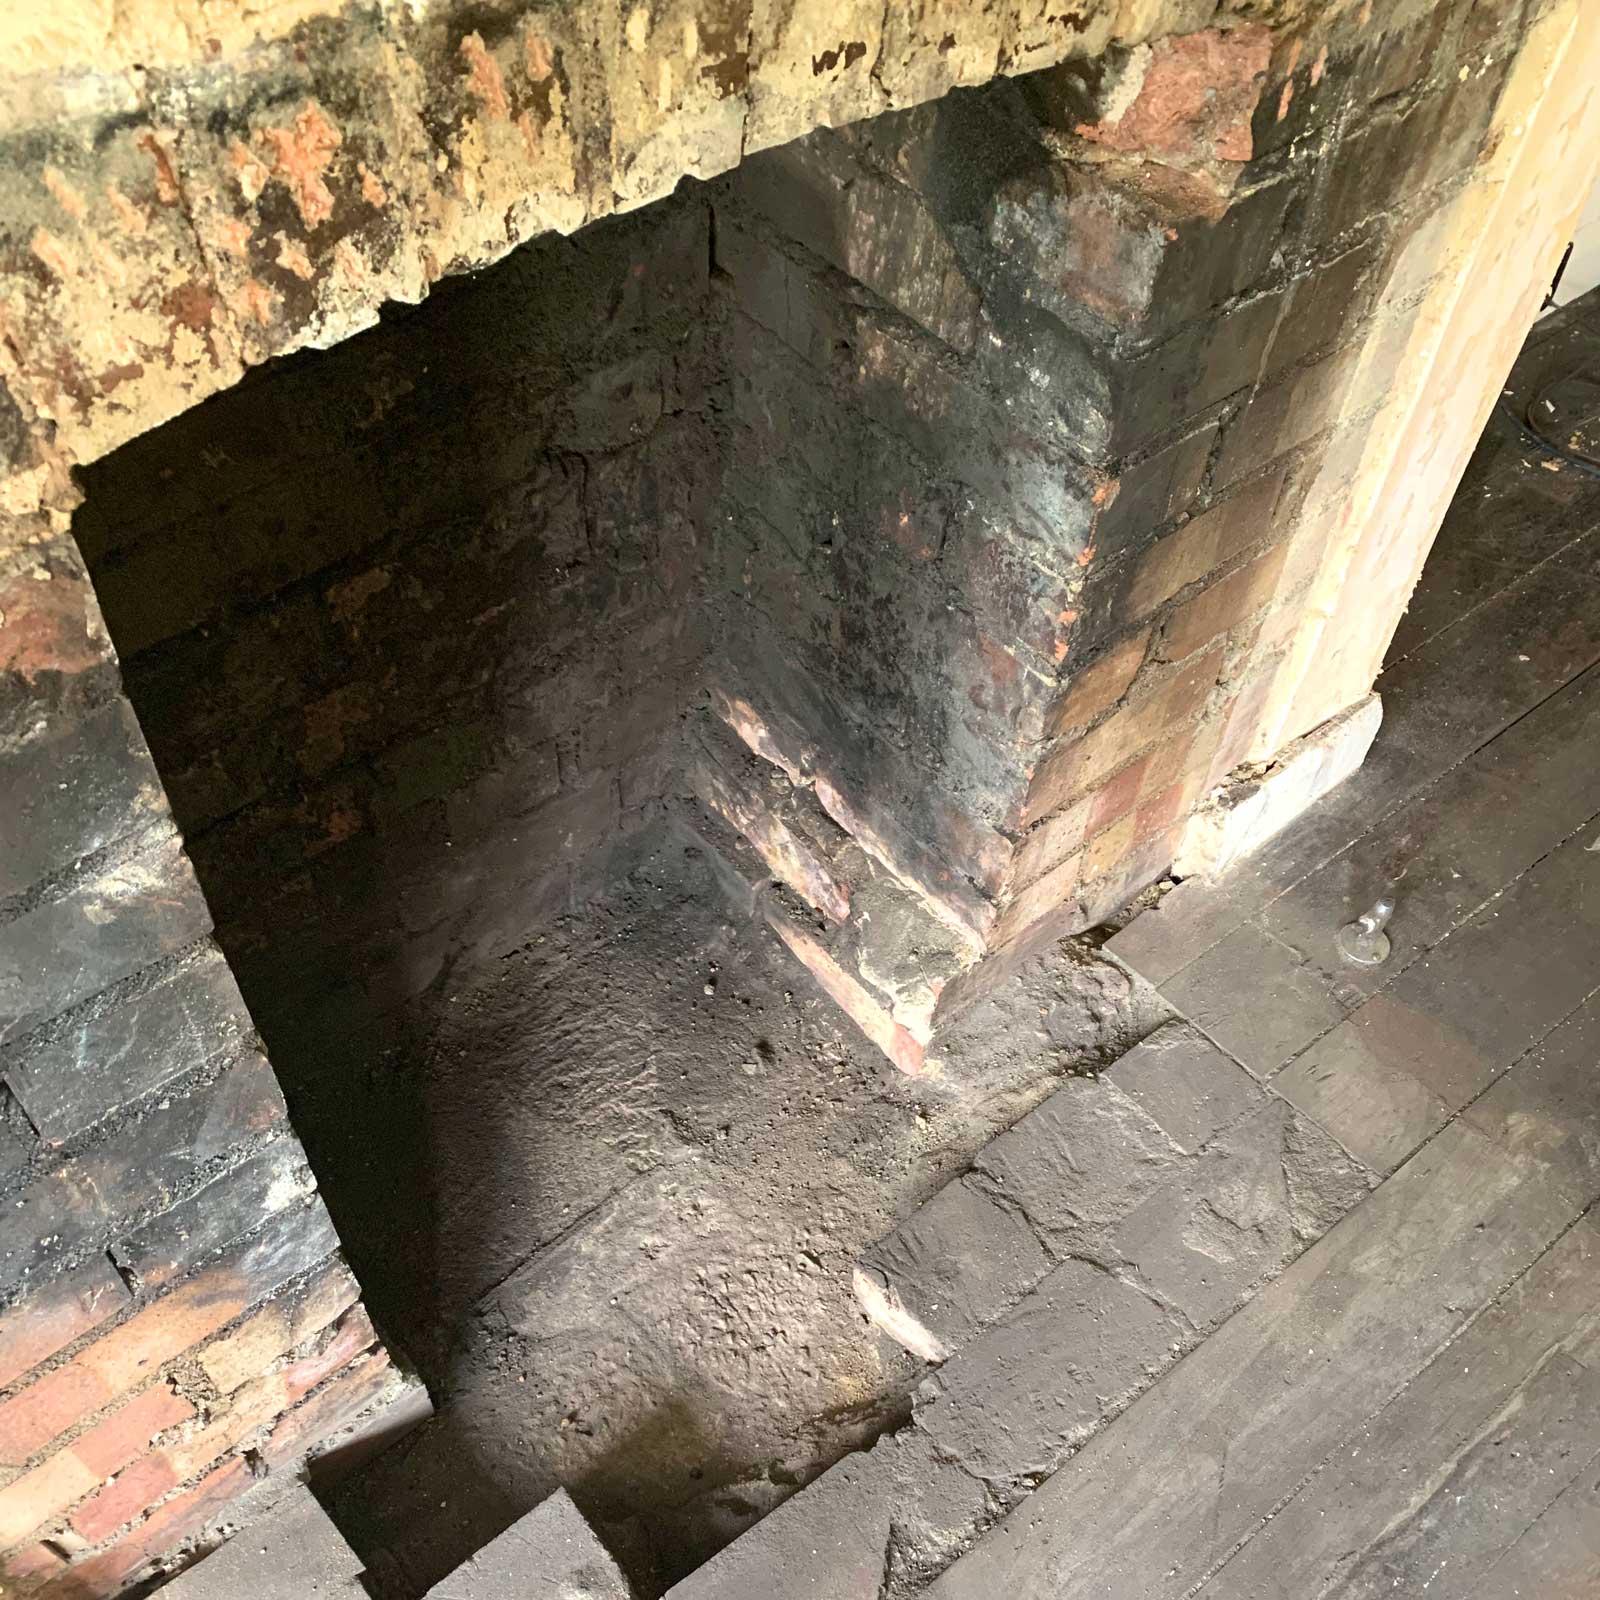
Old brick work revealed.
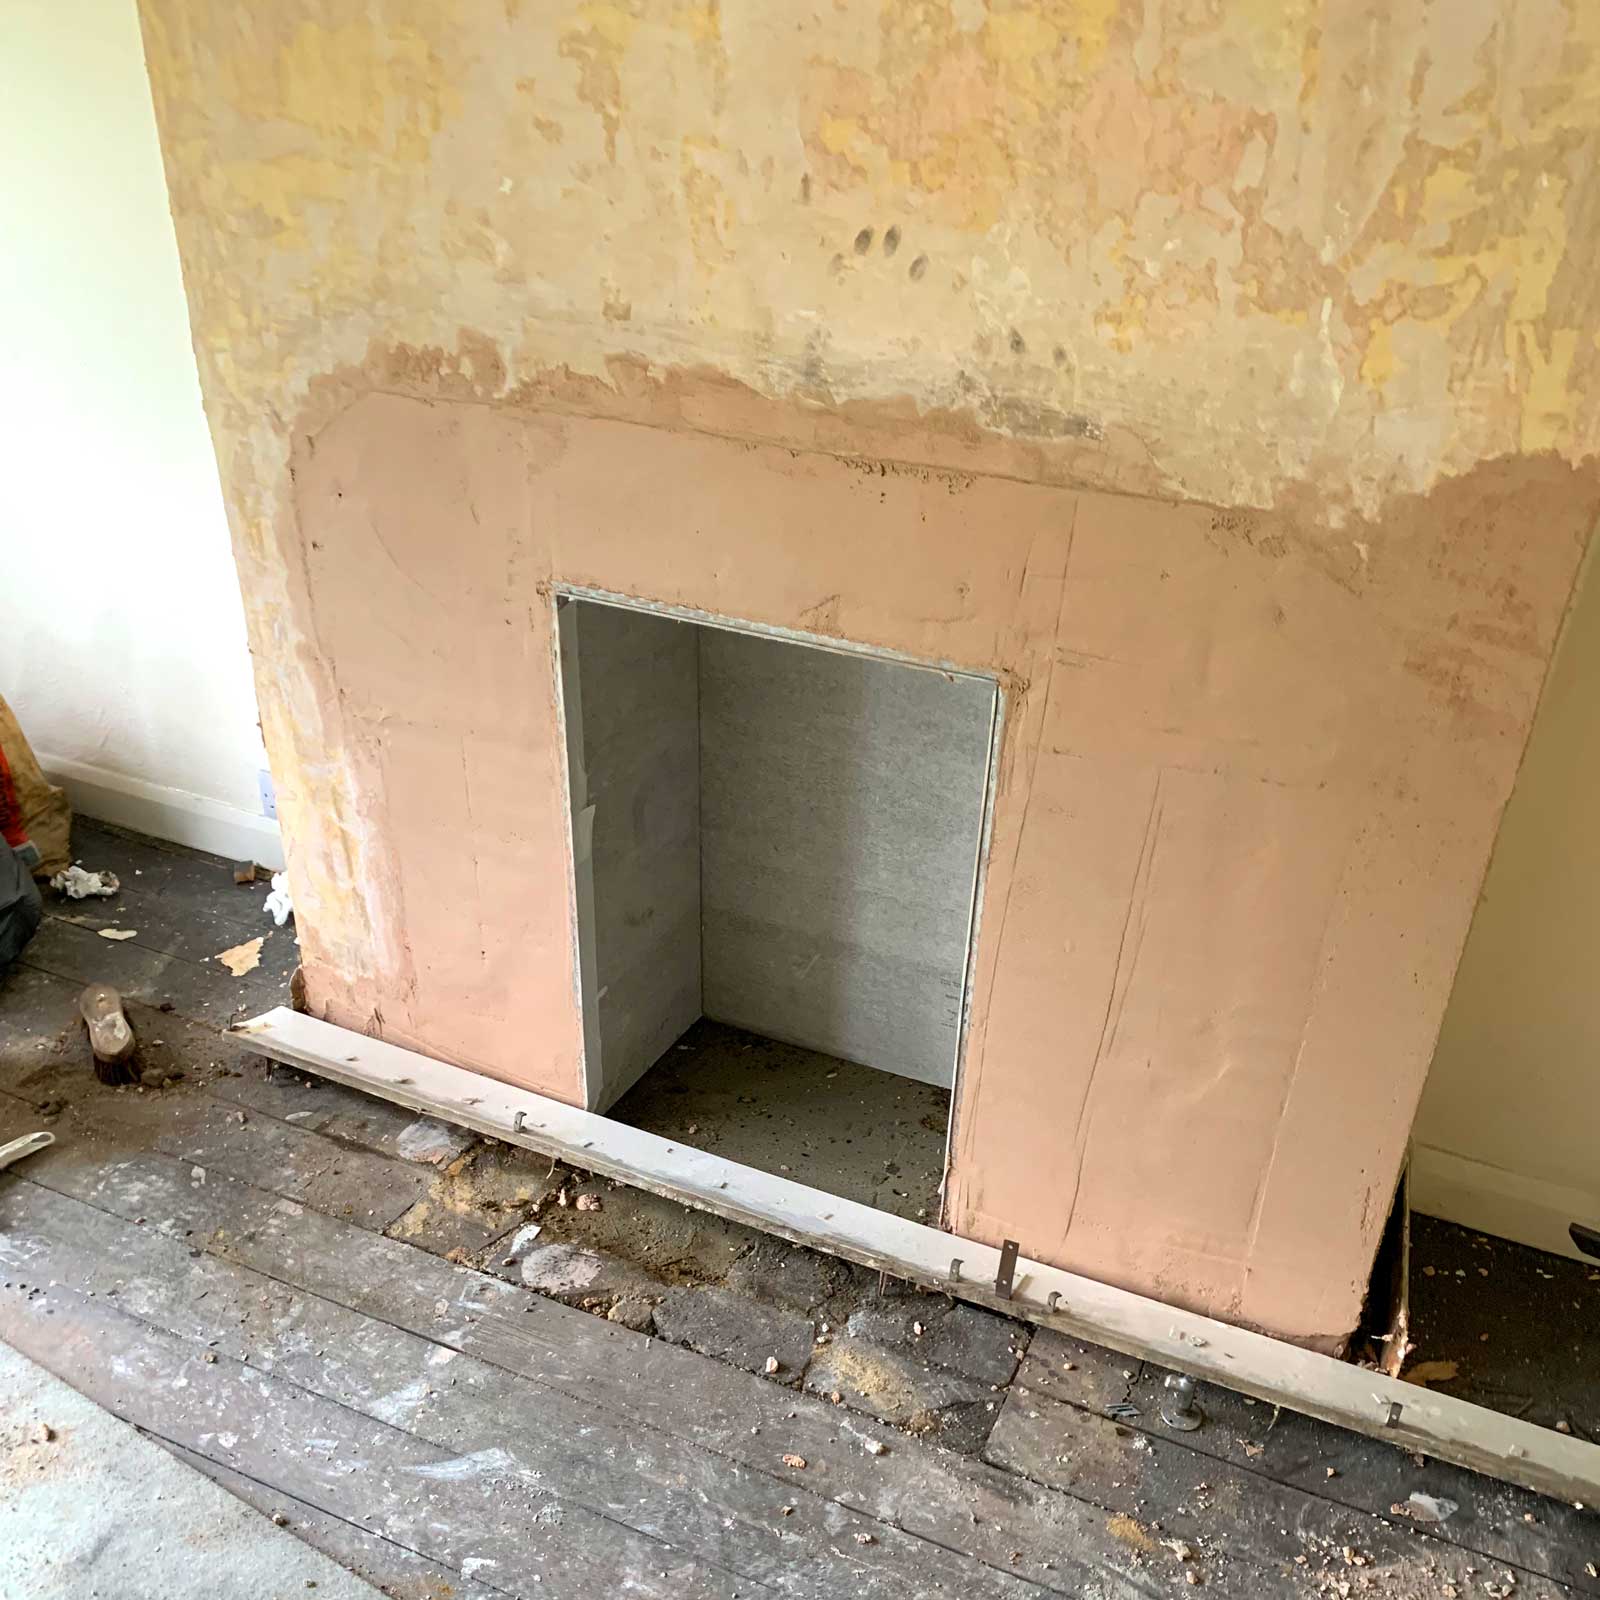
Boxed and re-plastered.
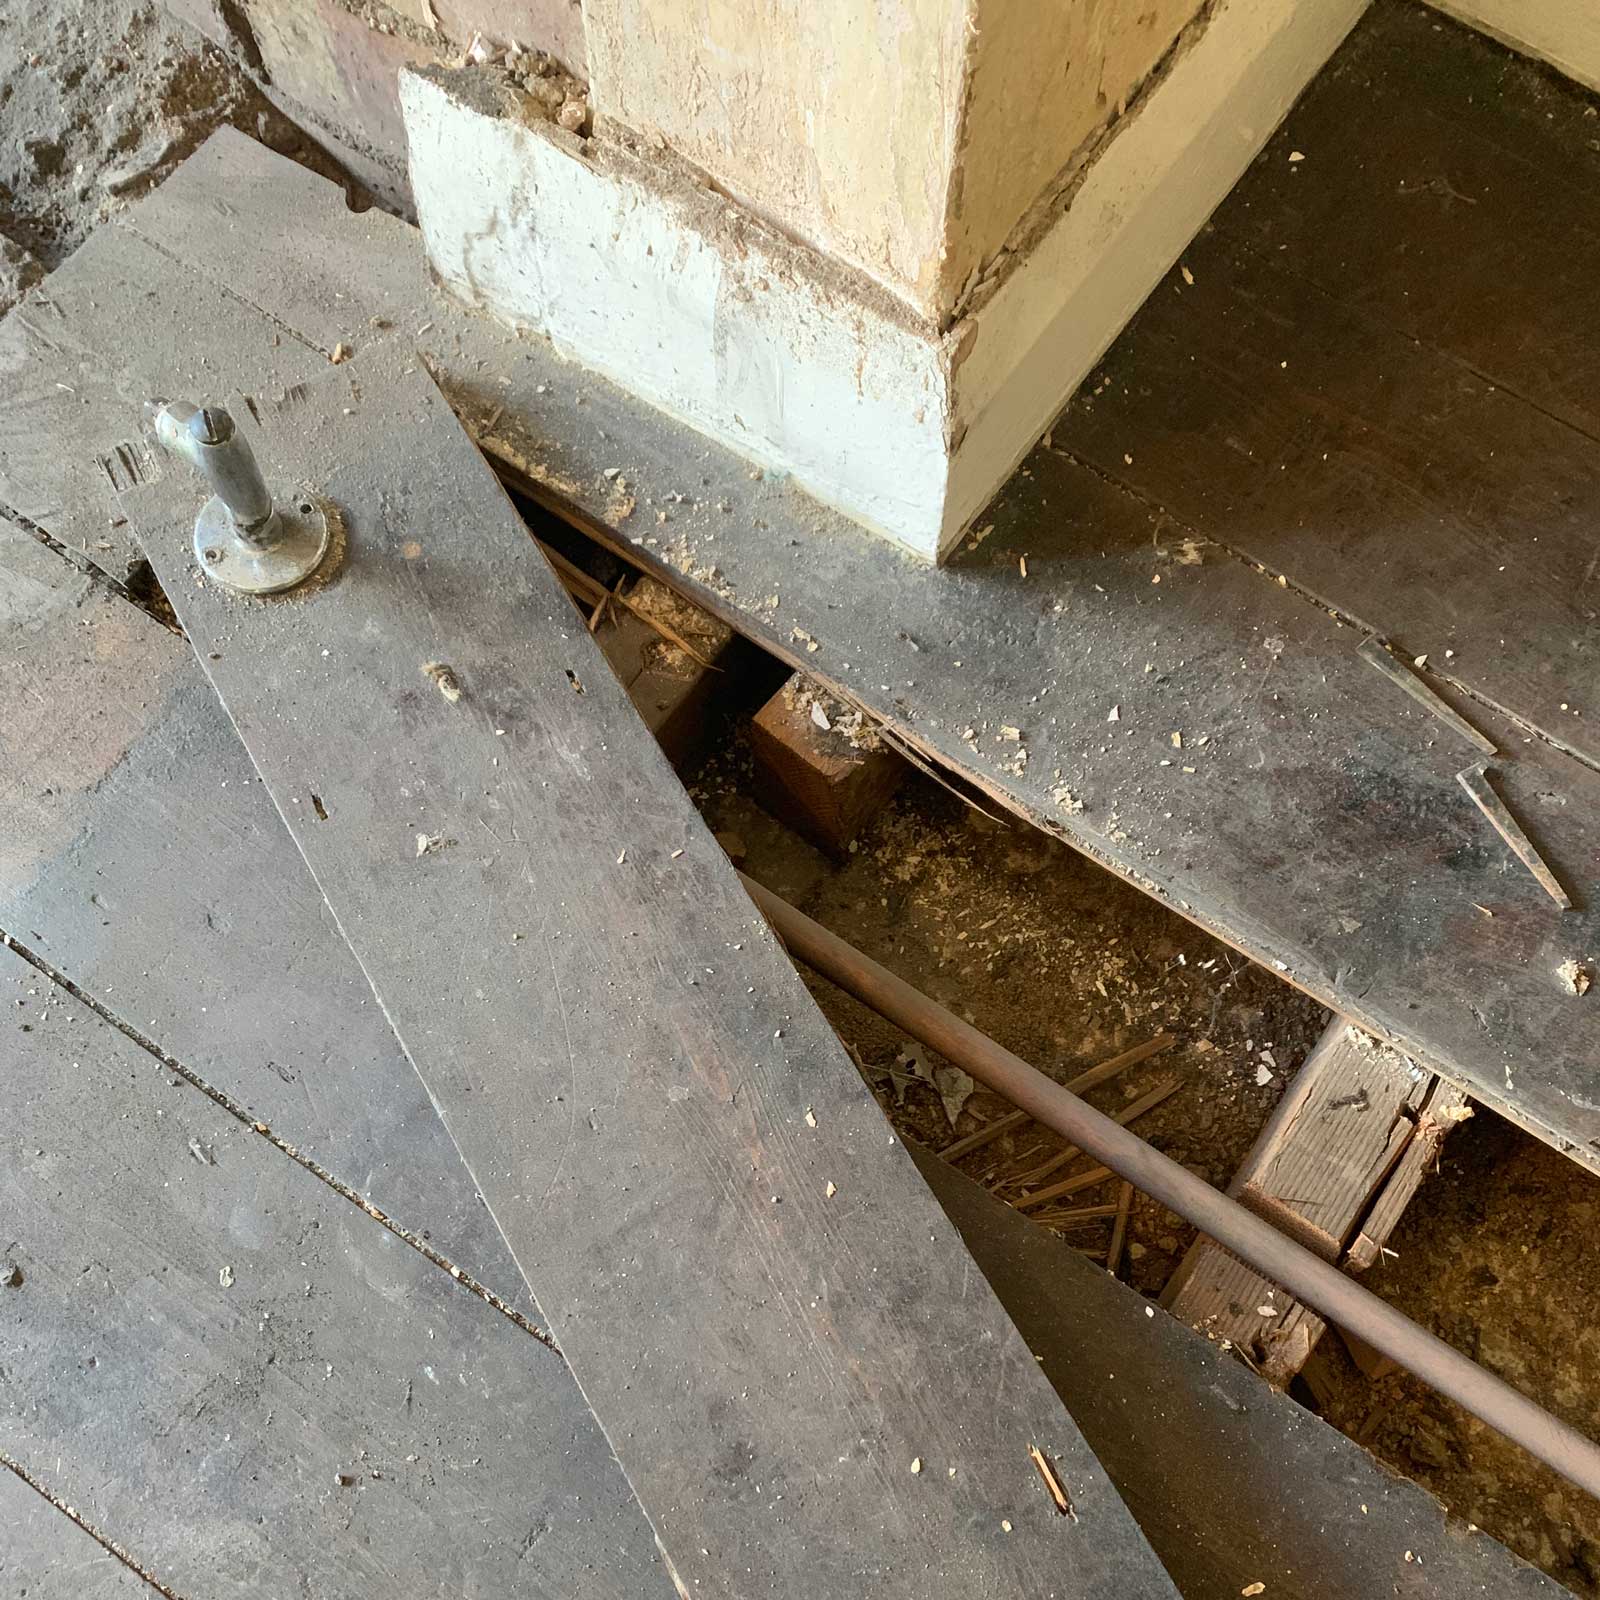
The old gas pipe.
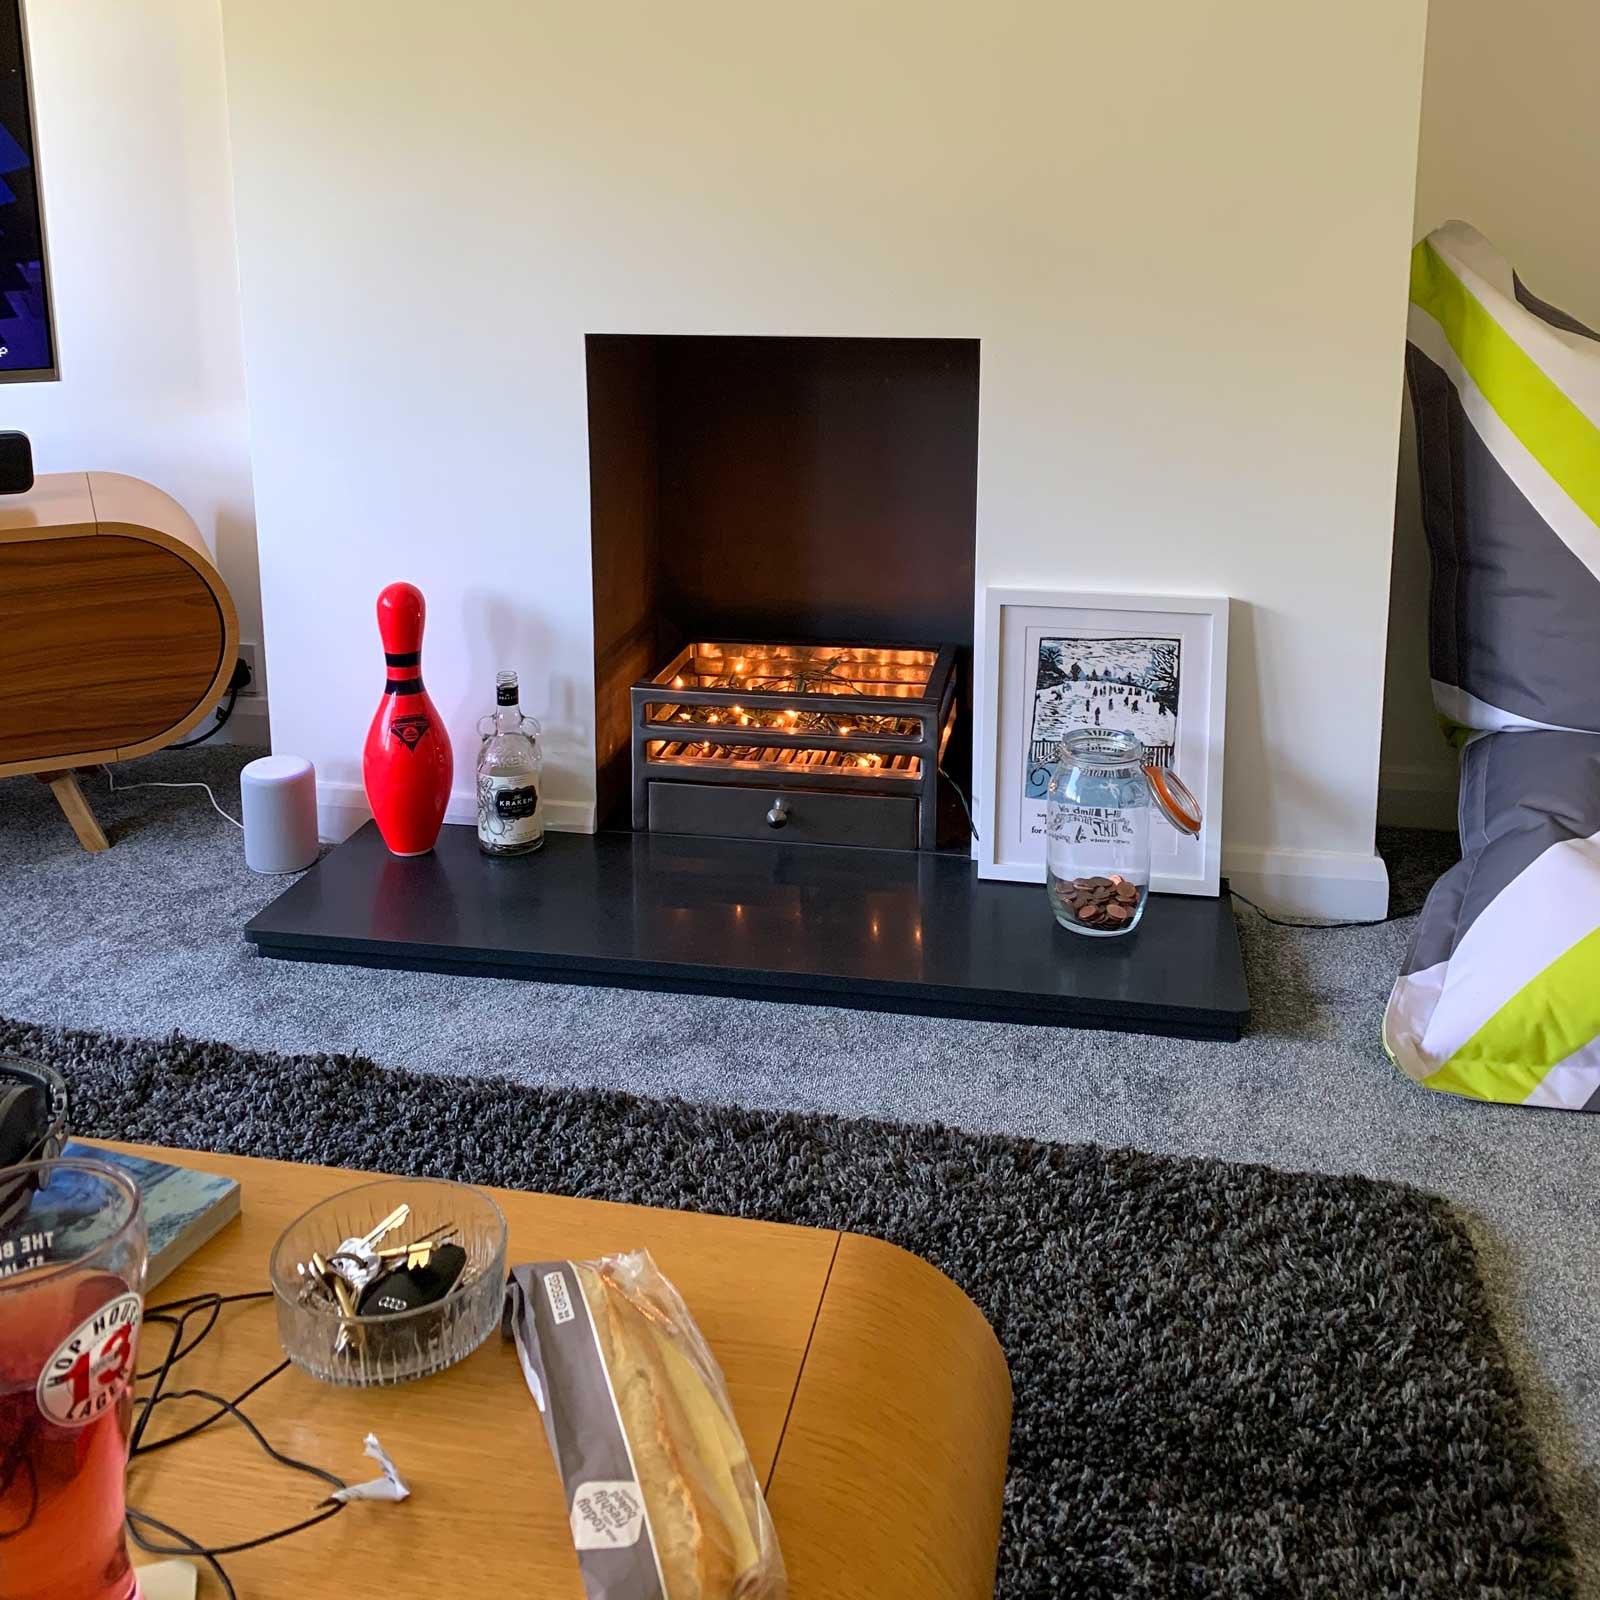
Once the fireplace was open I needed to make a decision on what to do with it. I could have left it open for a real fire but I didn’t want the hassle that comes with looking after it. So I decided to box it in and make a feature of it with a new granite hearth and a fantastic iron fire grate that I picked up on eBay for £30!
The friend of mine who did the bathroom also took care of the fireplace for me. He did a great job of boxing in, fitting the hearth and re-plastering the bare brick wall. The living room in my previous home had an old fireplace which I filled with fairy lights to make a feature of, so I did the same here and it’s worked out really well!
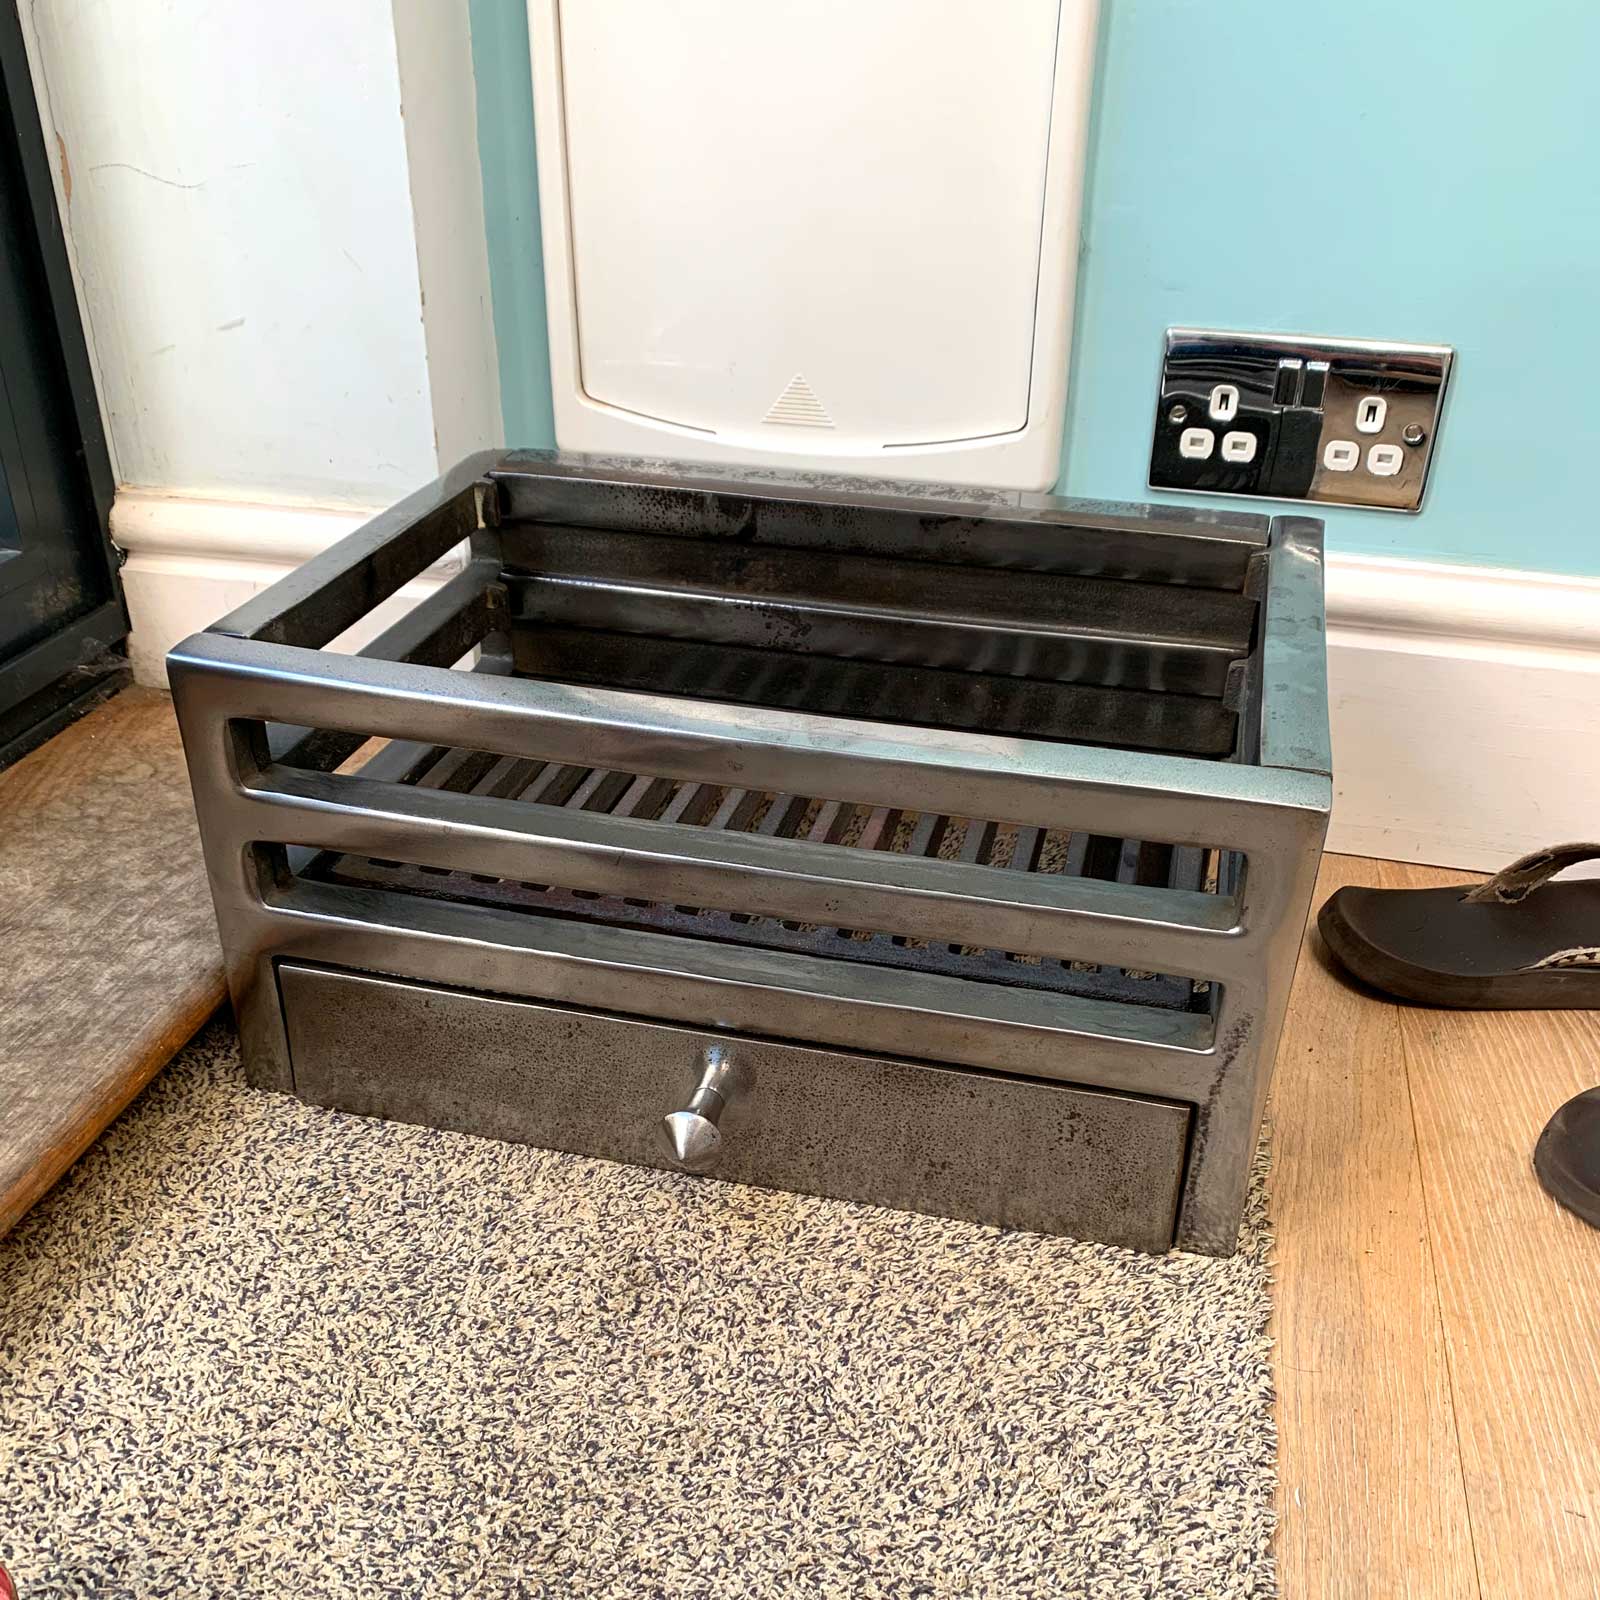
What an ebay bargin!
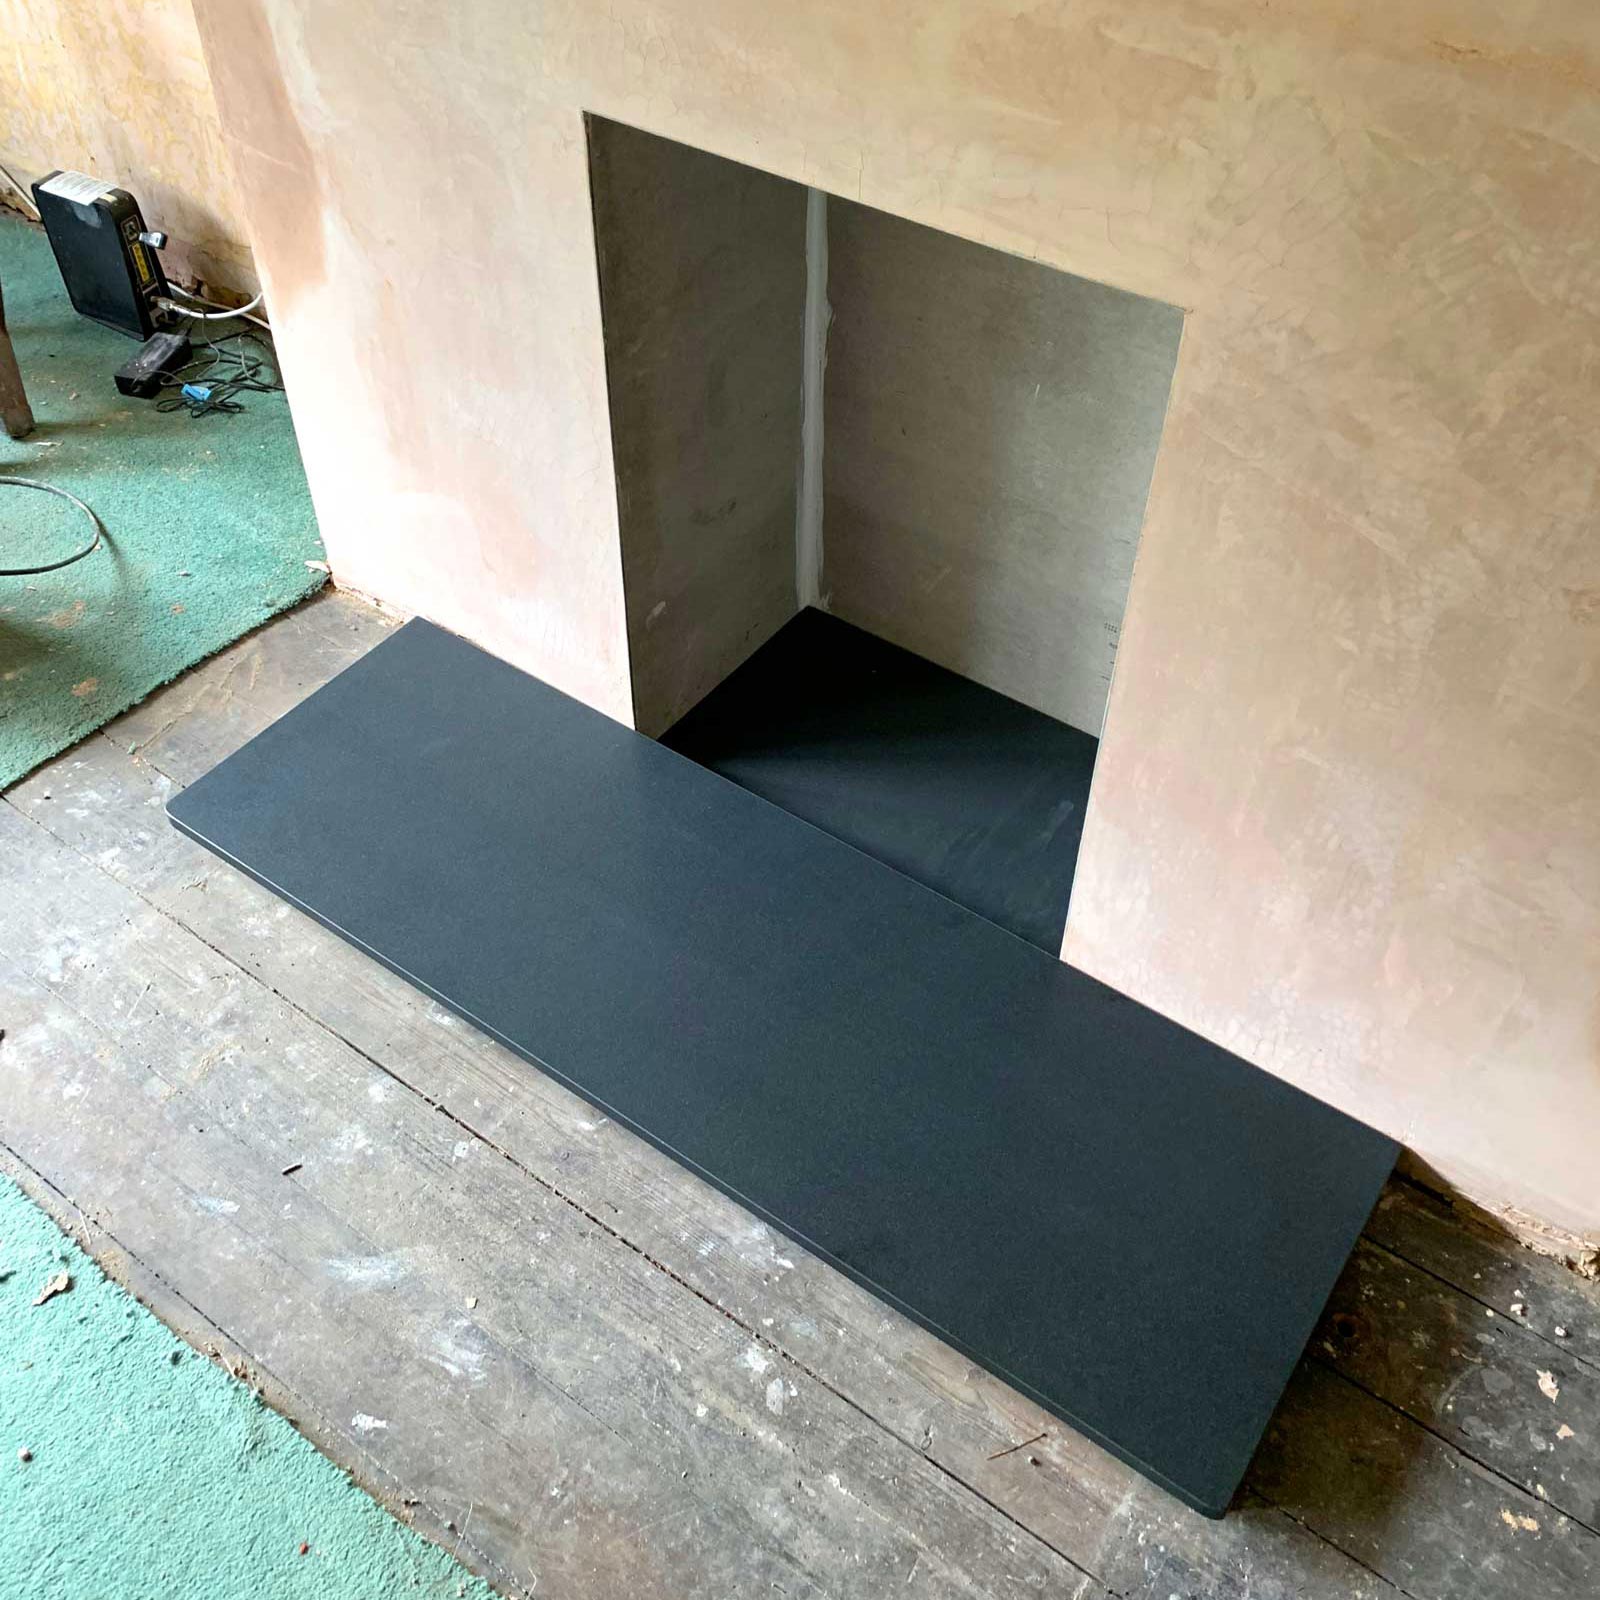
Honed black granite hearth.
As with all the other rooms there was wood chip everywhere and an artex ceiling to deal with, so it was more stripping shenanigans for me! The windowsill was again covered in layers of gloss paint so I stripped this back to bare wood to prepare it for a fresh new coat of white satin. During this time I also had the electrics in the room checked out just incase anything needed replacing, thankfully all was OK. After a week of preparation the room was ready to be skimmed, this process took just two days to complete and another three to four days to dry.
Like the rest of the flat the living room needed three coats of bright white matt on the walls and ceiling and two coats of white satin on the woodwork which took another three days. Now it was really starting to feel like home. All that was left to complete it was a decision on the floor.
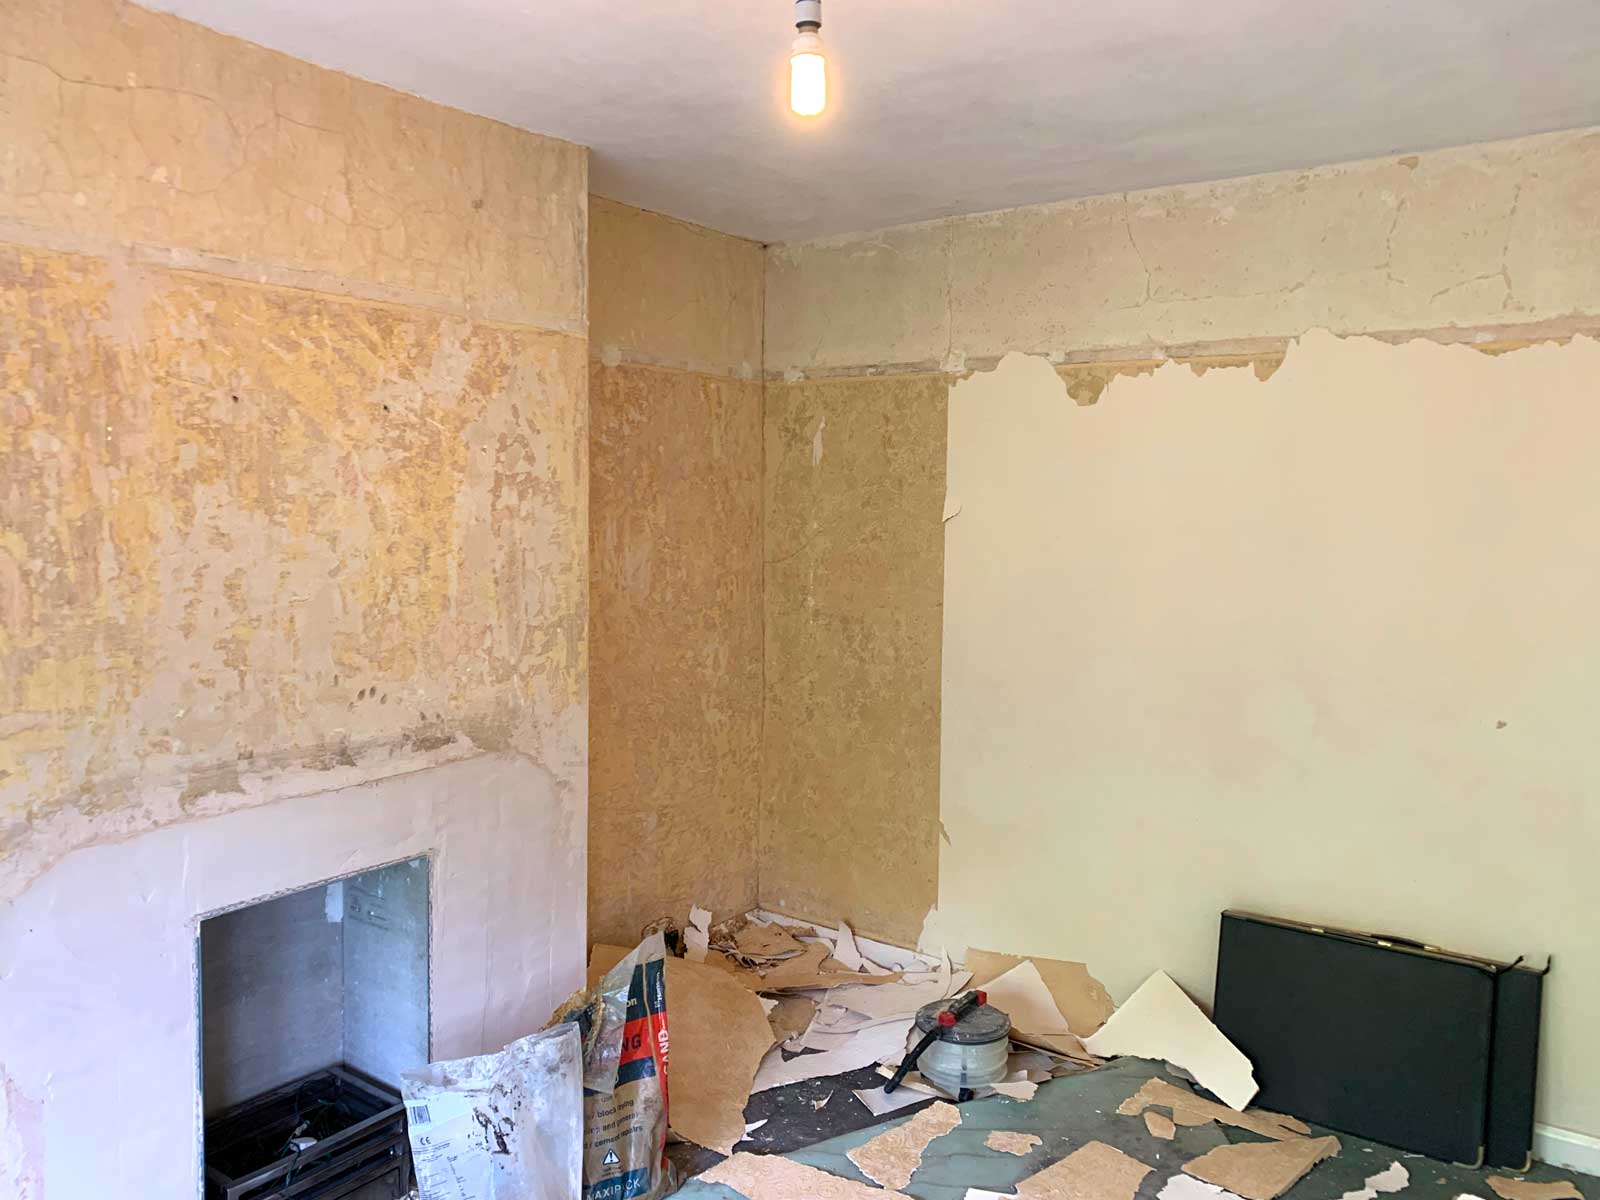
More stripping than one man can bare.
I had agonised over this for quite some time, do I sand back the original floor boards or do I use carpet? My boy made the decision for me as he always complained about getting splinters from the floor boards at his mums house, so carpet it was. Luckily I know a local self employed carpet fitter who did a fantastic job laying the carpet in just a few hours.
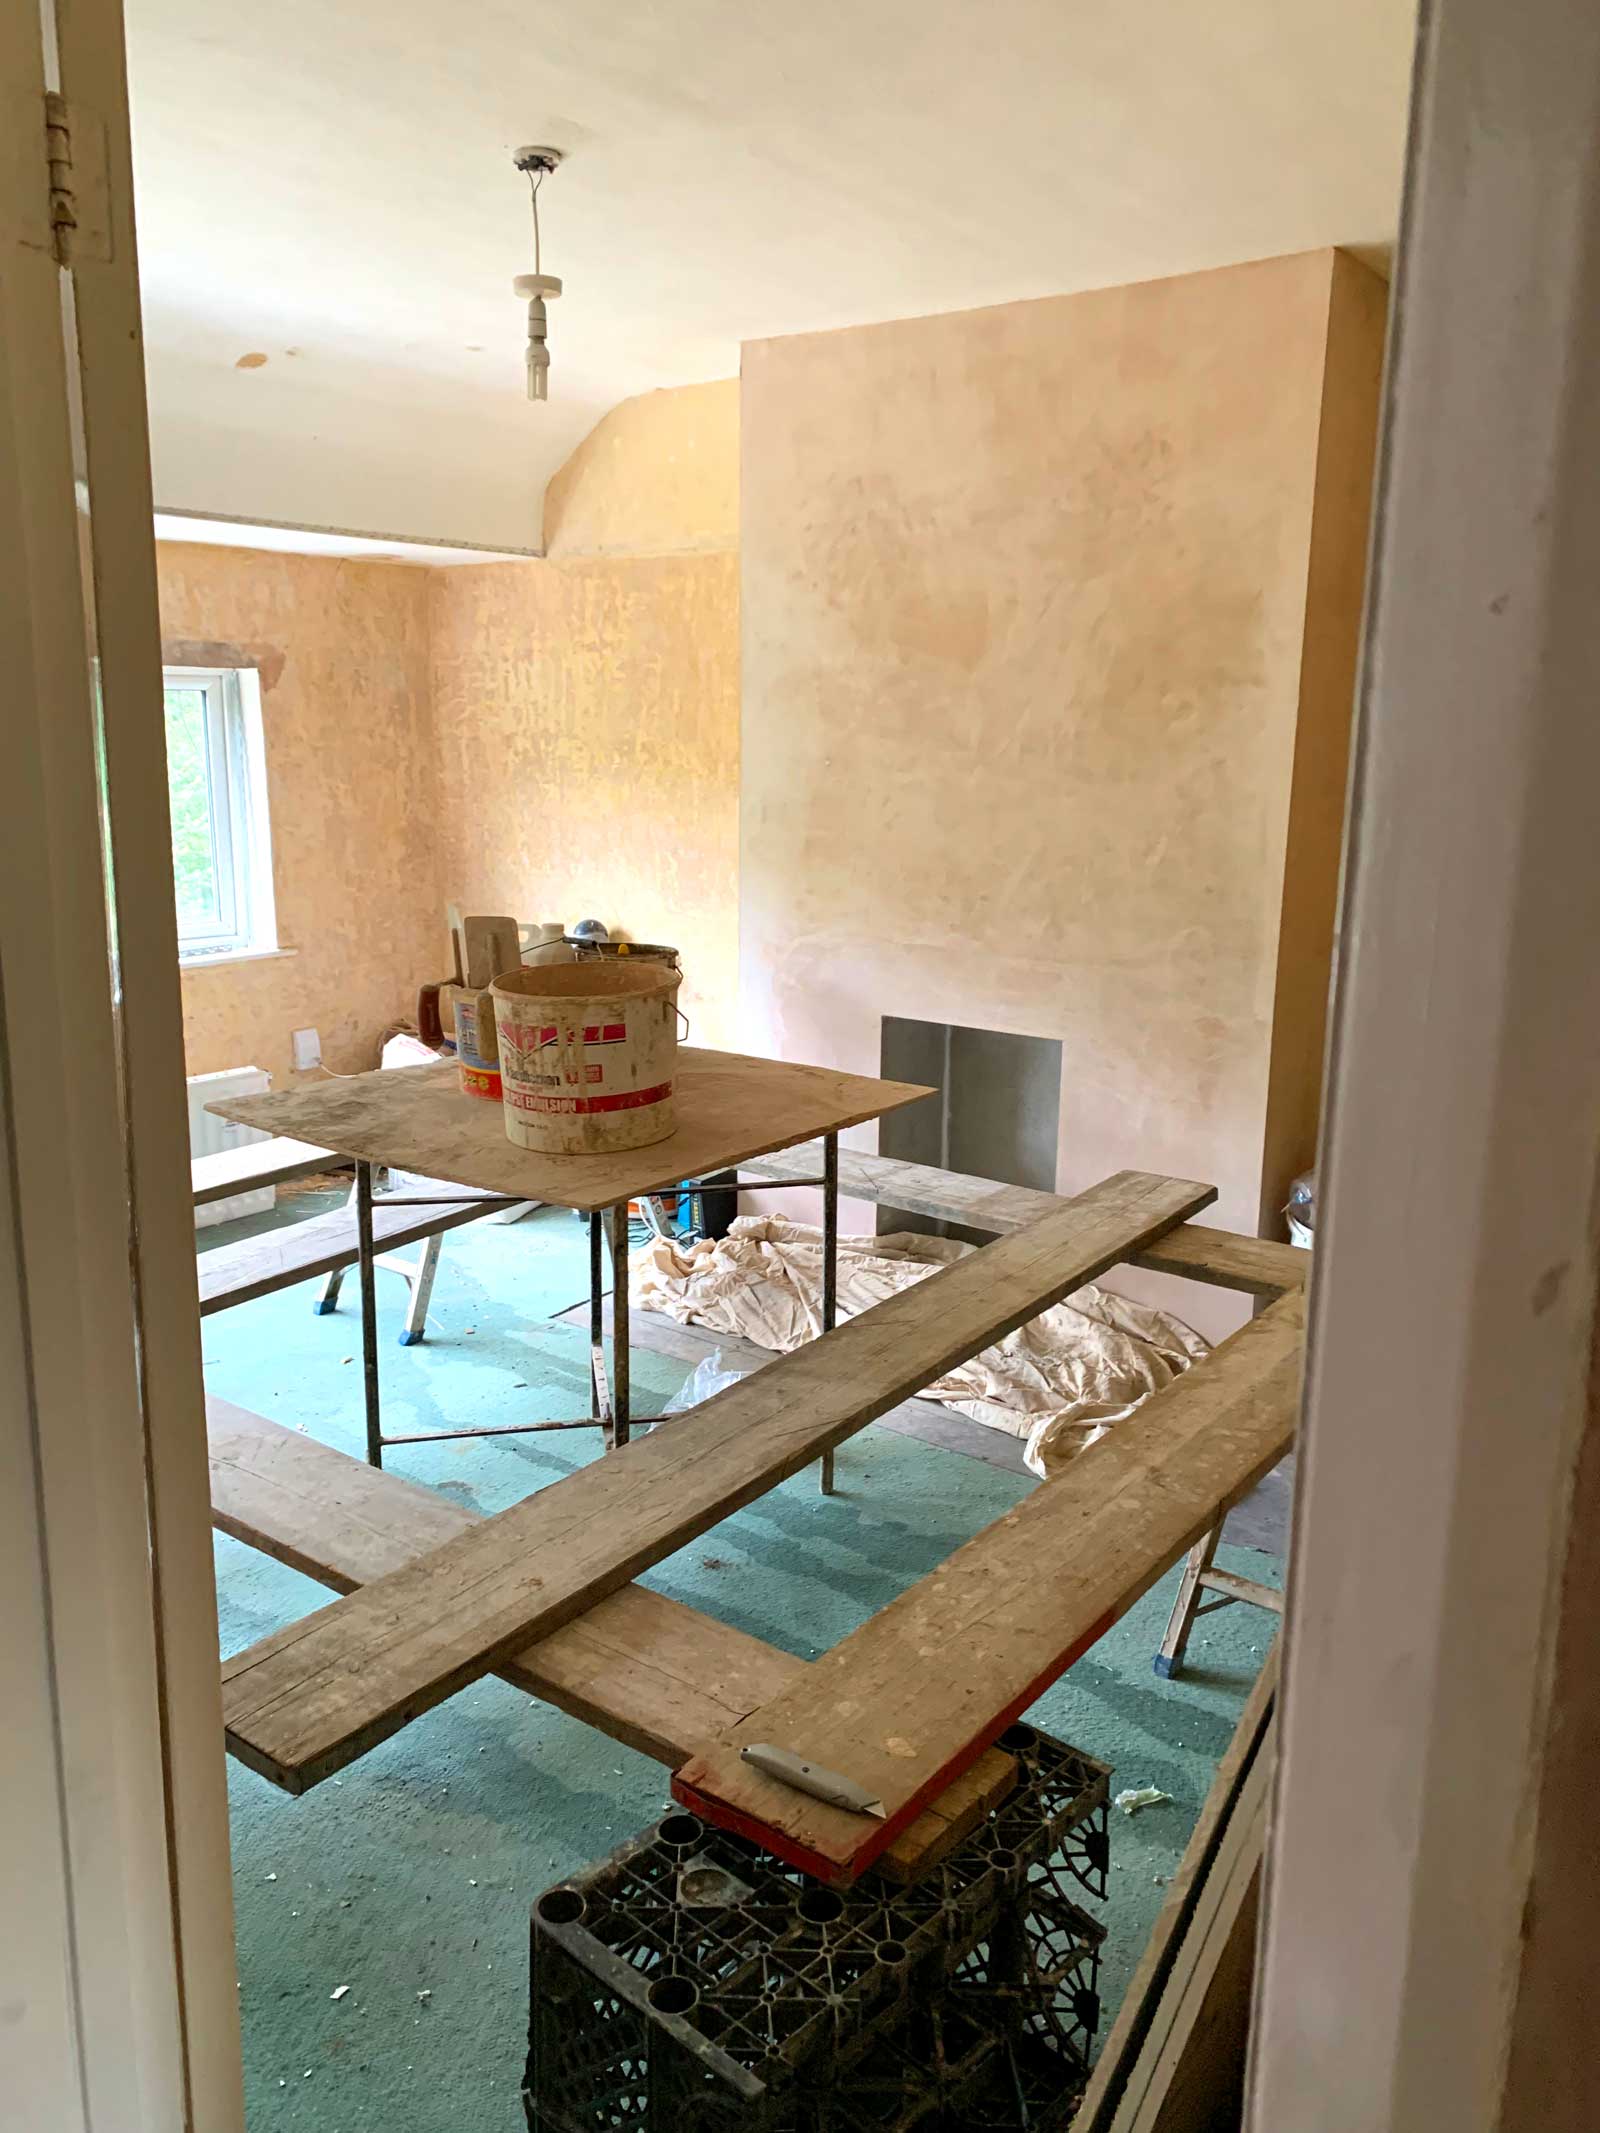
Let the skimming begin.
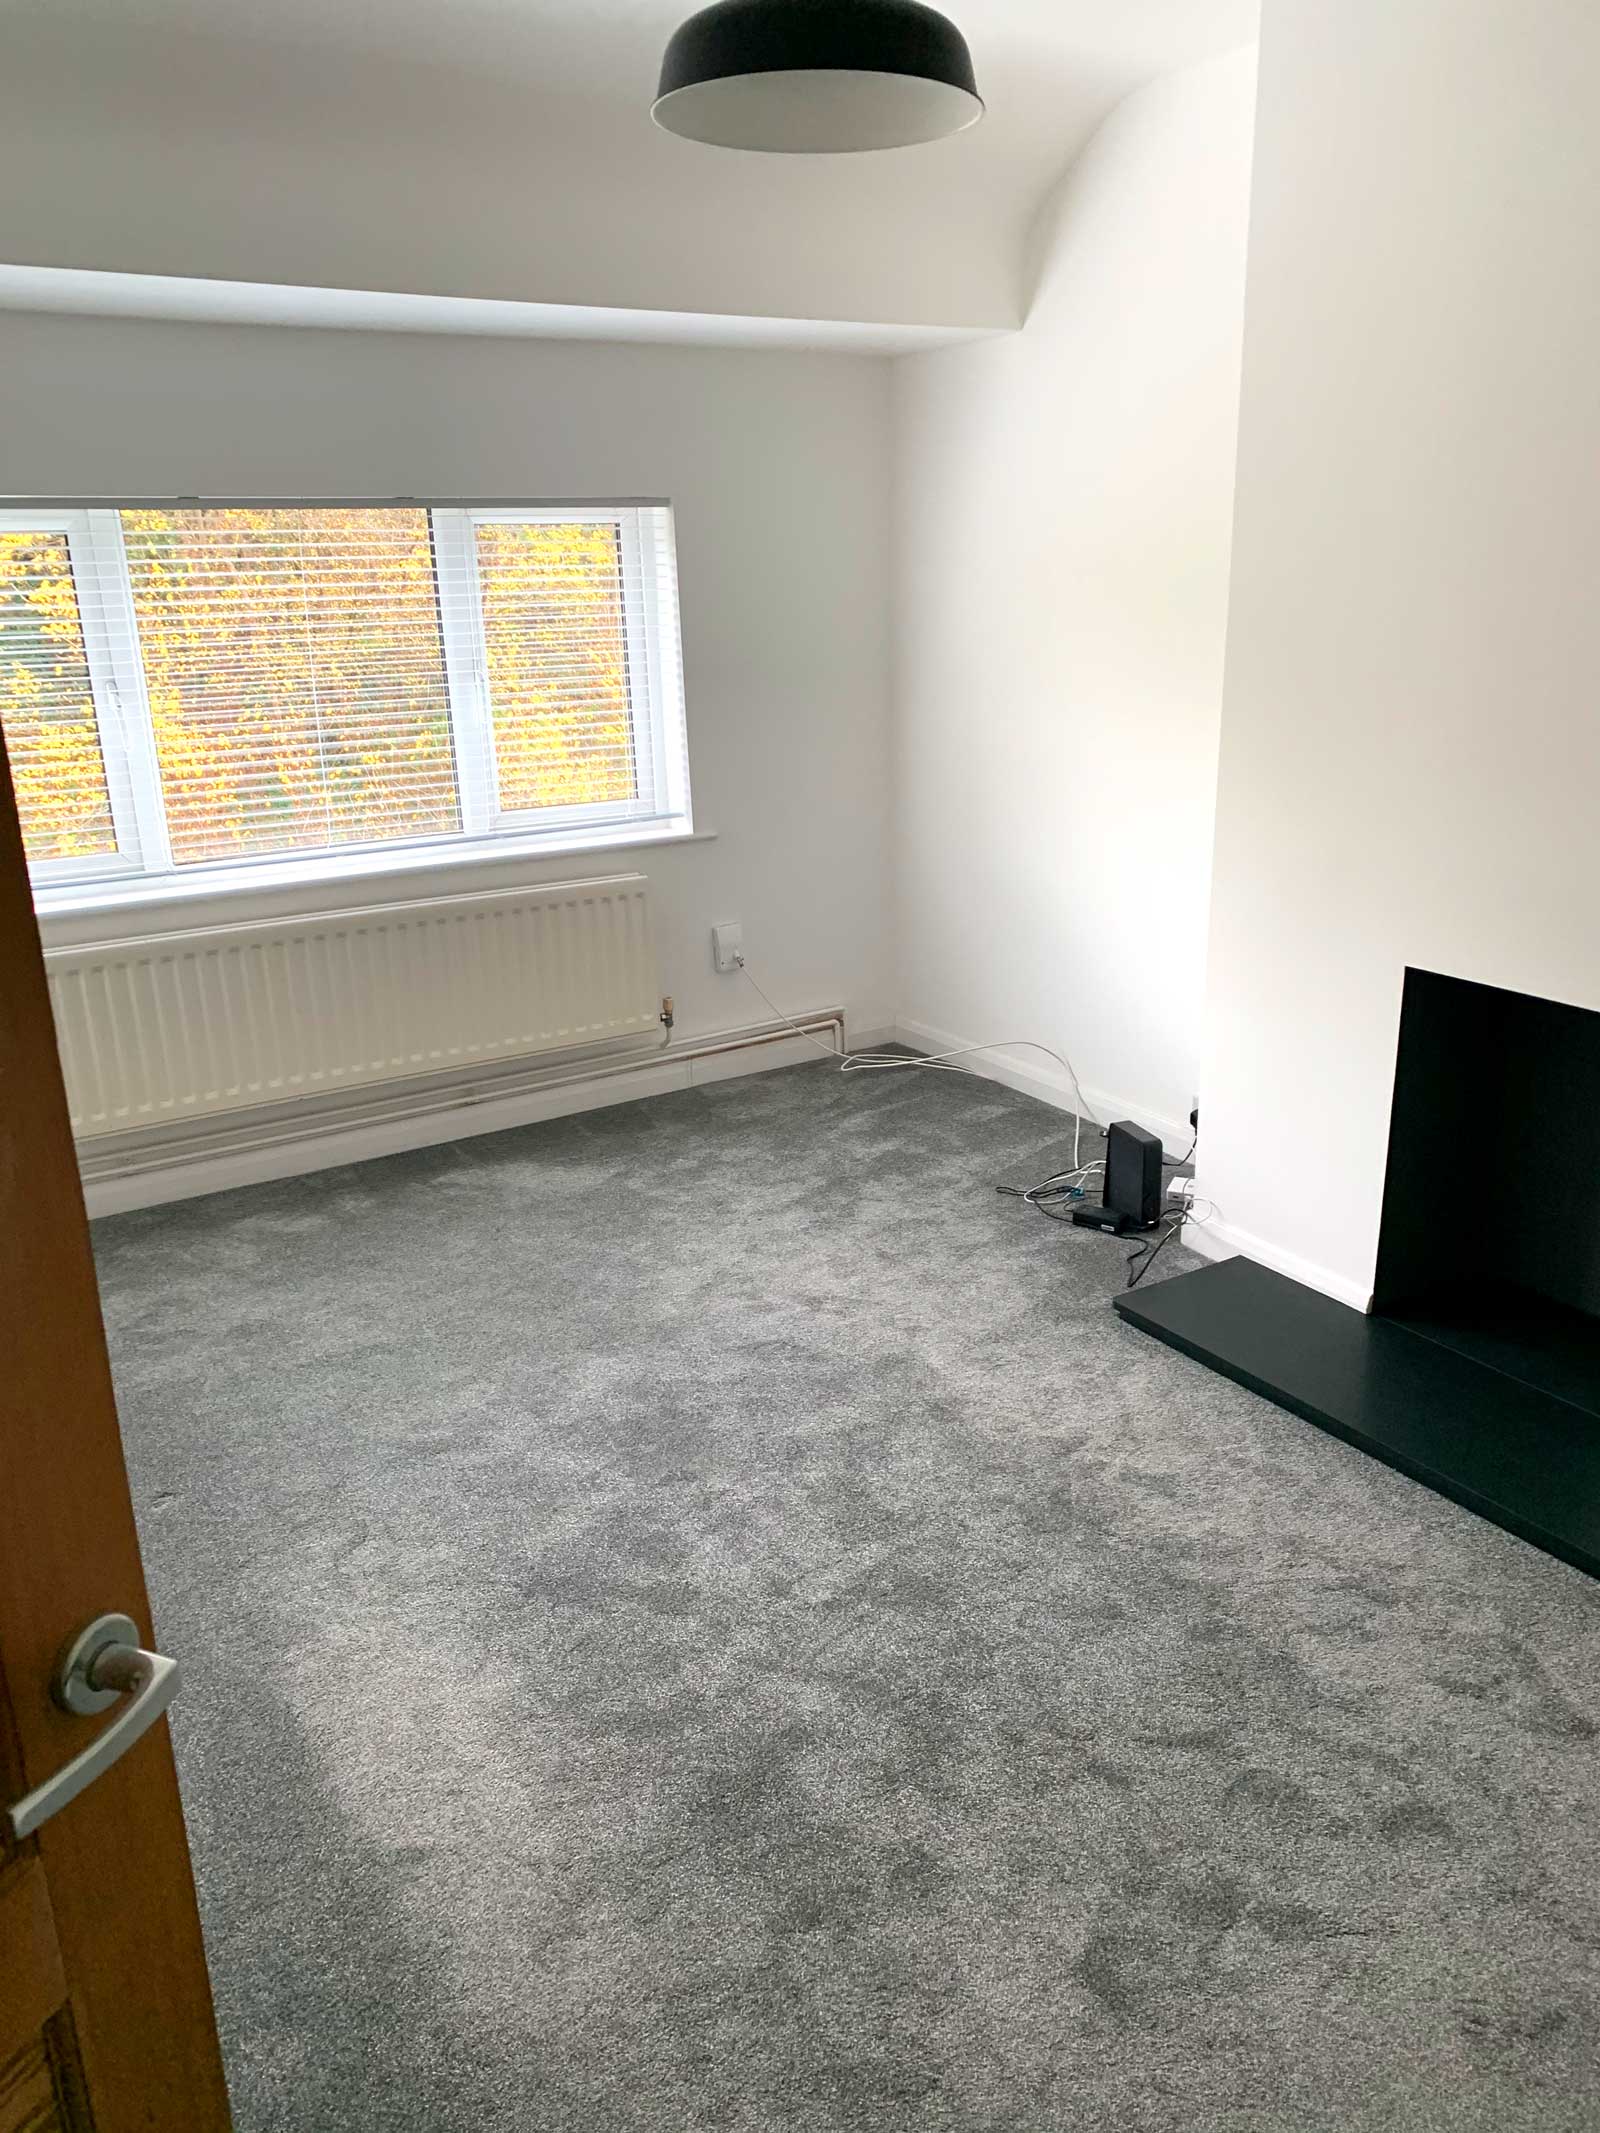
All ready to move in.
Once I had fitted the new blinds for the windows the living room was finished and looking great. All it needed now was my furnishings and pictures which had all been in storage in the main bedroom. It didn’t take long to get everything set up as I had already decided where things were going to go throughout the renovations. It was an amazing feeling to finally sit down on the sofa when it was all complete and think back to the time a few months previous when I was sat in this same living room in tears.
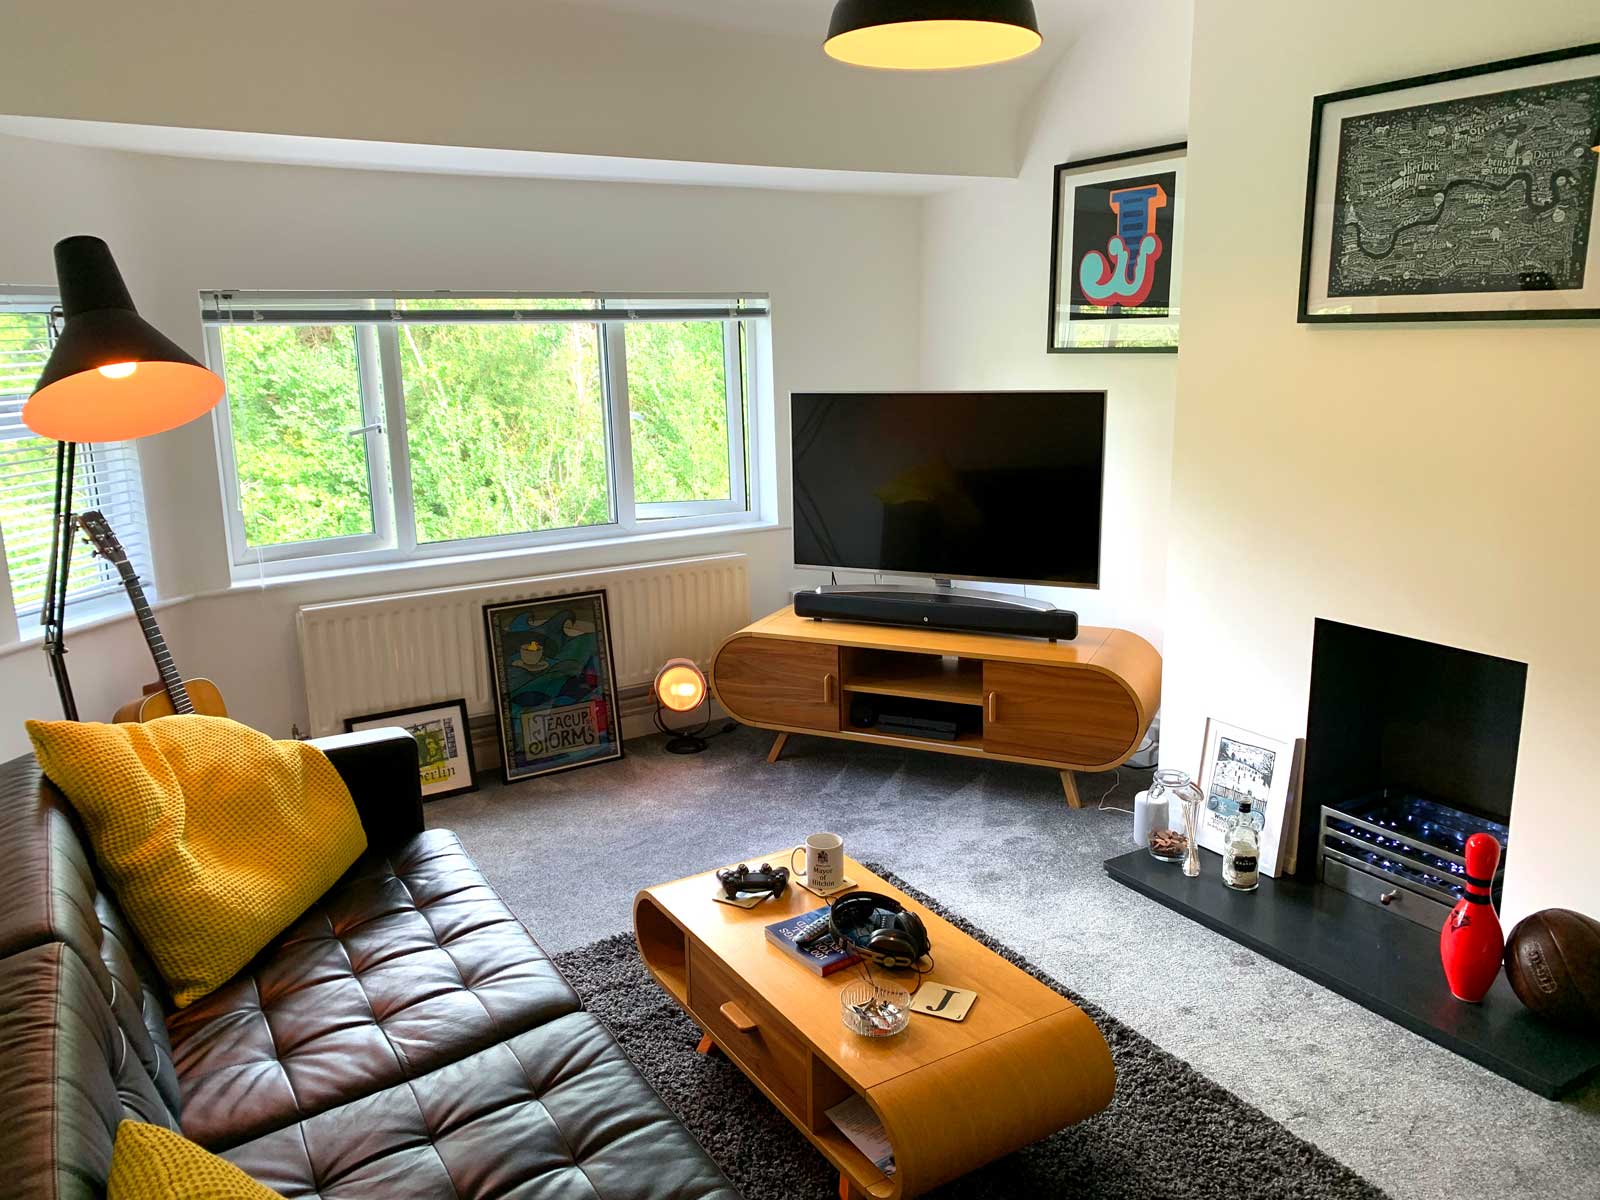
Loving how it’s all come together.
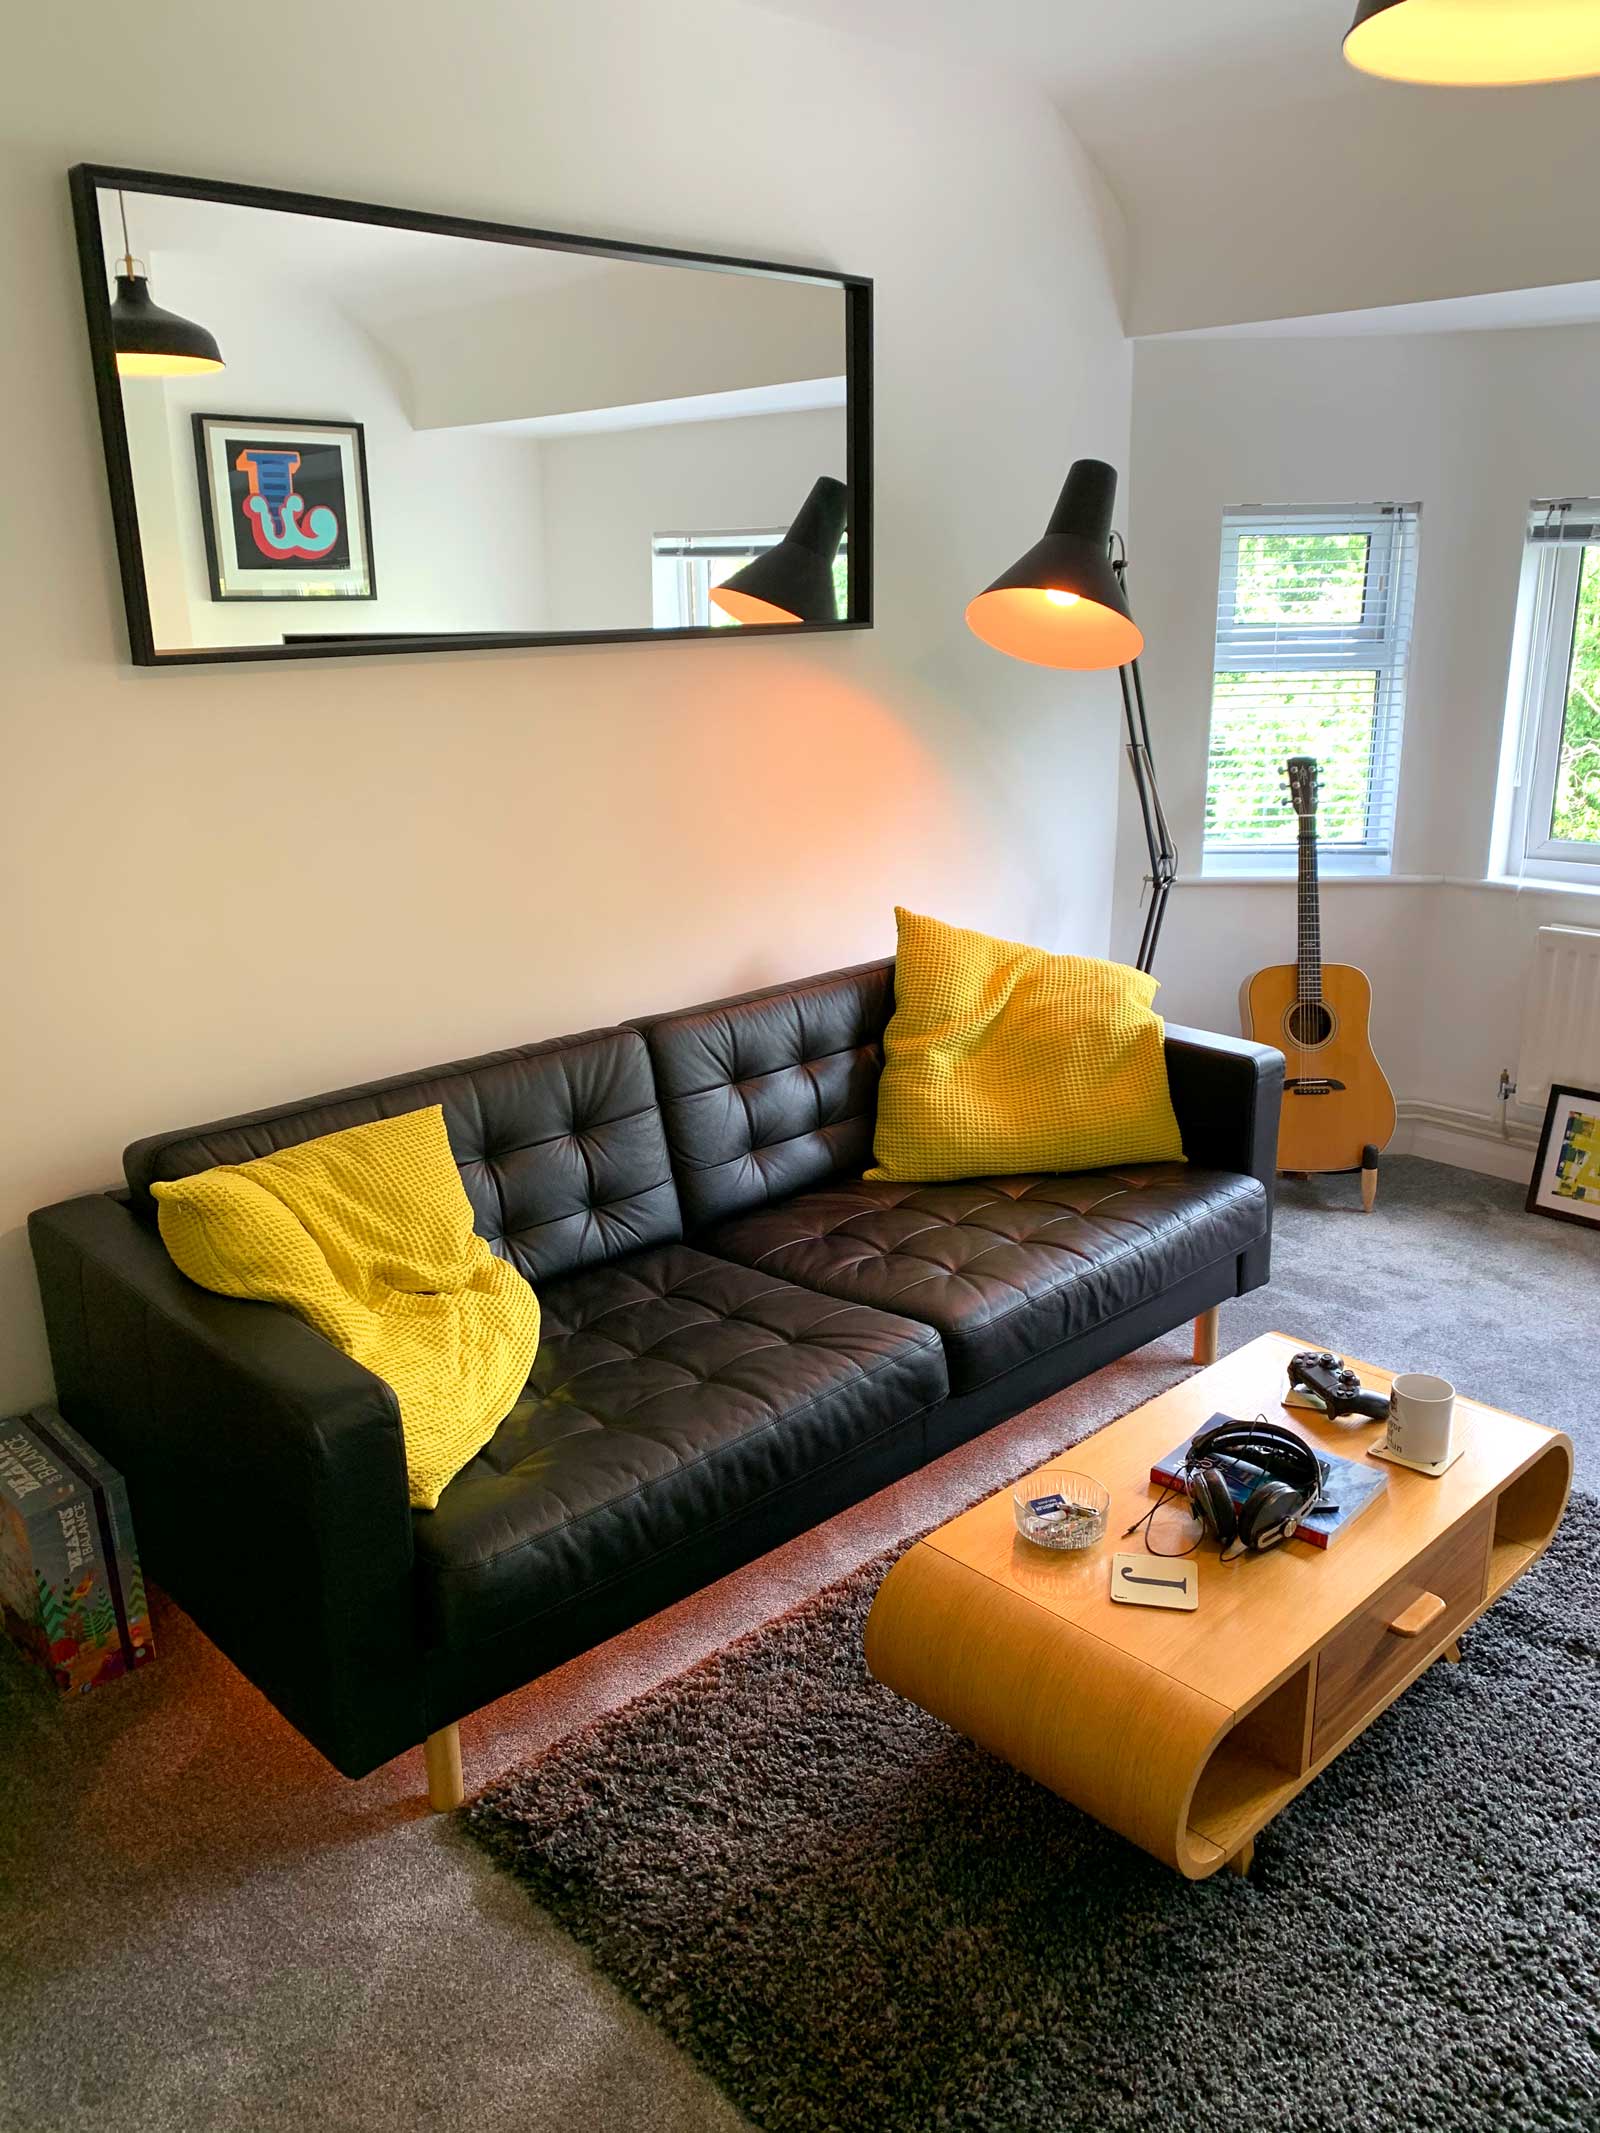
Mirror, mirror on the wall…
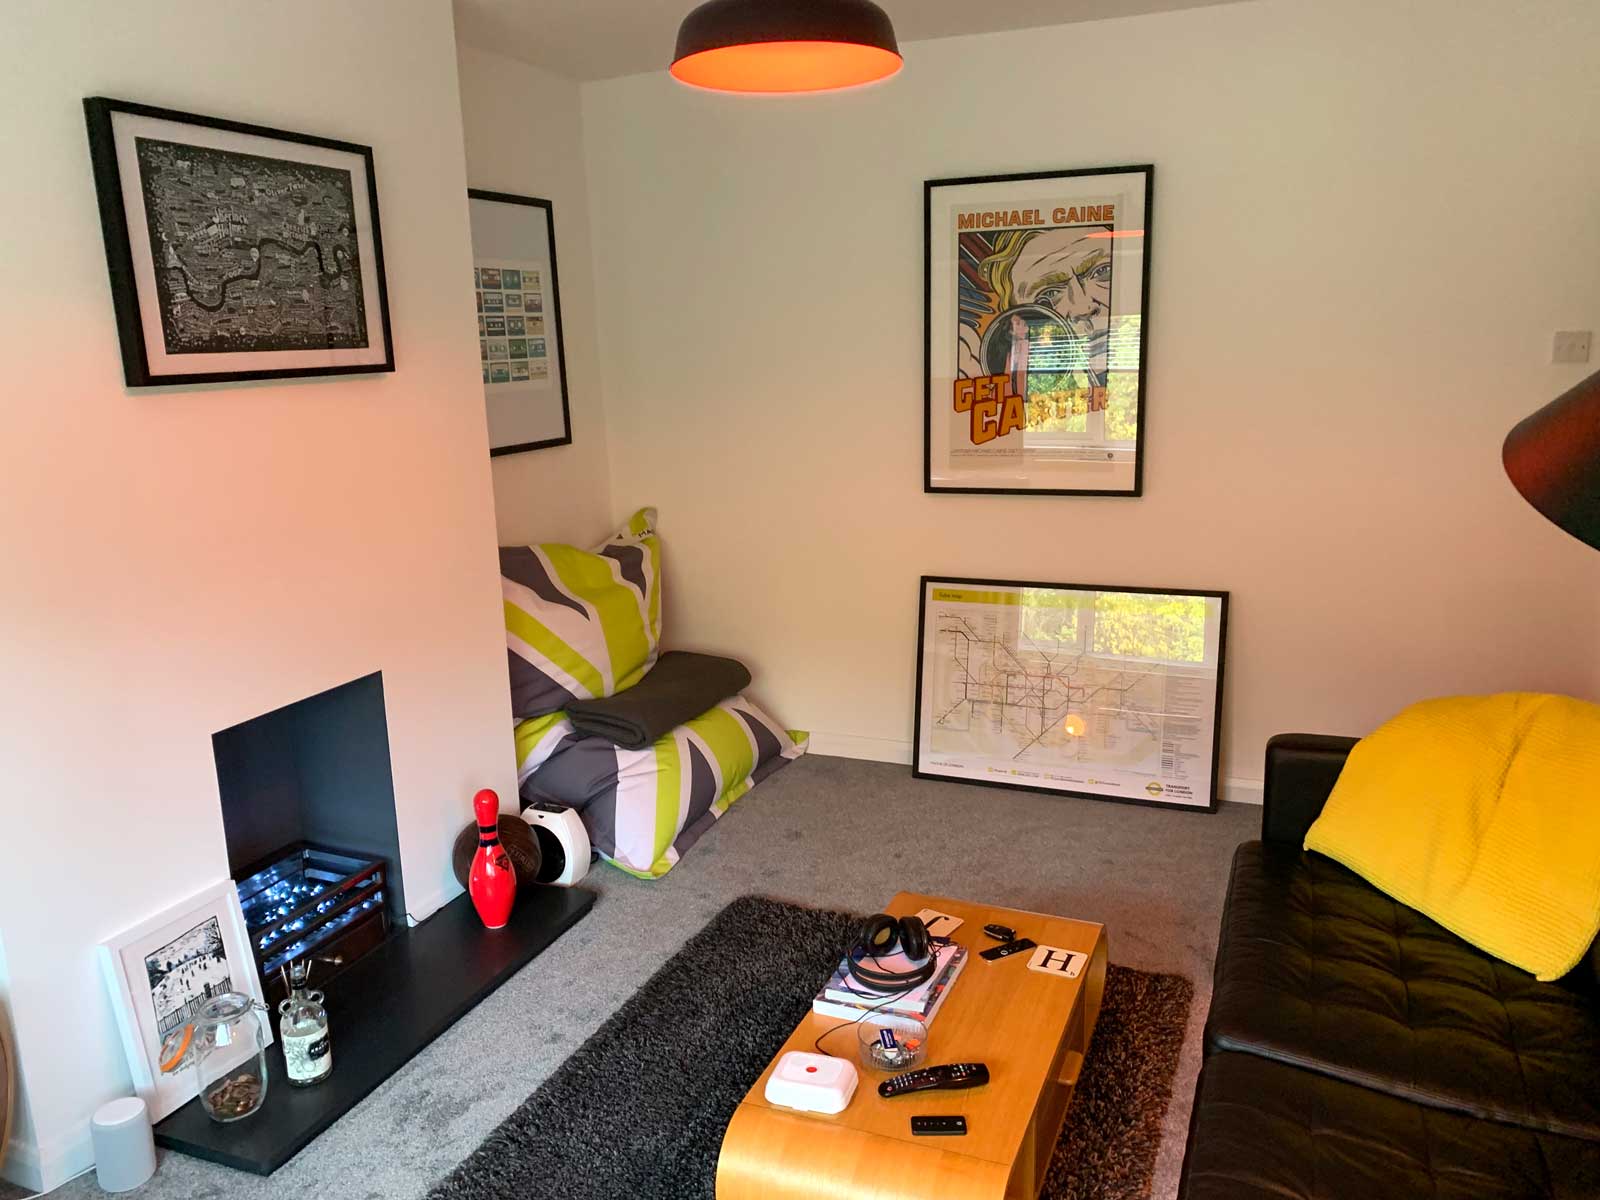
Where to put all my artwork?
Feet up and relax. 🙂
When this journey began I had an idea of how I wanted things to look and feel. but I had no idea they would turn out so mach better than I envisaged. Now the living room was complete the boy was able to stay over for the first time. As we sat on the sofa together looking at photos of the flat in it’s original state we both felt it was a job well done. He was obviously very happy with the place as he immediately asked when could he have friends over! The only room left to do now is my bedroom and finally find out what is in the box in the corner…
Flat Refurbishment – Part 5
flat refurbishment – part 5
The hallway… what can you say about the hallway? It’s not like the other rooms where a lot of consideration was needed to make things work the way I wanted. In fact it’s not really a room at all, more a collection of doors. But for me this was something that needed consideration, because in the hallway I saw an opportunity to make the flat feel more spacious that it actually is.
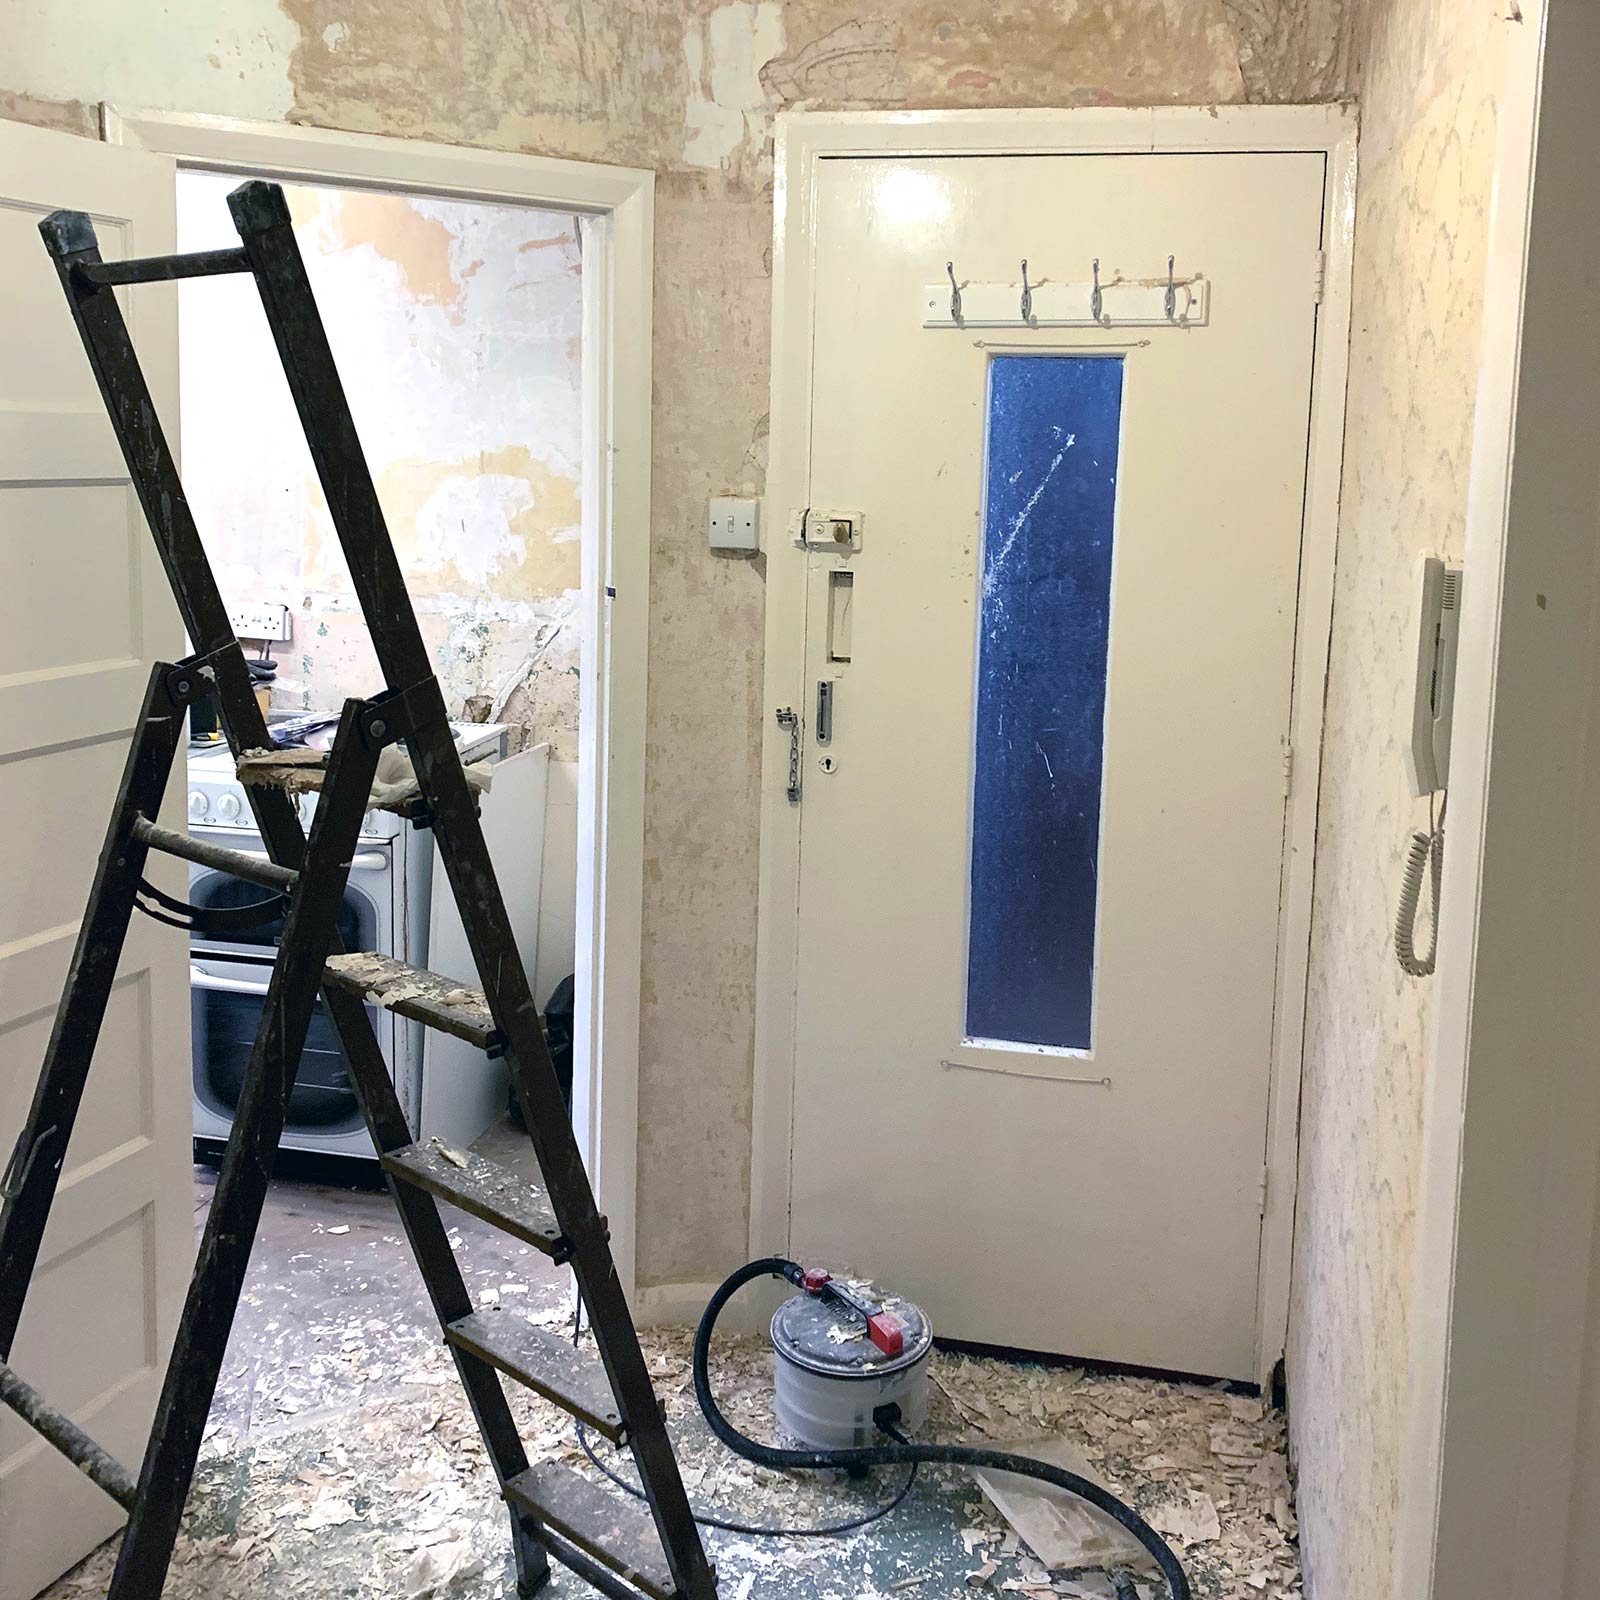
As with the rest of the flat there was wallpaper to remove from the walls and ceiling which didn’t take as much time as the other rooms due to the fact that the hallway doesn’t have much wall space at all.
At this point I also made the decision to keep the existing internal doors as they were original to the flat, but they did have an unsightly thick layering of gloss paint from years of re-coating! So whilst decorating the hallway I sent the doors away to be stripped back to bare wood and thankfully they turned out pretty well. I also invested in new door handles which I positioned higher up than they were before making the doors more comfortable to open.
The front door was another story though, this had to go! The new front door fits in well with the style of the flat keeping a look similar to the internal doors whilst also feeling very contemporary!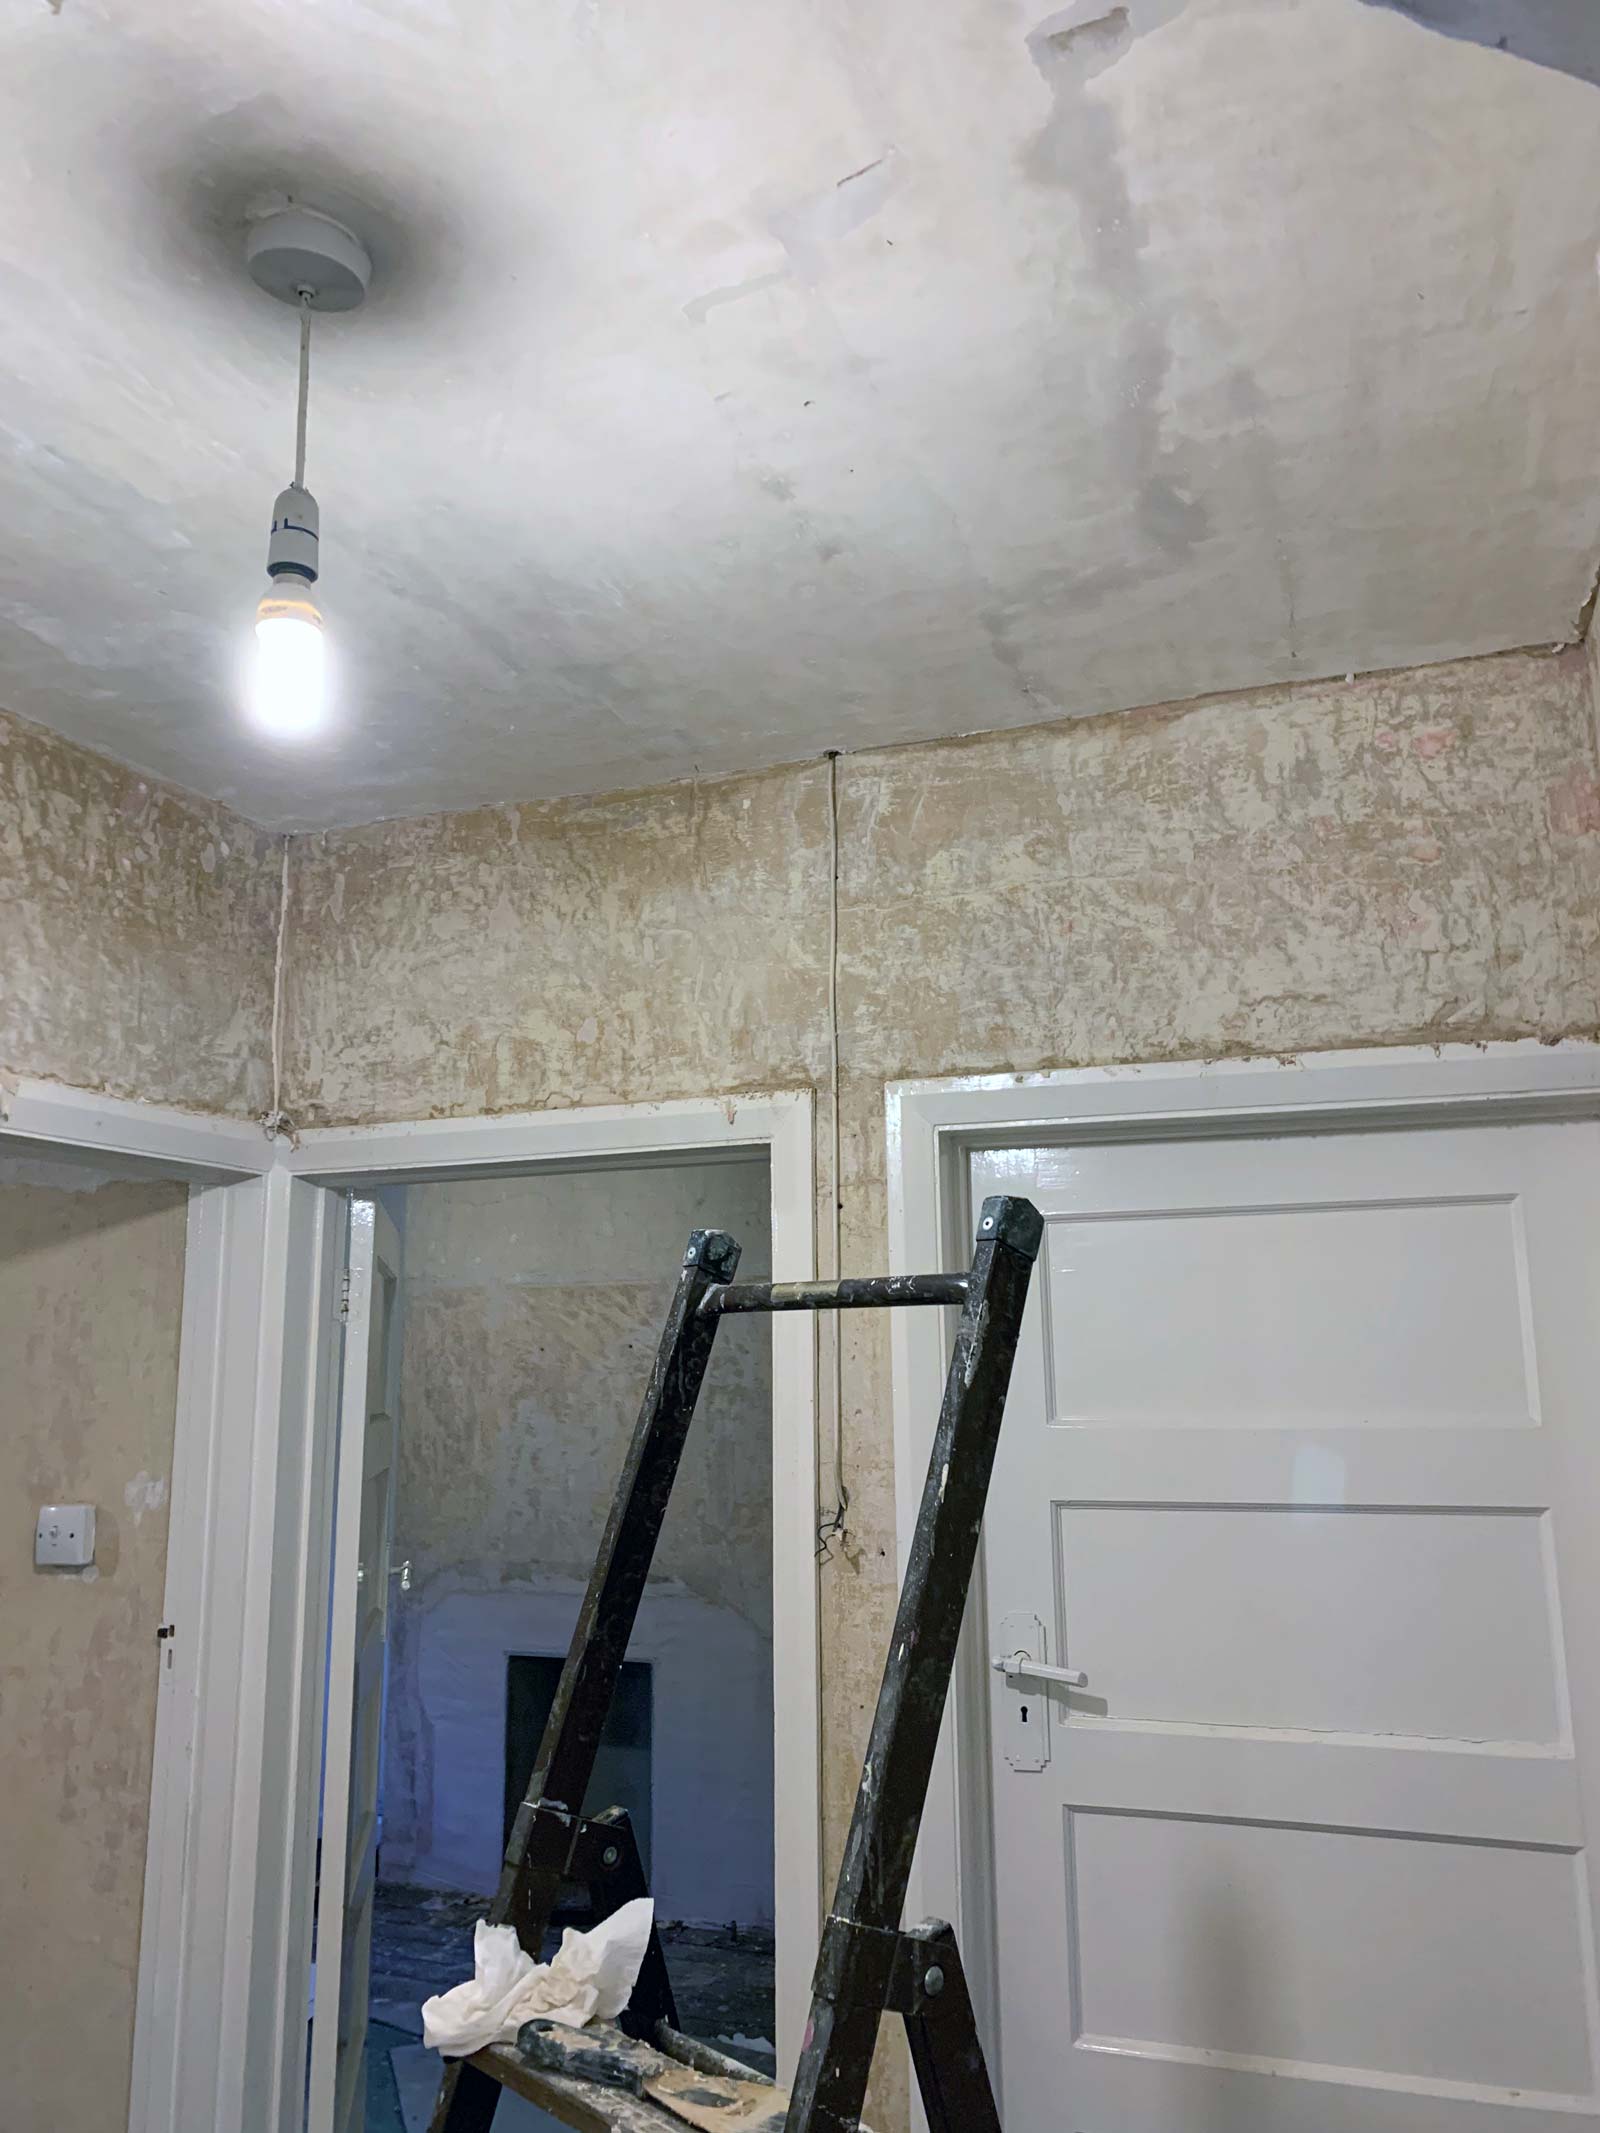
Stripping the walls and ceiling.
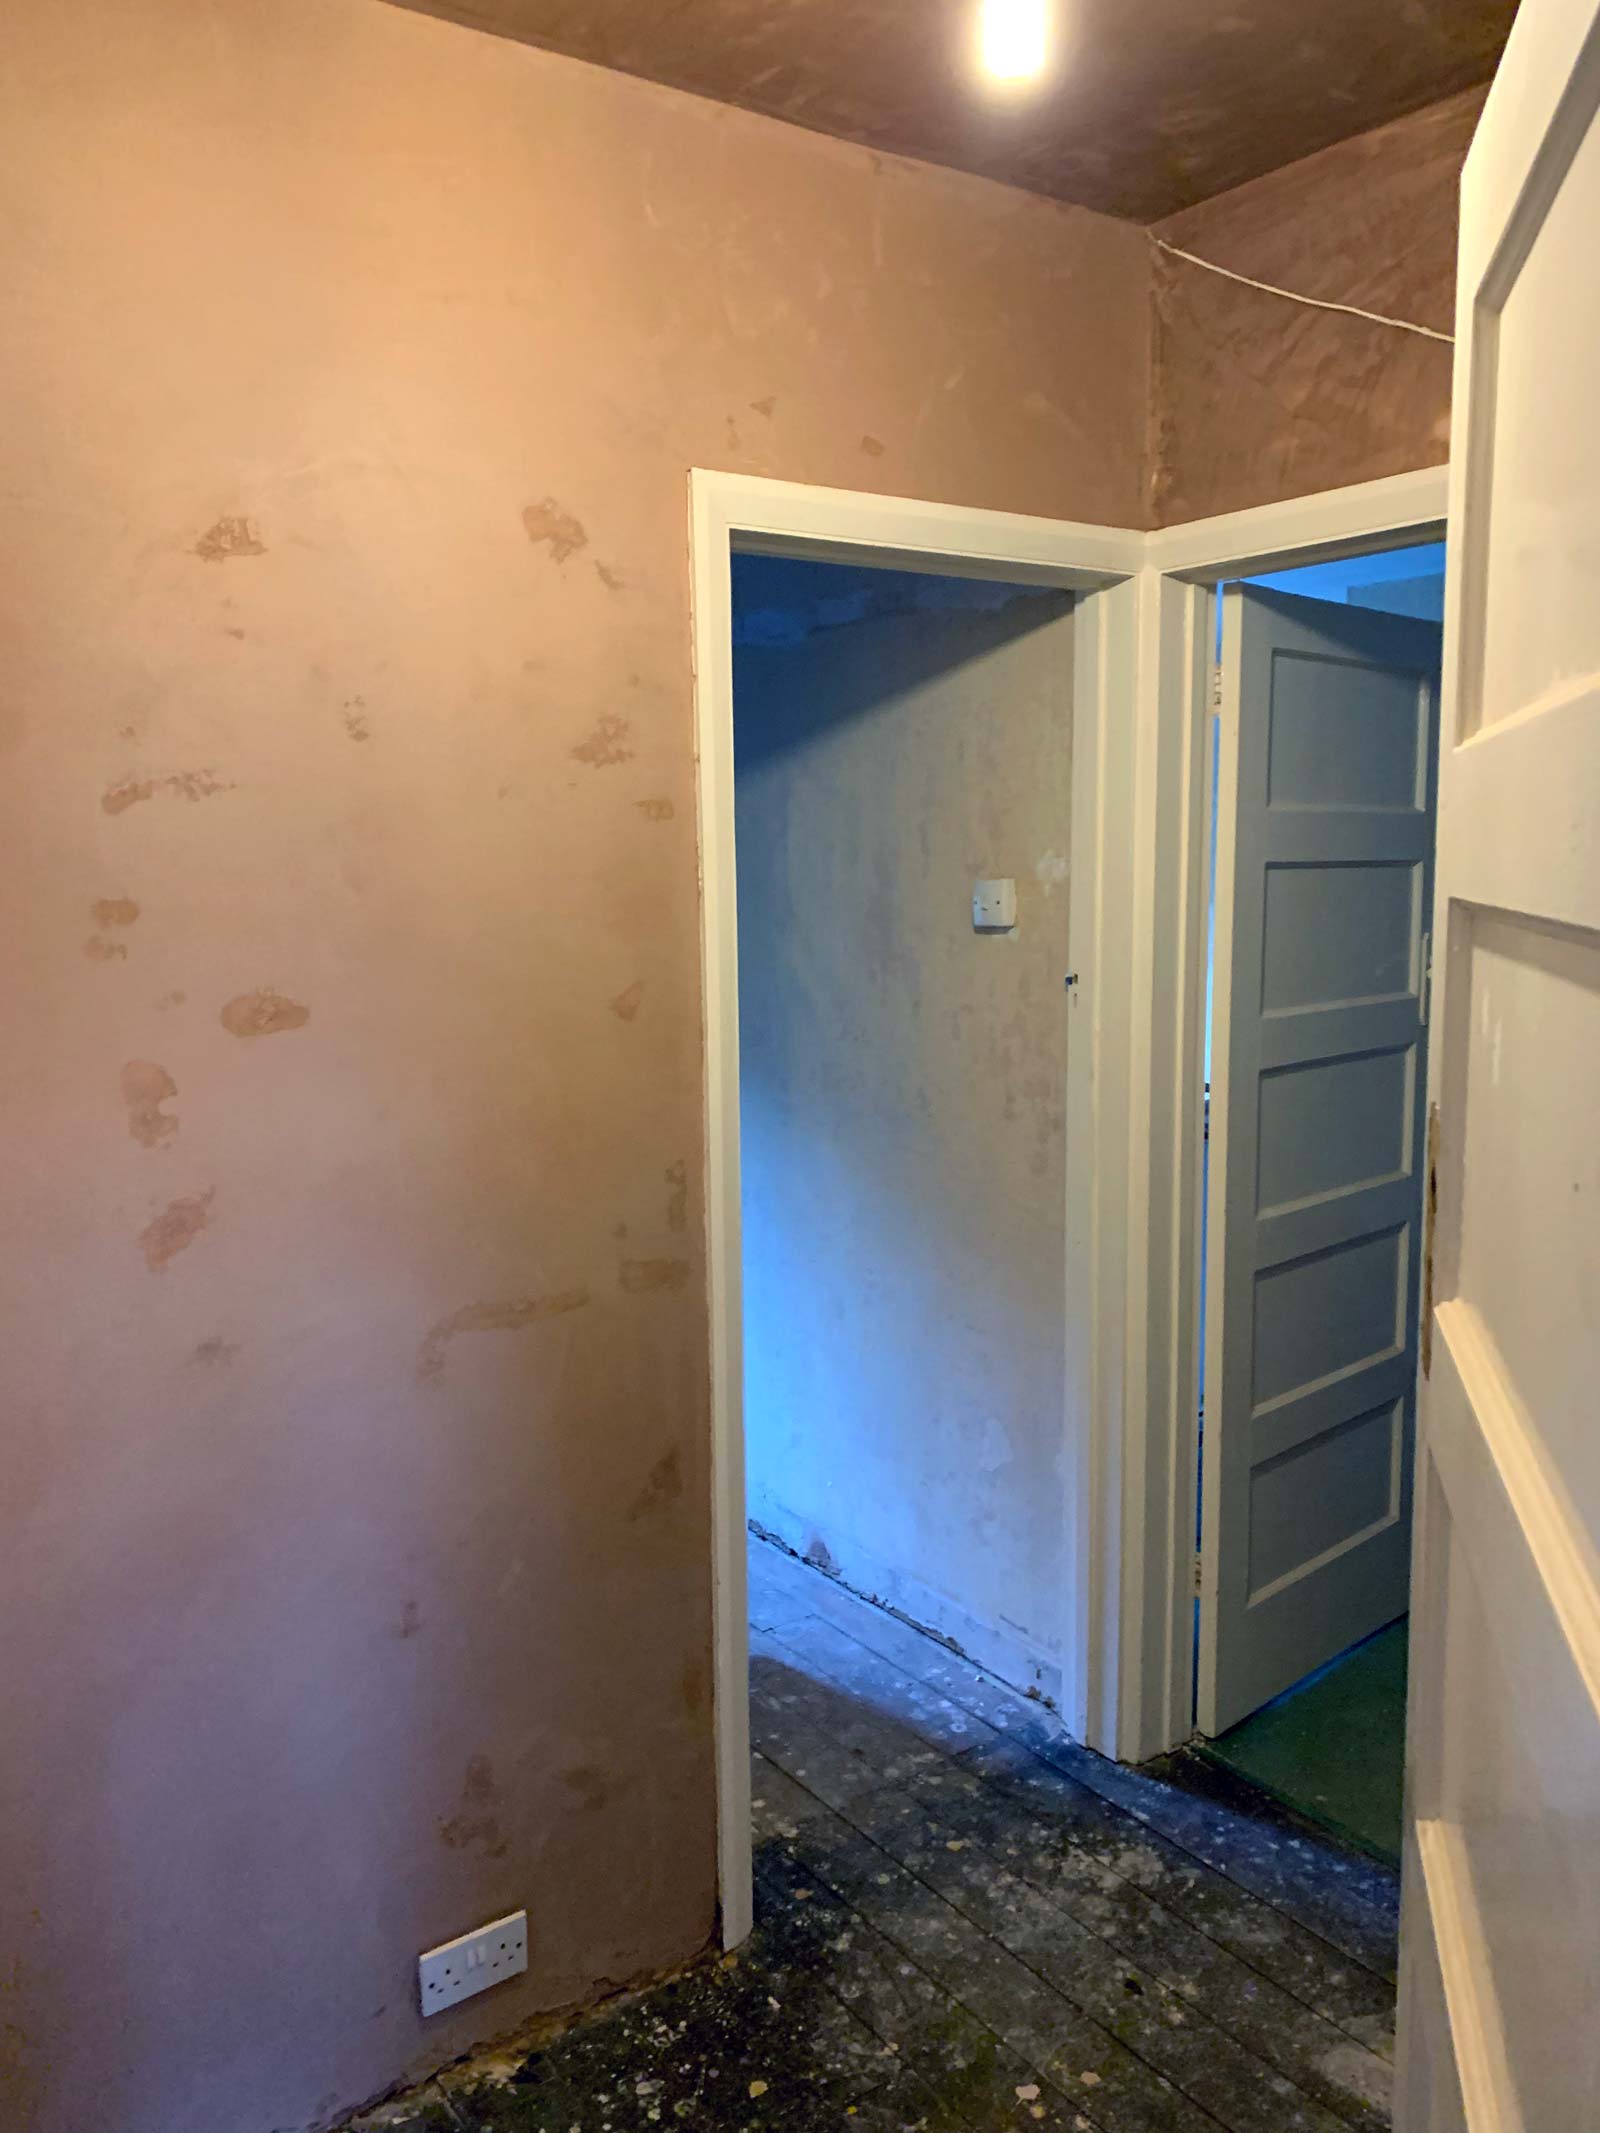
A smooth new skim.
As with the rest of the flat the hallway was given a new skim of plaster and then painted matt white to keep the flat as light and bright as possible. The hallway is the darkest area in the flat as it has no windows to let in natural light. Because of this I usually keep the kitchen and bathroom doors permanently open to let the light through and this is where I was able to enact my plan to make the flat feel more spacious.
I was conscious that if each room had a separate style of flooring then that would make the hallway feel like a small space. To combat this I decided to combine the flooring of the bathroom, kitchen and hallway so it felt like one seamless area. With the doors left open this does make the flat feel a lot more spacious and those areas feel much more connected. Because the kitchen and bathroom need a floor that is resistant to water it made sense to use tiles.
Thankfully the floorboards connecting all the rooms were on the same level which made it easy for the tiler to lay the tiles seamlessly throughout these three connecting areas. The black porcelain tiles I have used give the area a feeling of style and connectivity as well as being durable and practical! It also works really well contrasting against the light and bright colour scheme that has been used on the walls and ceilings.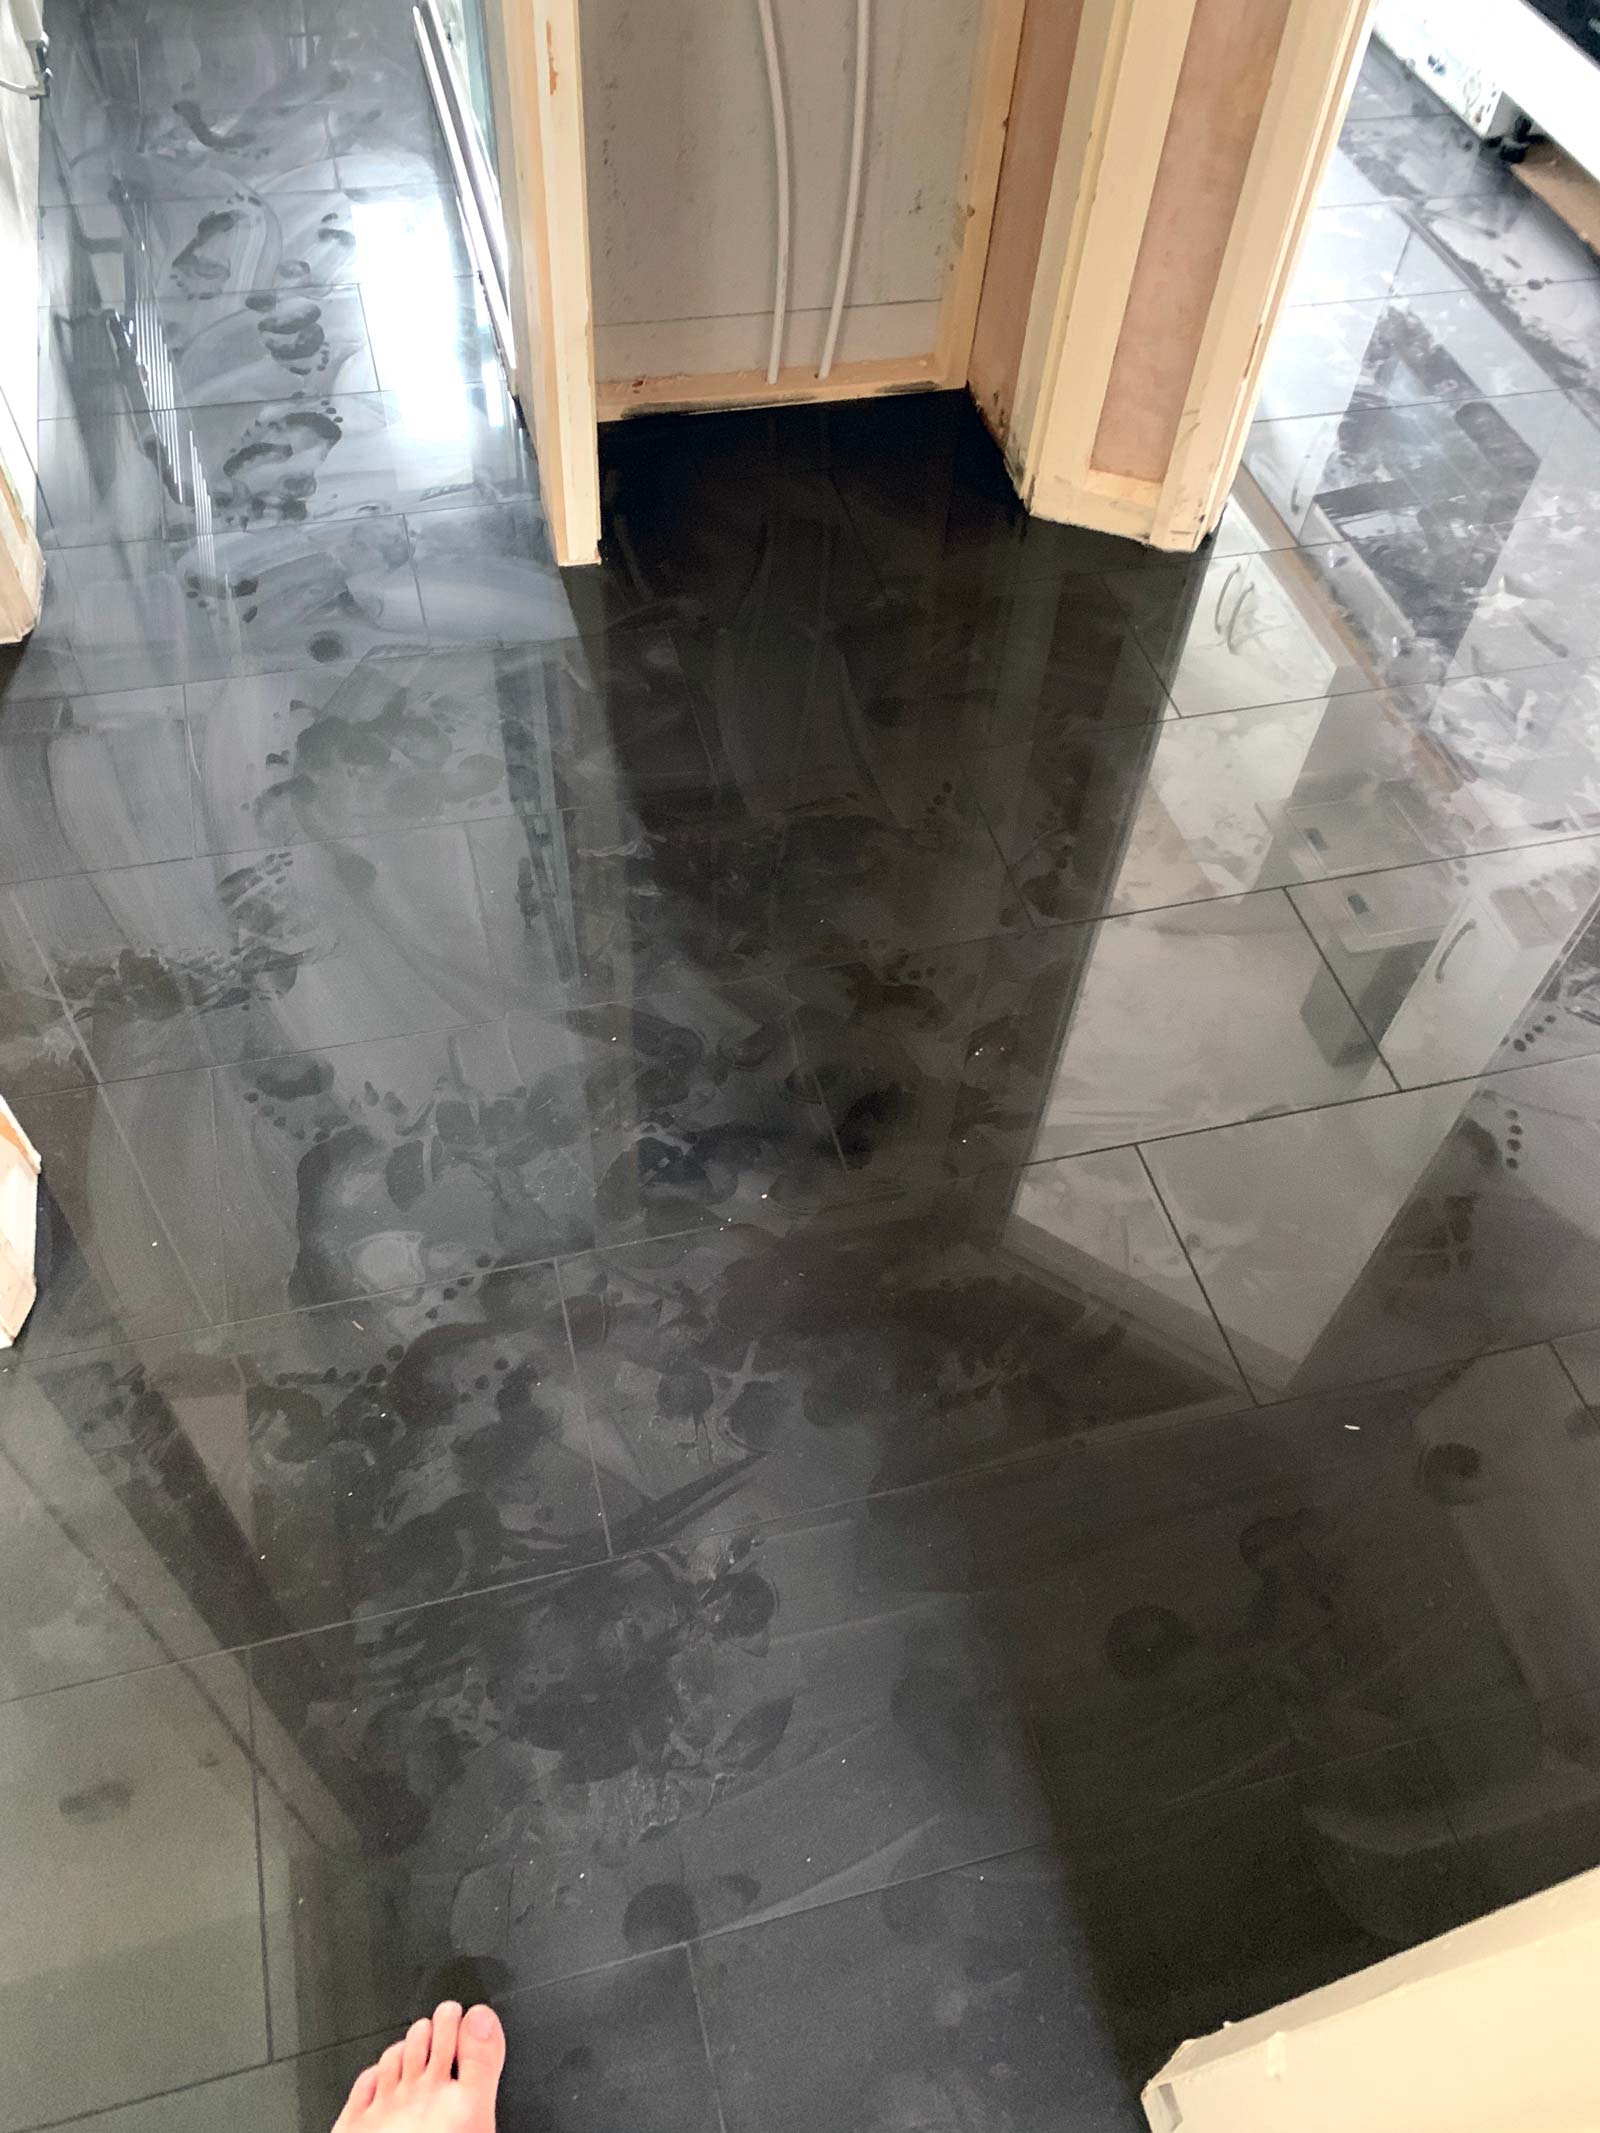
Tiles now laid needing a good clean!
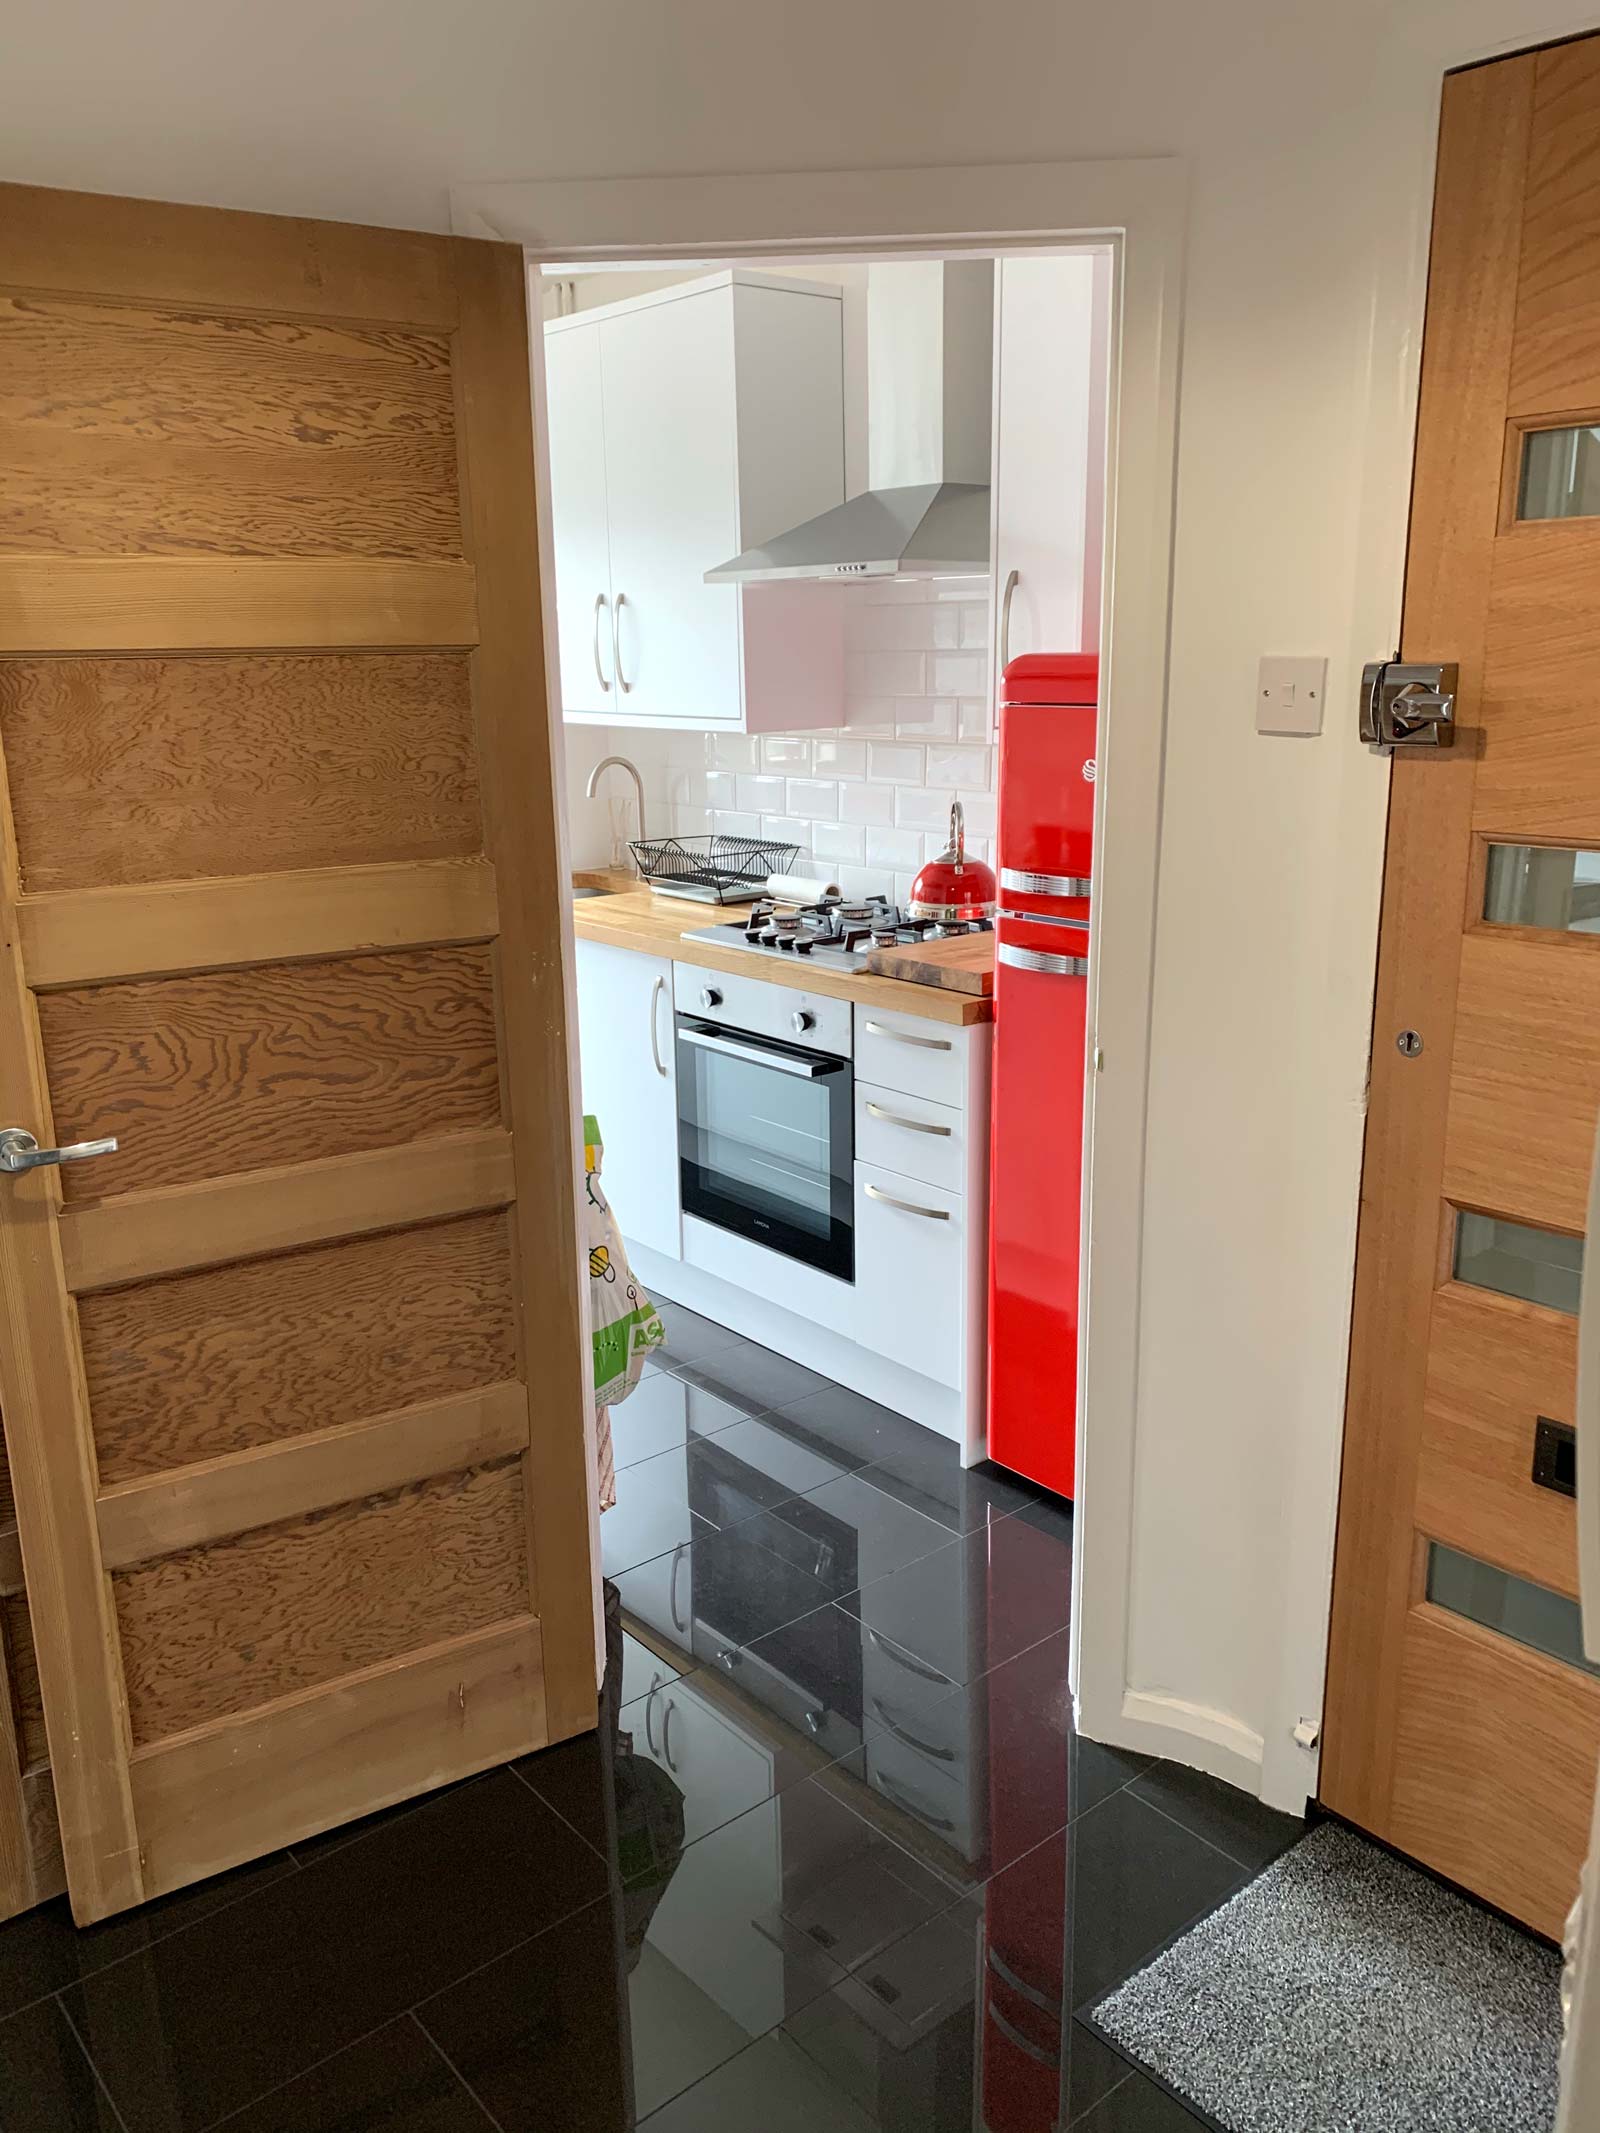
A seamless beautiful connection.
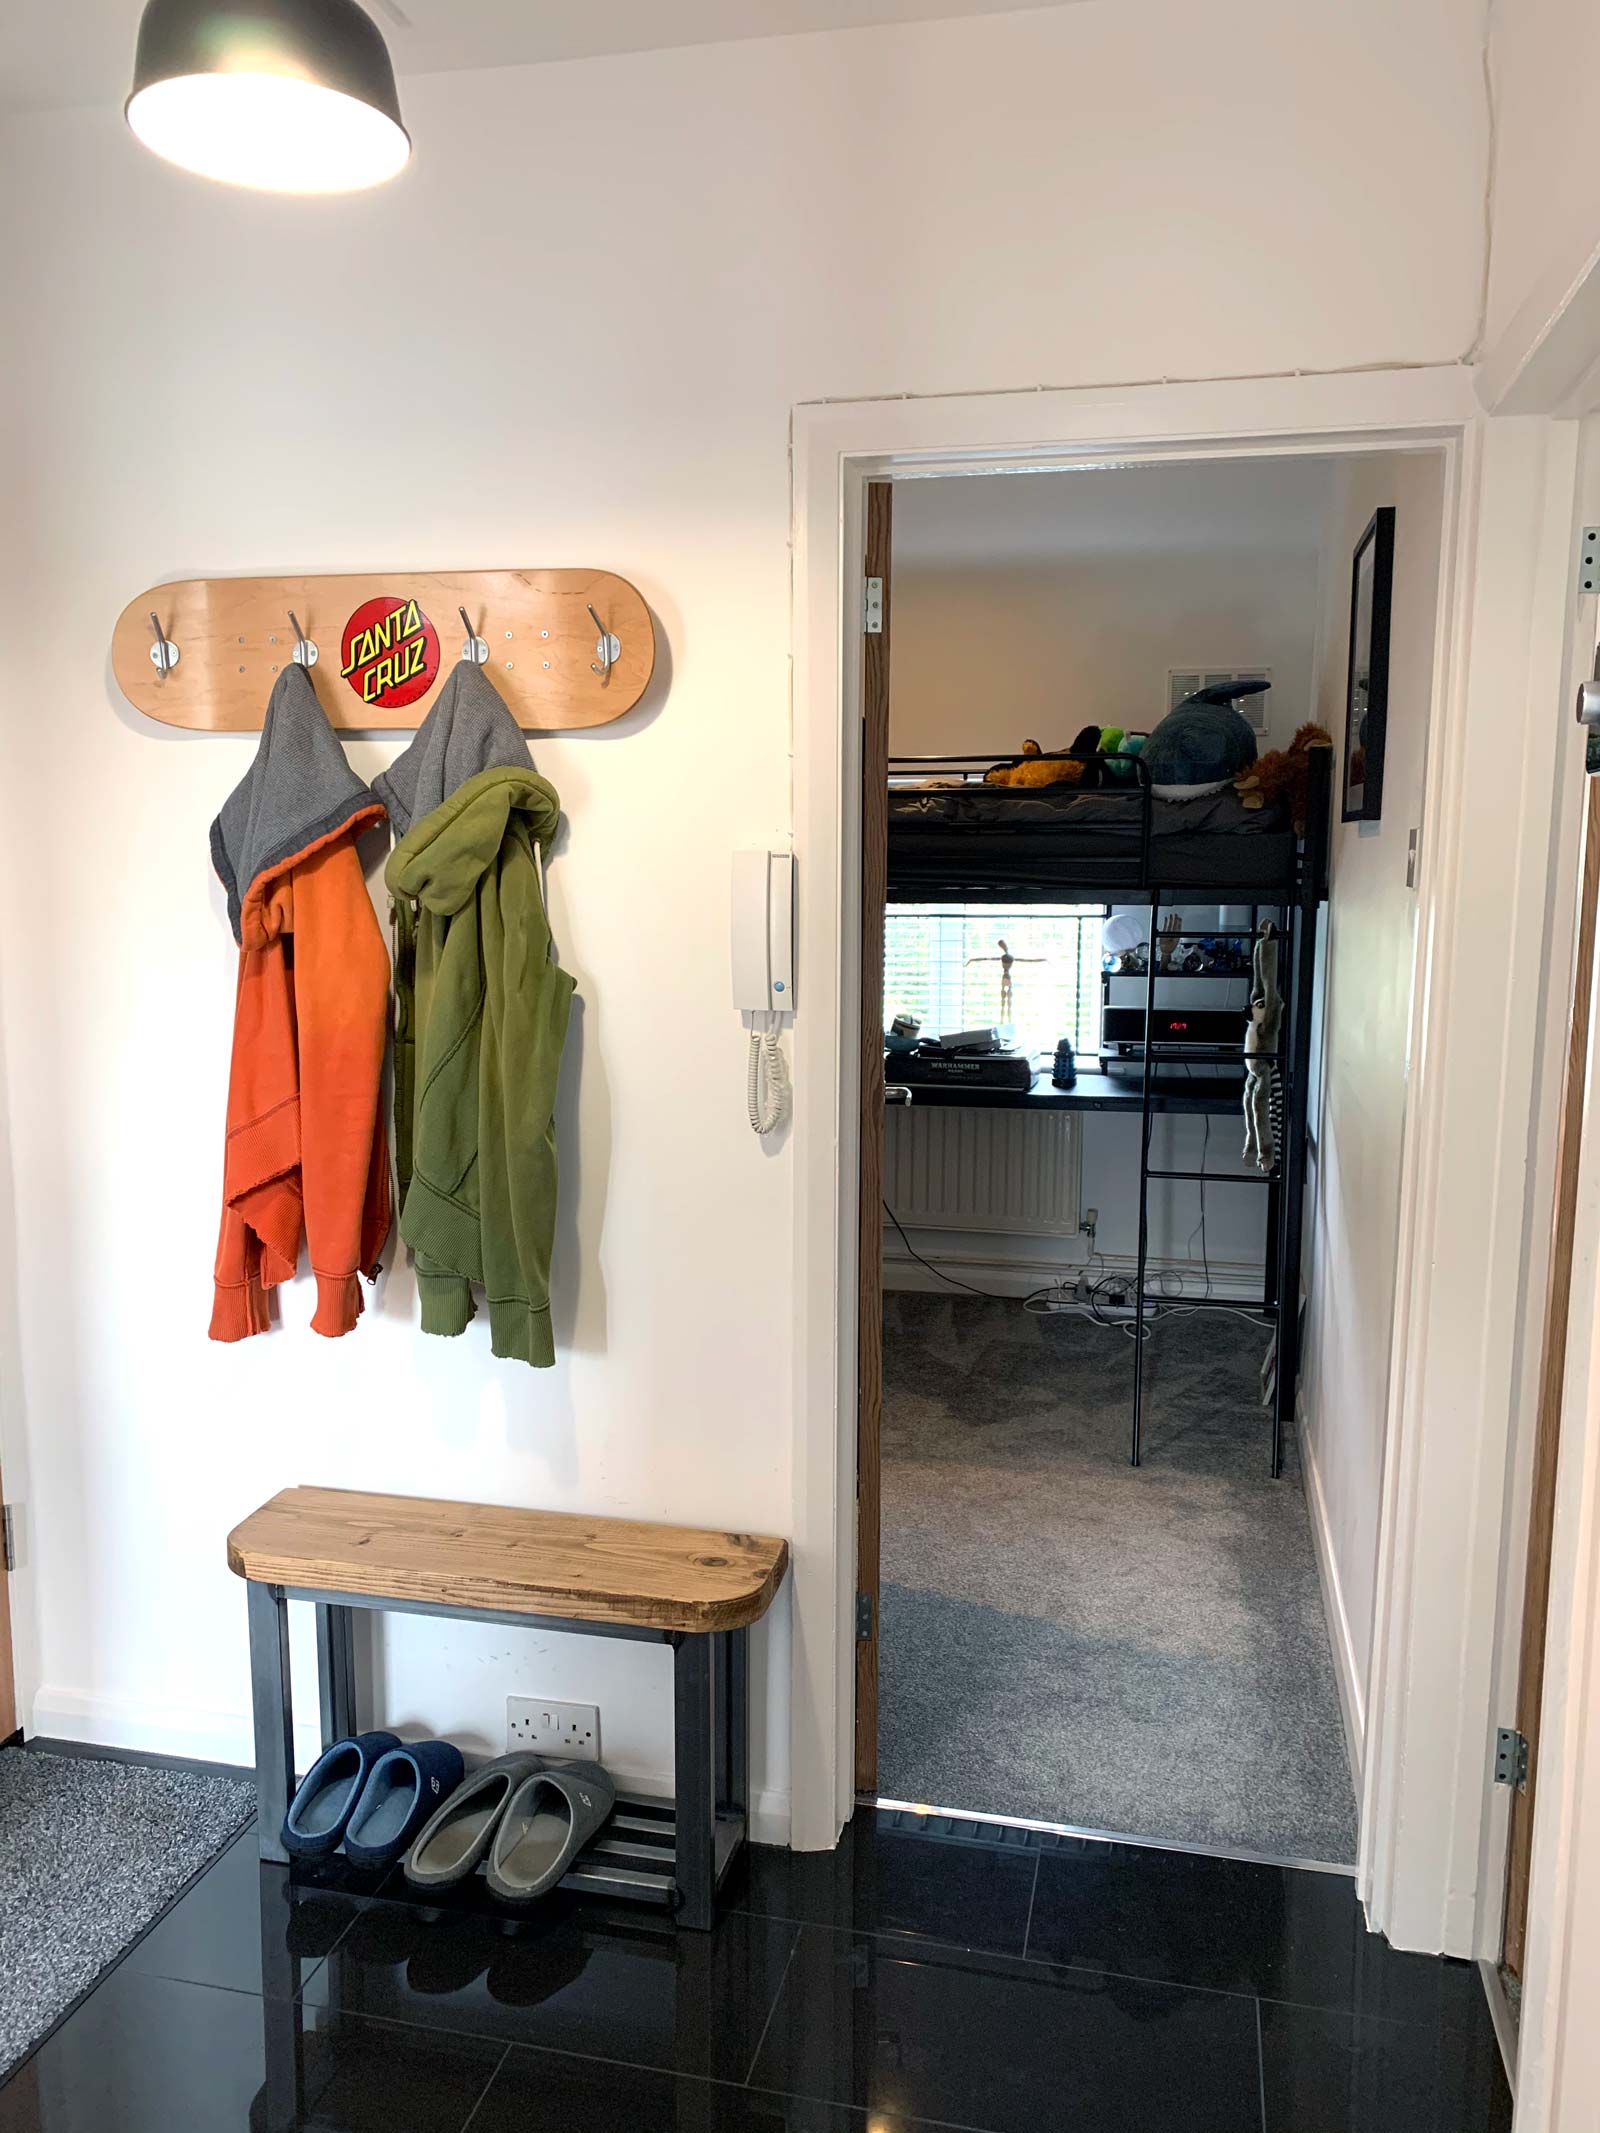
I love my skateboard coat rack.
All of the woodwork and skirting around the doors and flooring have been painted matt white throughout the flat to keep everything feeling consistent and fresh. The only proper design consideration for the hallway was the coat rack. I couldn’t find anything that I liked so I made my own out of a skateboard deck, you can see this in a separate blog I wrote about making it!
So now the flat was well on the way to completion, just the main bedroom and living room to tackle now…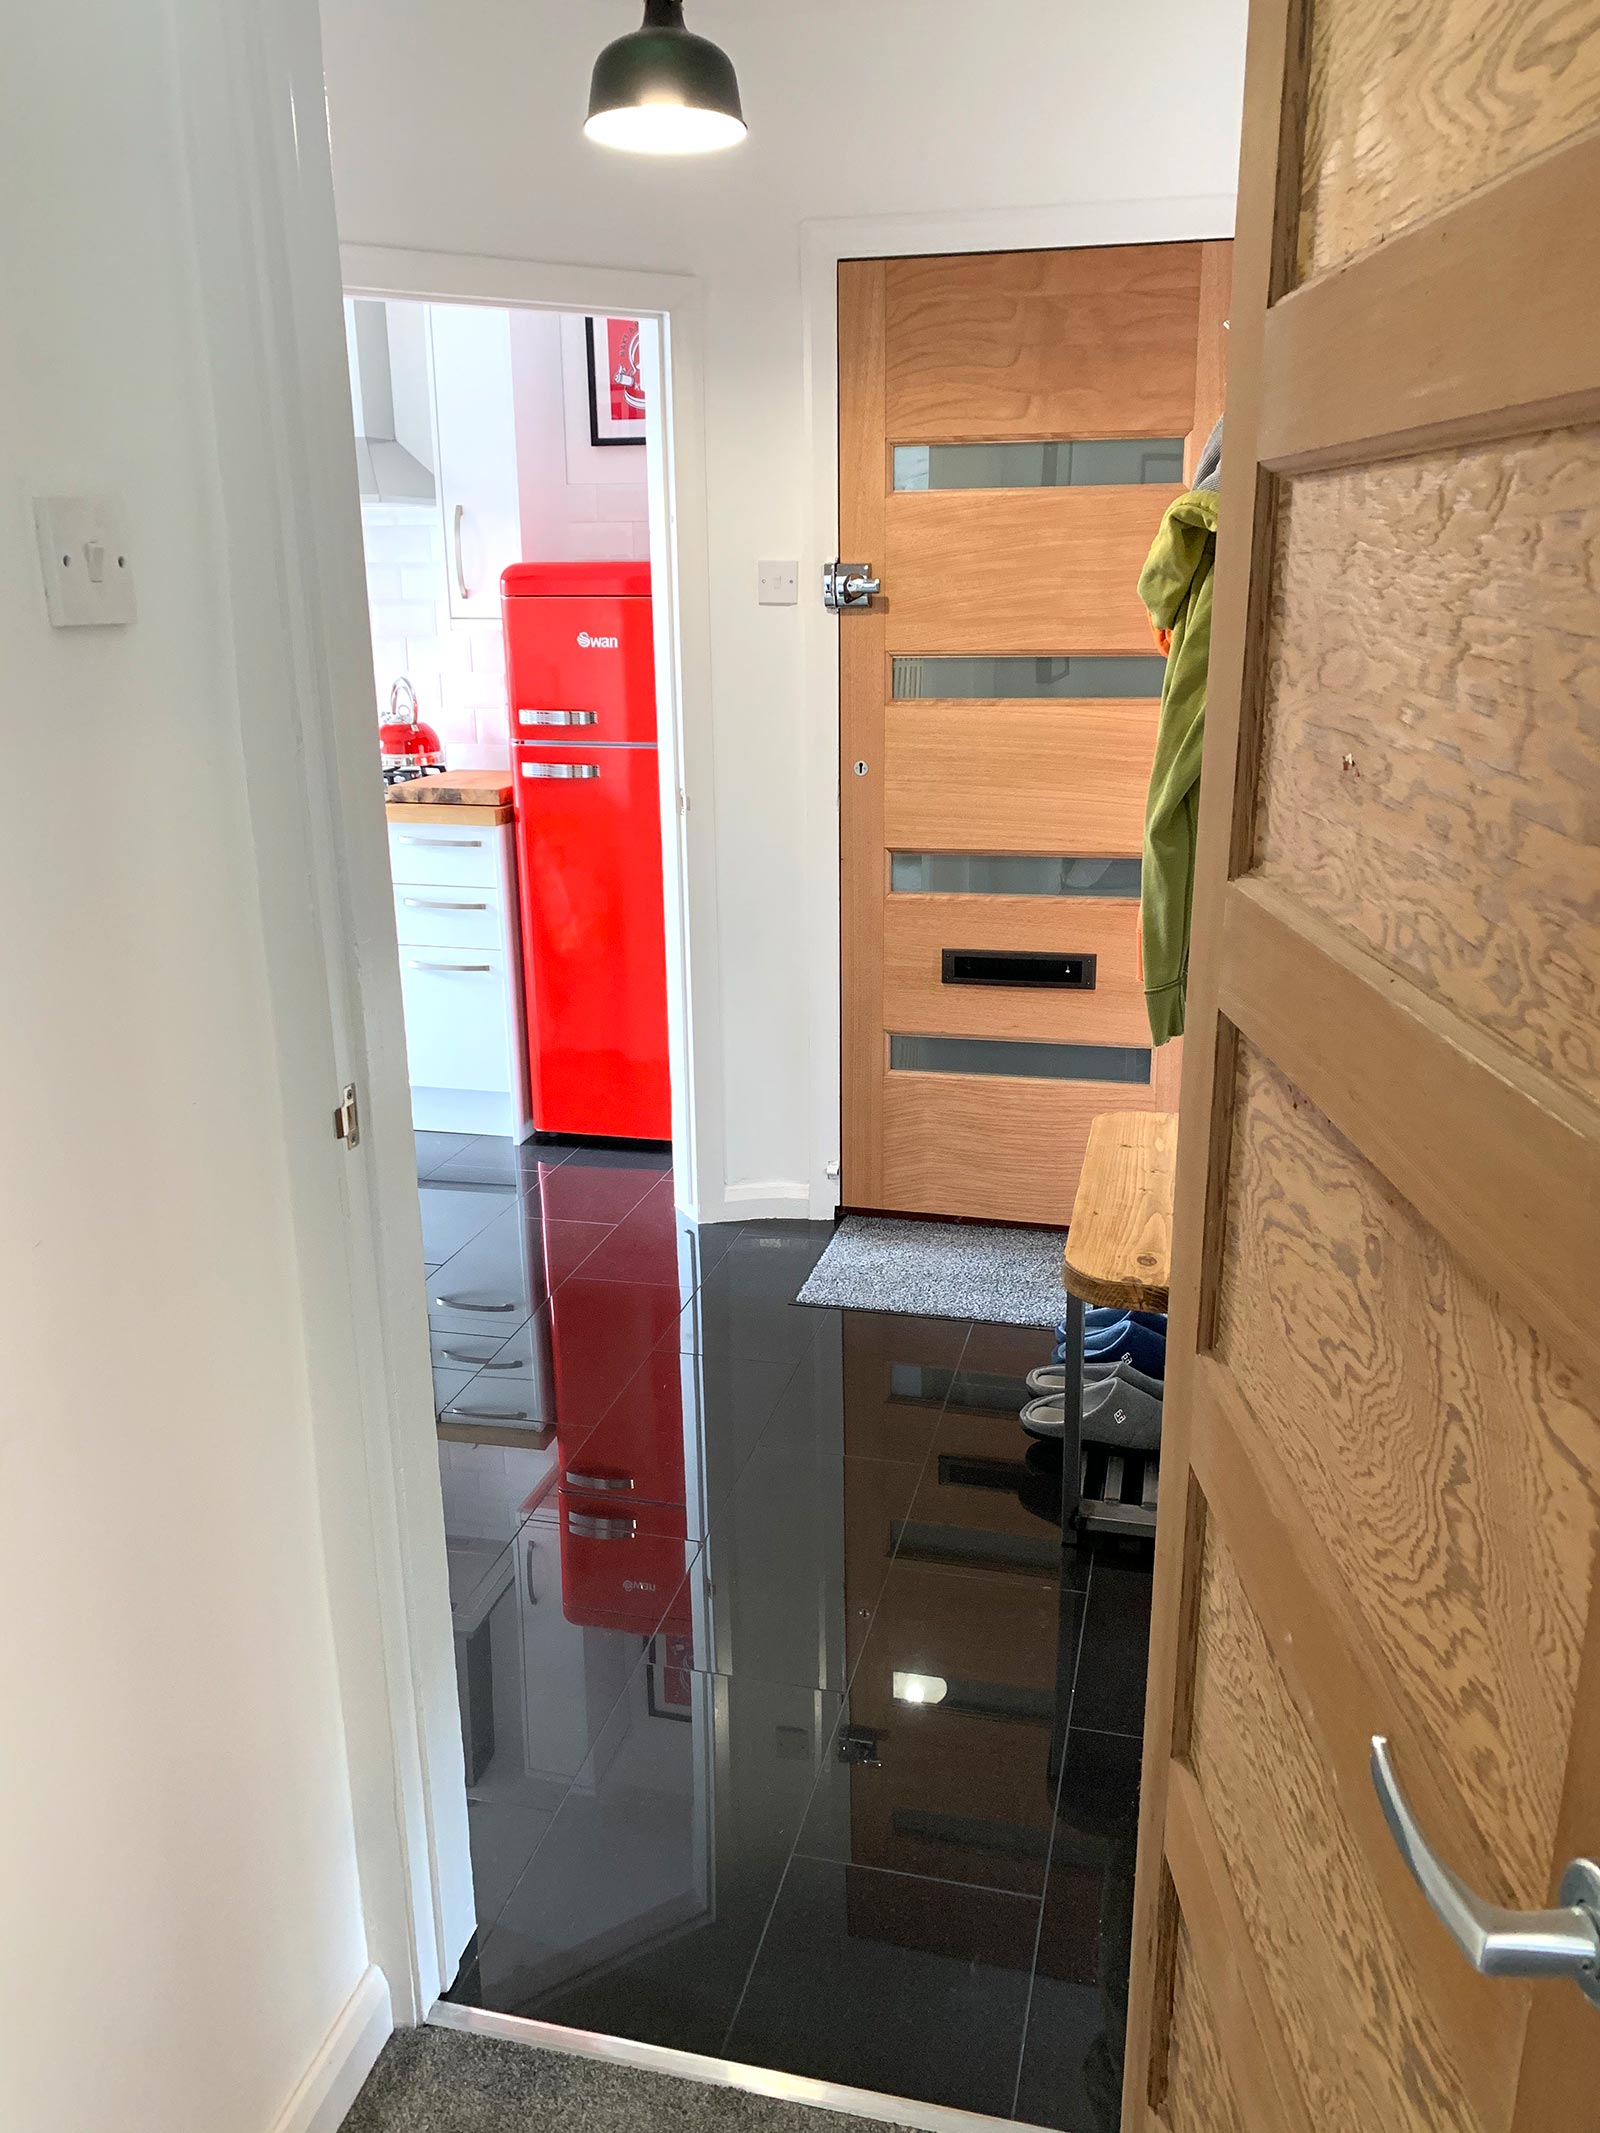
Loving the new front door.
Flat Refurbishment – Part 4
flat refurbishment – part 4
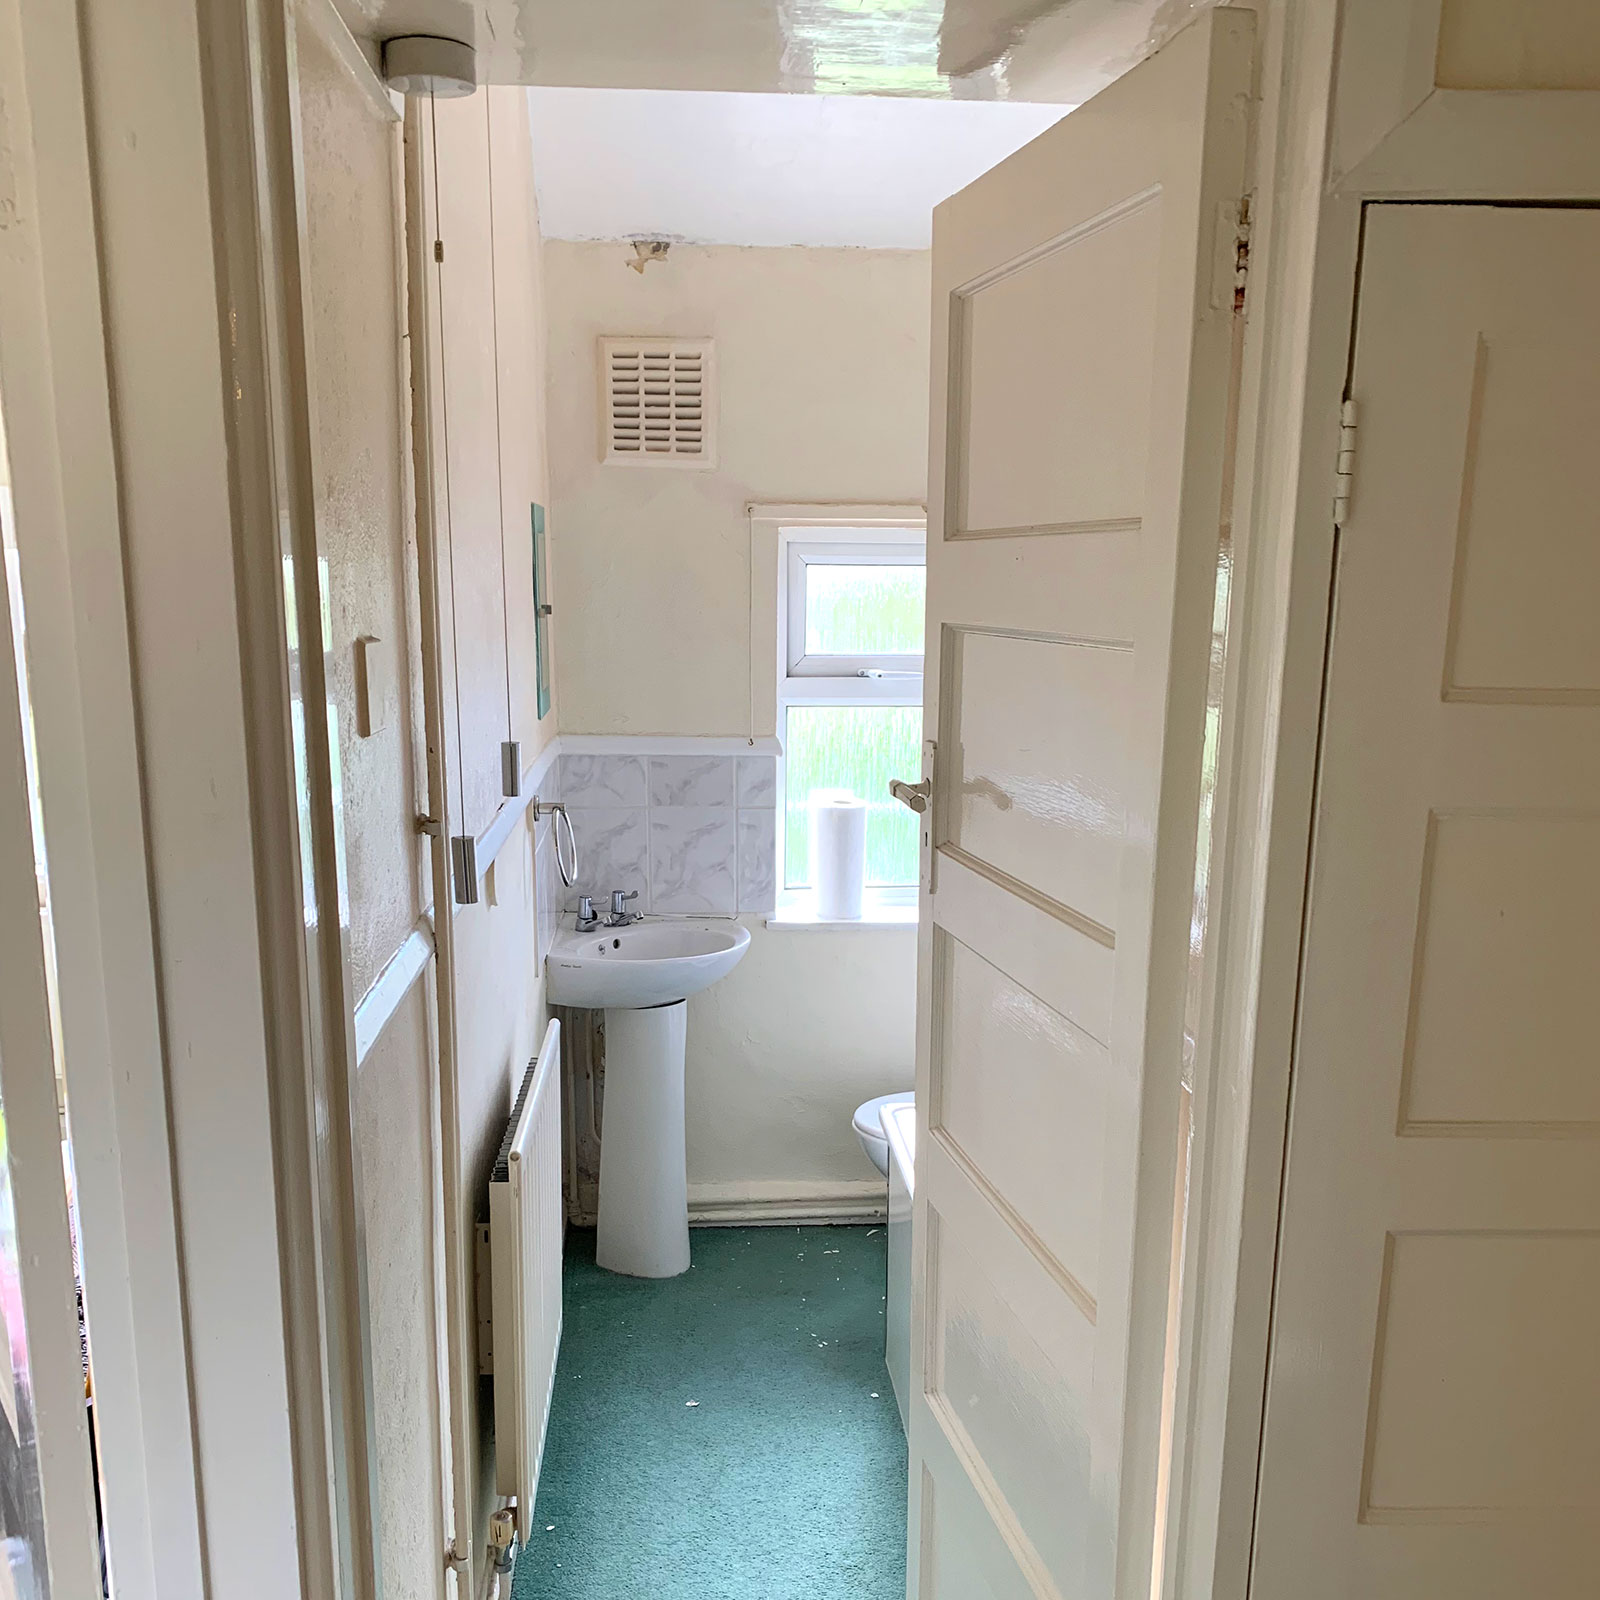
The bathroom… oh the bathroom. This was possibly even worse than the kitchen. The thing that first hit you was the musty damp smell which emanated from the floor. Why would anyone use carpet as bathroom flooring, just why!?!
The carpet went immediately revealing bare floorboards which were thankfully in very good condition! This room is a particularly small space in which to fit a bath, toilet and wash basin. It was further compacted by a fairly deep cupboard which had access from the hallway and above that a lofty shelving space which was hard to get too. The walls were a mixture of tiles and wood chip and the plumbing left a lot to be desired with old pipes and a badly situated radiator. Like the kitchen this would all need to be ripped out and started over.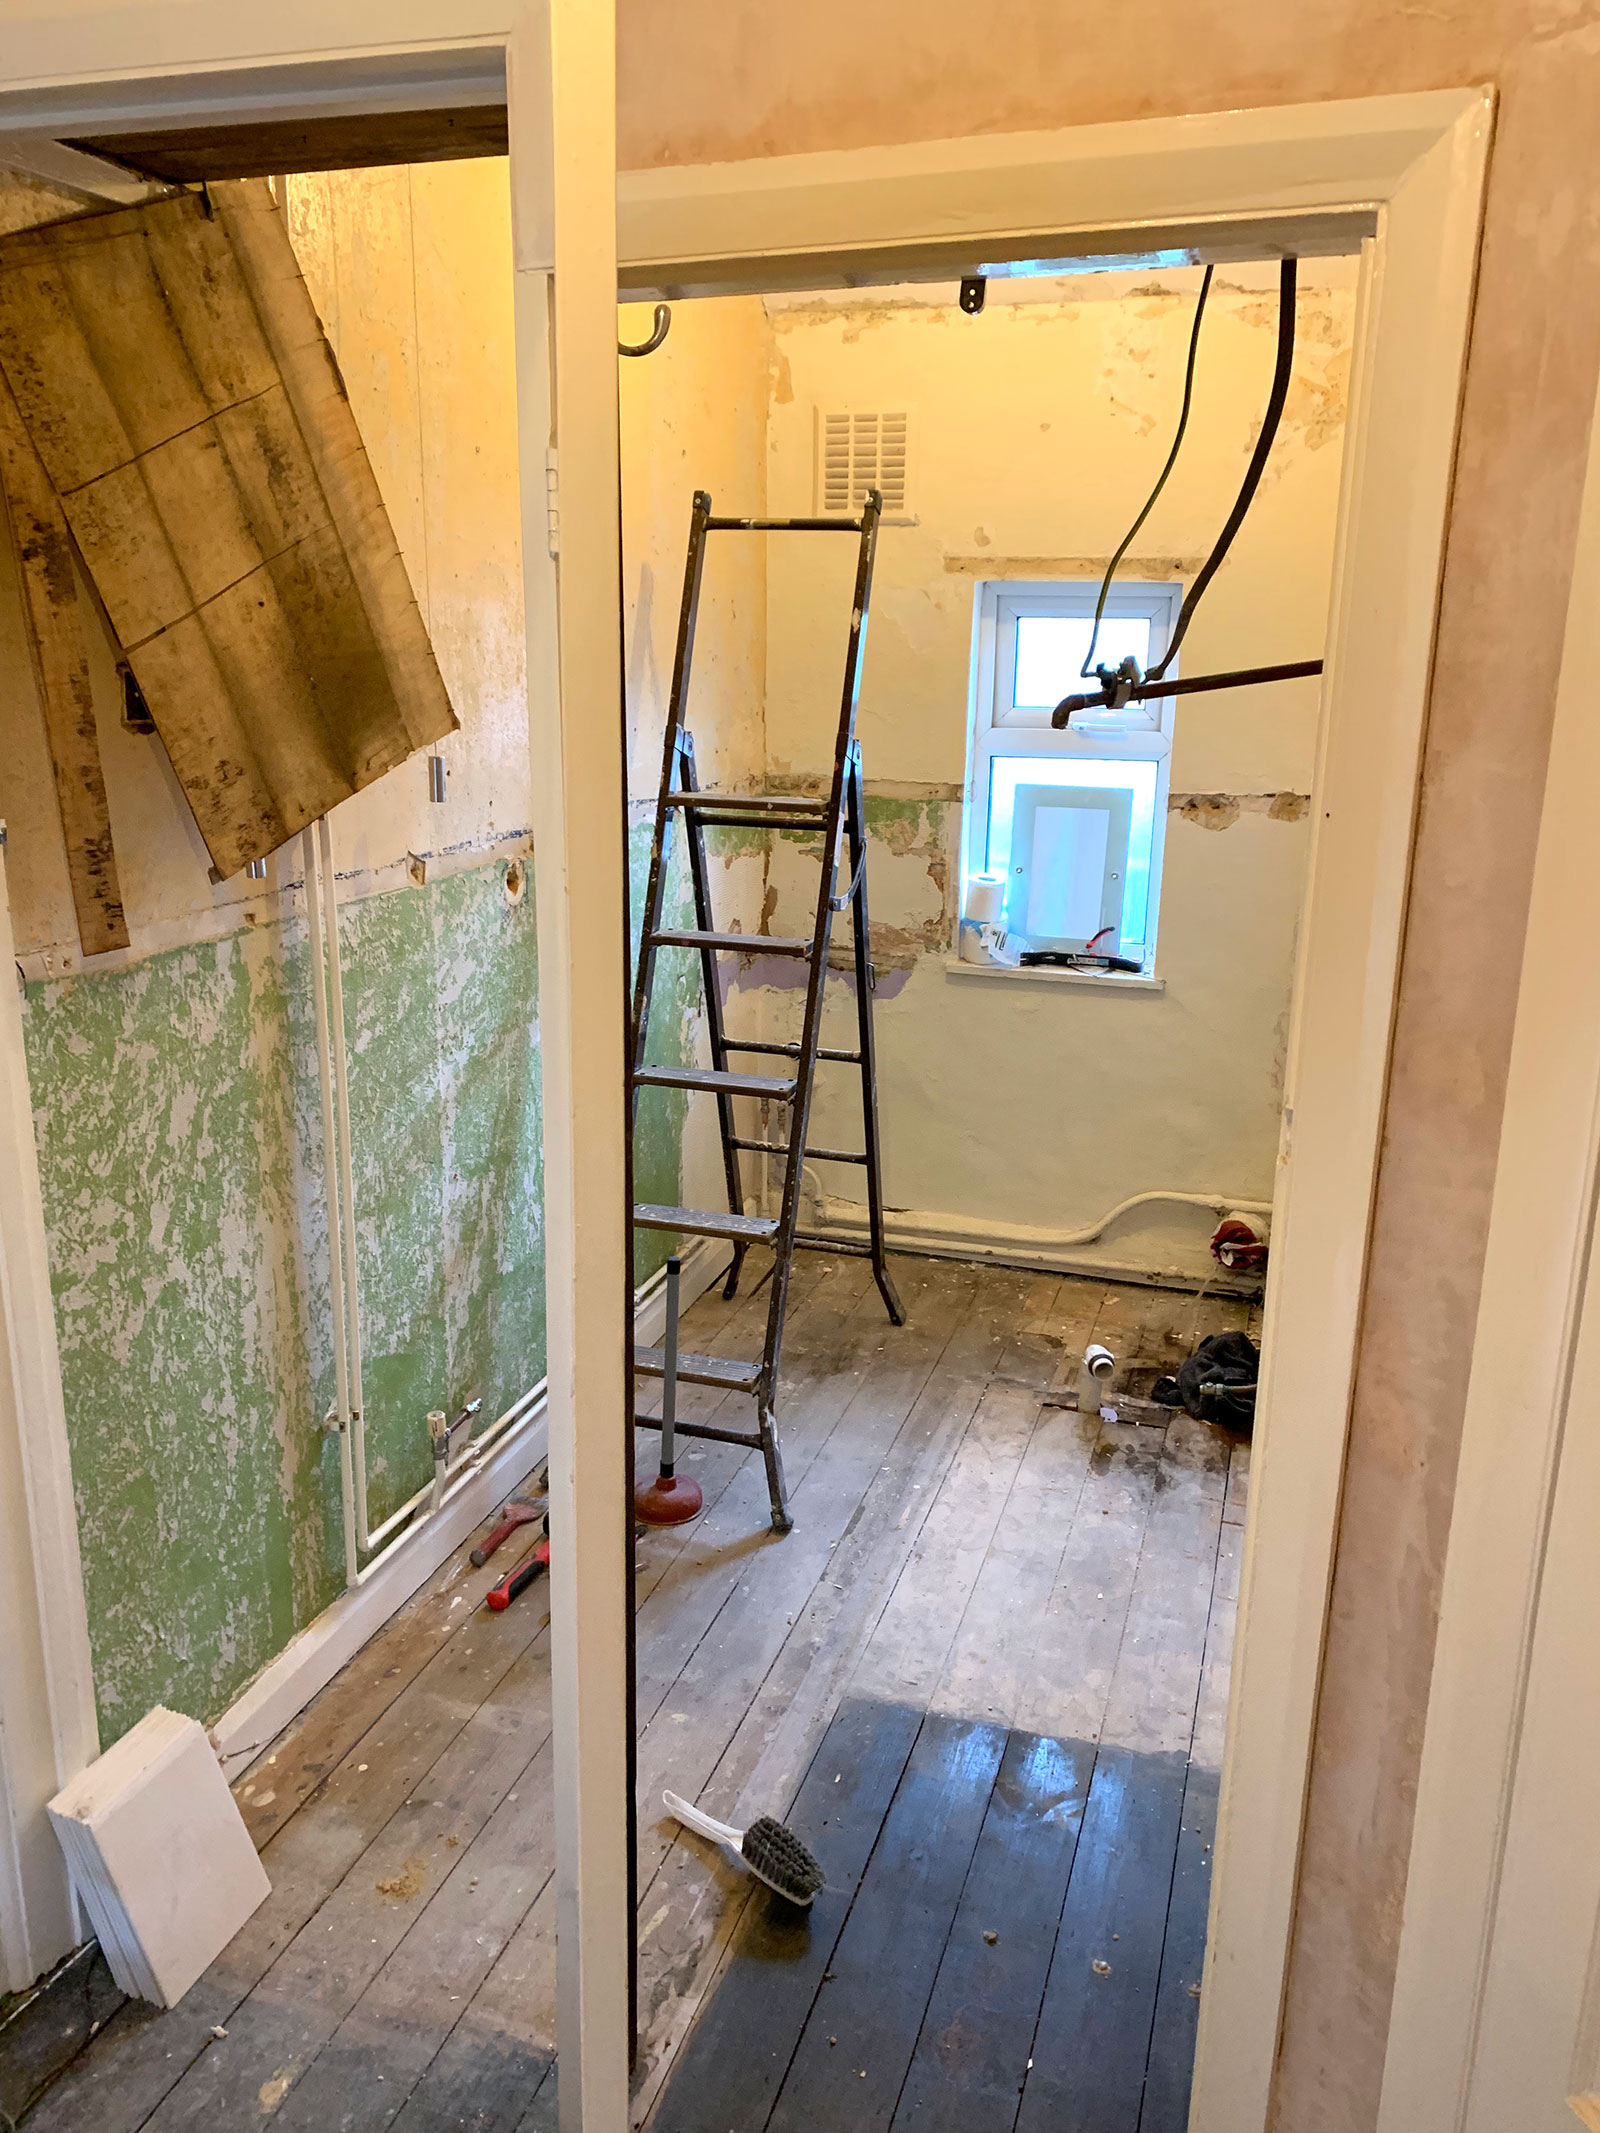
Ripping out the old cupboard.
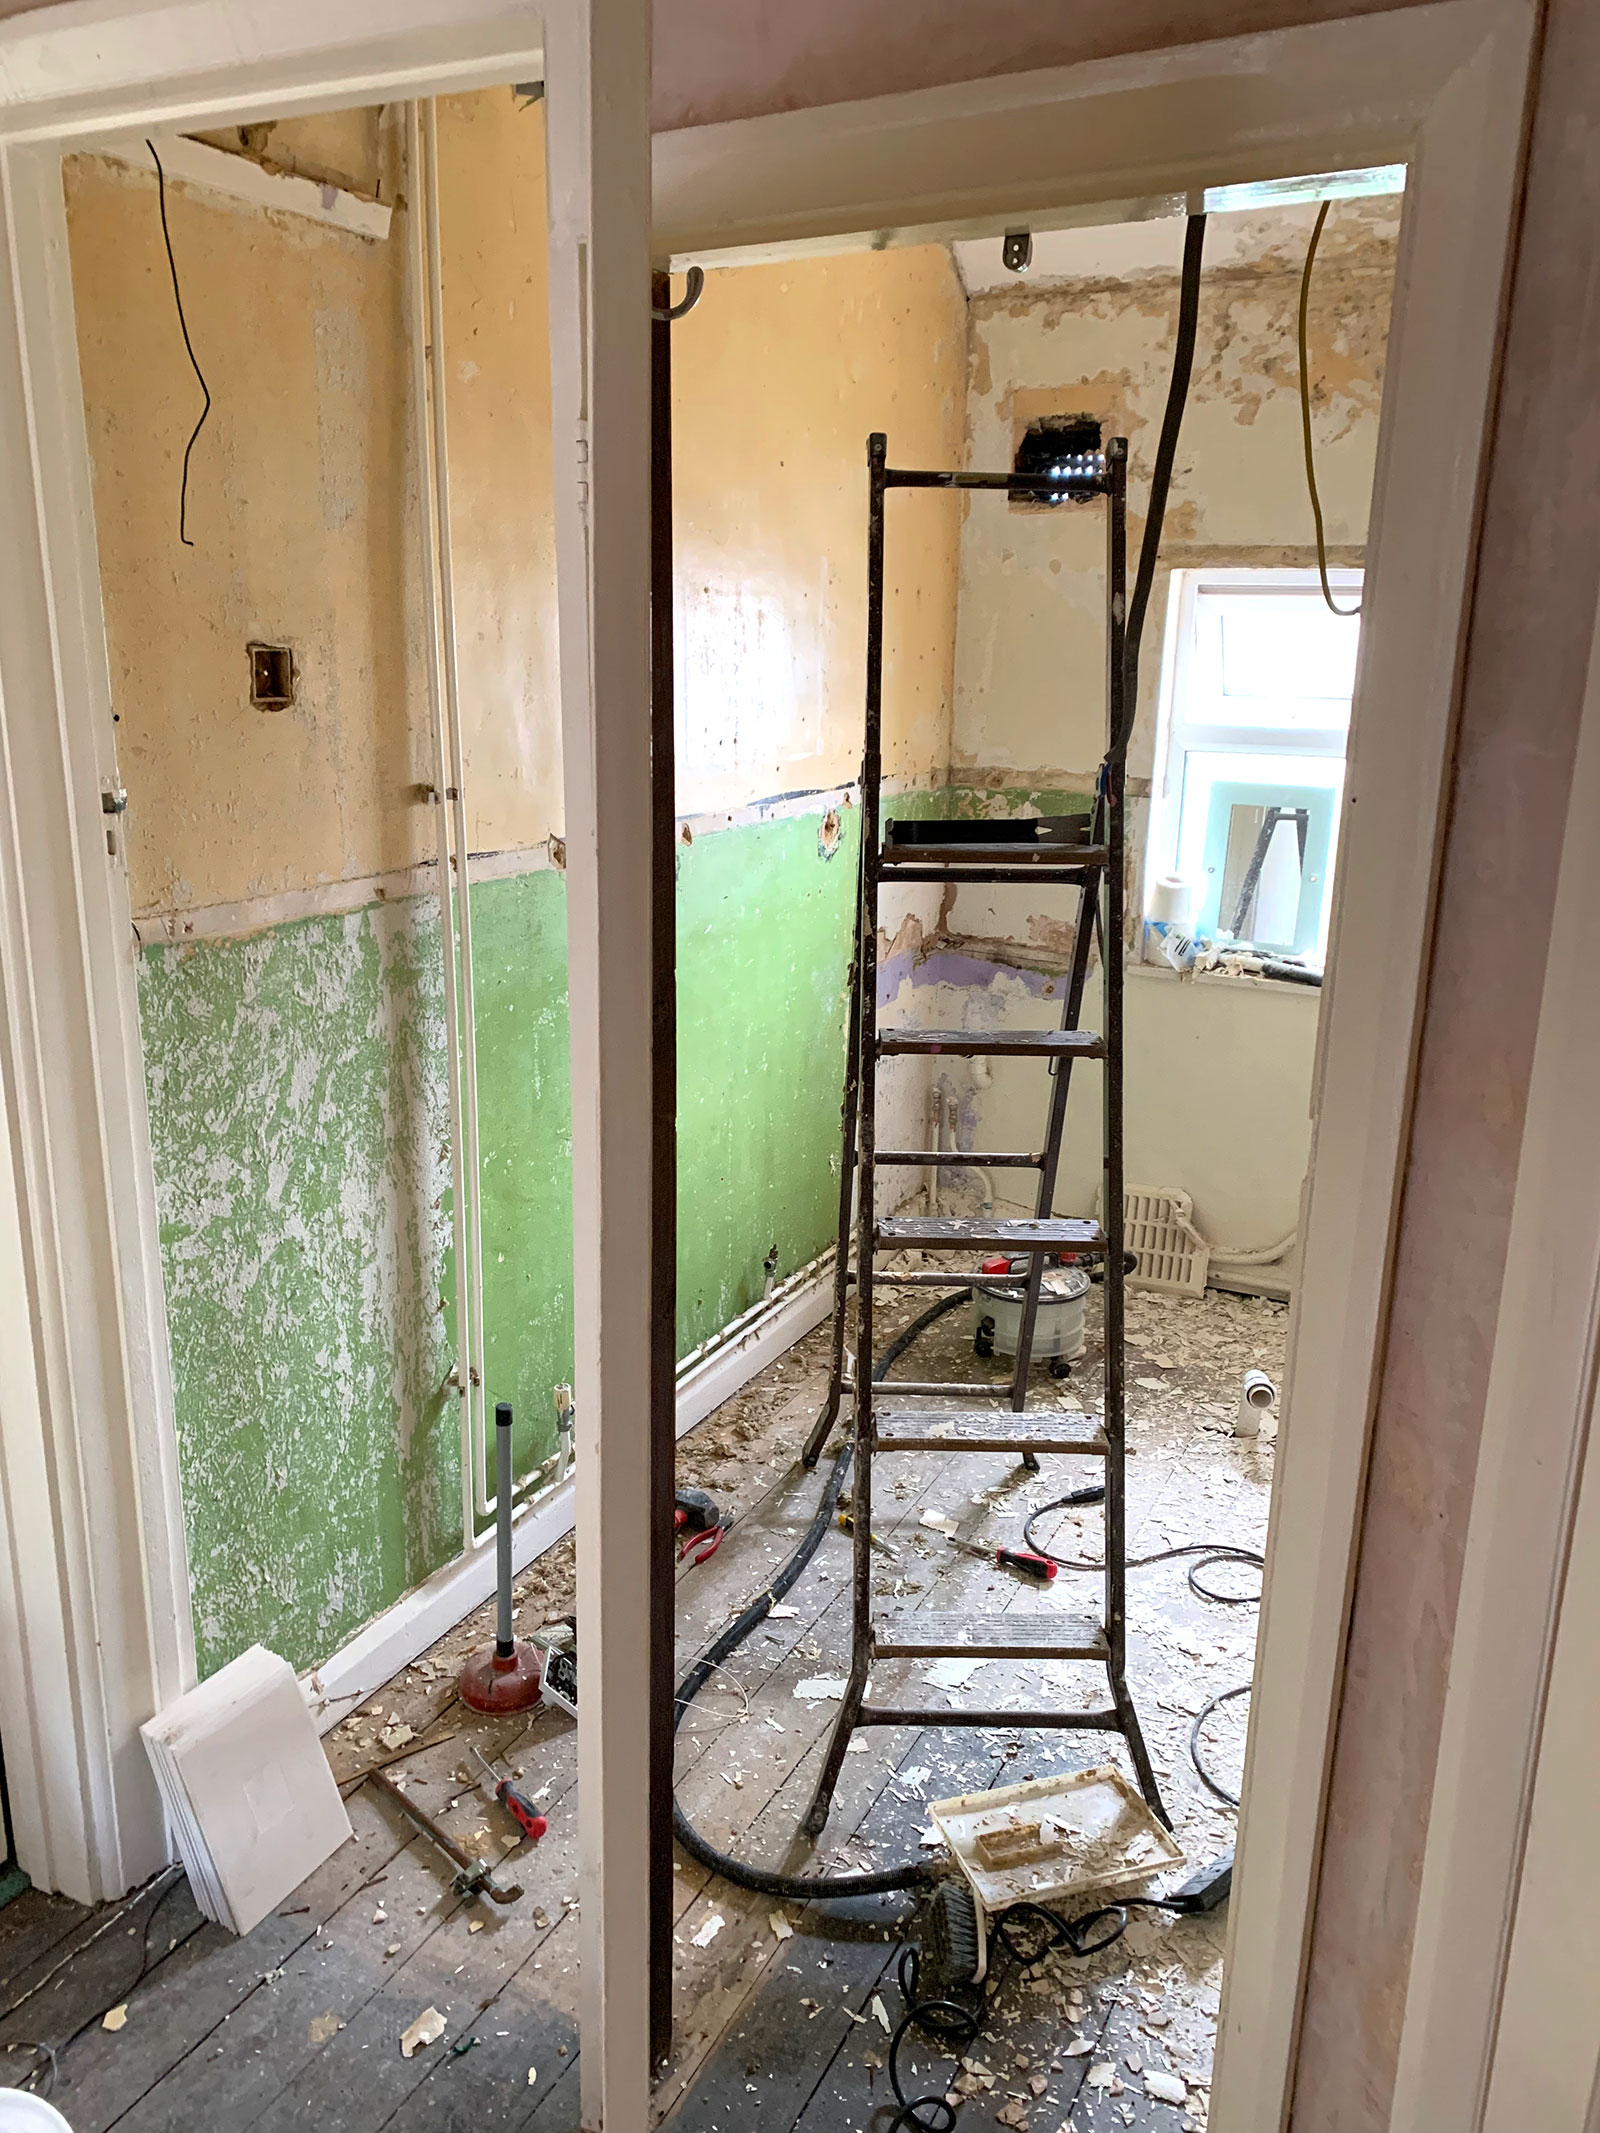
Stripping the walls.
To do this job, ideally I wanted someone who could do the lot in one go rather than getting different people in to do it in separate parts. Again I had a good friend who does this kind of work and thankfully he had two weeks spare in his diary to fit it all in. Always thinking of the budget I did what I could to cut costs, so it was down to me to rip the old bathroom out and prepare it as best I could before the hard work began.
I have to say I really enjoyed ripping the cupboards and shelving out (there is something weirdly theraputic about destroying a room!). I had help disconnecting the bath, toilet, sink and radiator but I was left to strip the walls of tiles and wood chip which wasn’t fun, but pretty soon it was back to a bare shell of a room.
On closer inspection it was clear that the tiled wall needed to be stripped back to bare brick and re-plastered, the room as a whole needed a re-skim too. To make the bathroom as maintenance free as possible I wanted floor to ceiling tiling, this would also add to the contemporary feel I wanted throughout the flat. The tiles I used were 60x30cm in size and had a light grey concrete effect which kept the room feeling light a bright with a slight industrial twist.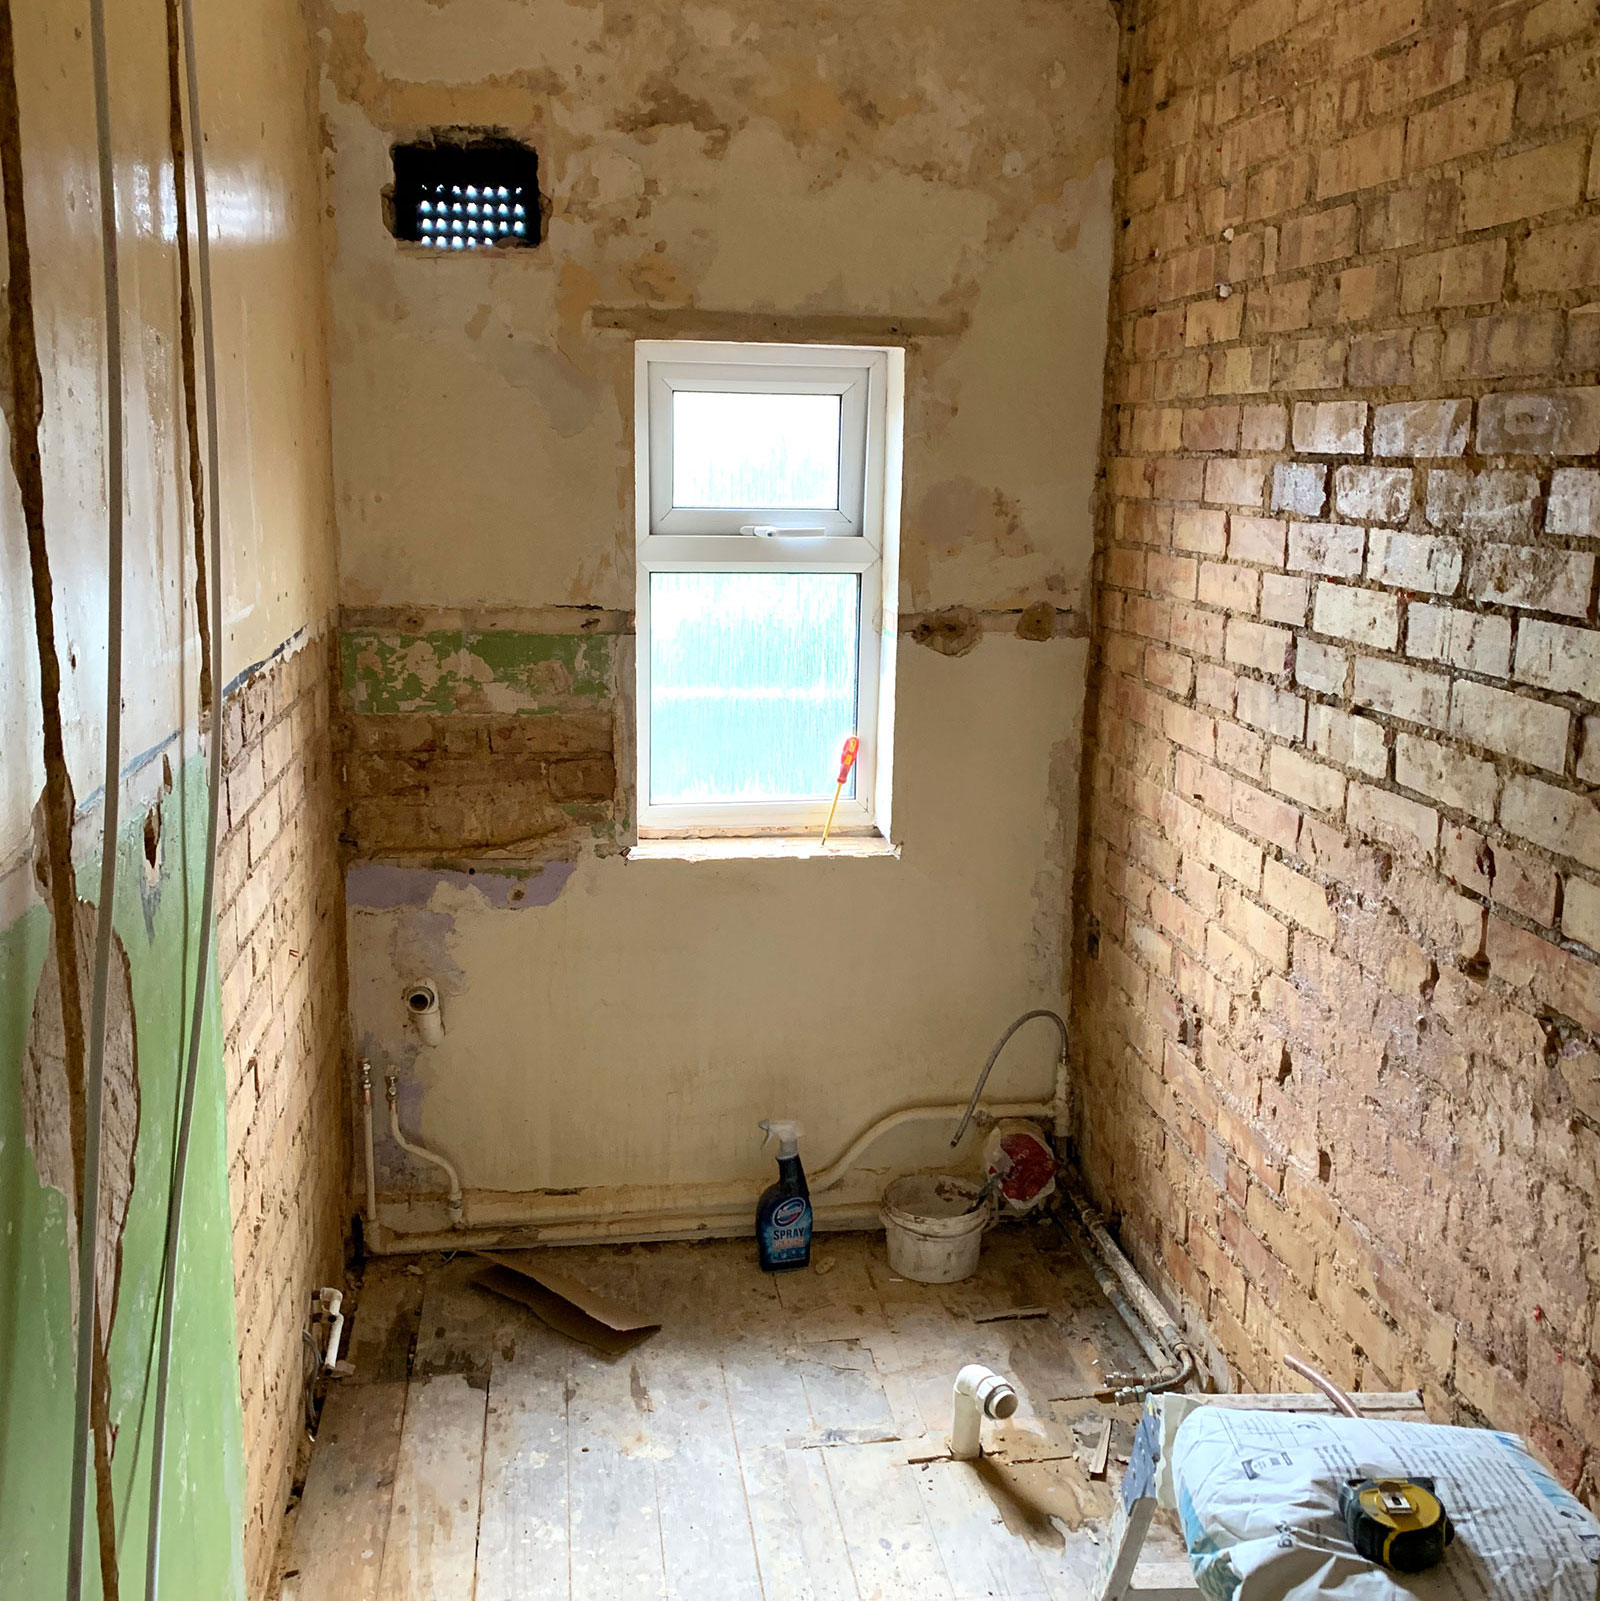
Getting things back to bare brick!
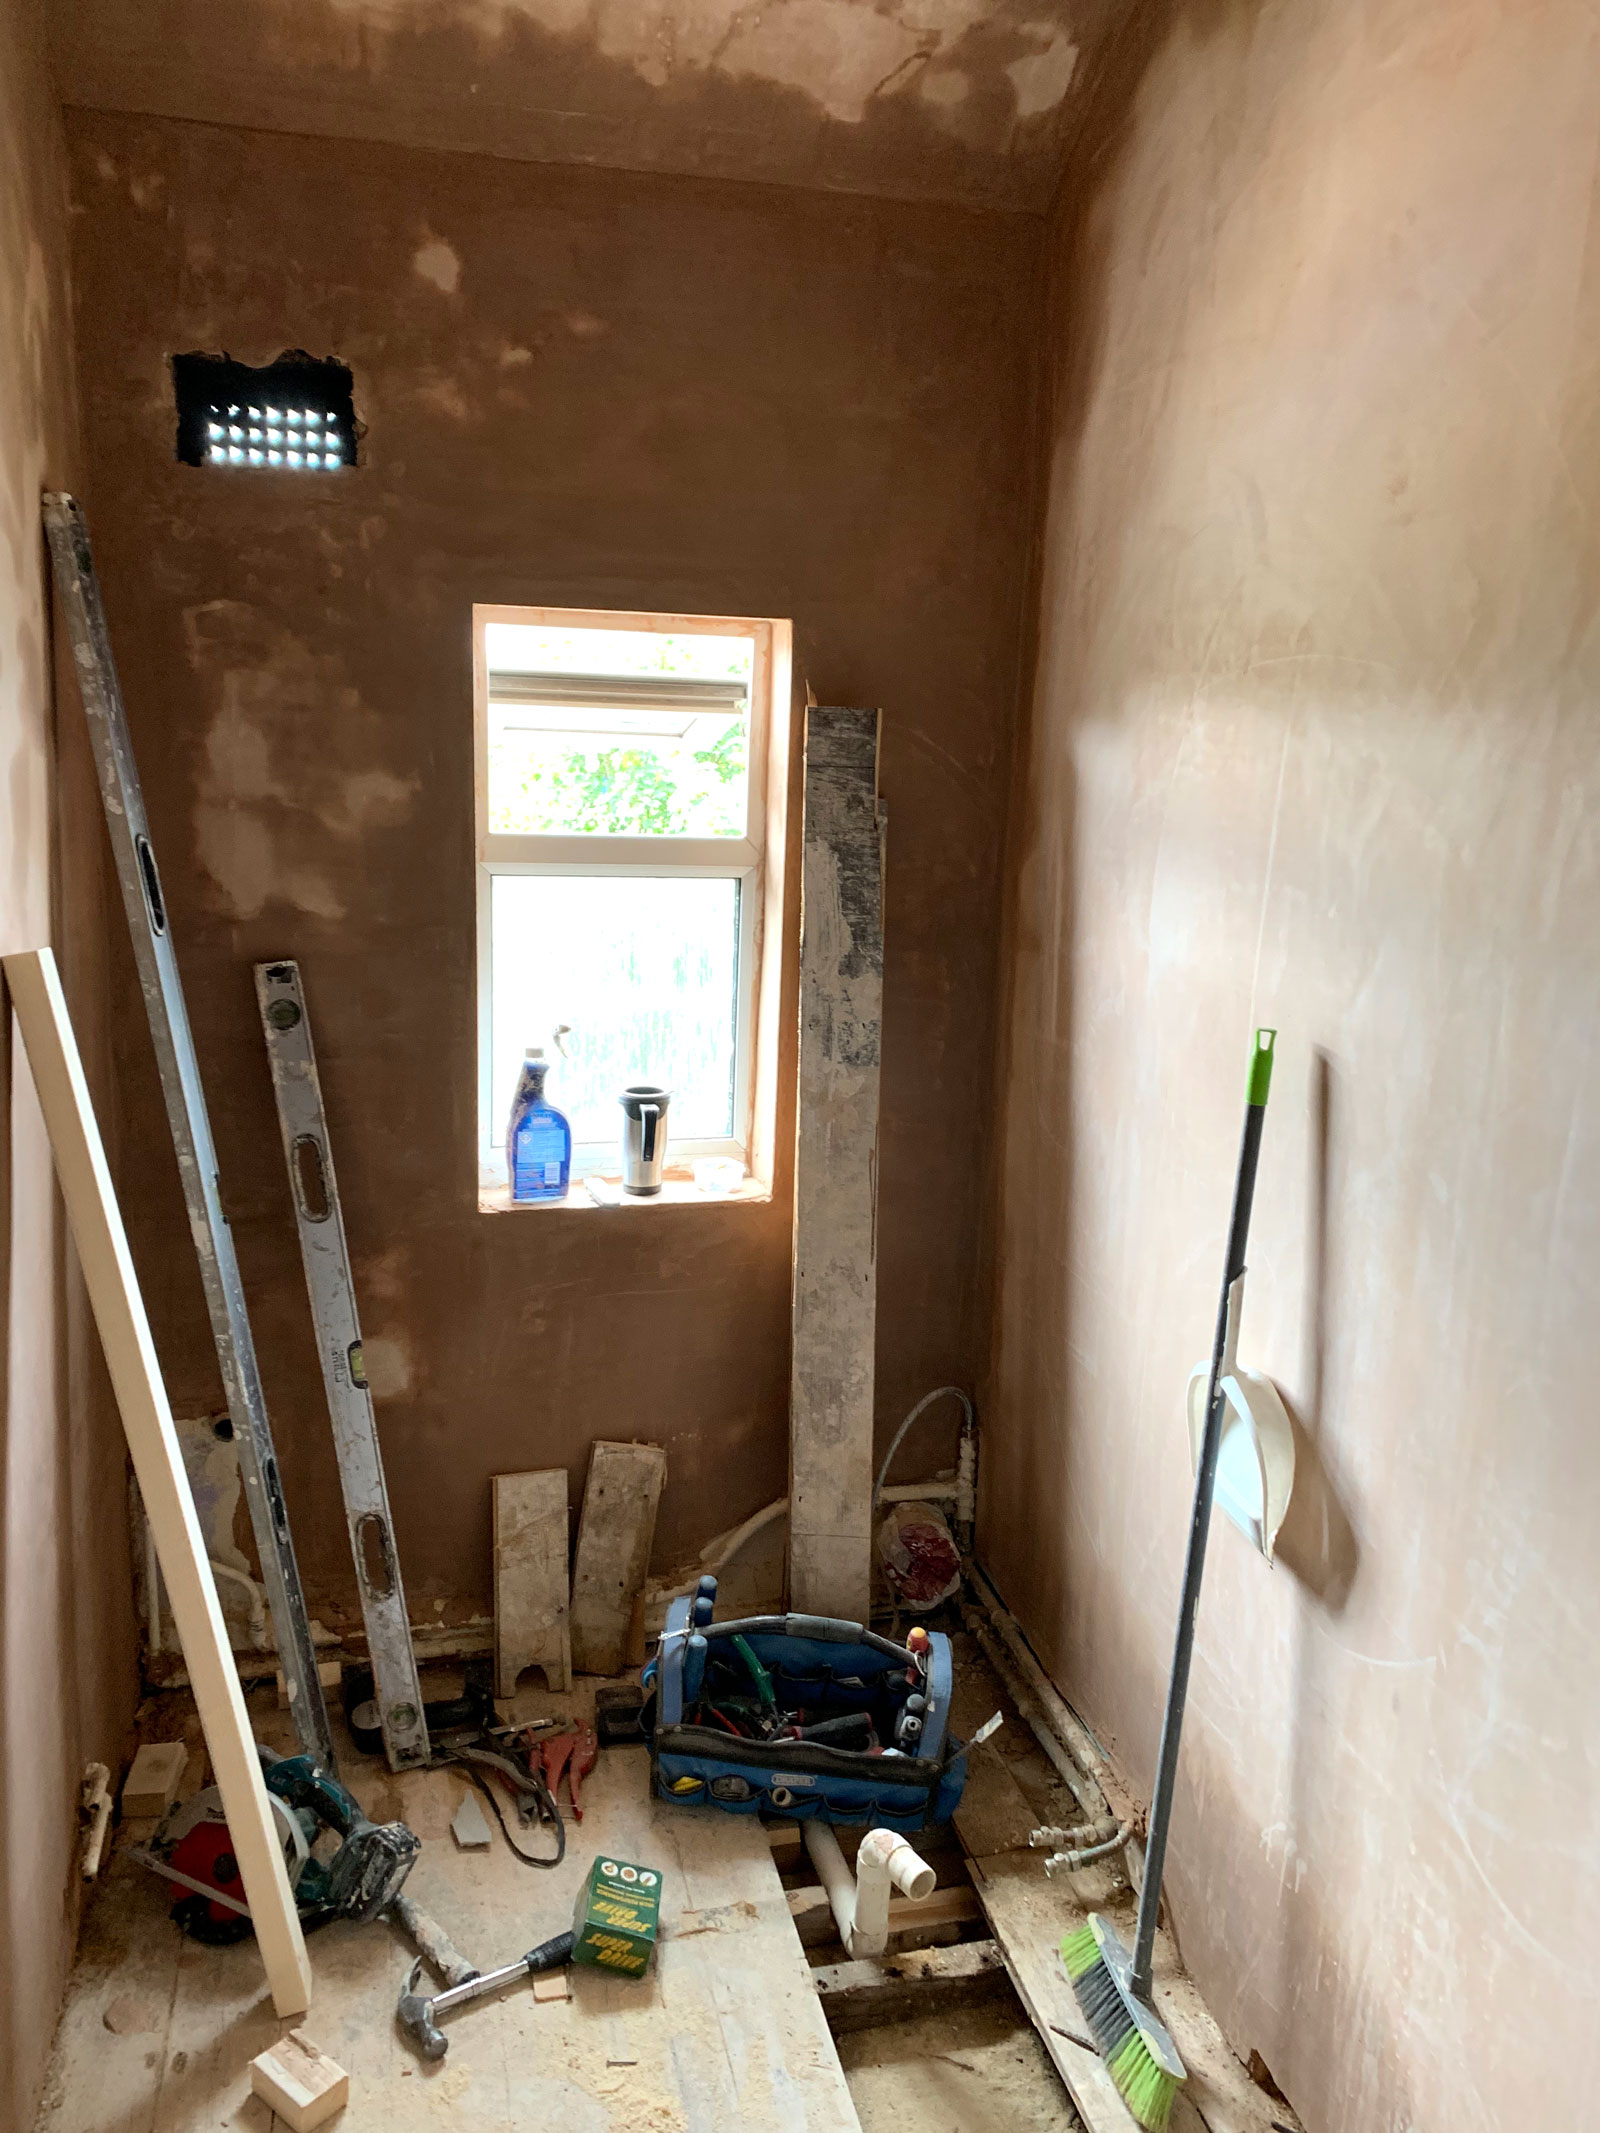
New plaster and skim.
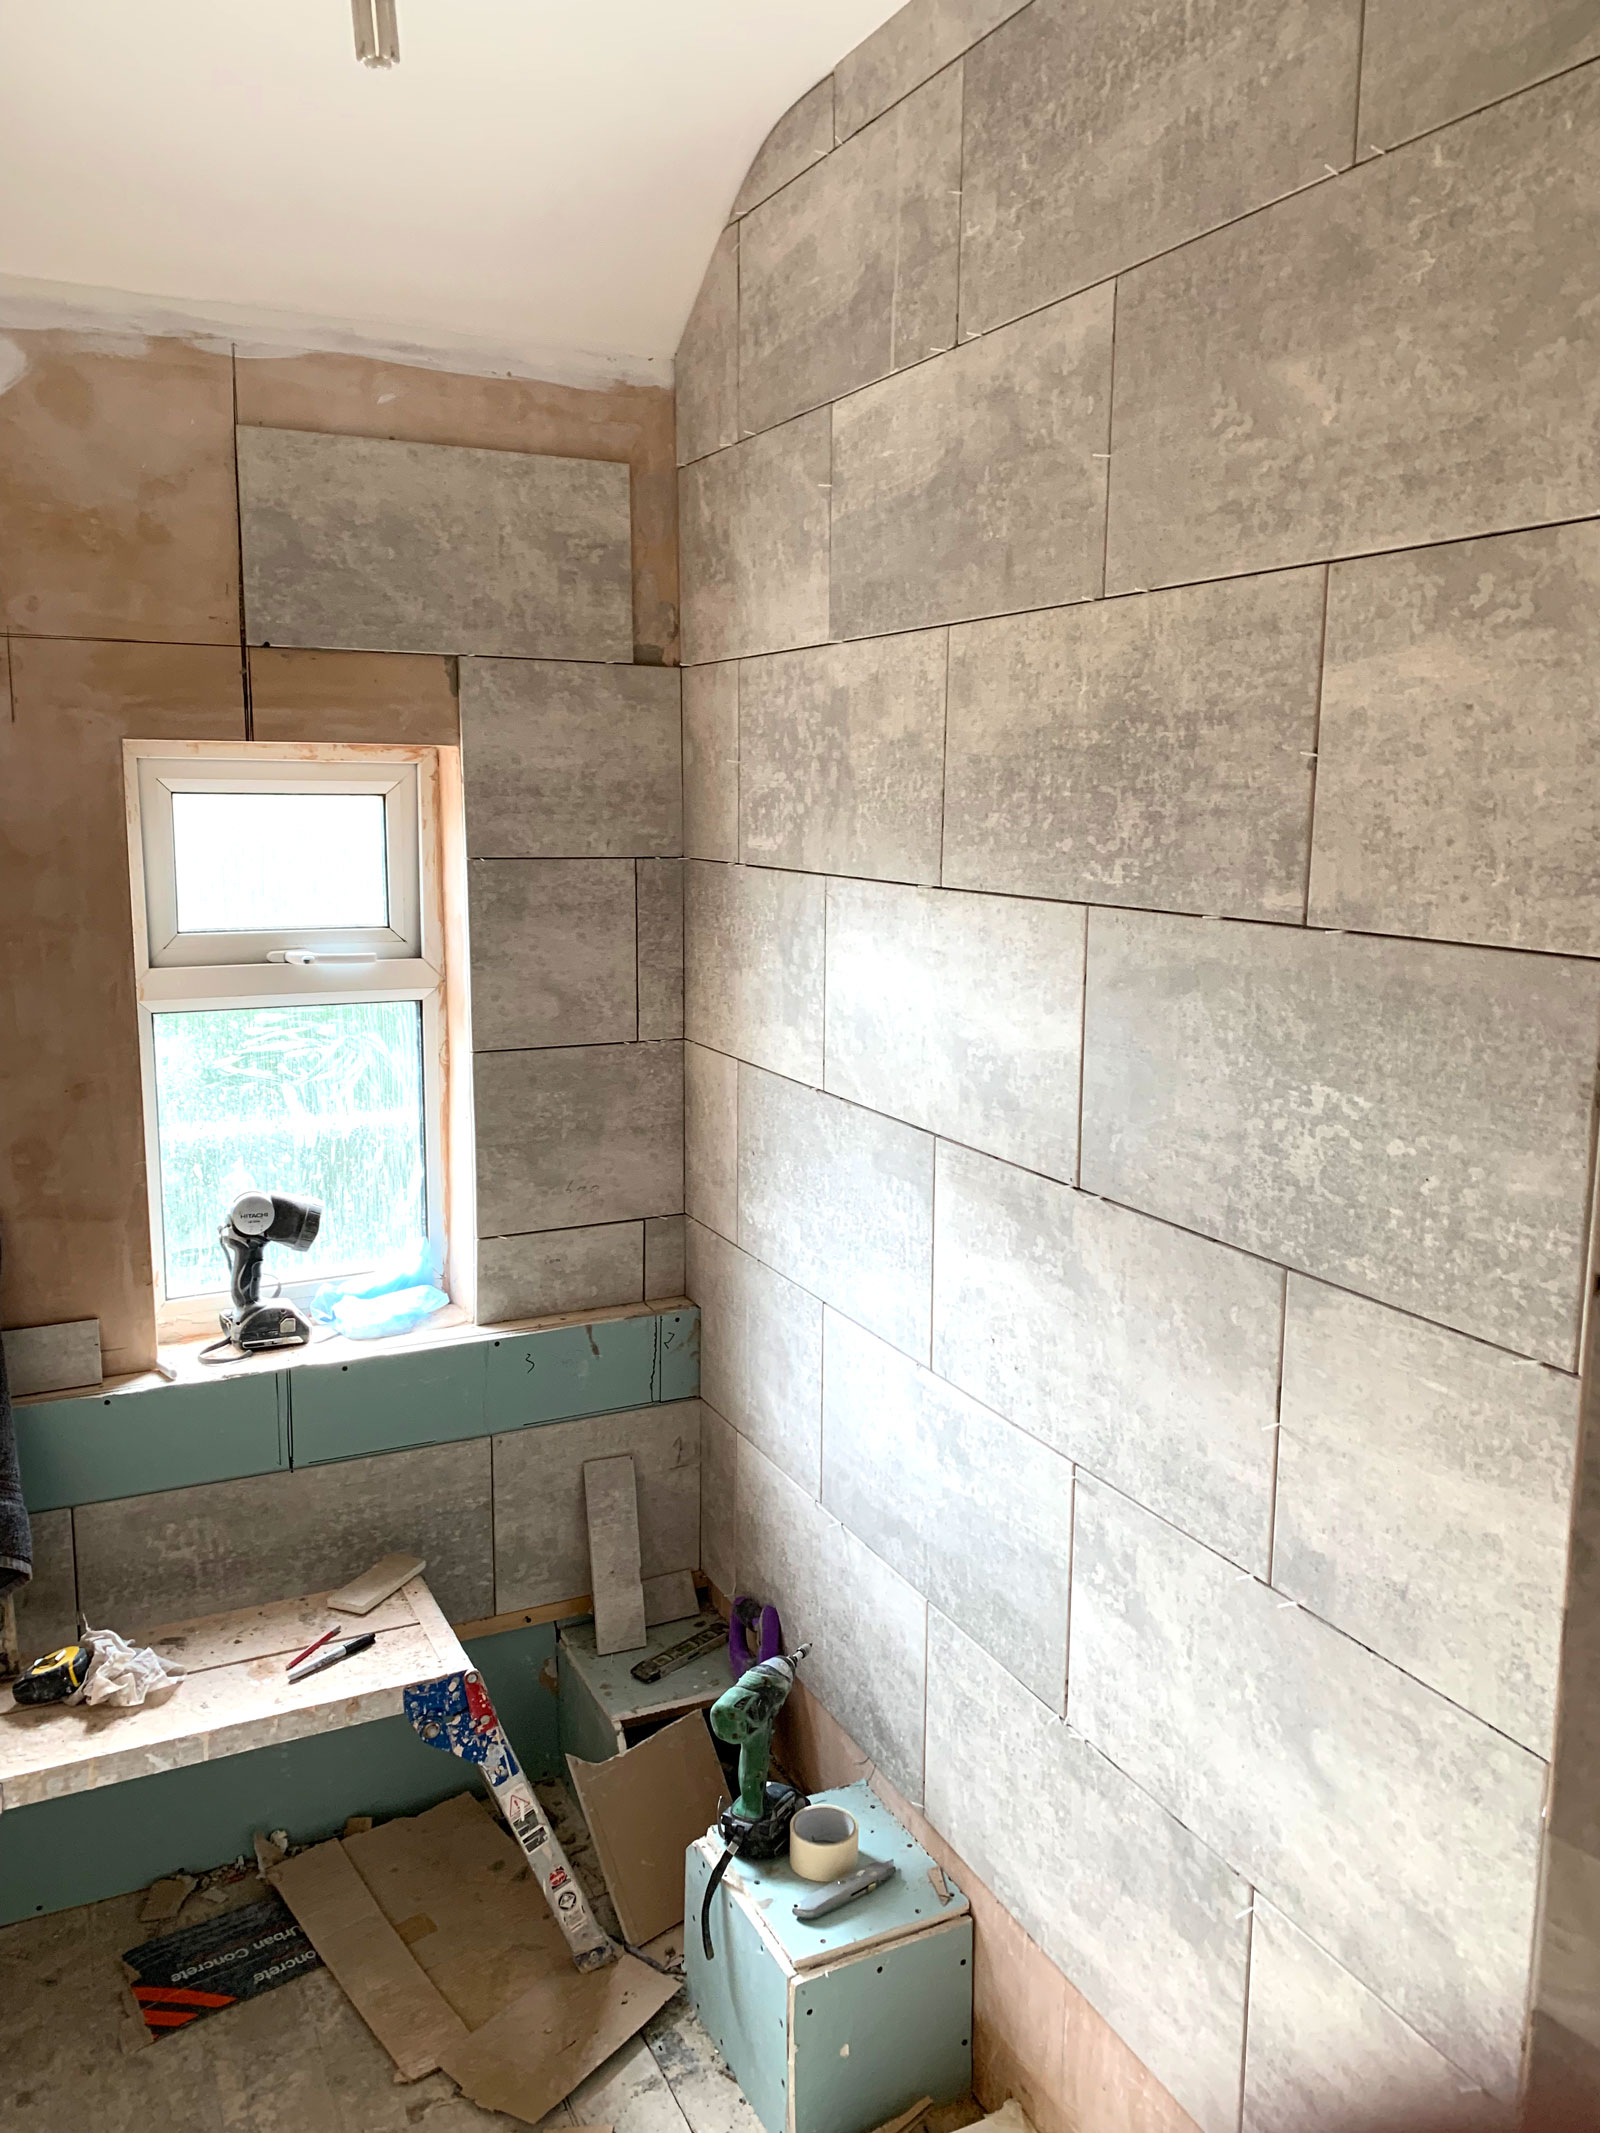
New tiles going on nicely.
Because of the size of the room I decided not to reinstate a both. I wanted to save as much space as possible and in the process make this room feel bigger than it actually is. This is part of the reason why I went with a shower unit. The other reason is because I don’t really have baths anymore as I prefer to shower, plus showering saves on water too. More space was saved by rebuilding the cupboard but with half the depth. Doing this also gives easy access to the plumbing for the shower and still provides a little storage space.
I was advised to make sure that the budget was enough to buy a decent shower unit, one that was made with quality materials and would last. It’s advice I took and I’m glad I did. Simple things like having a stone based shower tray rather than a plastic moulded one feels much better quality when your in the shower and it never flexes or creaks sparing any OCD tendancies I may have.
The shower itself is a simple but elegant design which adds quality as well as a contemporary feel. Because it replaces the bath means it could mains fed so no electrics to worry about. The main shower head produces larger droplets of water than a standard shower which makes it feel like your standing in the rain, its just a blissful, beautiful experience!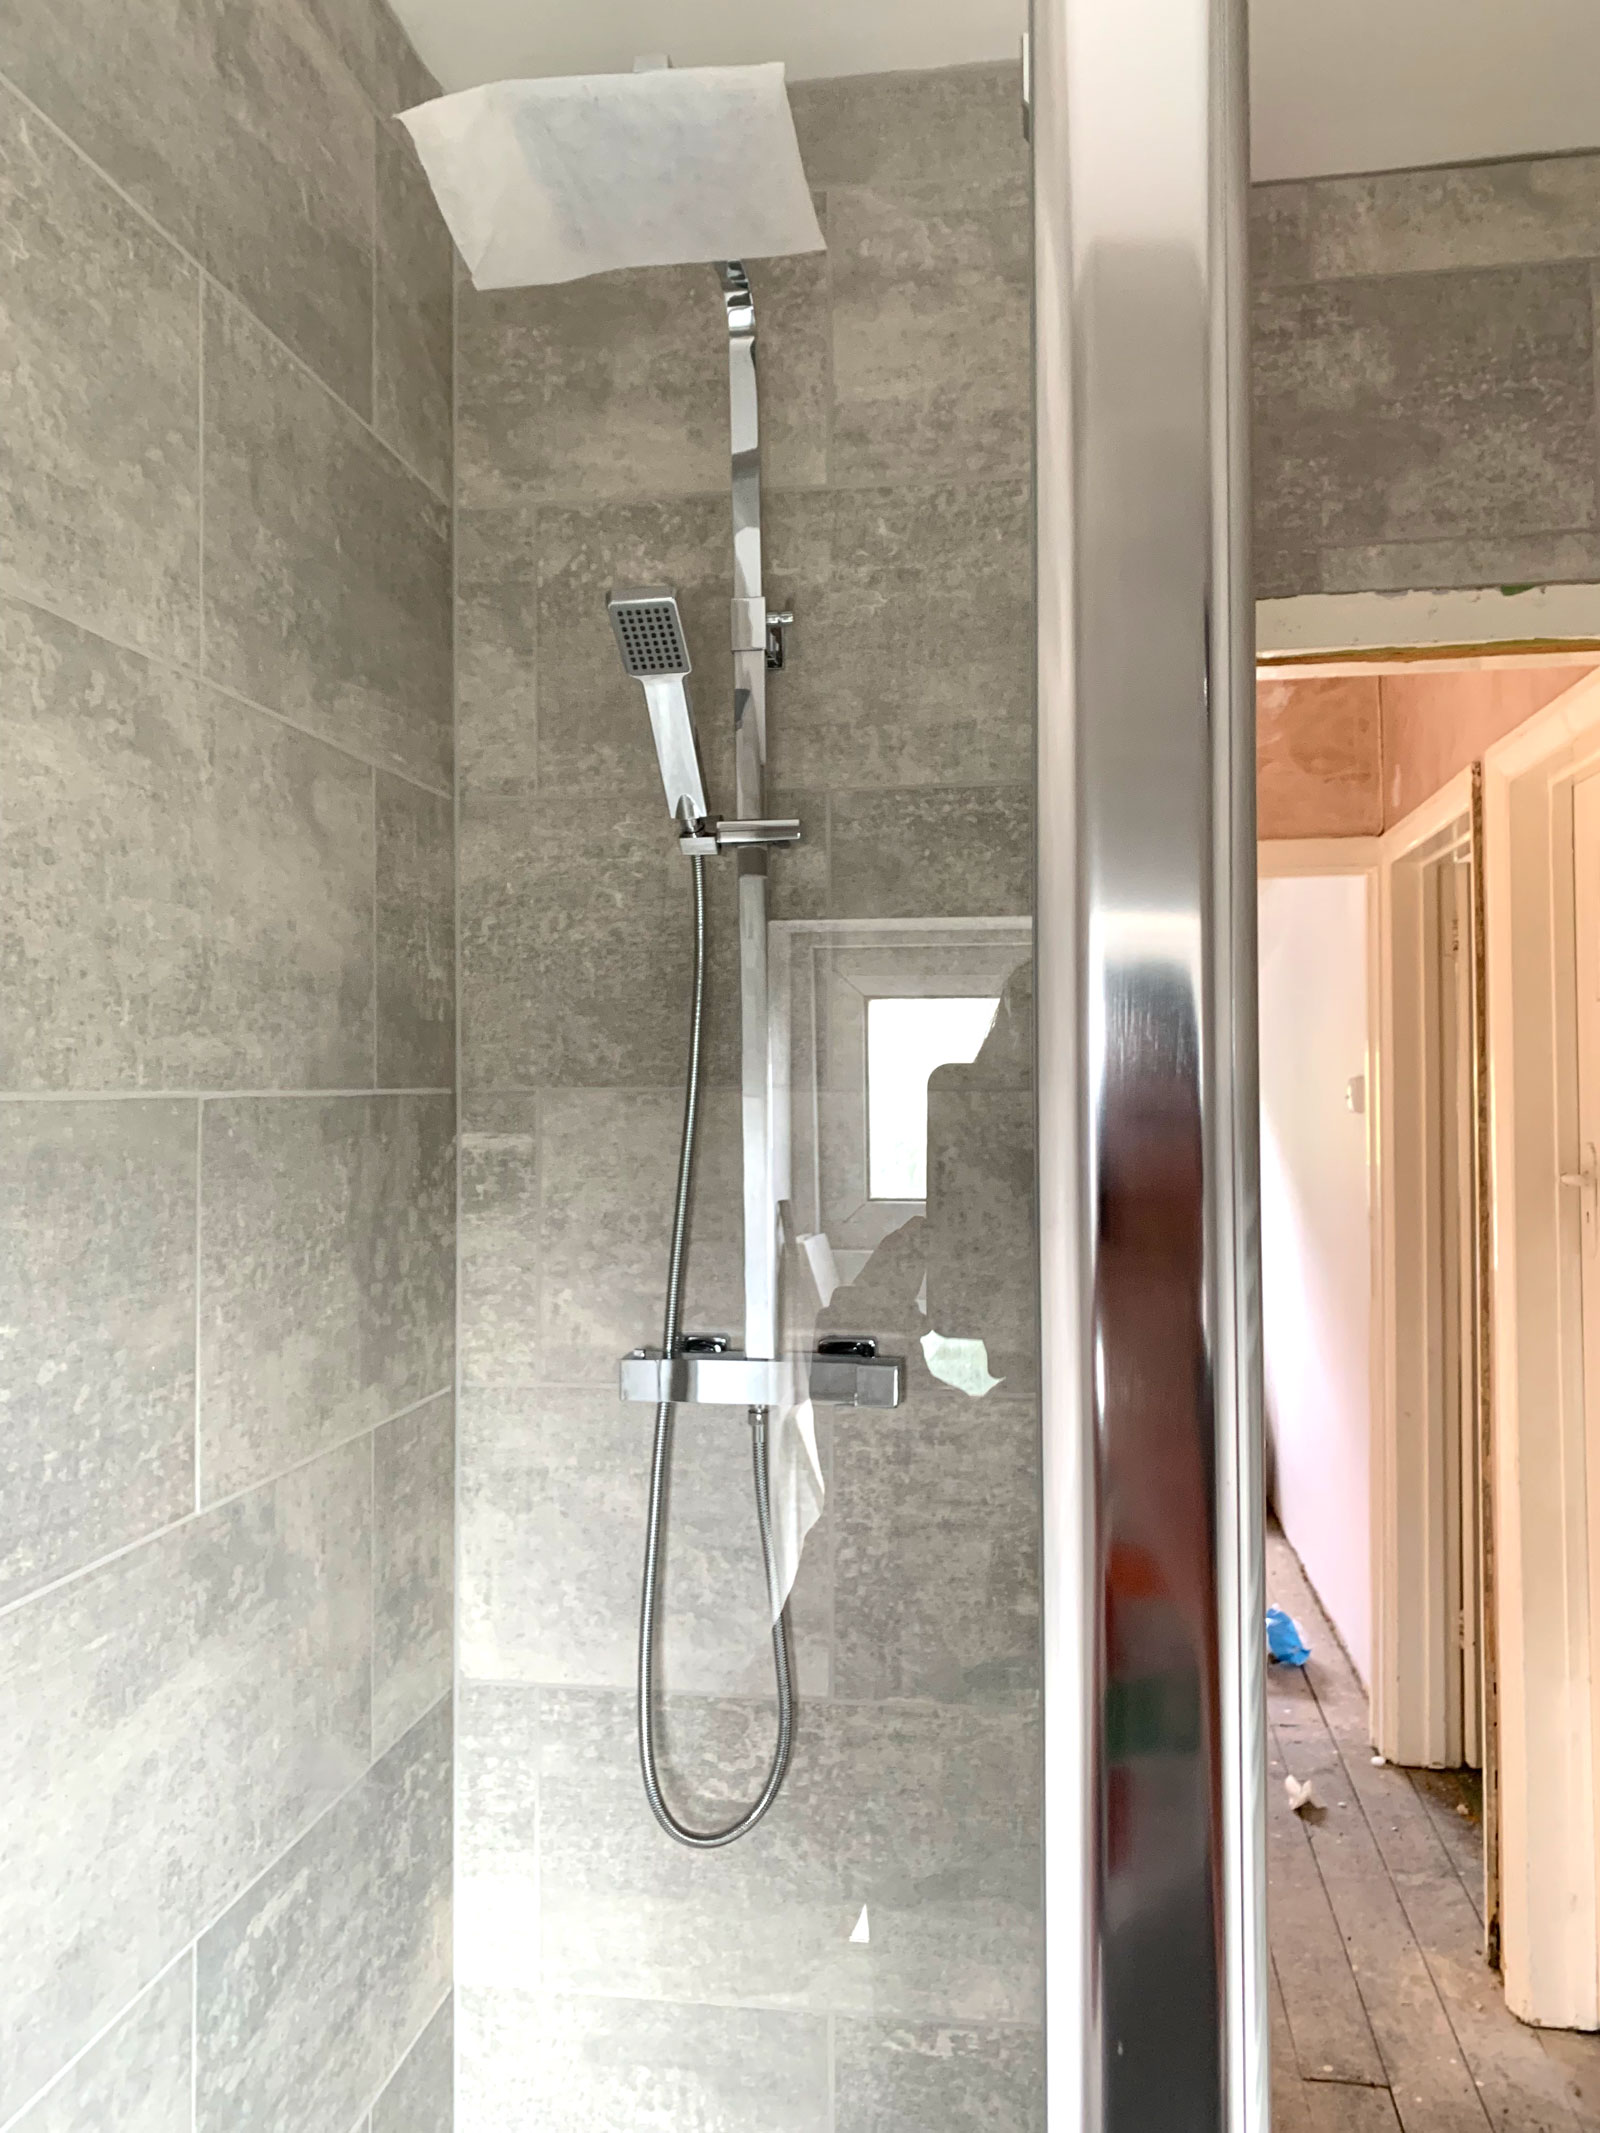
Shower unit now installed.
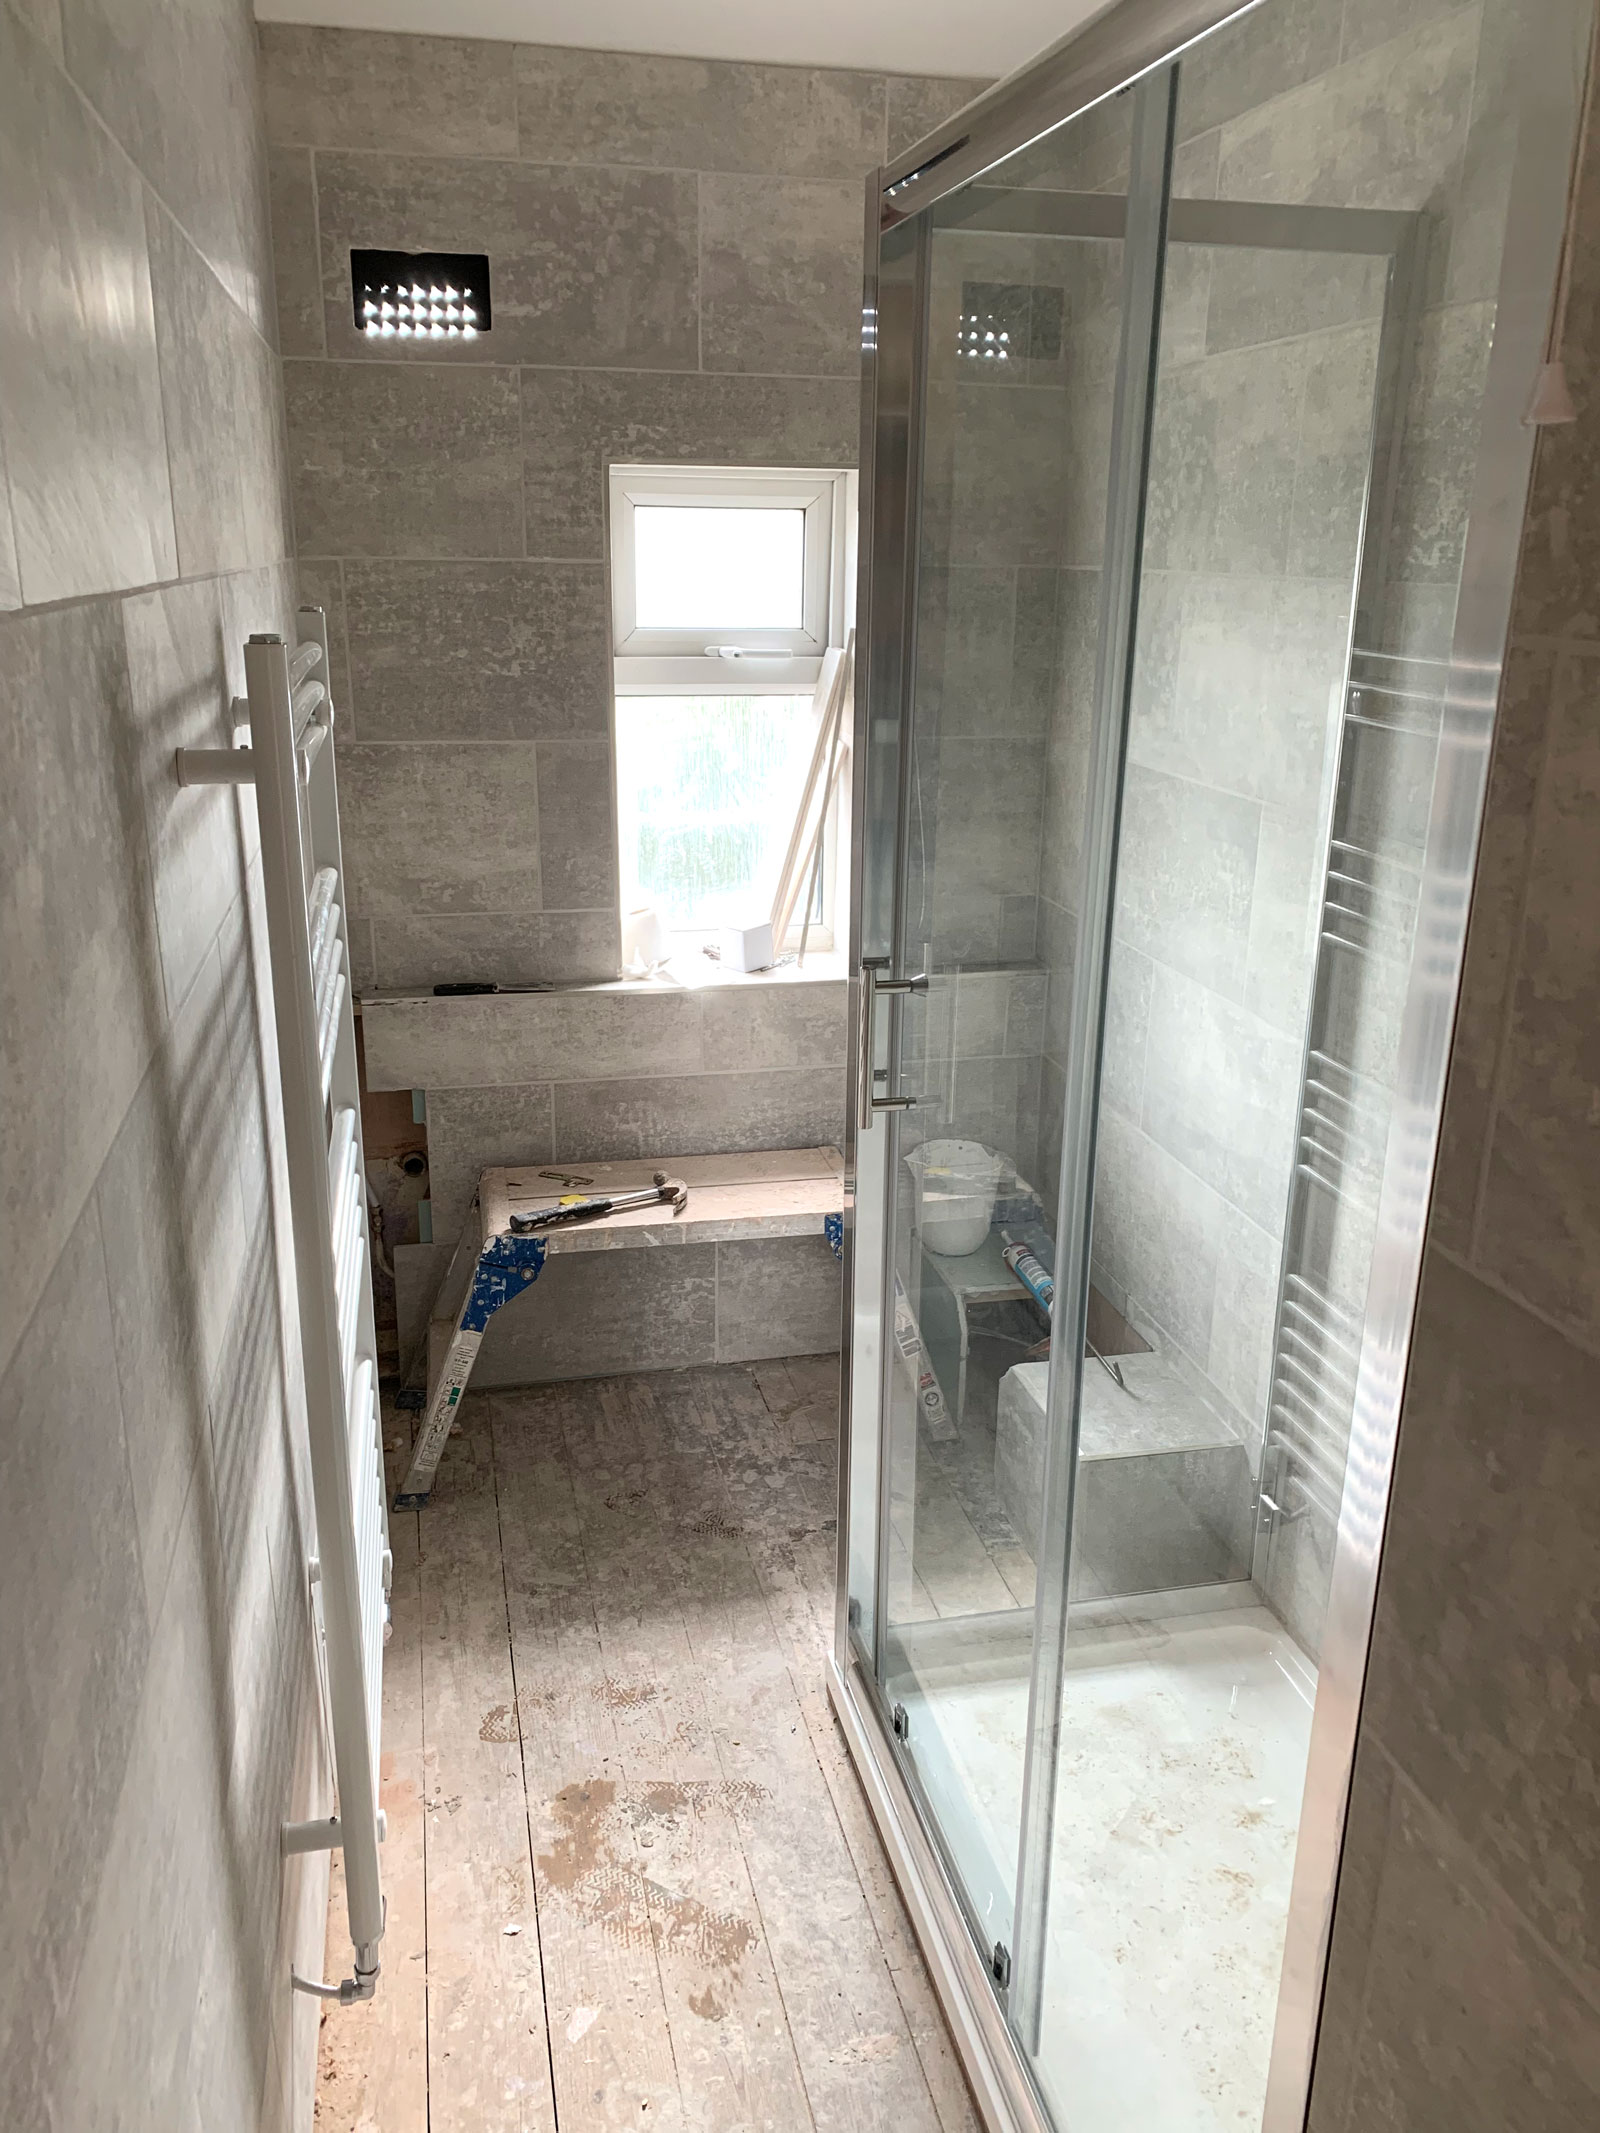
Towel rail radiator look flush.
Again, thinking about space and storage I went with a low profile slimline toilet (but still big enough to use) and a corner style sink that had an integrated storage unit underneath it, both of which work perfectly in the spaces they were allocated too.
Stripping the room back to bare walls also gave an opportunity to rethink the radiator. The pipework for the existing radiator was very unsightly as it ran on the outside of the wall from the ceiling to the floor and then along the length of the bathroom to go through the wall into the main bedroom. I wanted a towel rail style radiator to maximise usage for drying whilst saving space at the same time. All the pipework was carefully rerouted and hidden in the wall leaving it with a nice clean profile.
Like the Kitchen and the boys bedroom, the bathroom was fitted with two spotlights in the ceiling. This arrangement gives a good amount of light and adds to the clean, contemporary look the bathroom has been finished with. The room was completed within the two weeks it had been allocated, something I don’t think would have been possible If I had separate people doing the different elements that this job required.
I feel very lucky to have a friend who is talented and qualified enough to have done this job in one hit, and what a job he has done!!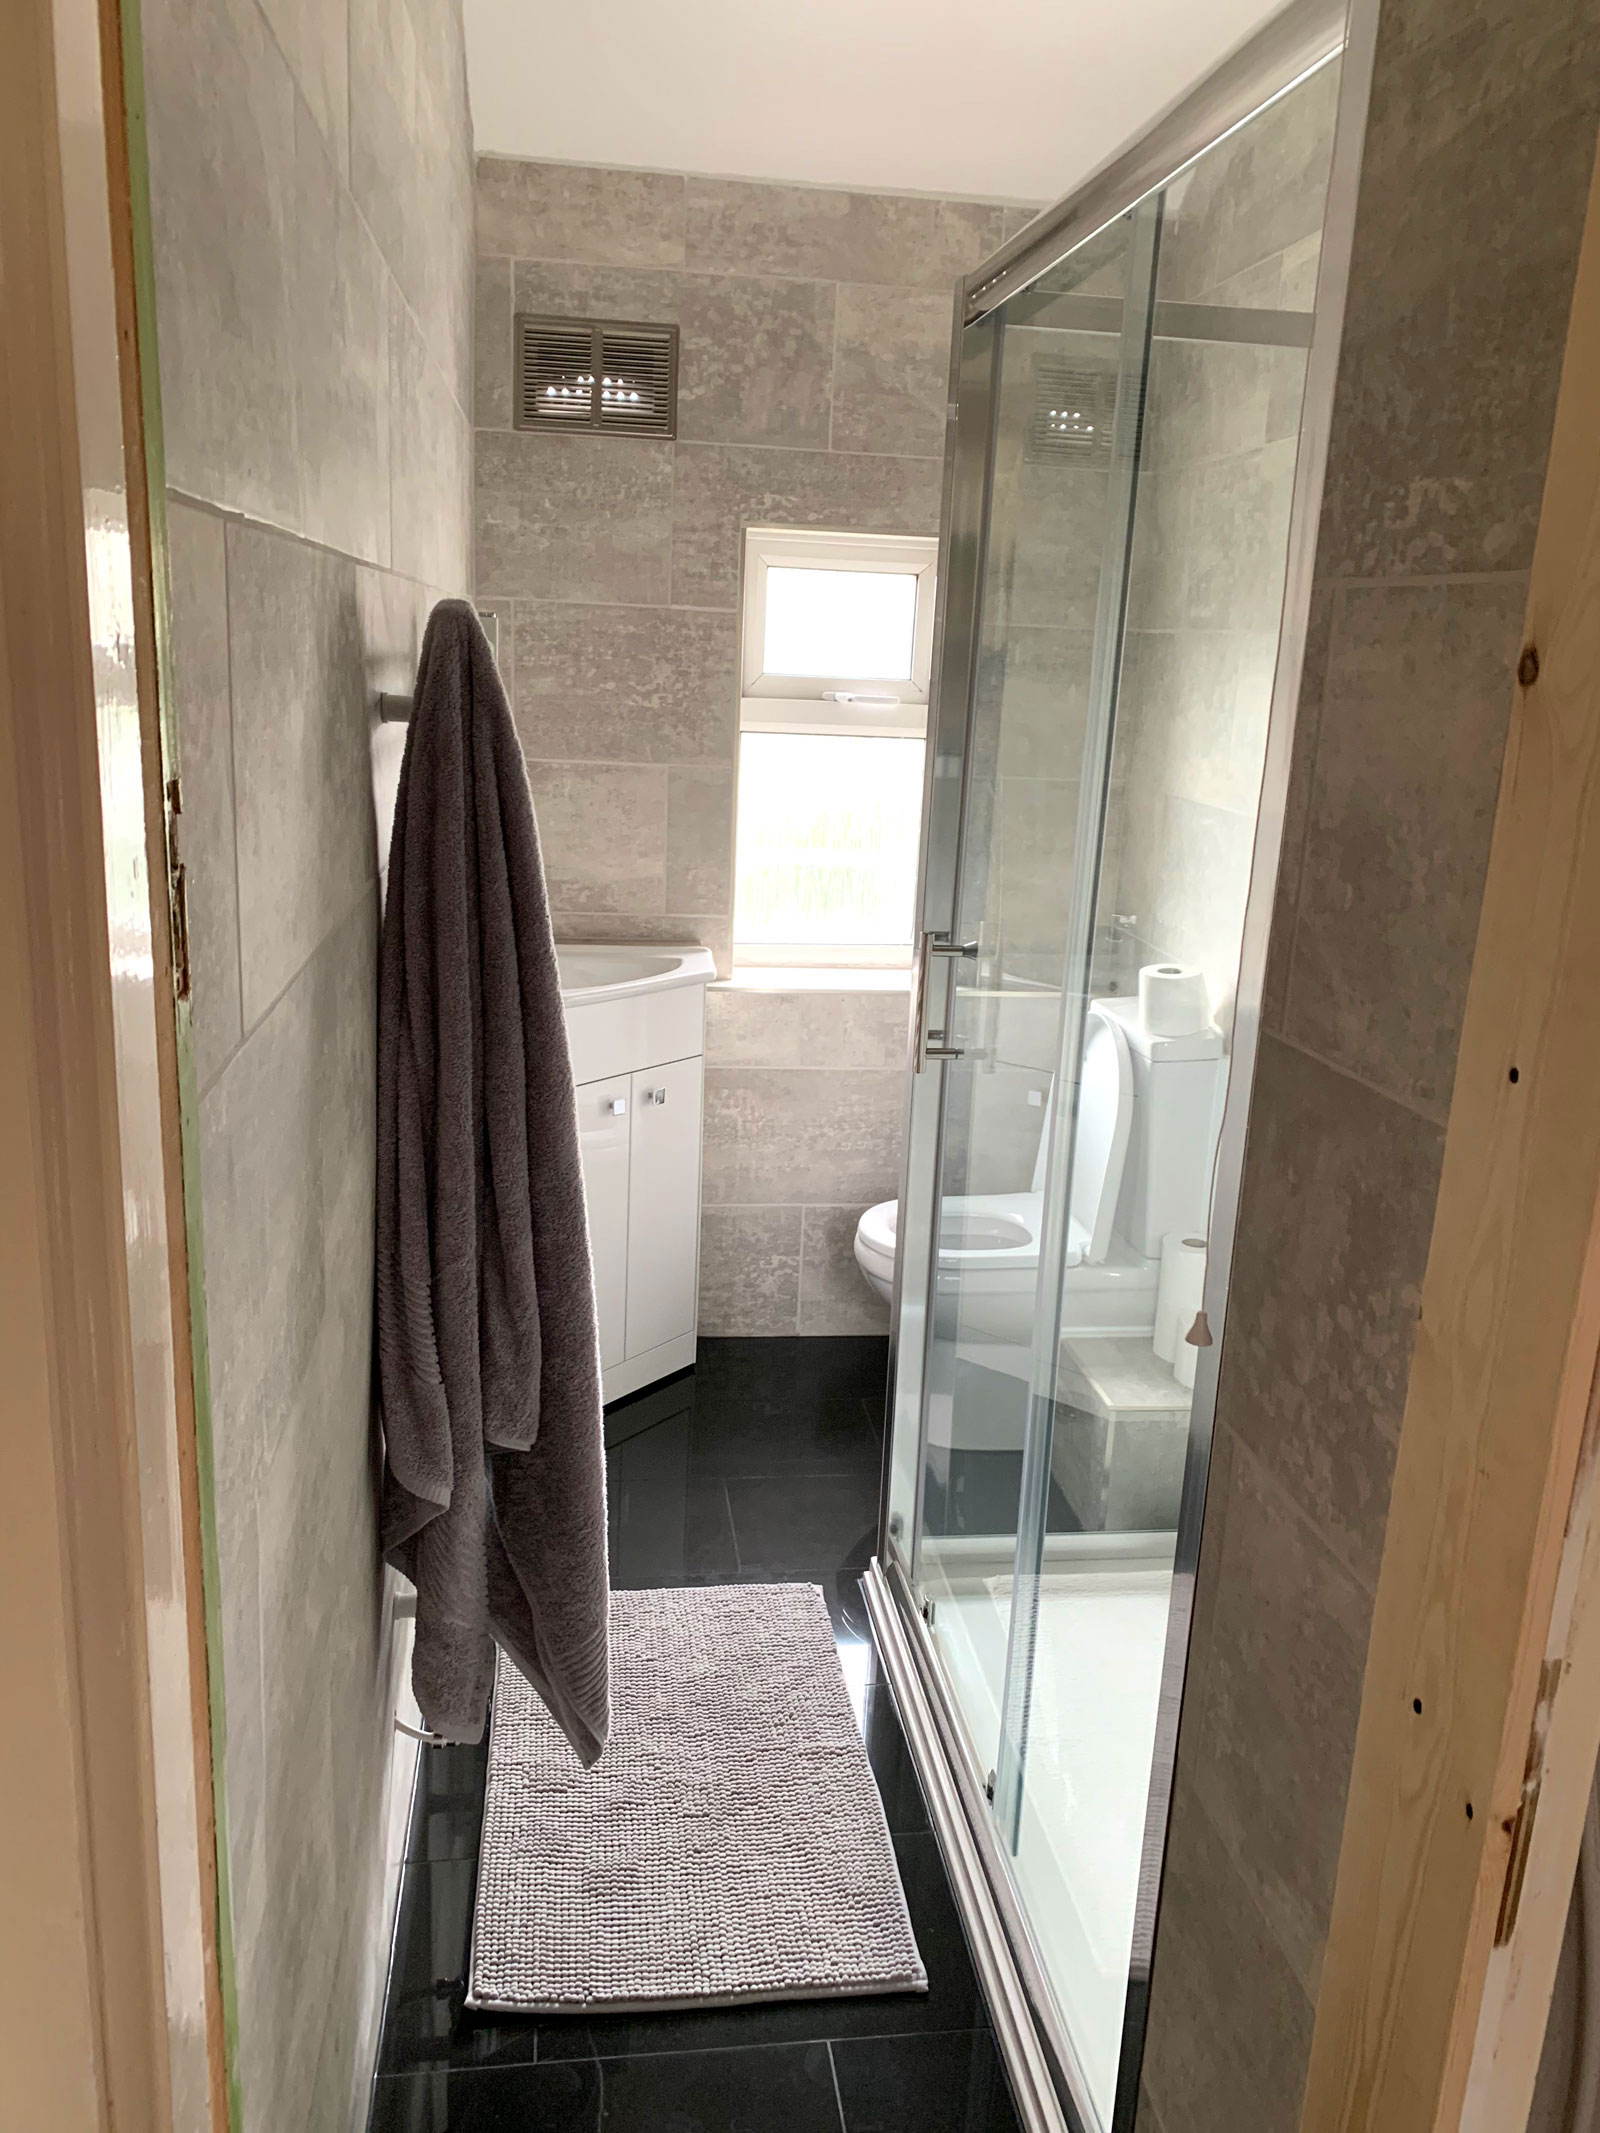
New shower room ready for use. 🙂
Flat Refurbishment – Part 3
flat refurbishment – part 3
The toughest and most costly parts of this refurb were always going to be the kitchen and bathroom as both needed to be completely ripped out, re-designed and rebuilt from scratch. I decided to tackle the kitchen first and as I mentioned in the previous blog my cousin came over to quote for the work. He then put me in contact with a designer he liaises with at a local kitchen company so we could get the ball rolling.
It’s a fairly small galley style kitchen so it needed careful consideration to maximise every inch for storage, accessibility and usability. The designer did a great job in measuring up and matching that brief. Together we finalised the designs and the kitchen was ordered, hoorah!
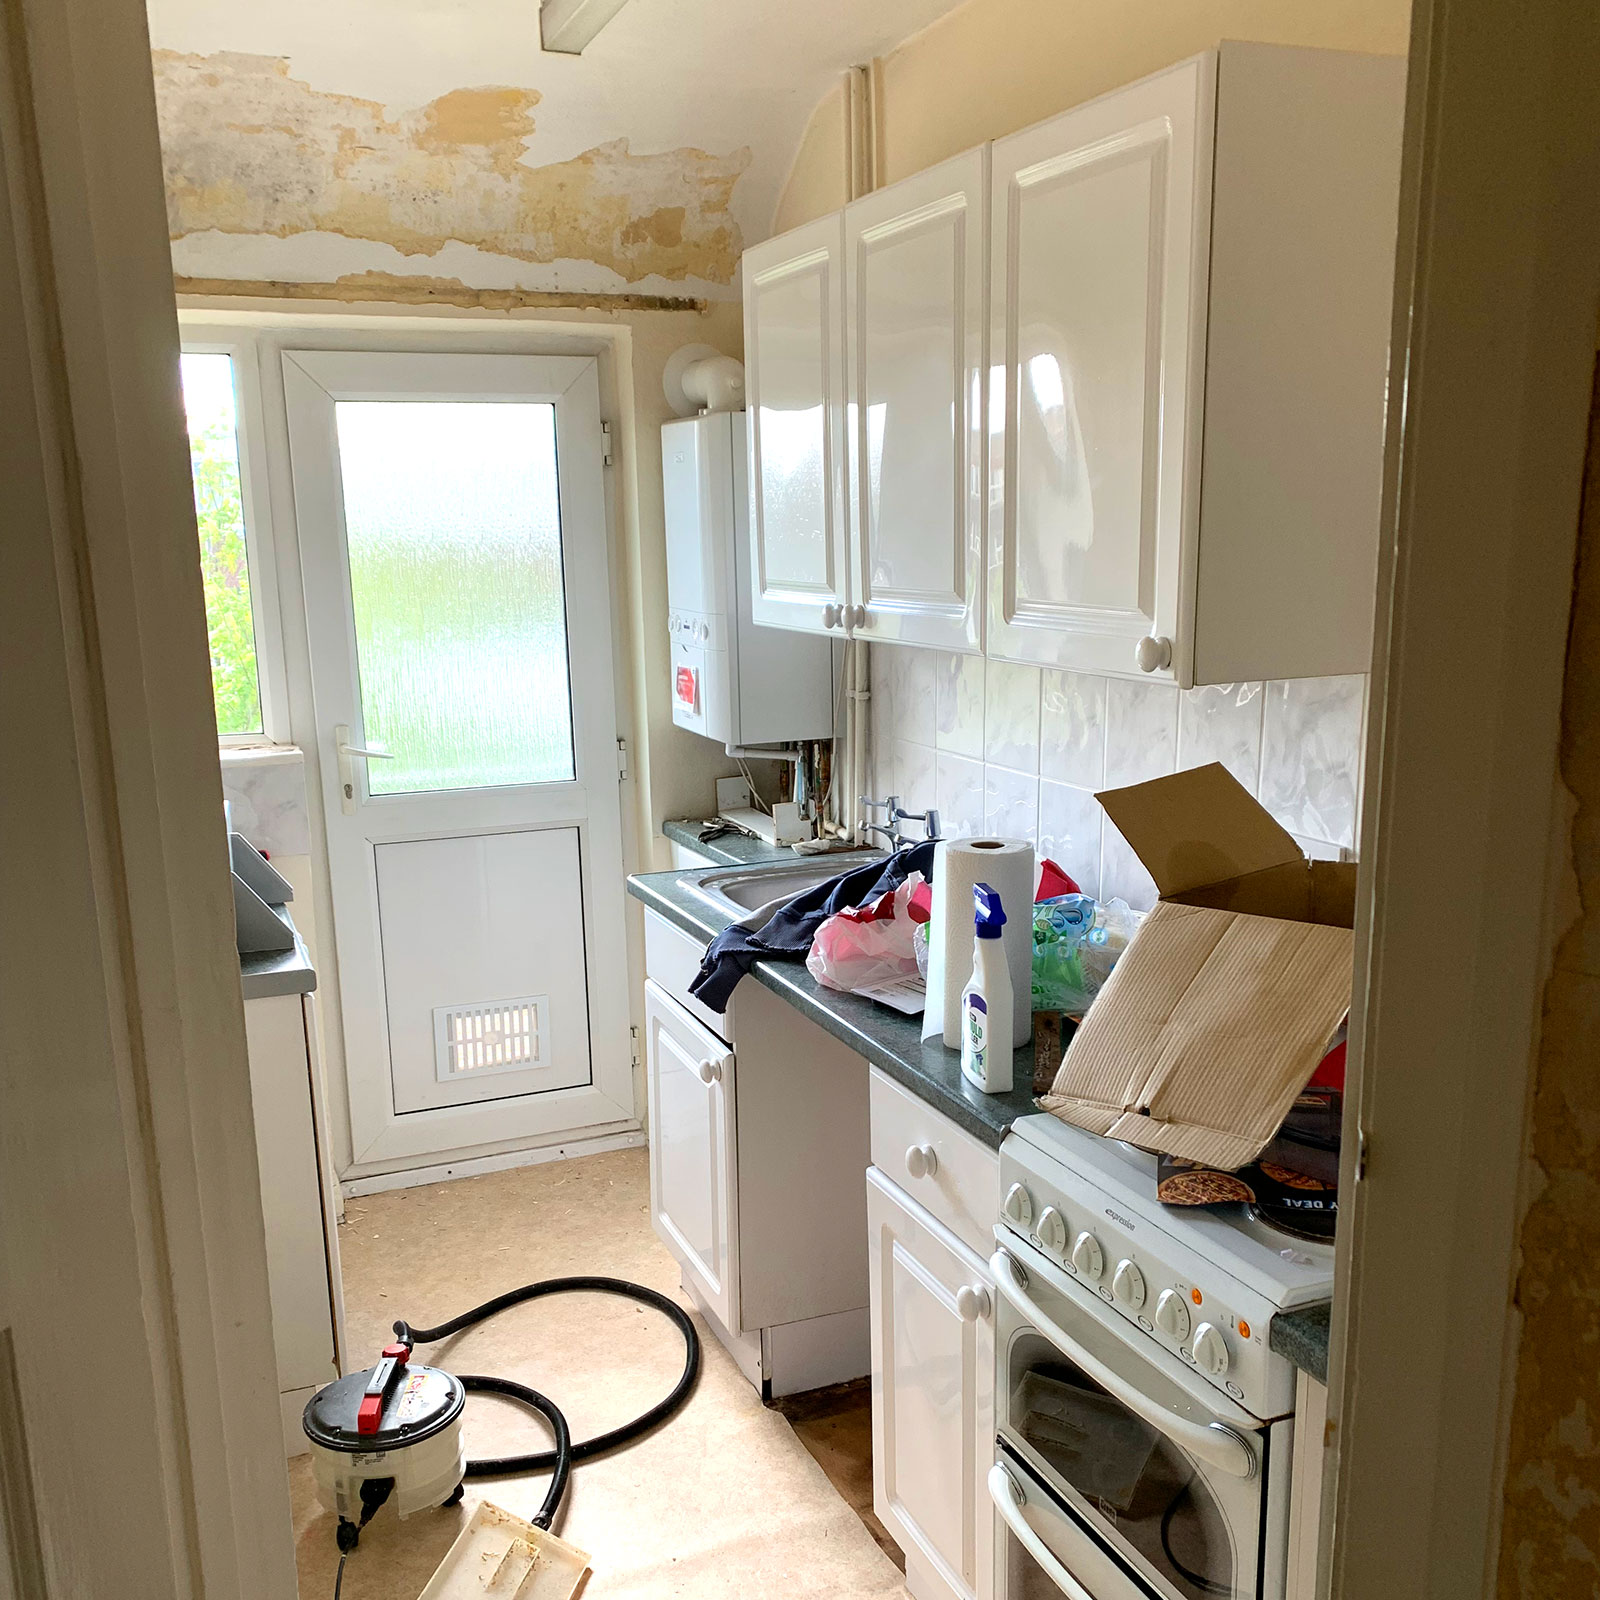
It was going to take around a week for it to be put together and delivered which gave me time to demolish, I mean prepare the kitchen as best I could to try and save some money. It turned out the kitchen needed completely rewiring which was unforeseen and like the boy’s bedroom it needed re-plastering.
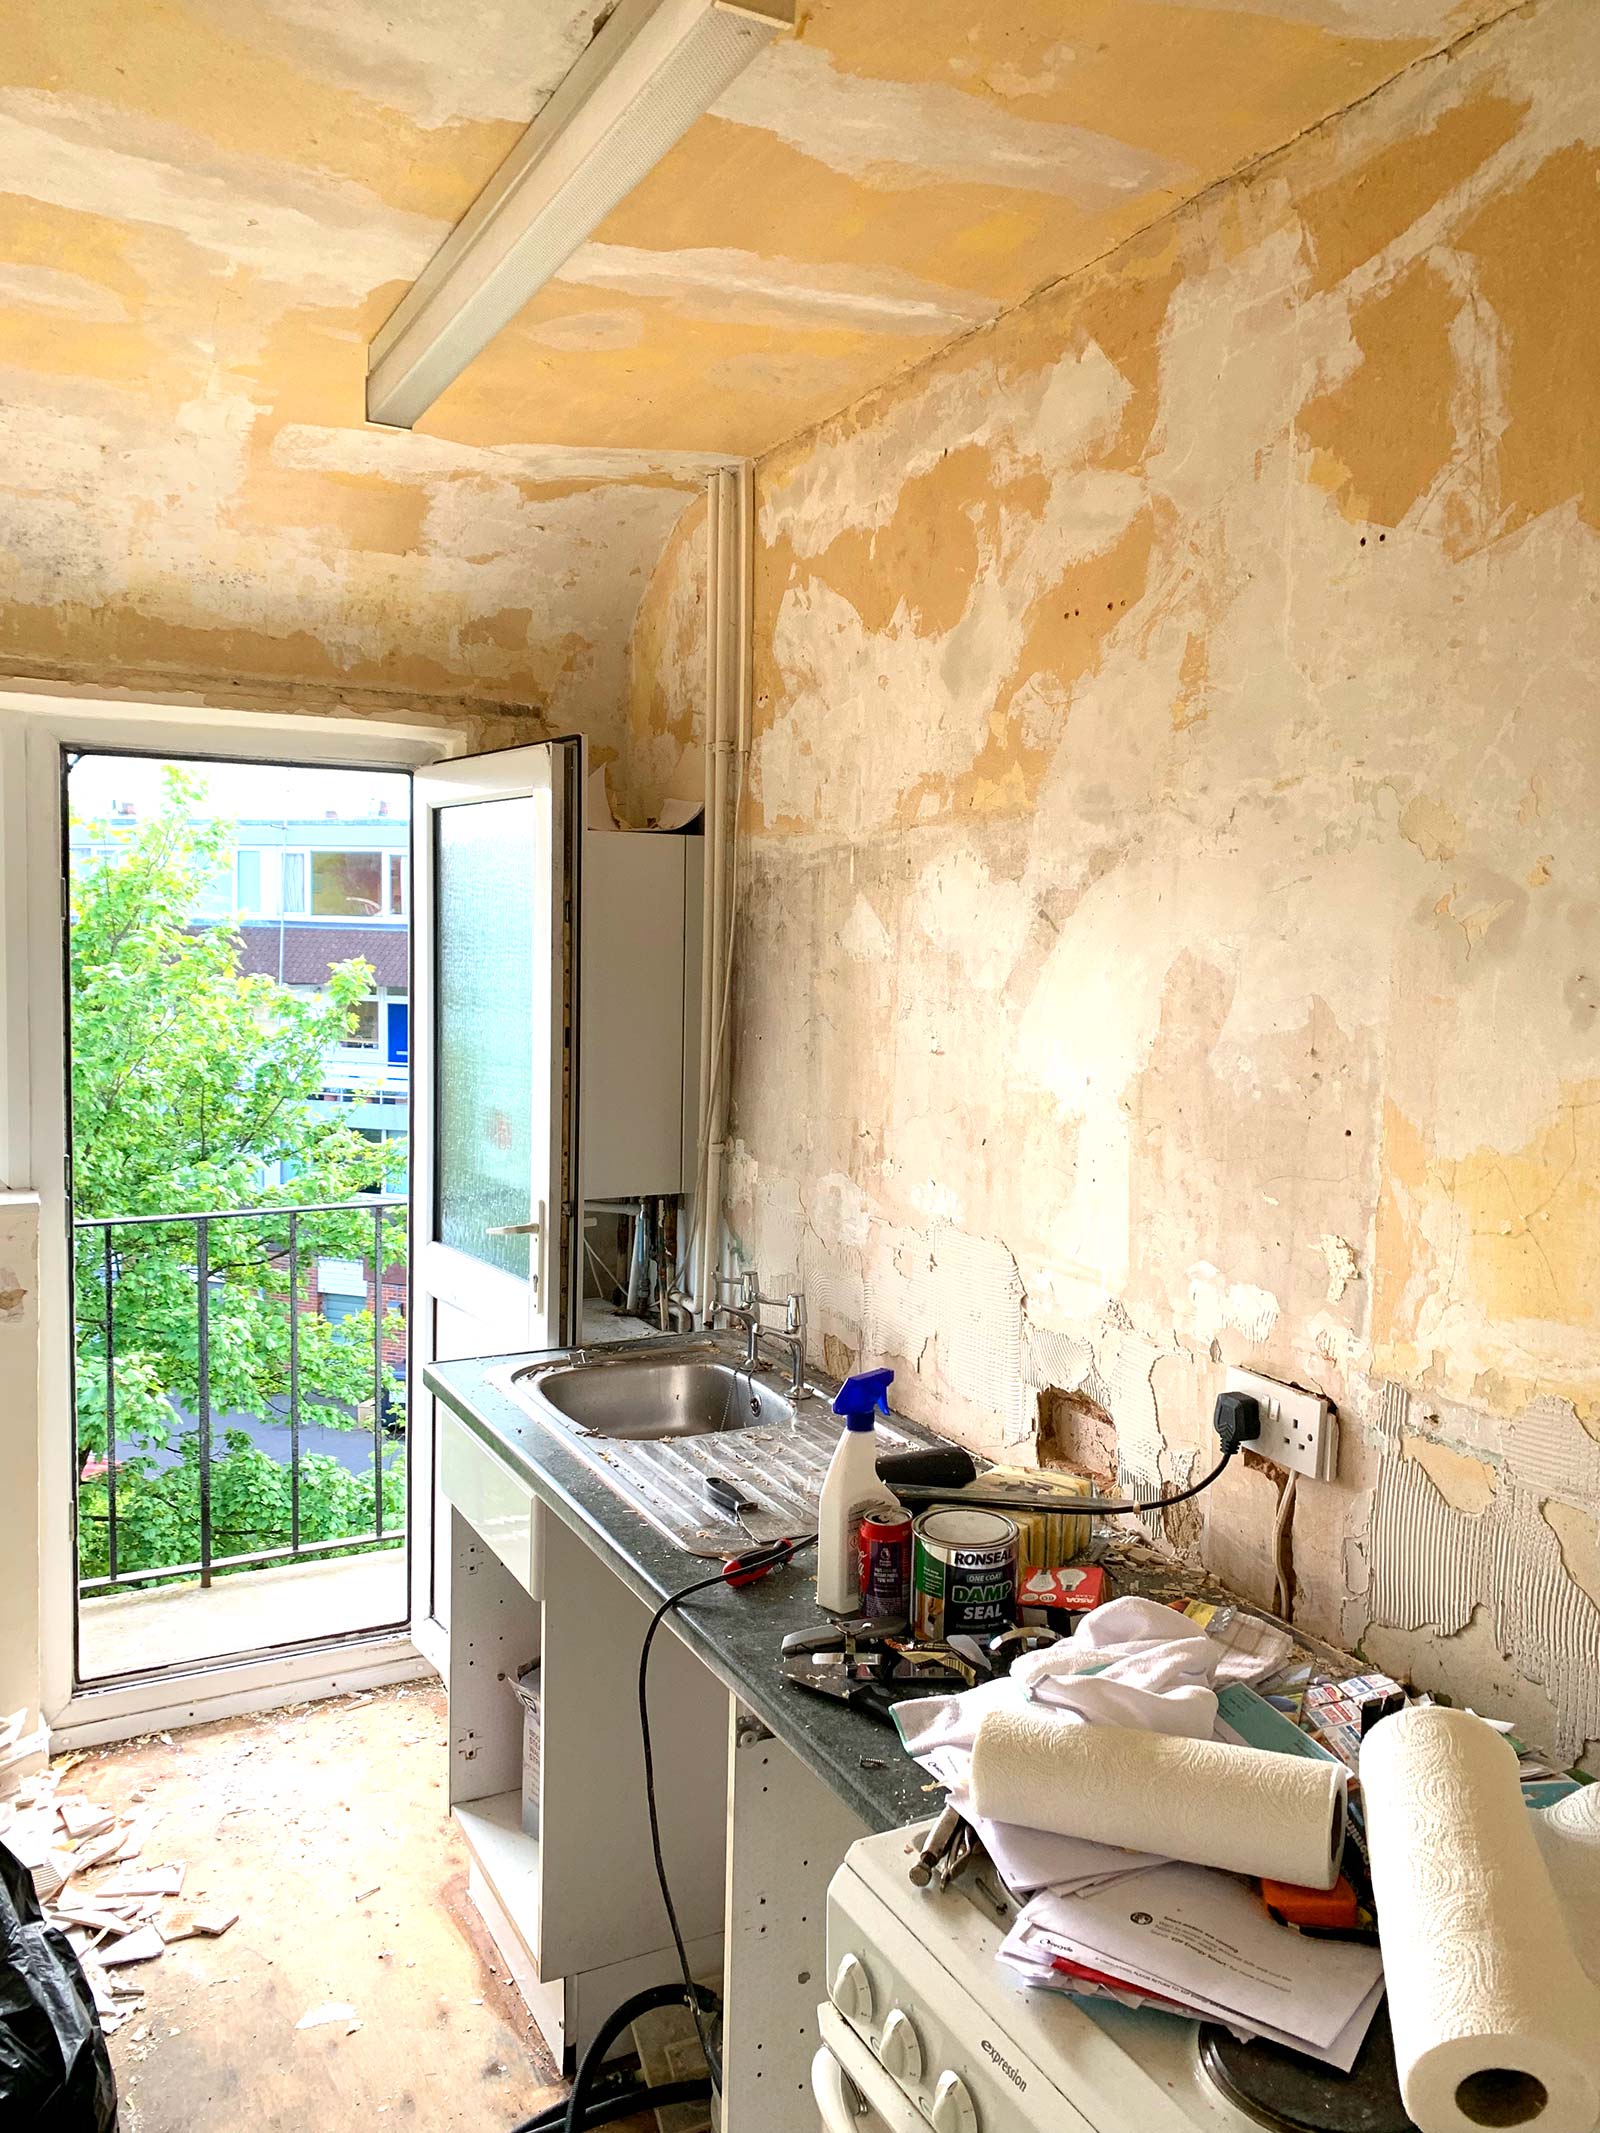
Stripping the wall took some work!
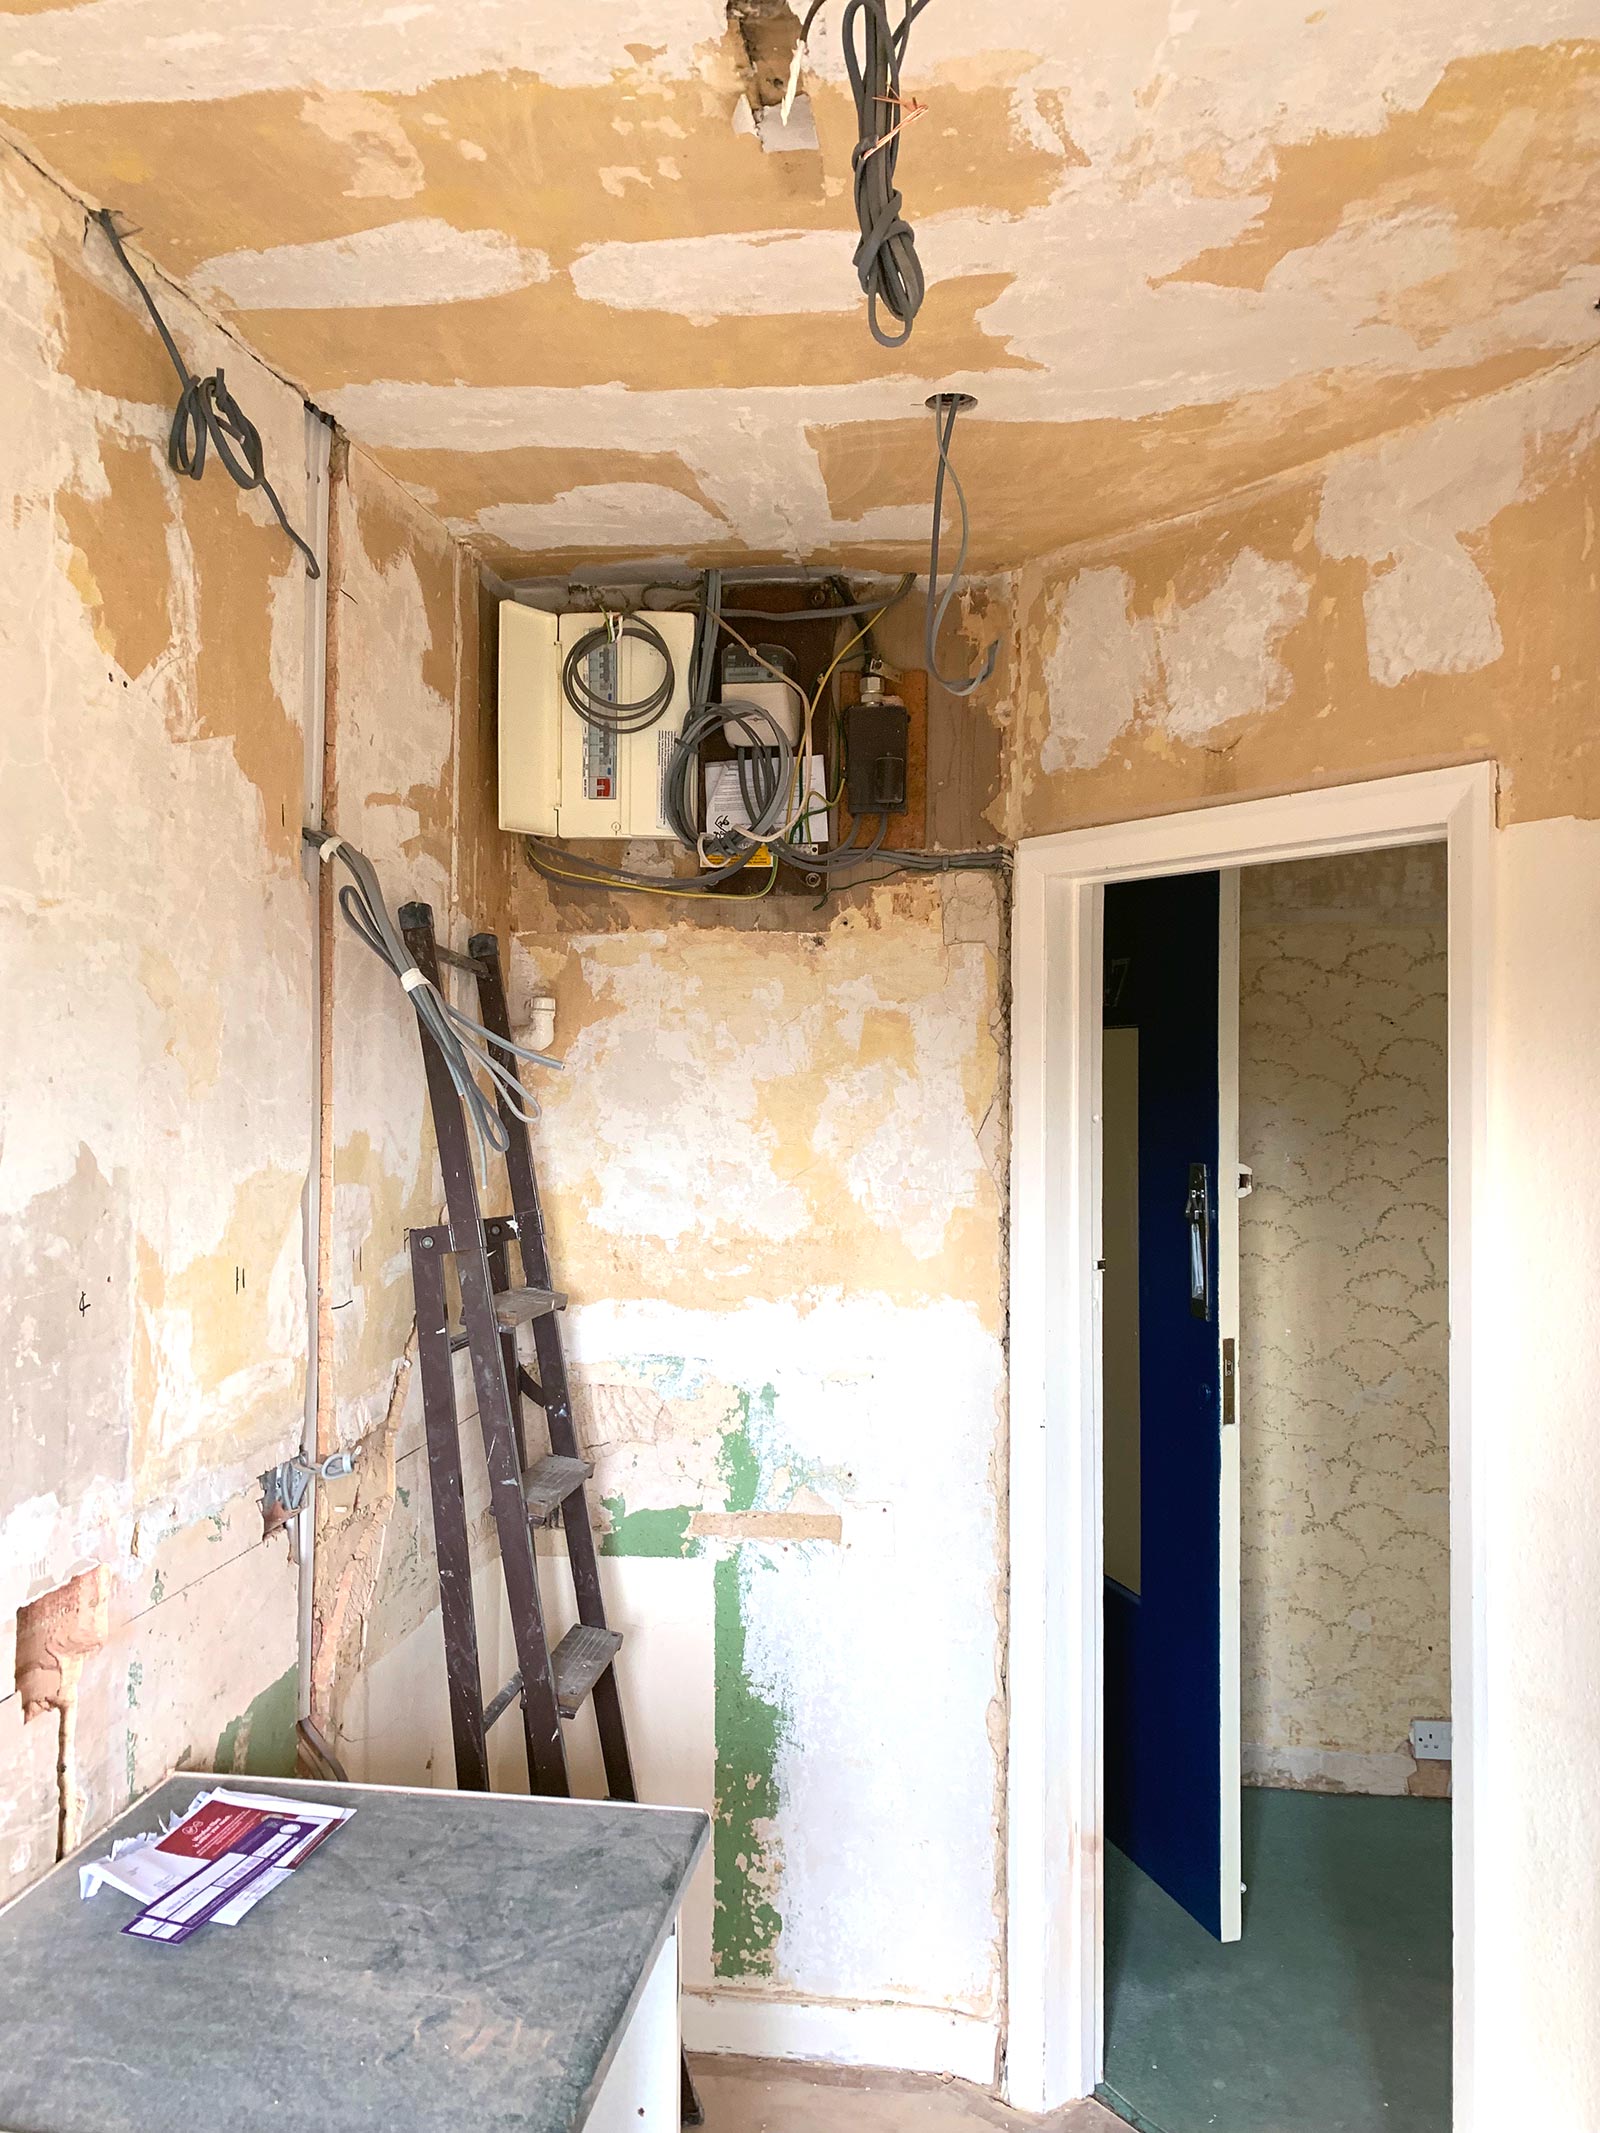
New electrics going in.
There was quite a bit of elbow grease involved in ripping out the old kitchen which included removing all the old units, chipping tiles of the walls and stripping woodchip which was everywhere, again! A couple of days hard work got that done which left just enough time for the electrician and plasterer to do their magic before the kitchen arrived.
You will see in the photos there was a horrible strip light on the ceiling which had to go, this was replaced with three super cool spot lights. There was also a small radiator which I wanted to remove as the kitchen was limited for space and its the one room that doesn’t really lack for heat, what with cooking and all that stuff.
I decided on solid oak work surfaces and because they would be either side of the galley that meant I had to order two three meter lengths. This worked out well as it also provided me with a fantastic shelf for more much needed storage, a couple of matching chopping boards and a new sill for the window by the door. I’m definitely a dude for making the materials go a long way! Because the shelf was solid oak I invested in 3 strong steel brackets which turned it in to a cool design feature.
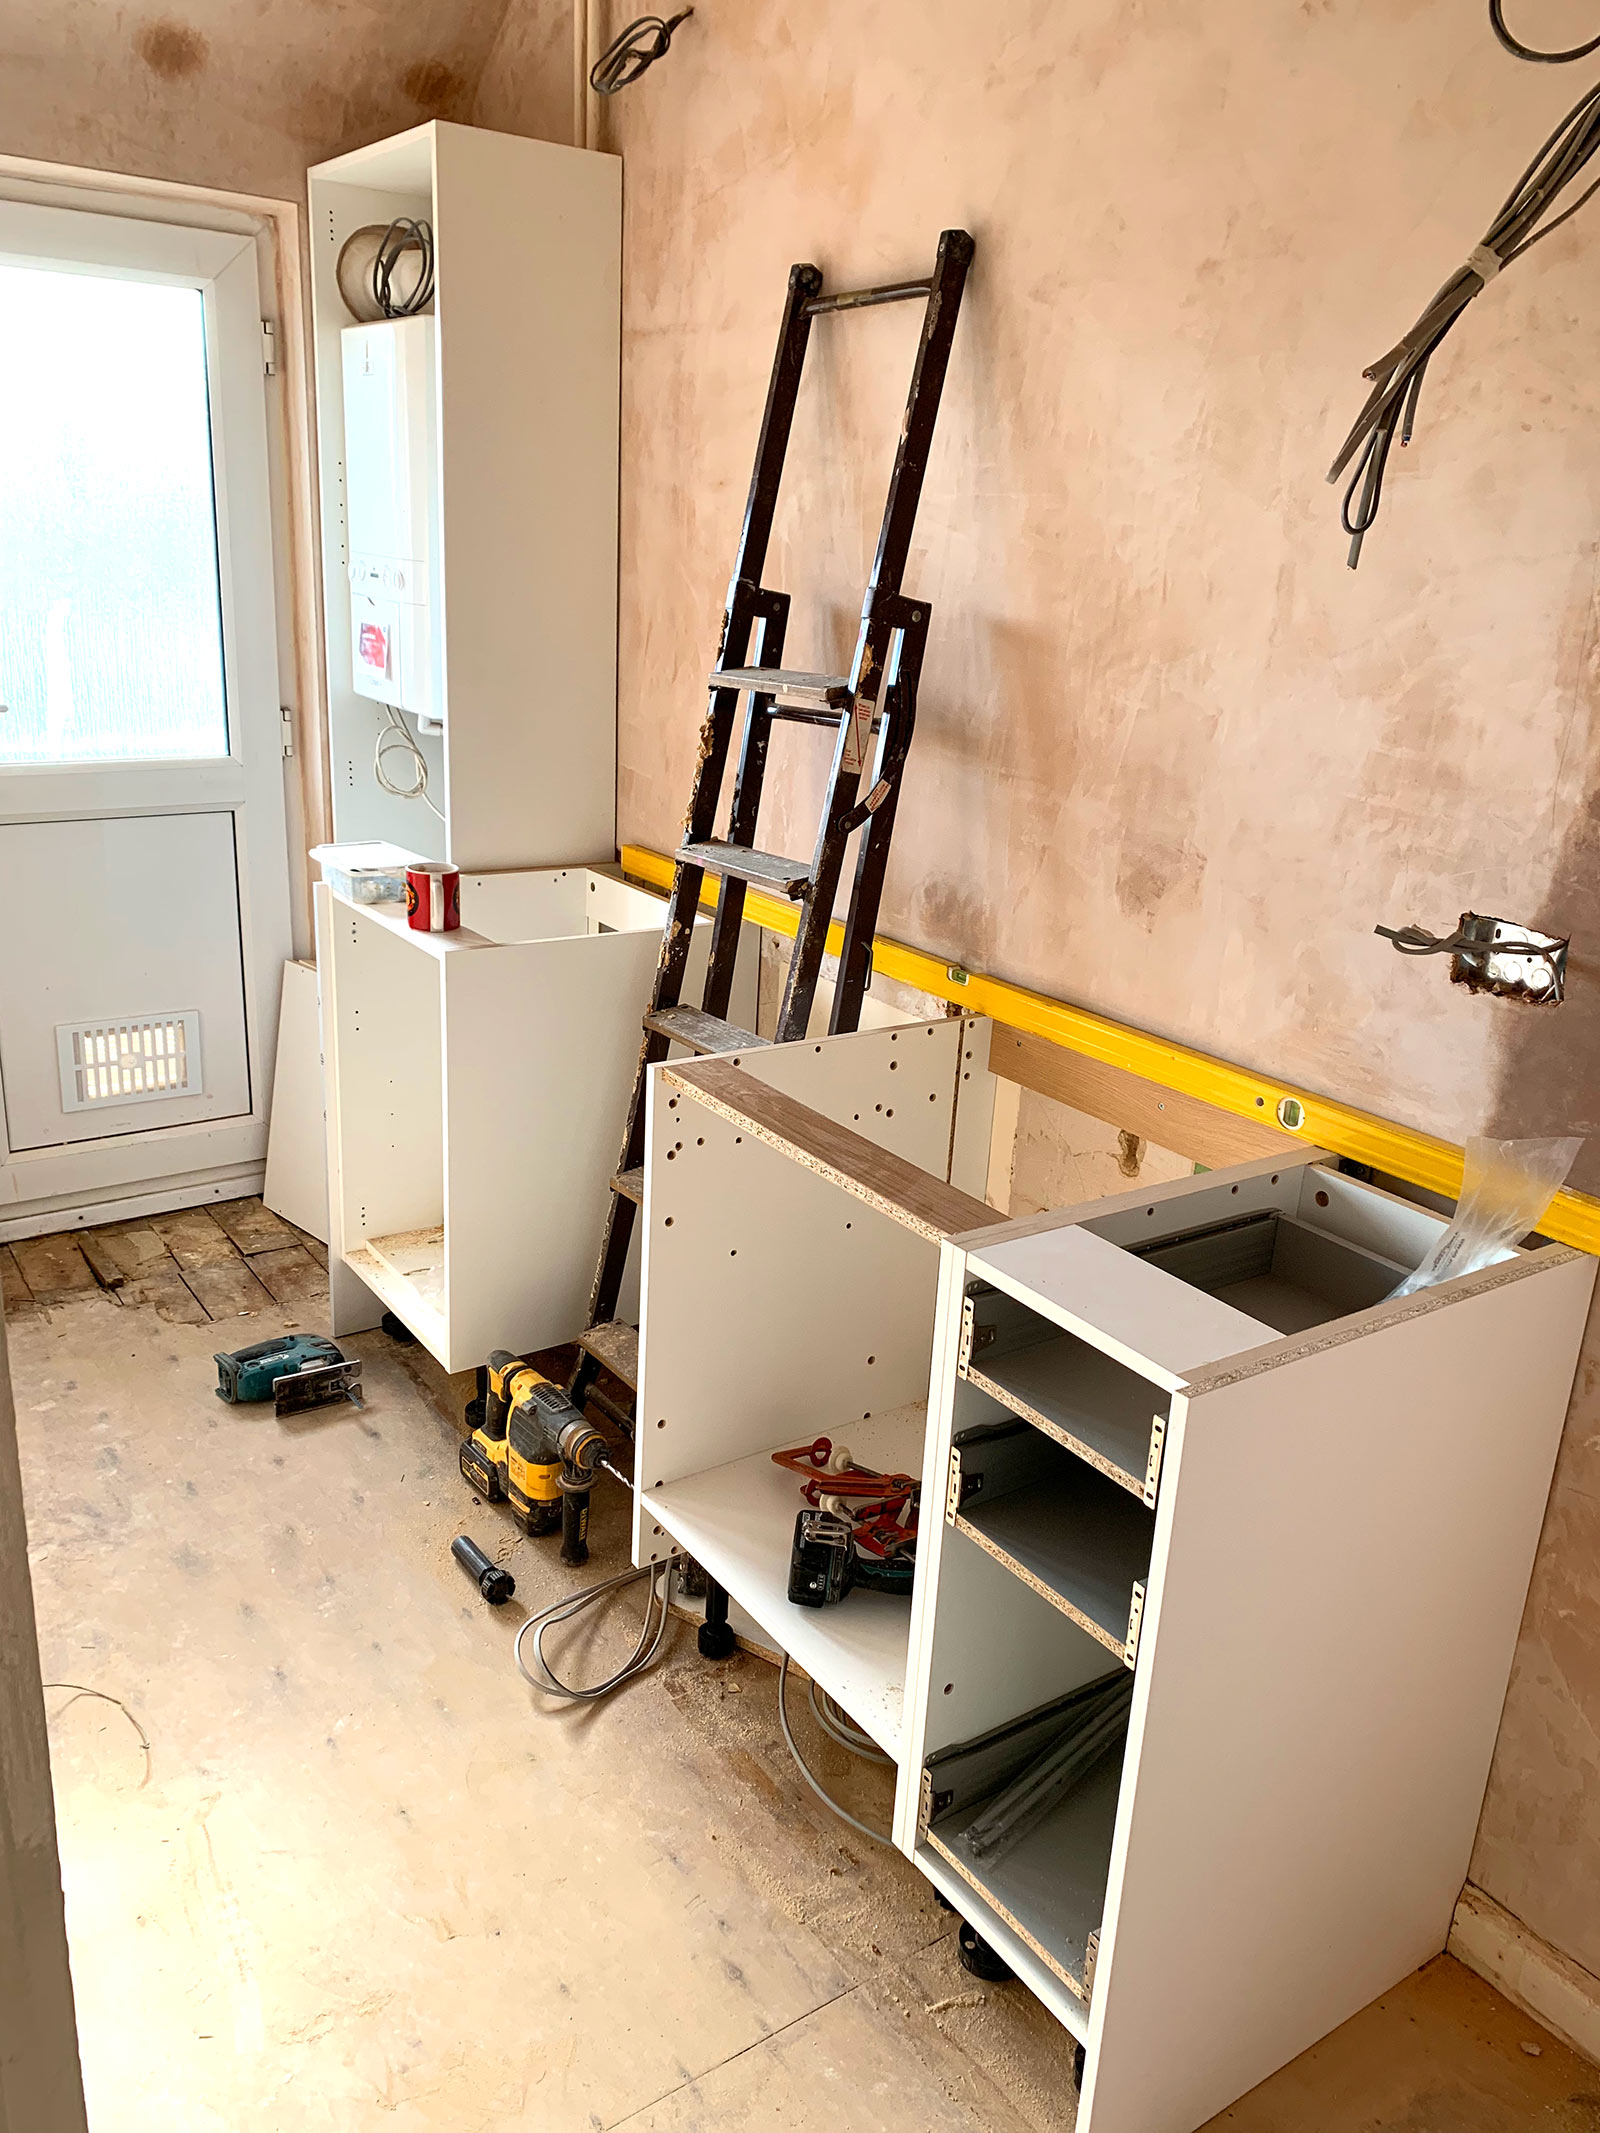
New units taking shape.
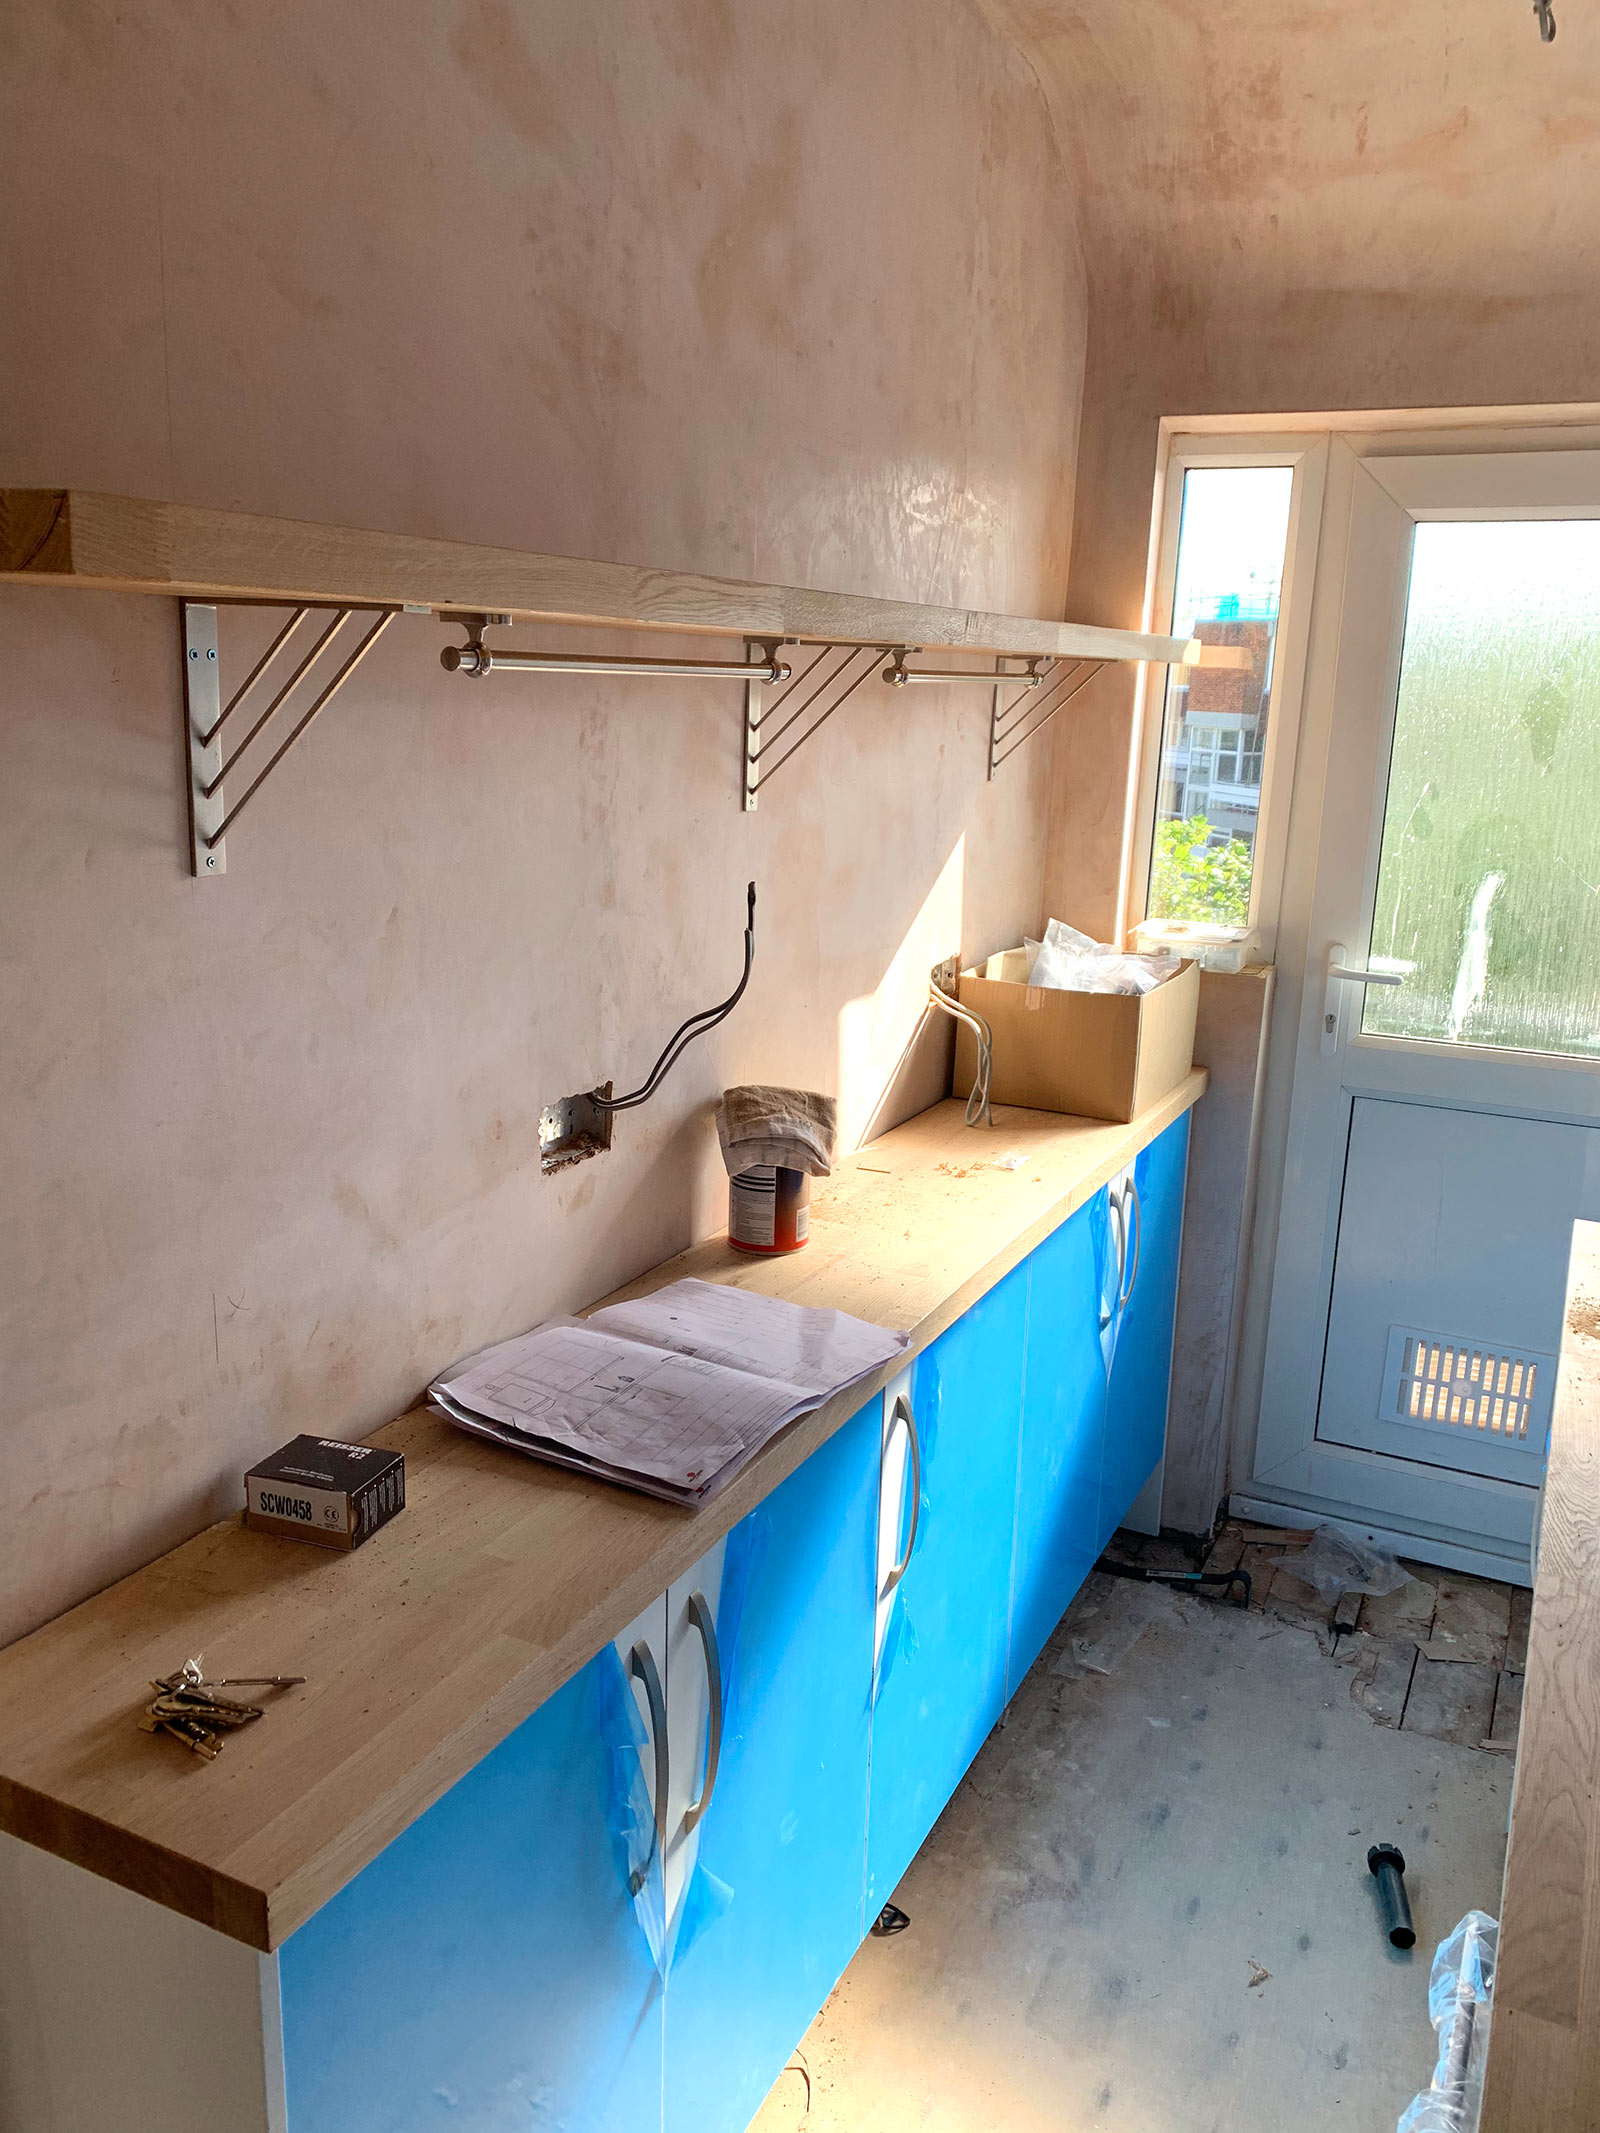
A great shelf for added storage!
One thing I wanted to make sure of is that the boiler wouldn’t be on show. Luckily the profile of the boiler was slim enough to be enclosed in a tall cupboard which didn’t interfere with the opening of the kitchen door, that was a definite win!
Being a 30’s period flat meant that it still had a working gas supply. This was great as it meant I could have a gas hob which I much prefer over the modern electric ones (this was installed by a gas fitter who also plumbed in the sink and washing machine, once again someone recommended and used by my cousin), but the oven I decided on was an electric fan version.
The kitchen designer also managed to get a larger steel deep pan sink basin fitted in that sat flush underneath the oak work surface. With a stylish brushed steel tap to accompany it, this added to the minimalist, clean modern look.
Things were starting to take shape pretty fast in the kitchen and where there was bare plaster I once again took to painting everything white. This made it feel light, bright and more spacious than it actually was. All the kitchen units were white for the same reason leaving it to the kitchen accessories to add a bit of colour.
In January Heather and I had a weekend break in Brighton where we stayed in a lovely Air B&B flat. They had lovely a 50’s style Smeg fridge in the kitchen which I fell in love with. I decided I wanted a similar style fridge in my kitchen but didn’t want to pay Smeg prices (I had a budget to stick too!) so I managed to find a fridge in that style but without the high price tag. Being bright red this became the kitchen’s feature design statement! Other accessories I bought also followed the red theme to give a feeling of consistency and unity.
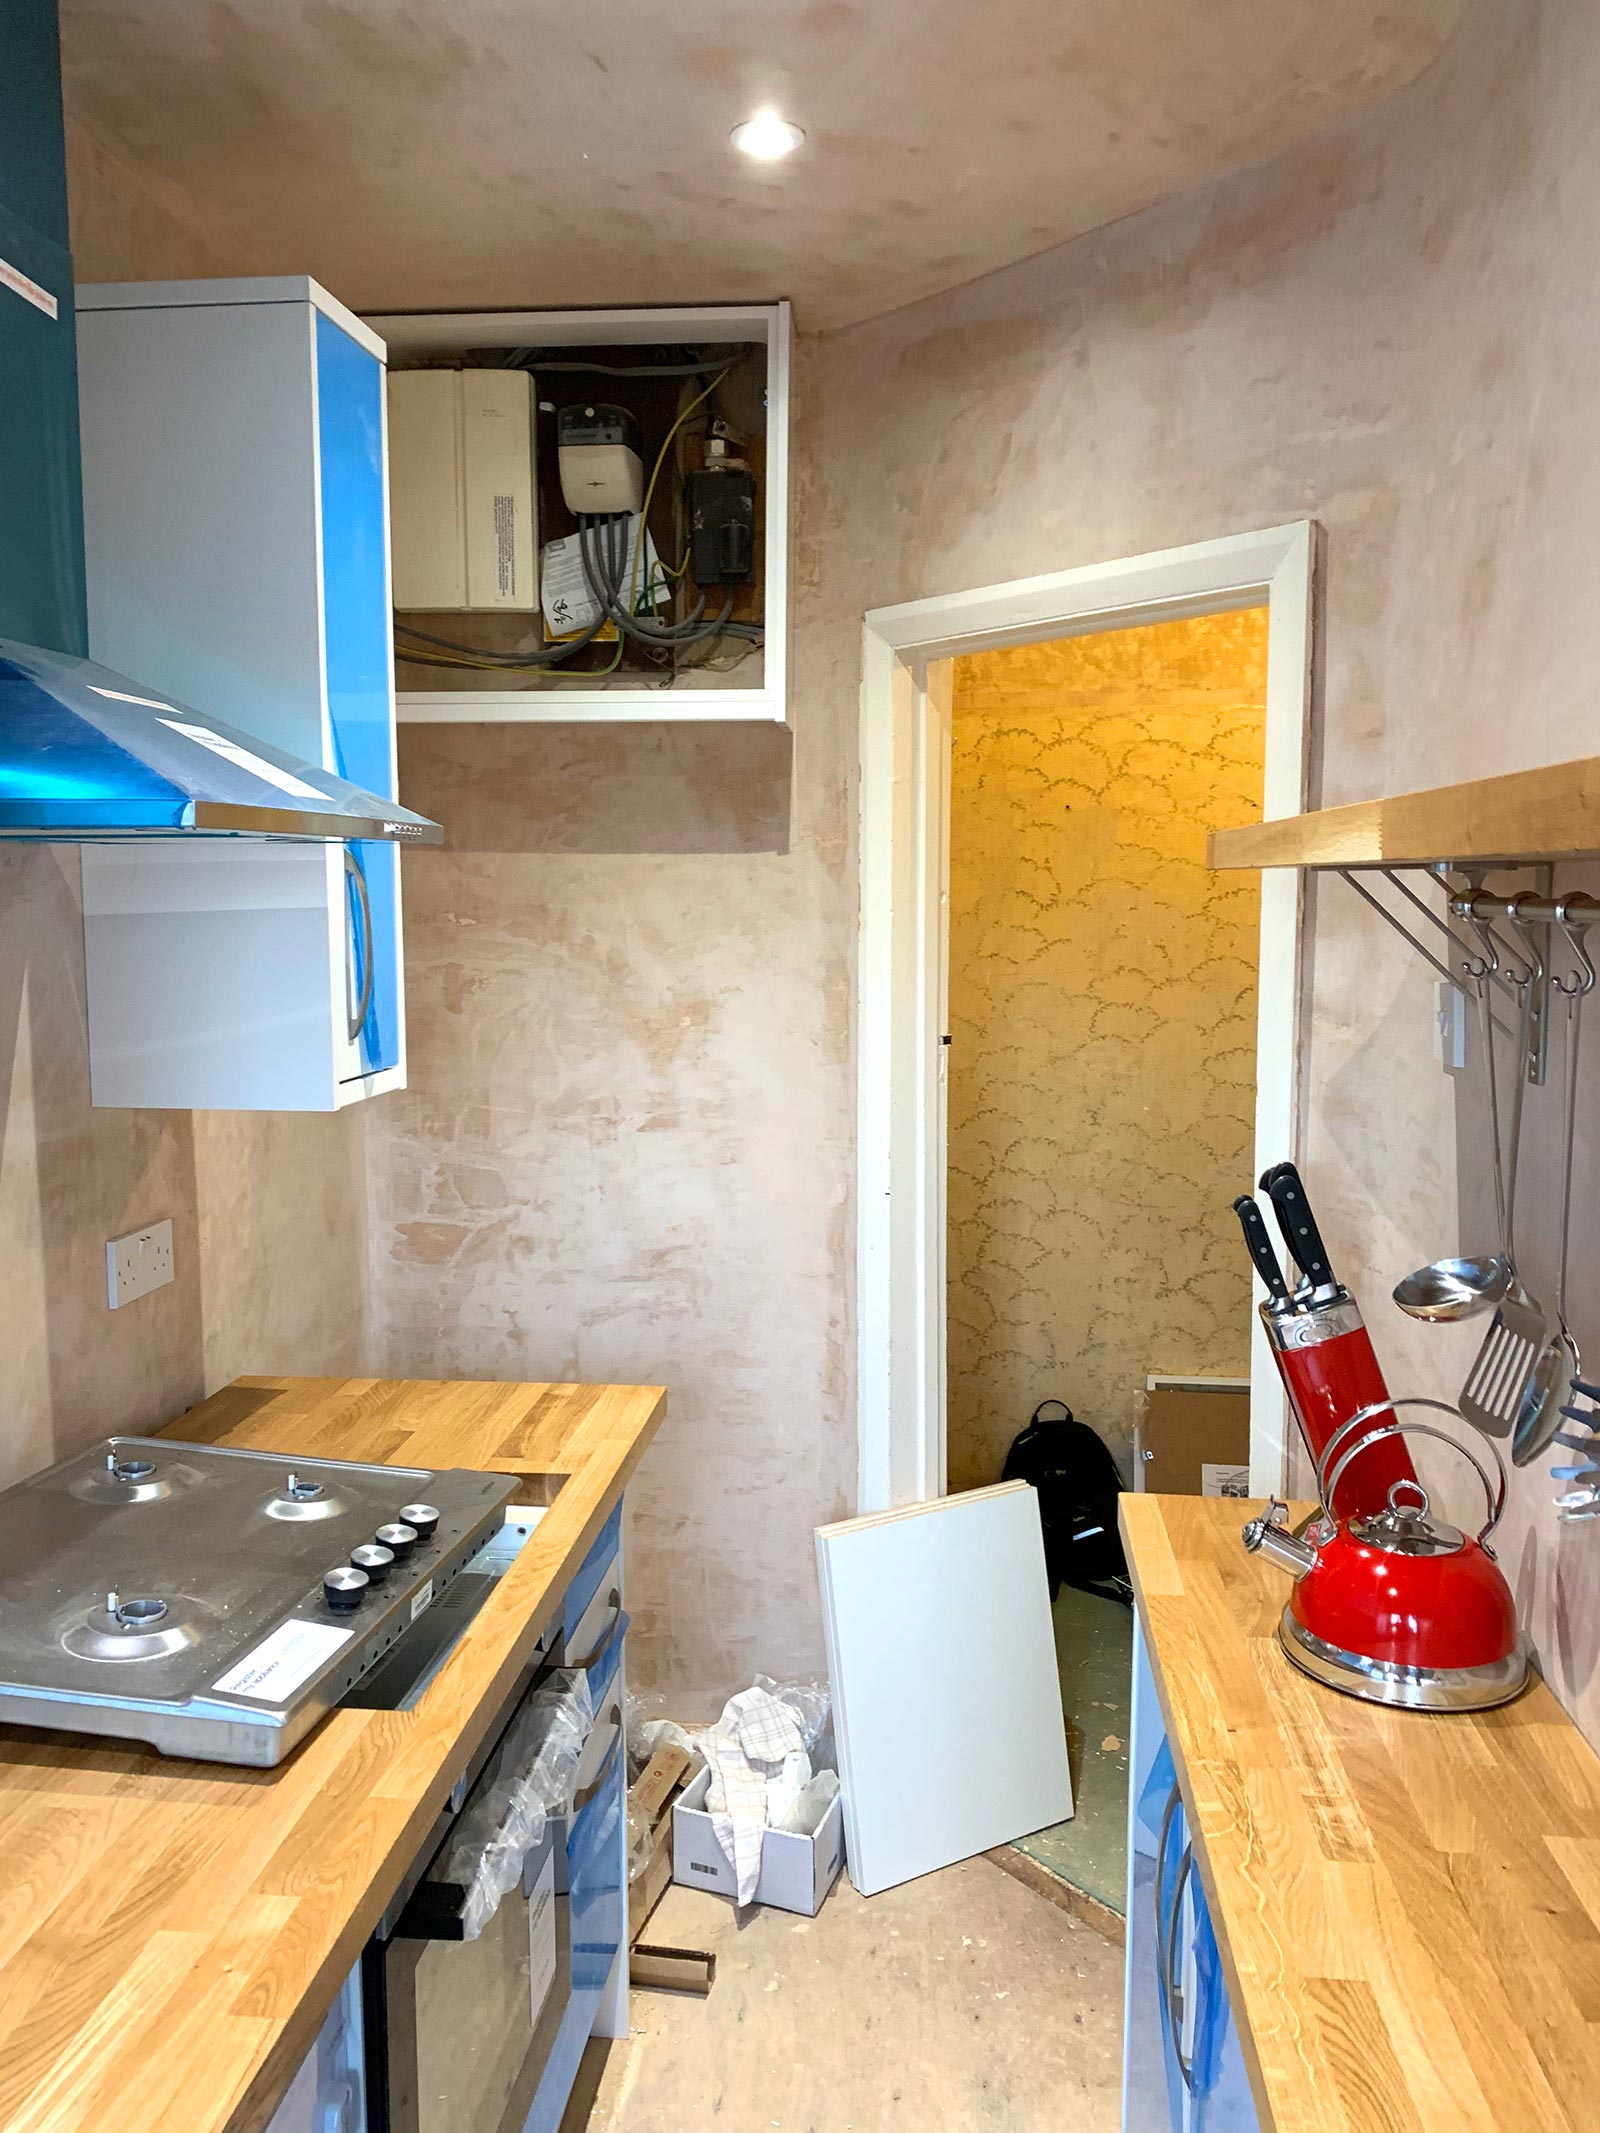
Hiding the electrics.
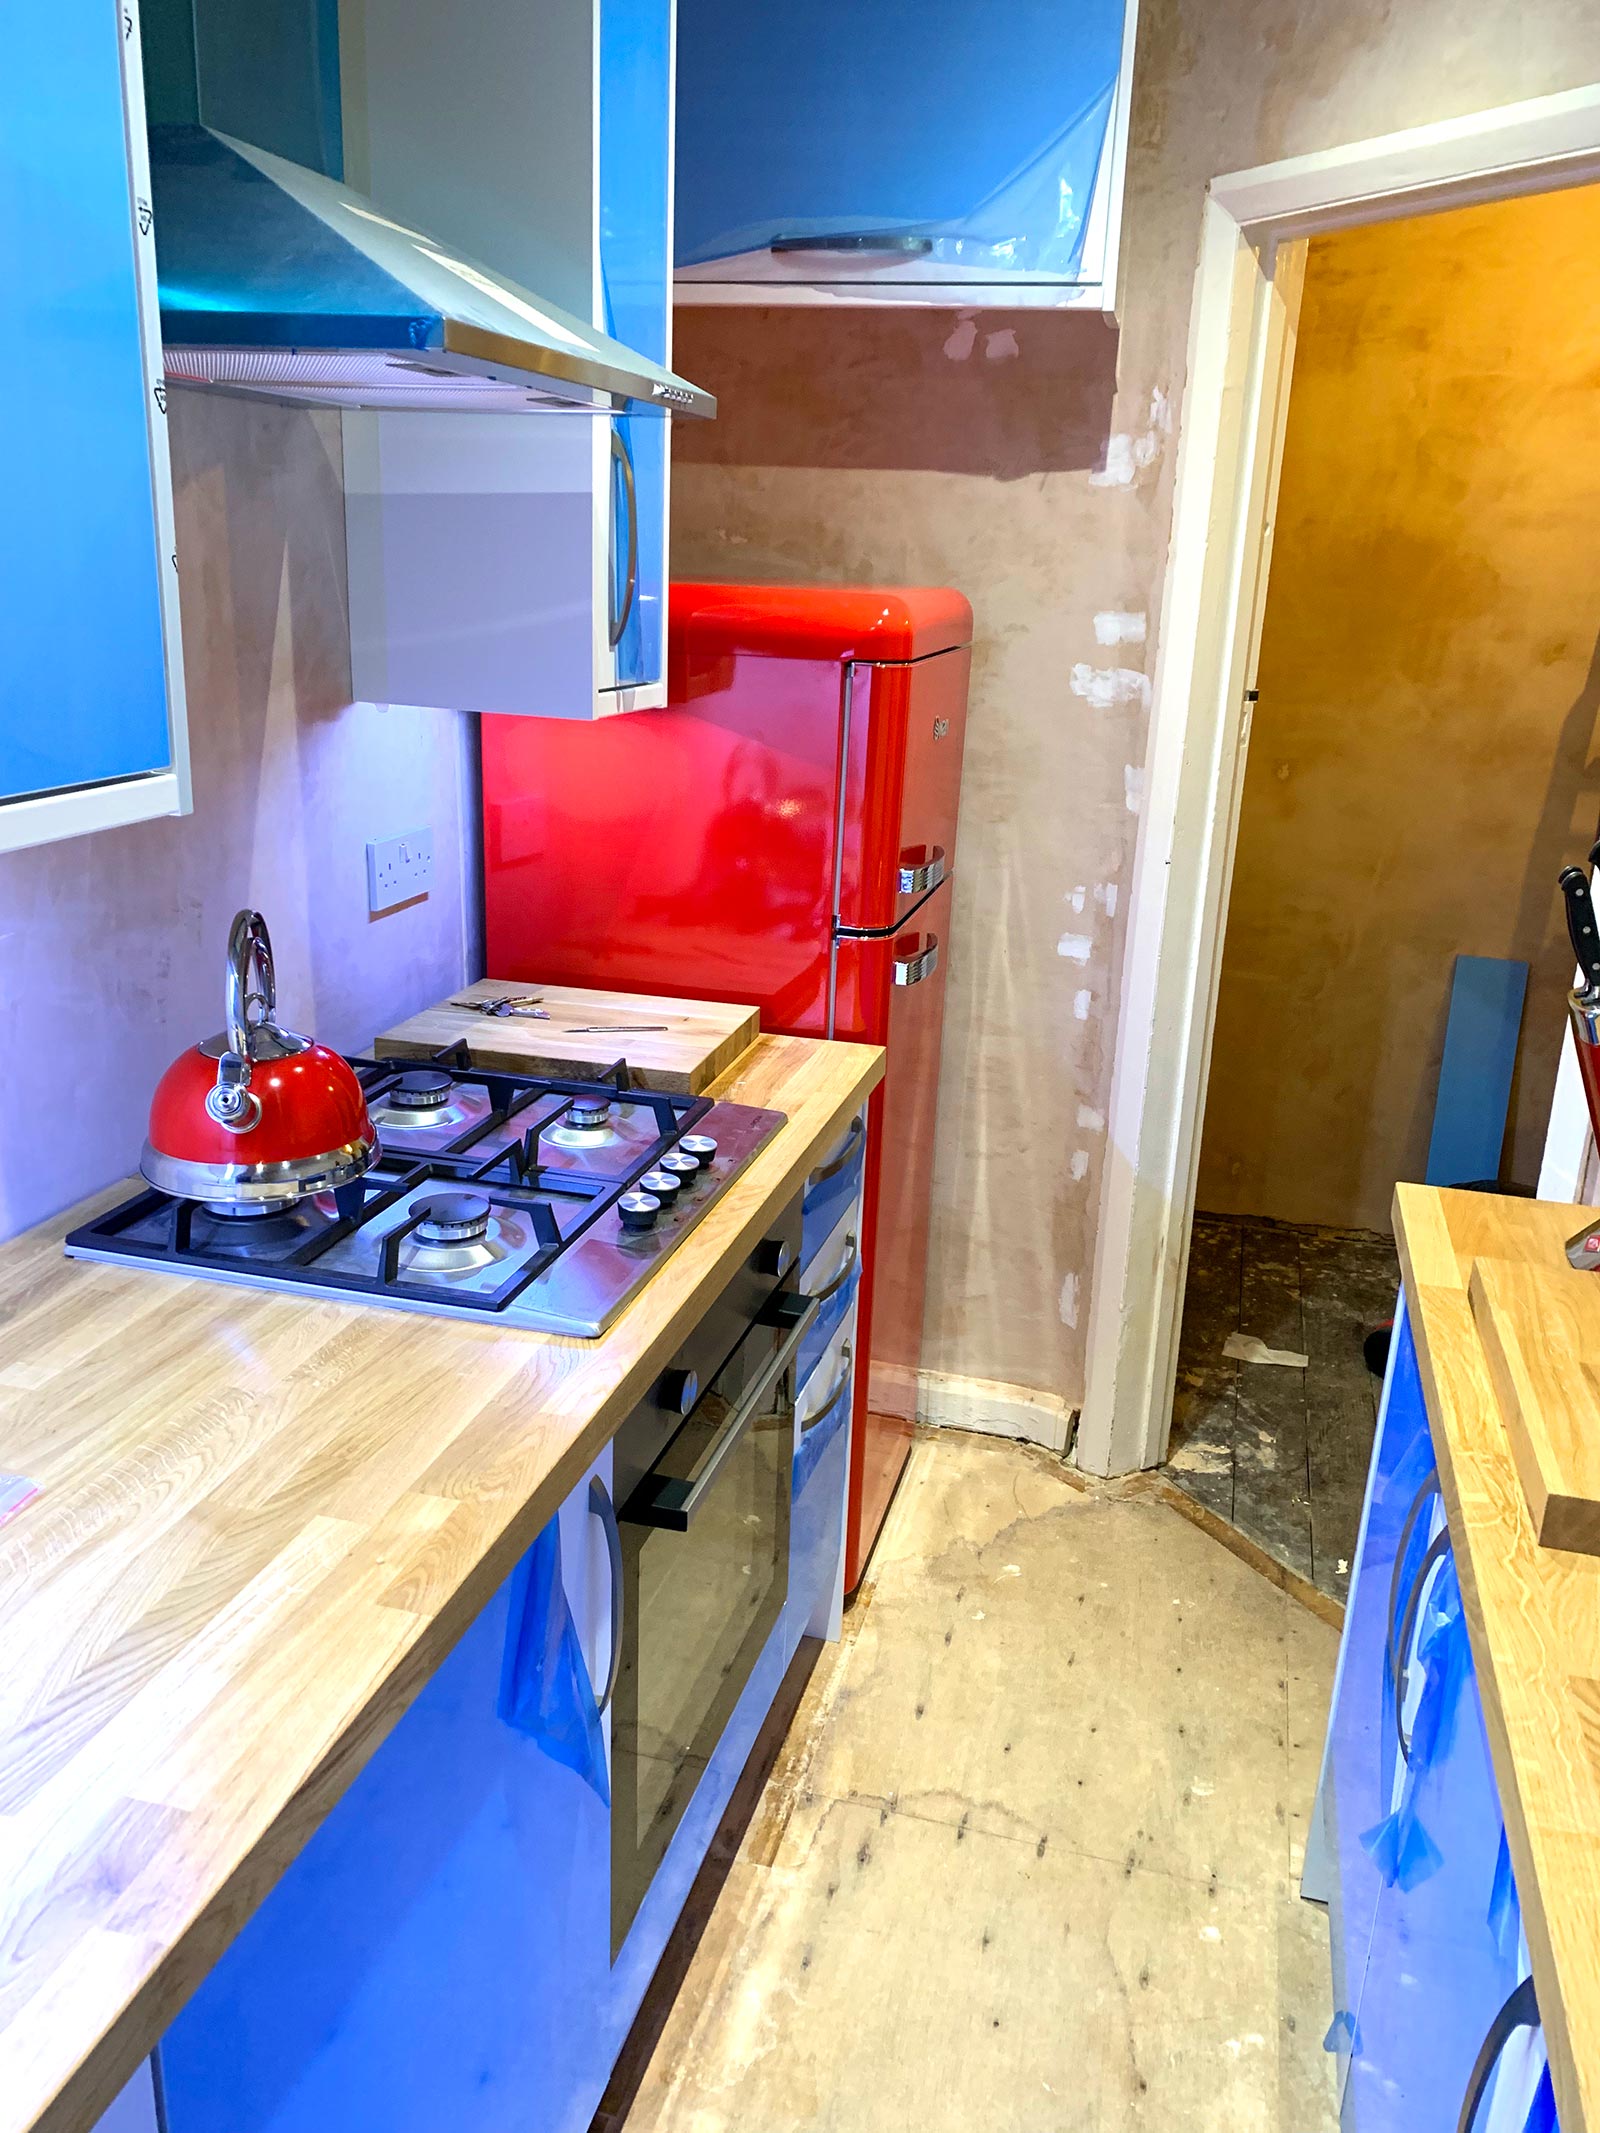
Loving the 50’s style red fridge!
Some tiling was required in the kitchen and once again my cousin had someone he regularly used who was happy to help. To add to the contemporary look I was going for, white metro tiles were used which really brought things together and enhanced the modern style.
There were some clever design touches in the kitchen too like the imaginative use of a small kitchen unit to cover the electrics switch board and meter, hiding the main switch and fuse for the oven in one of the cupboards, extra plug sockets which included USB ports and the addition of the Hive Heating System all making the flat future proof for a few years to come.
The washing machine was integrated into the units under the main work surface keeping everything sleek, neat and tidy. I think at this point the boy was starting to understand my vision for the flat which was great!
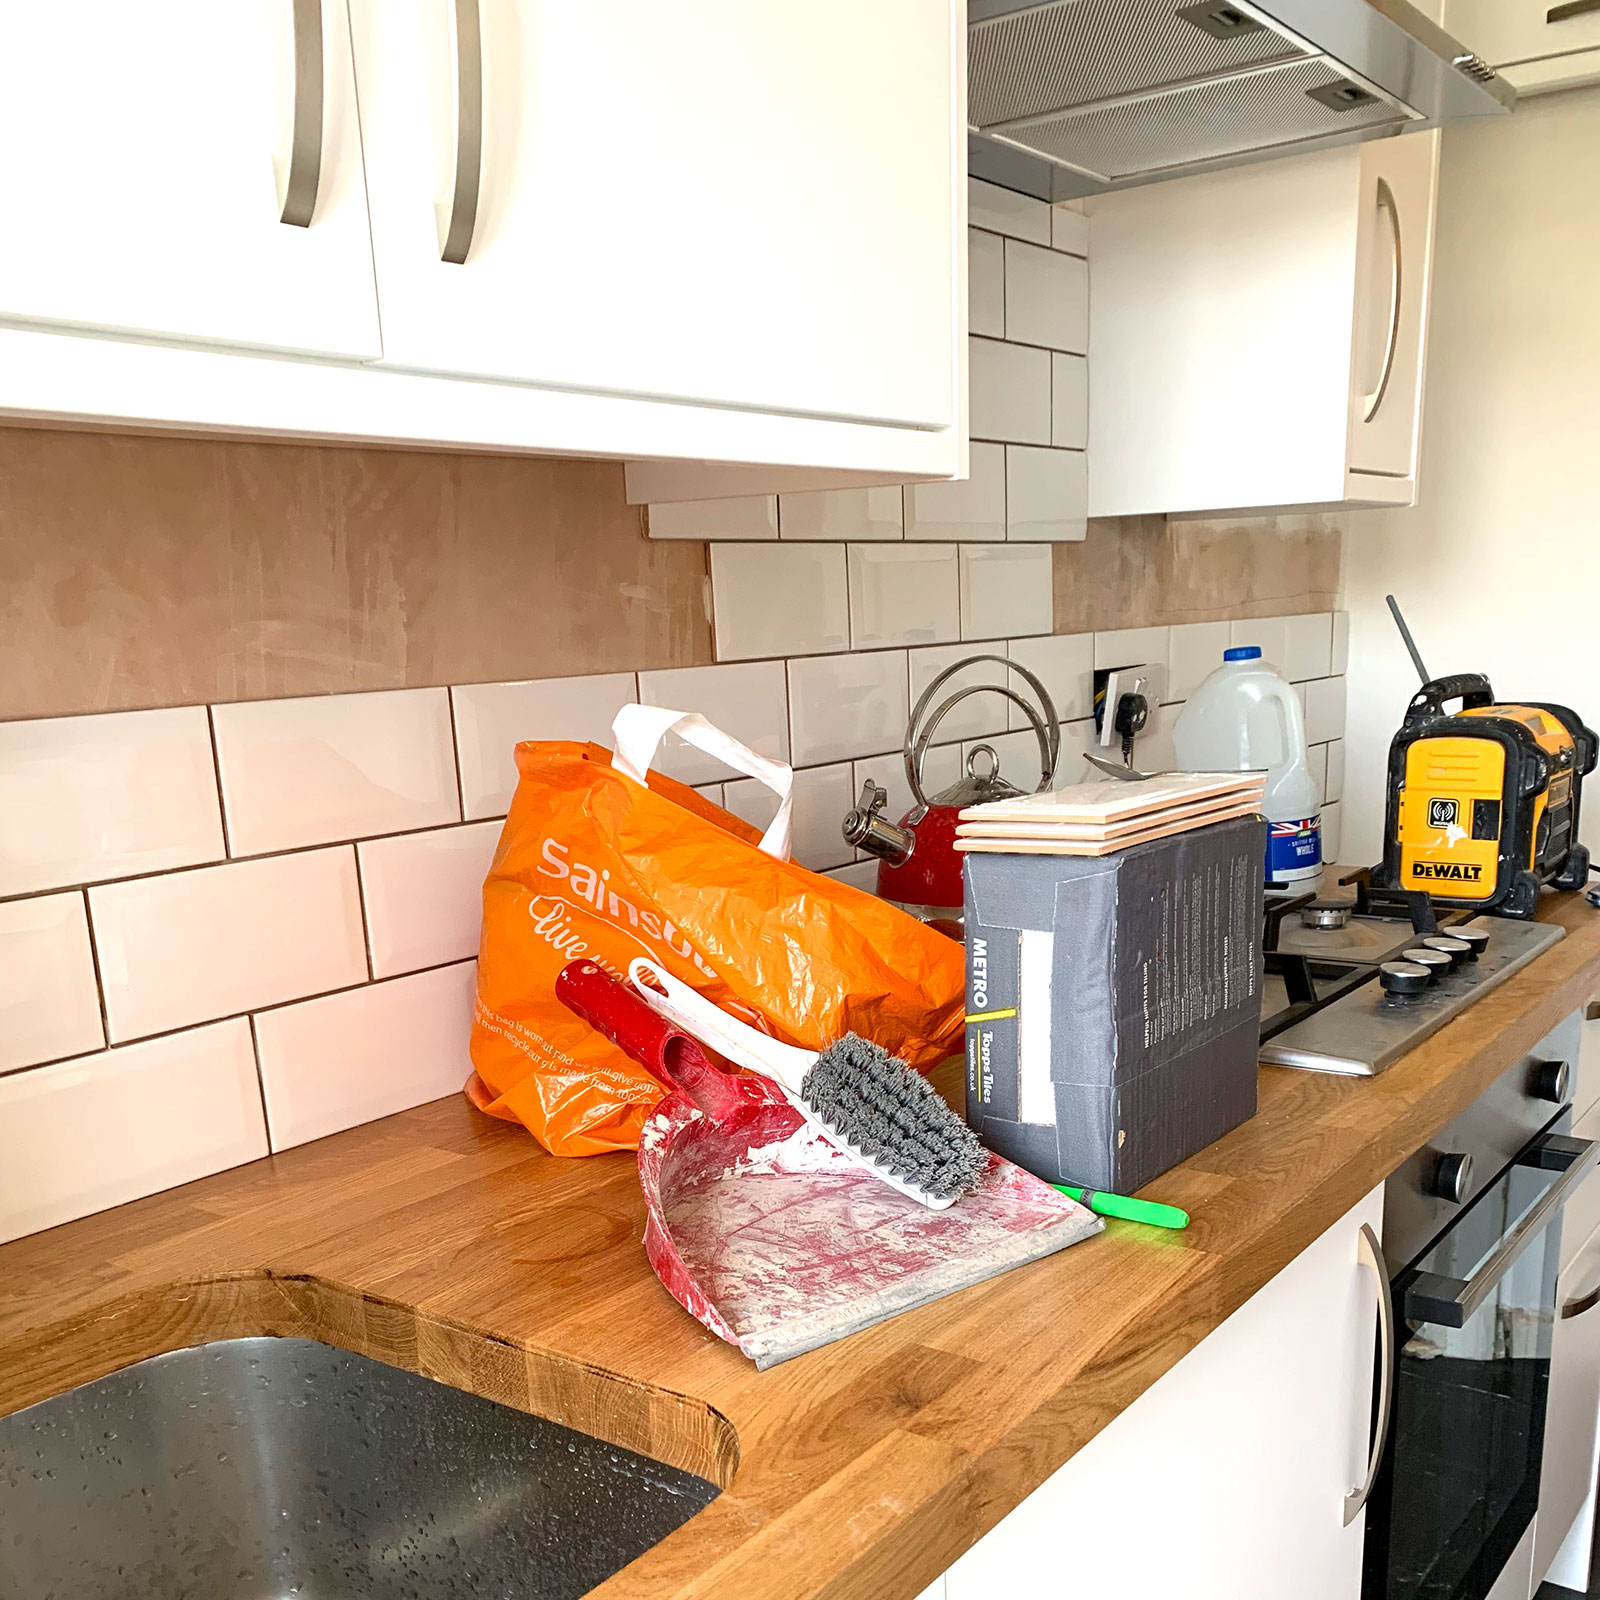
Metro tiles going on nicely.
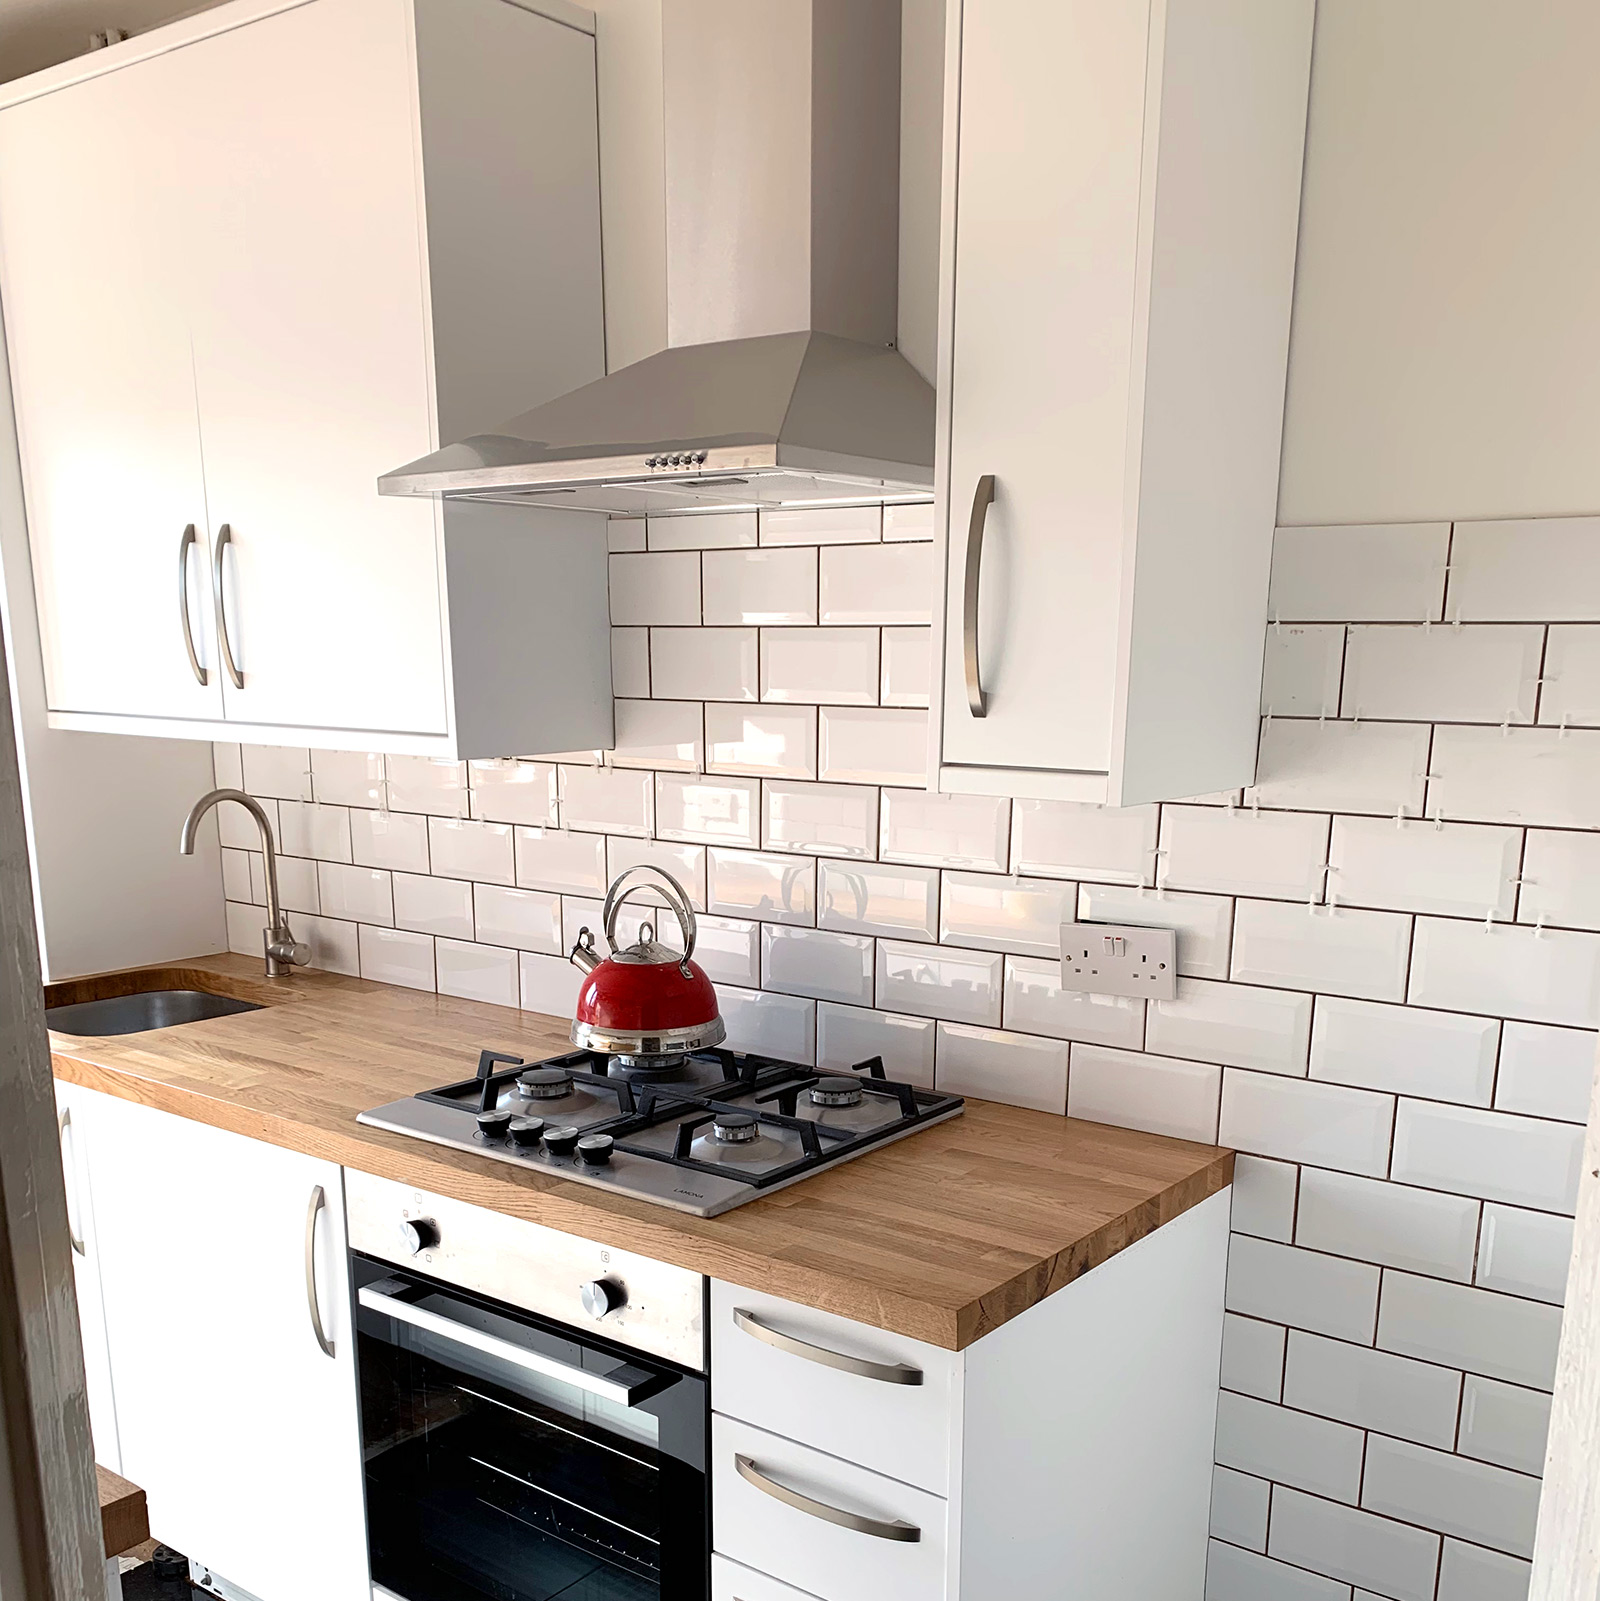
The new hob all plumbed in.
With the addition of the electrics in the kitchen I was going slightly over budget but with some clever little changes at the design stage I was able to keep things financially in check. This is something that was vitally important as I had no extra money to tap into if i didn’t keep an eye on the spend.
As I was finding out, good management of a project like this is key to it’s success. Careful planning and constantly re-evaluating how things are progressing really does make a big difference.
Thinking about the project management side of things before I started did give me some sleepless nights but as I ultimately found out, managing something like this is not impossible and is very rewarding. If I can do it I reckon anybody can…
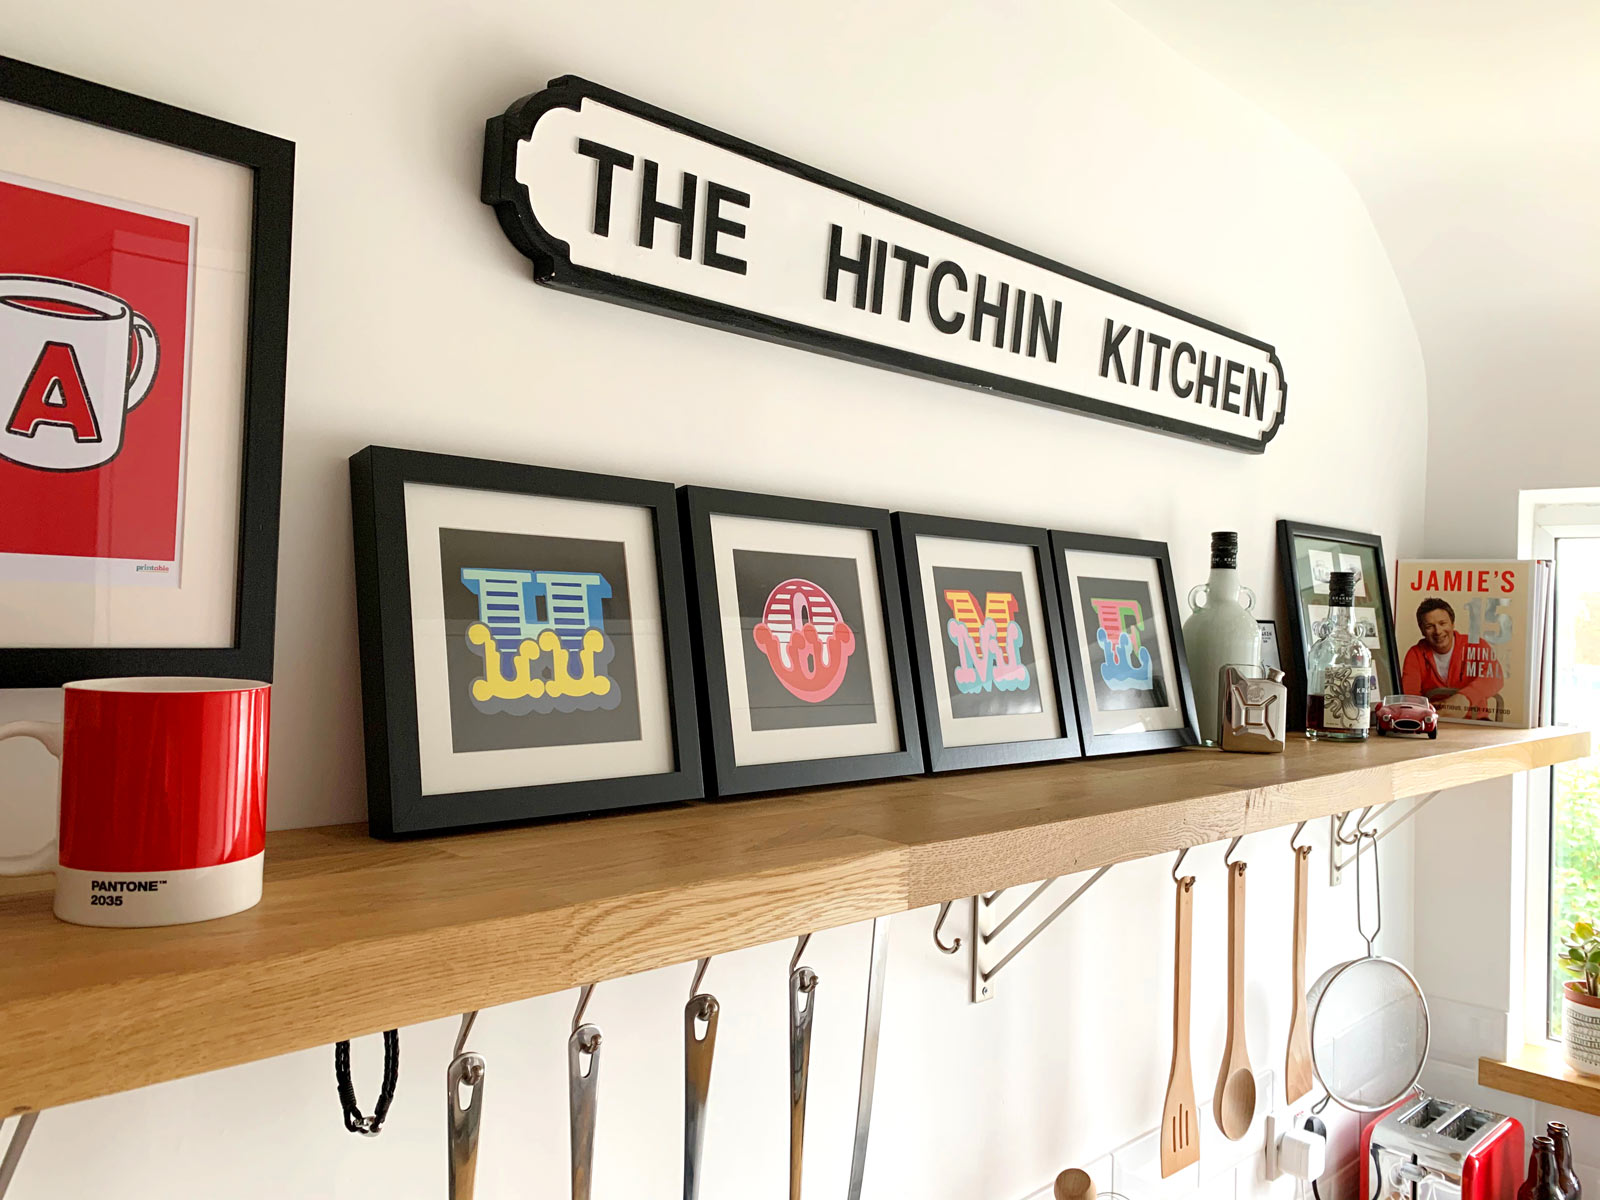
Making a home a home.
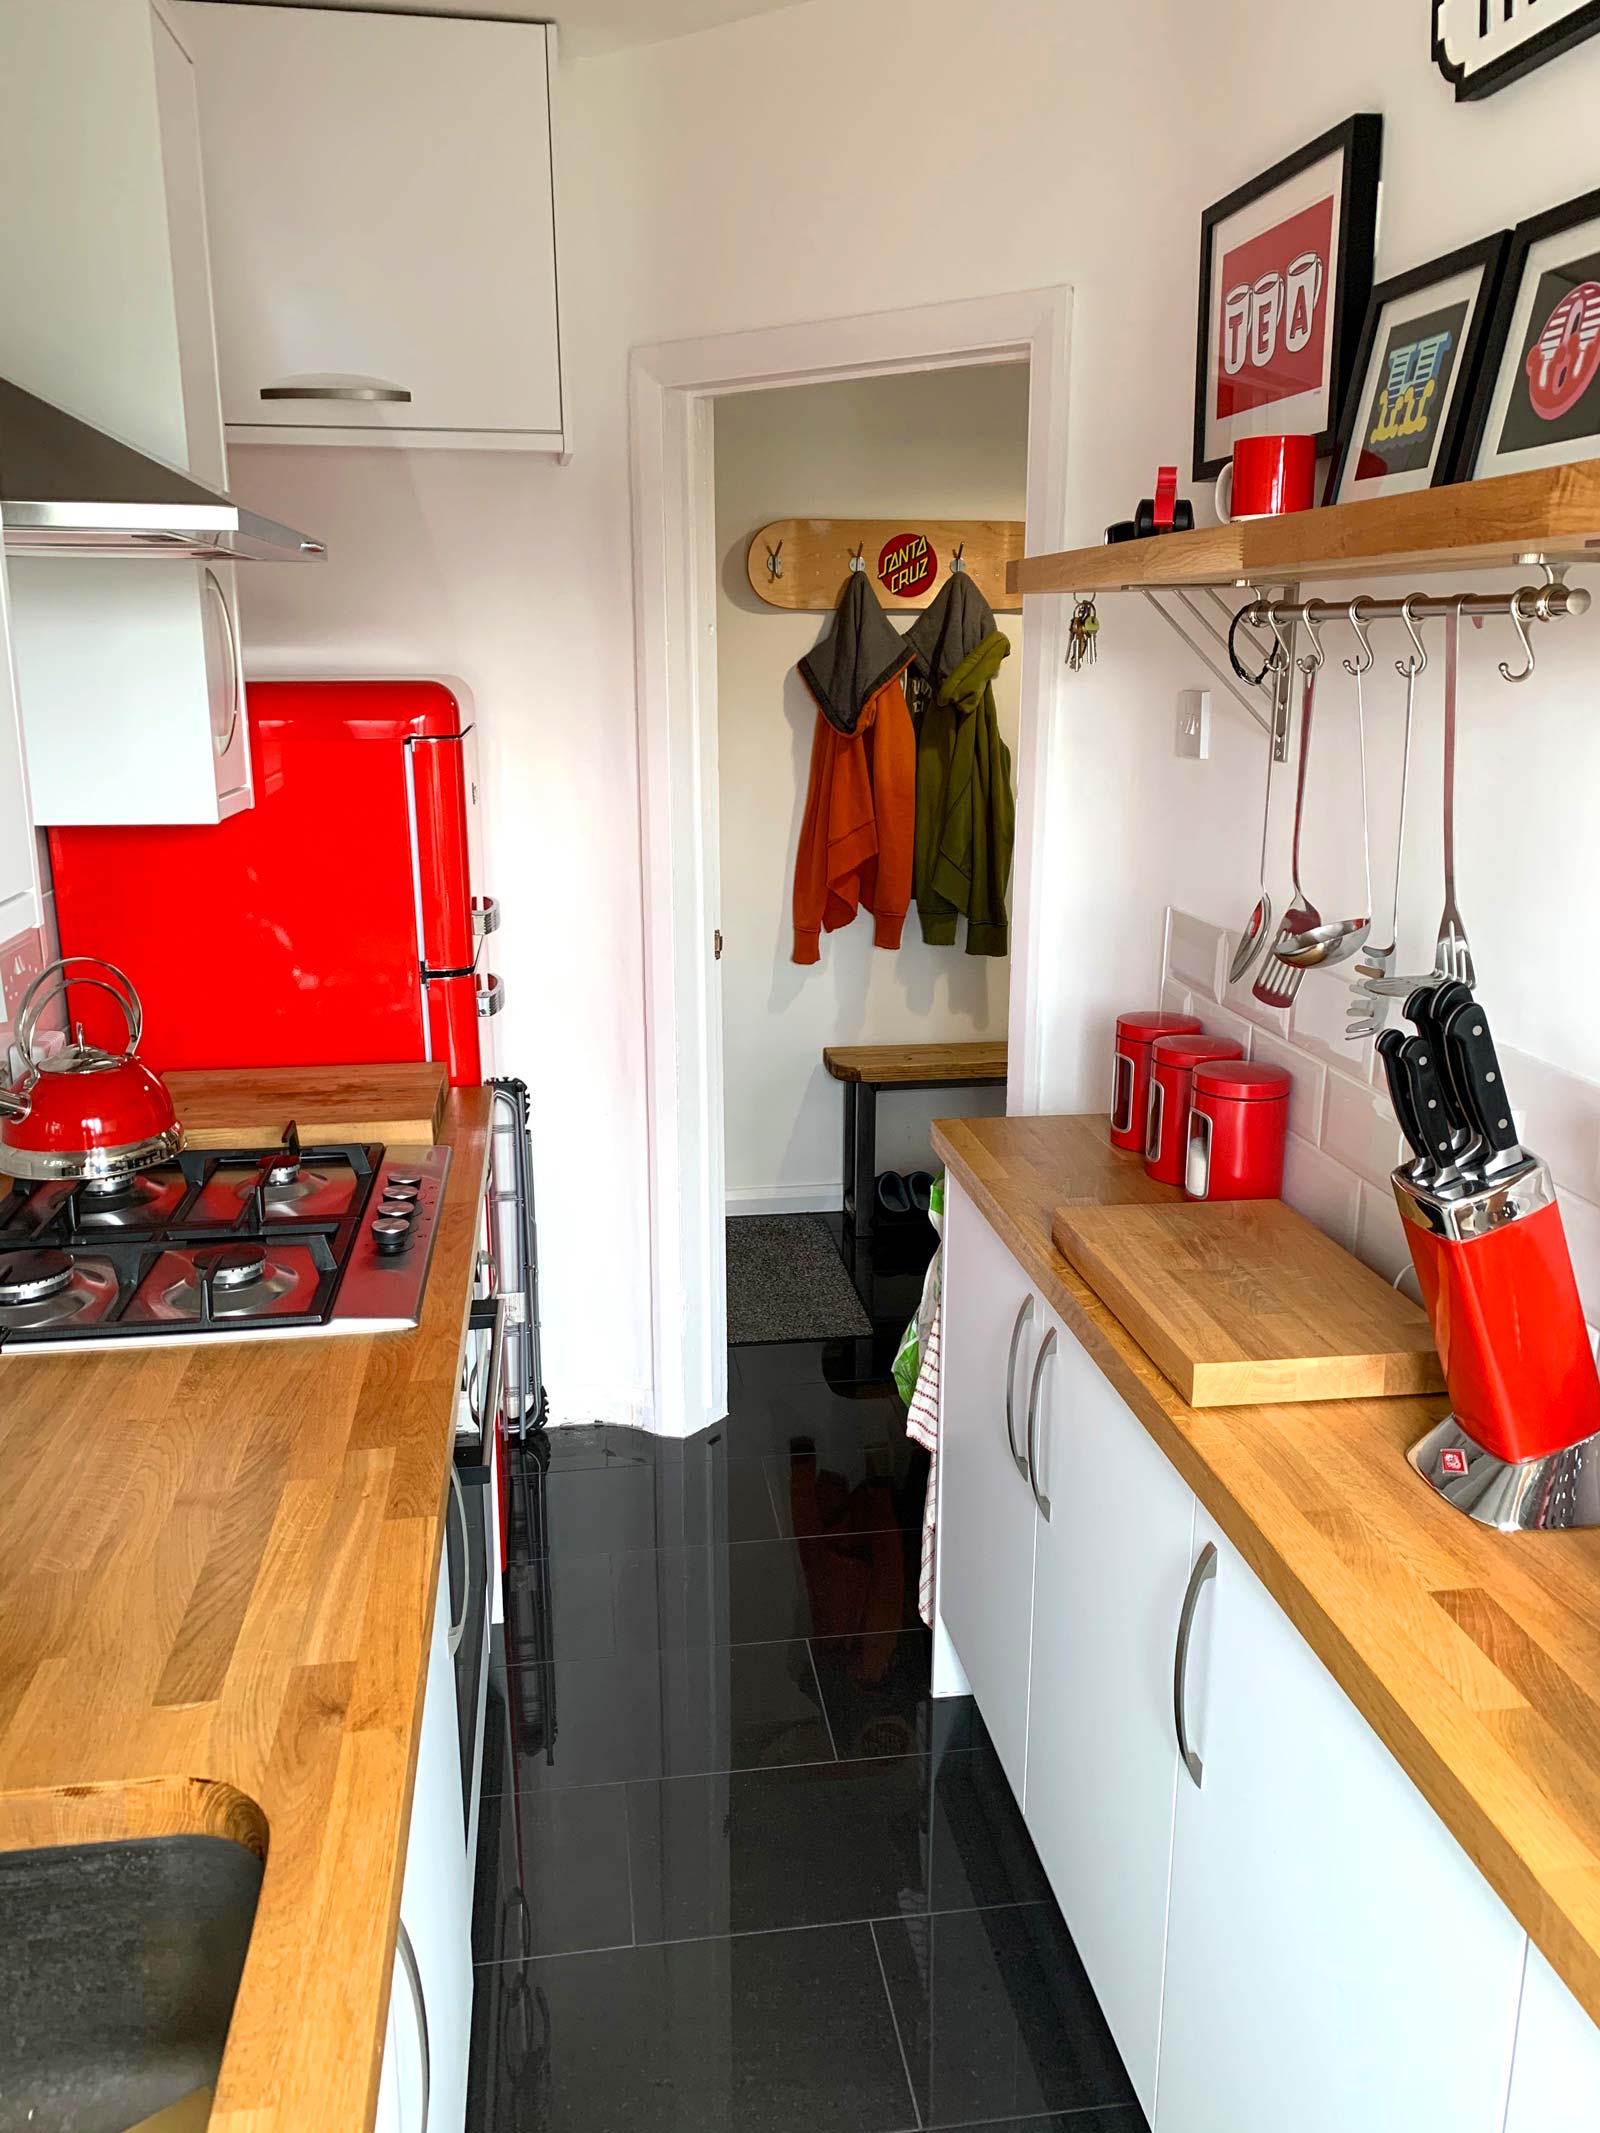
Bit of a red theme going on.
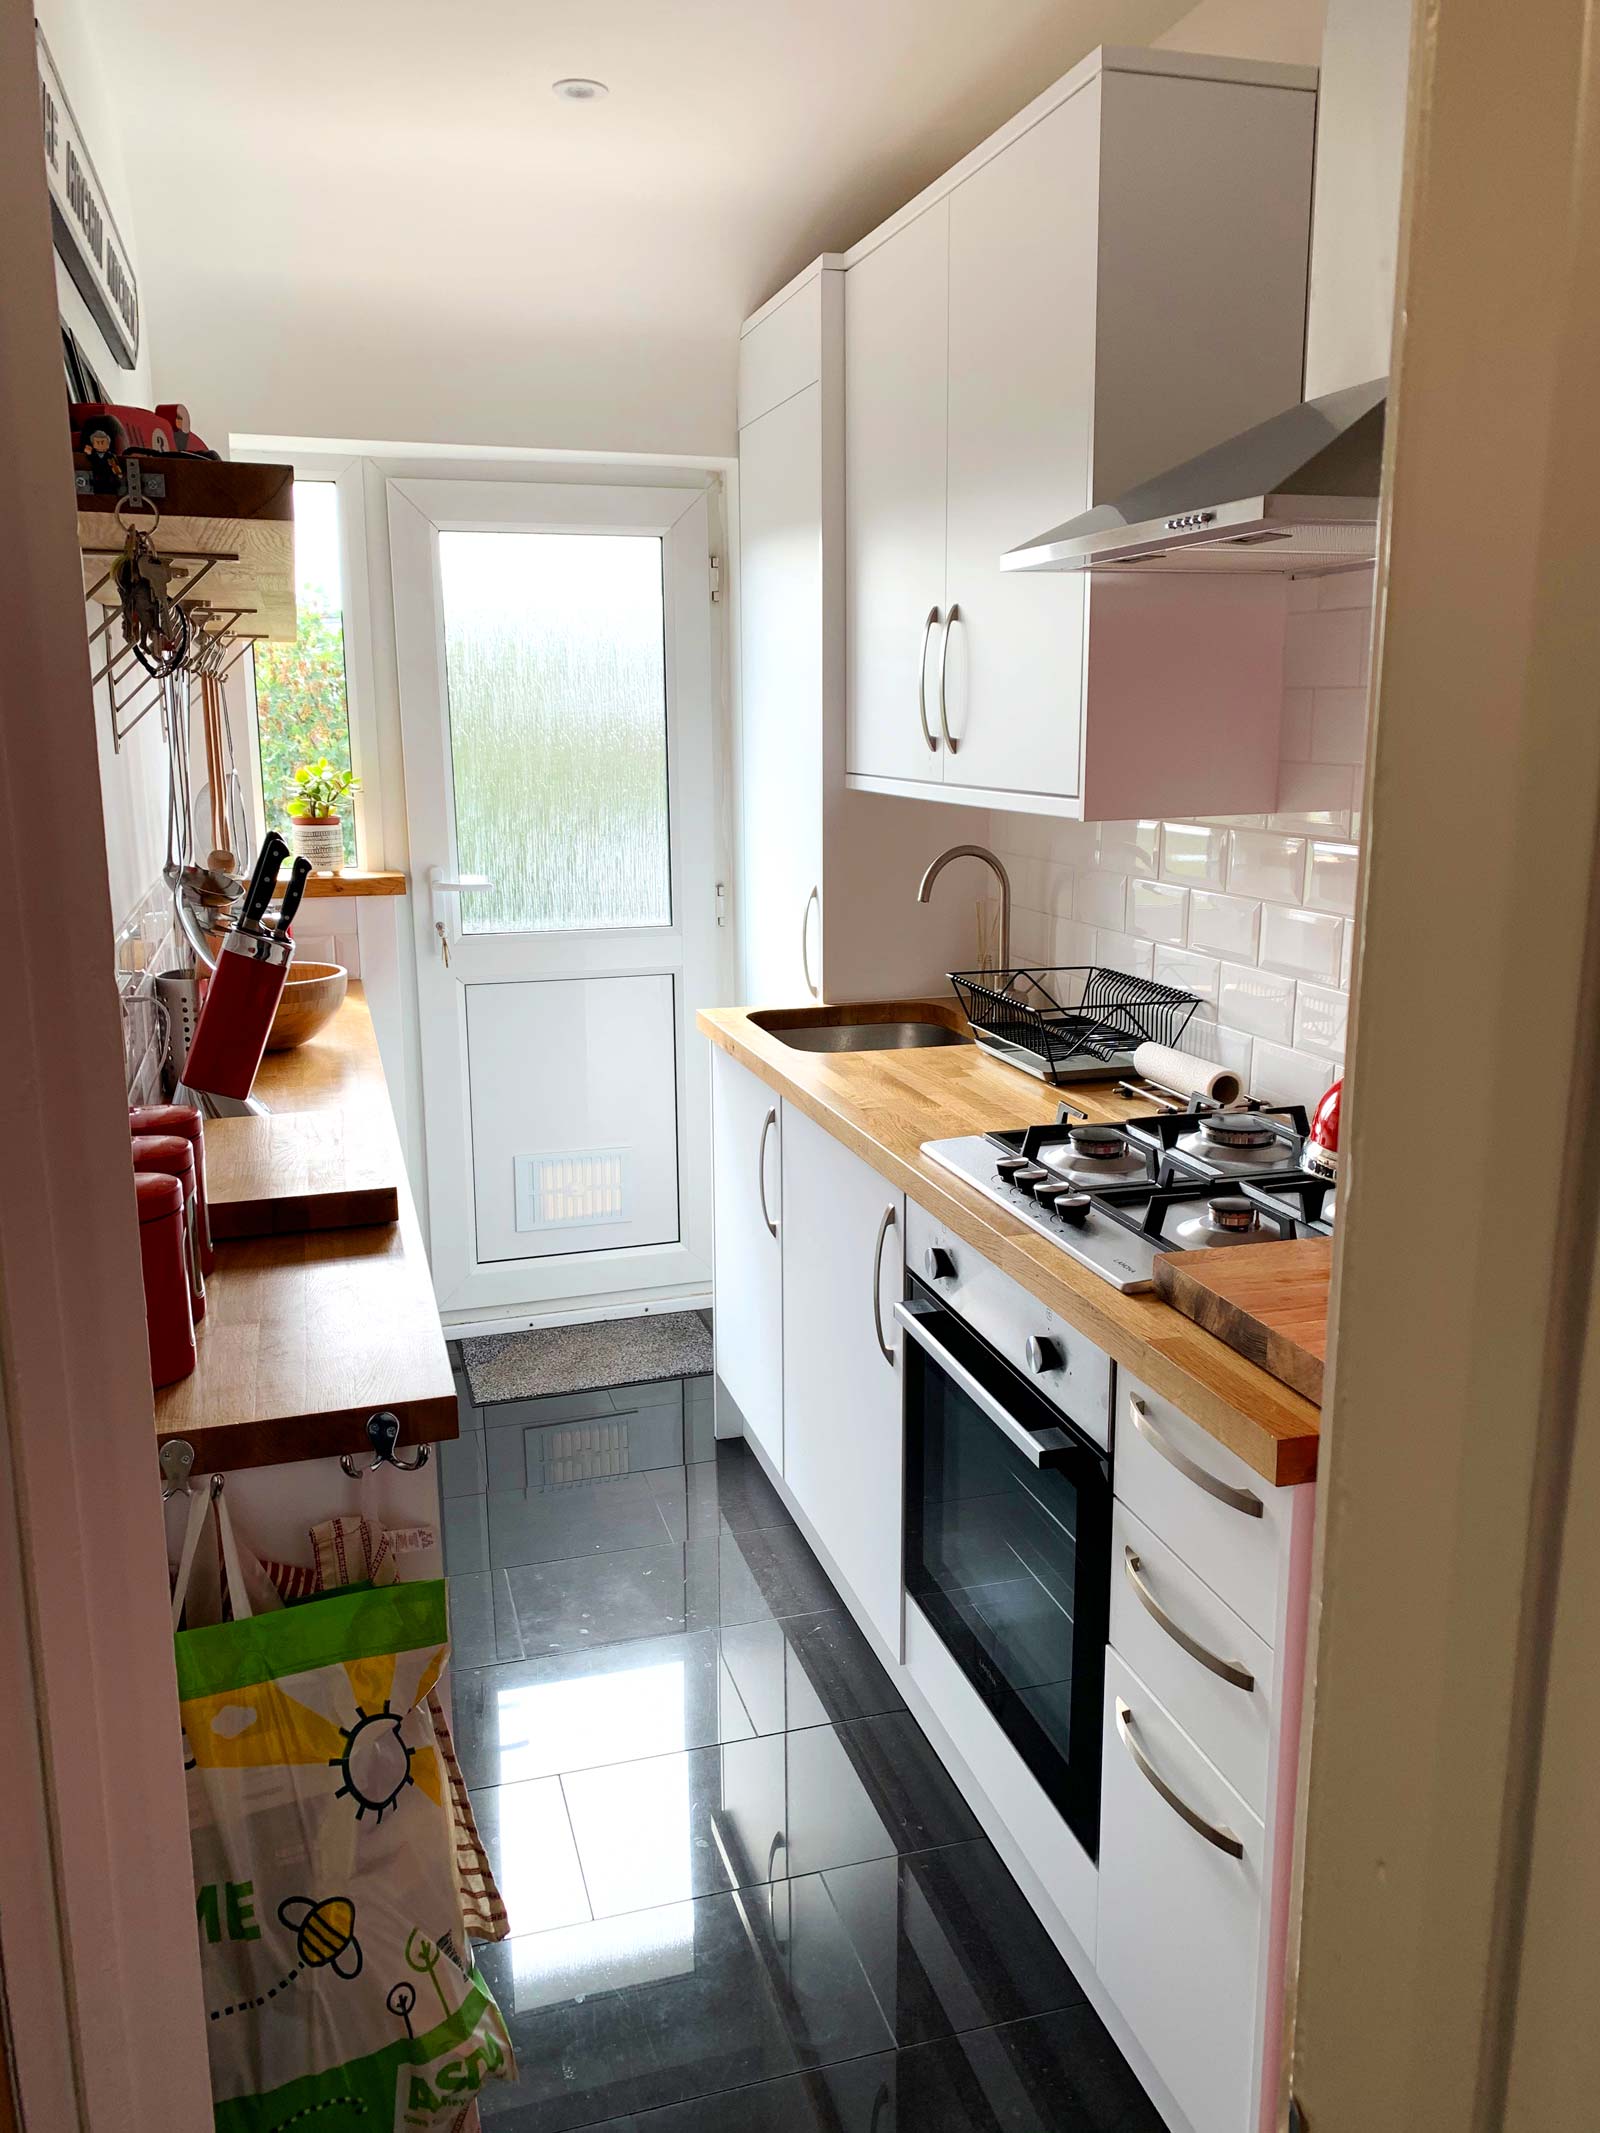
All ready to start cooking!
Flat Refurbishment – Part 2
flat refurbishment – part 2
Before I get into part two I just have to say that this project would’ve been a nightmare if it wasn’t for the love and support of my partner Heather. She agreed to let me live with her whilst I worked on the flat which meant all my possessions could be put into the main bedroom so the rest of the flat was free to be transformed! I ended up staying for over 3 months but luckily for us that strengthened our relationship, so much so that we are now living together permanently, massive thanks to you Heather. 🙂
So, I had the keys, my stuff was all moved in, the only thing left to do was show the place to my son. He was 12 at the time and I guess he probably couldn’t visualise what the flat could become. He was pretty excited on the way as it would be the first home that was just for the both of us, something we had wanted for quite a while, but that excitement quite visibly changed to horror when he walked in through the front door.
As you have seen from the pics in part 1 the place was a bit of a mess and what would be his bedroom was no different. I showed him in and quite proudly said “this will be your room”, I think it was all he could do to stop himself from crying. I tried my hardest to convince him that it would look great when I was finished but sadly it wasn’t working.
I guess this is why I started on his bedroom first, I wanted him to be happy about the flat and a happy boy would mean a happy dad! A point to note is that every room was covered in wood chip wall paper, his room even had it on the ceiling. This is where the journey really got started, stripping the wallpaper! I was expecting this to be a difficult task but most of it just peeled straight off and in a few hours the room was back to bare plaster. I knew that I didn’t want to repaper the walls, I wanted to paint straight on to the plaster but this stuff wasn’t smooth enough for that so it left me wondering what to do.
At the same time as doing the boy’s room I got things moving with the kitchen. This is where I have been quite lucky throughout the refurb with the help from friends and family. My cousin who is a carpenter by trade runs his own local business and one of the many things they do is fit kitchens. He was there to look at and quote for the kitchen when I mentioned the bedroom walls. He took one look at the walls and suggested the best thing to do would be to get them re-skimmed with a fresh coat of plaster, so that’s what I did. My cousin is in touch with lots of trades that he works with and knew a plasterer that could help out and as you will see in future posts the whole flat ended up being re-skimmed.
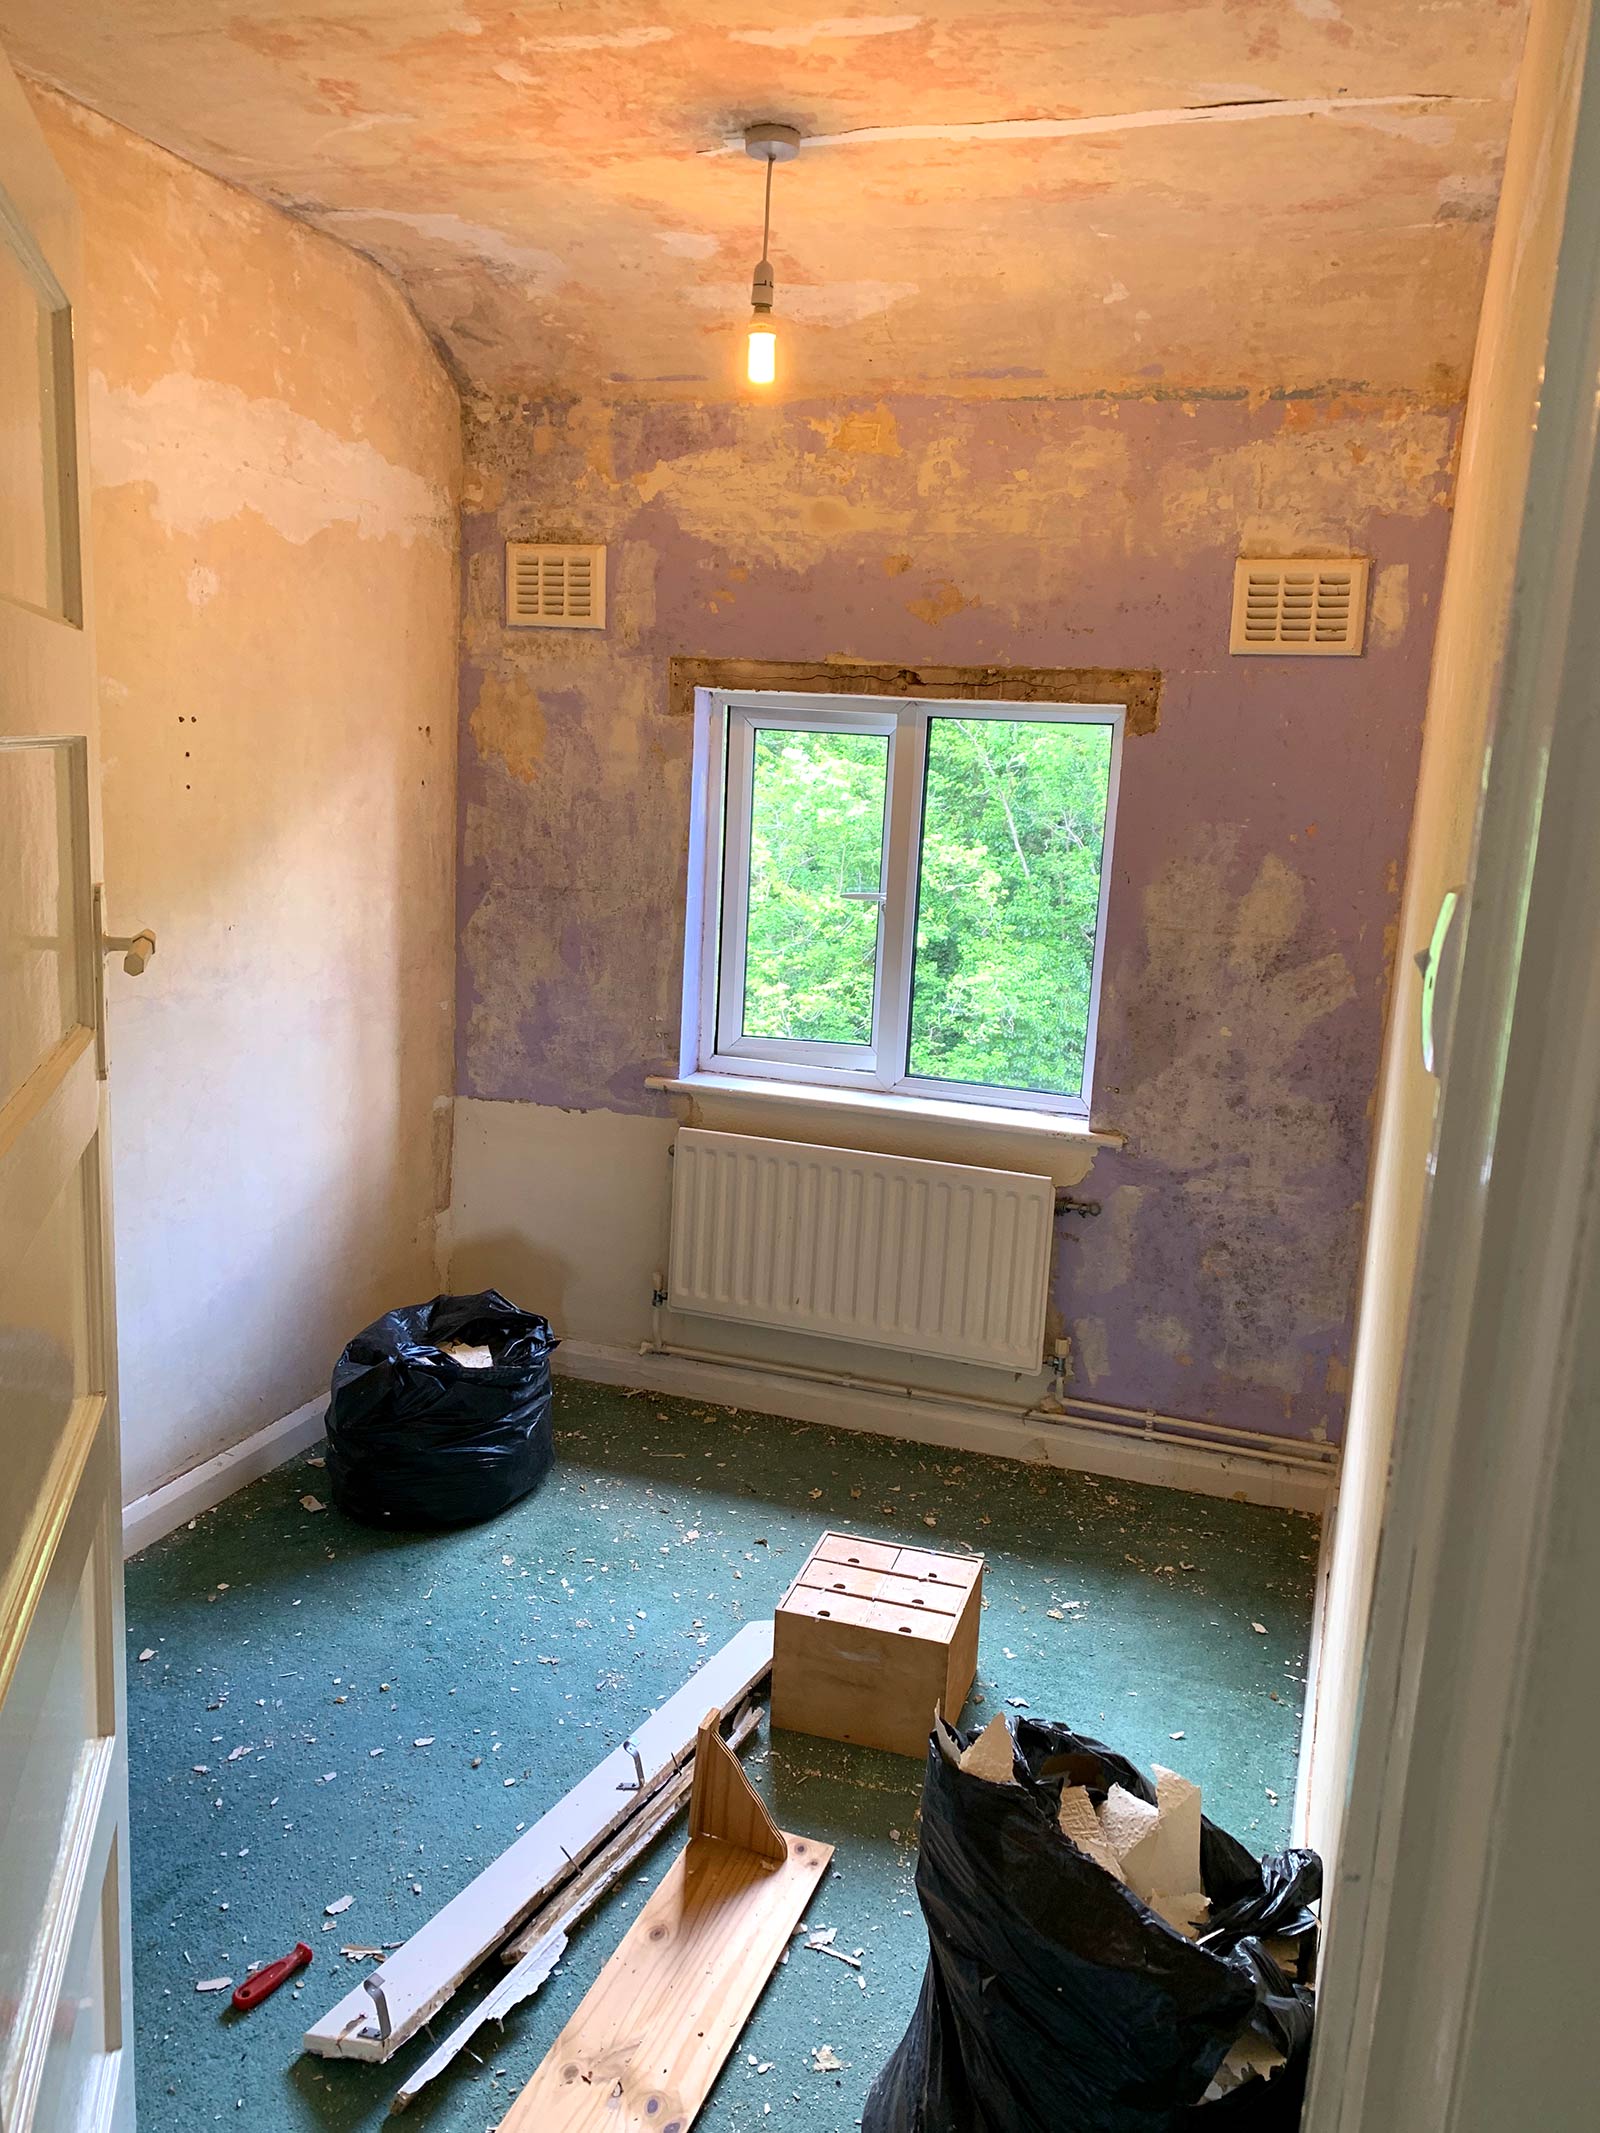
Stripping the wood chip from the walls.

The room with a fresh new skim.
You can see from the photos there were little areas of mould here and there, but it was only on the surface where moisture had been trapped between the wallpaper and the wall and none of it had actually penetrated the plaster. This was all carefully cleaned before the new skim was applied, it didn’t even take a day for the plasterer to finish the room and when it was done it really changed the whole feel of it. It took a few days for the plaster to dry before I could paint on it during which time I worked on scrapping off thick layers of gloss paint from the wooden windowsill which also needed to be repainted.
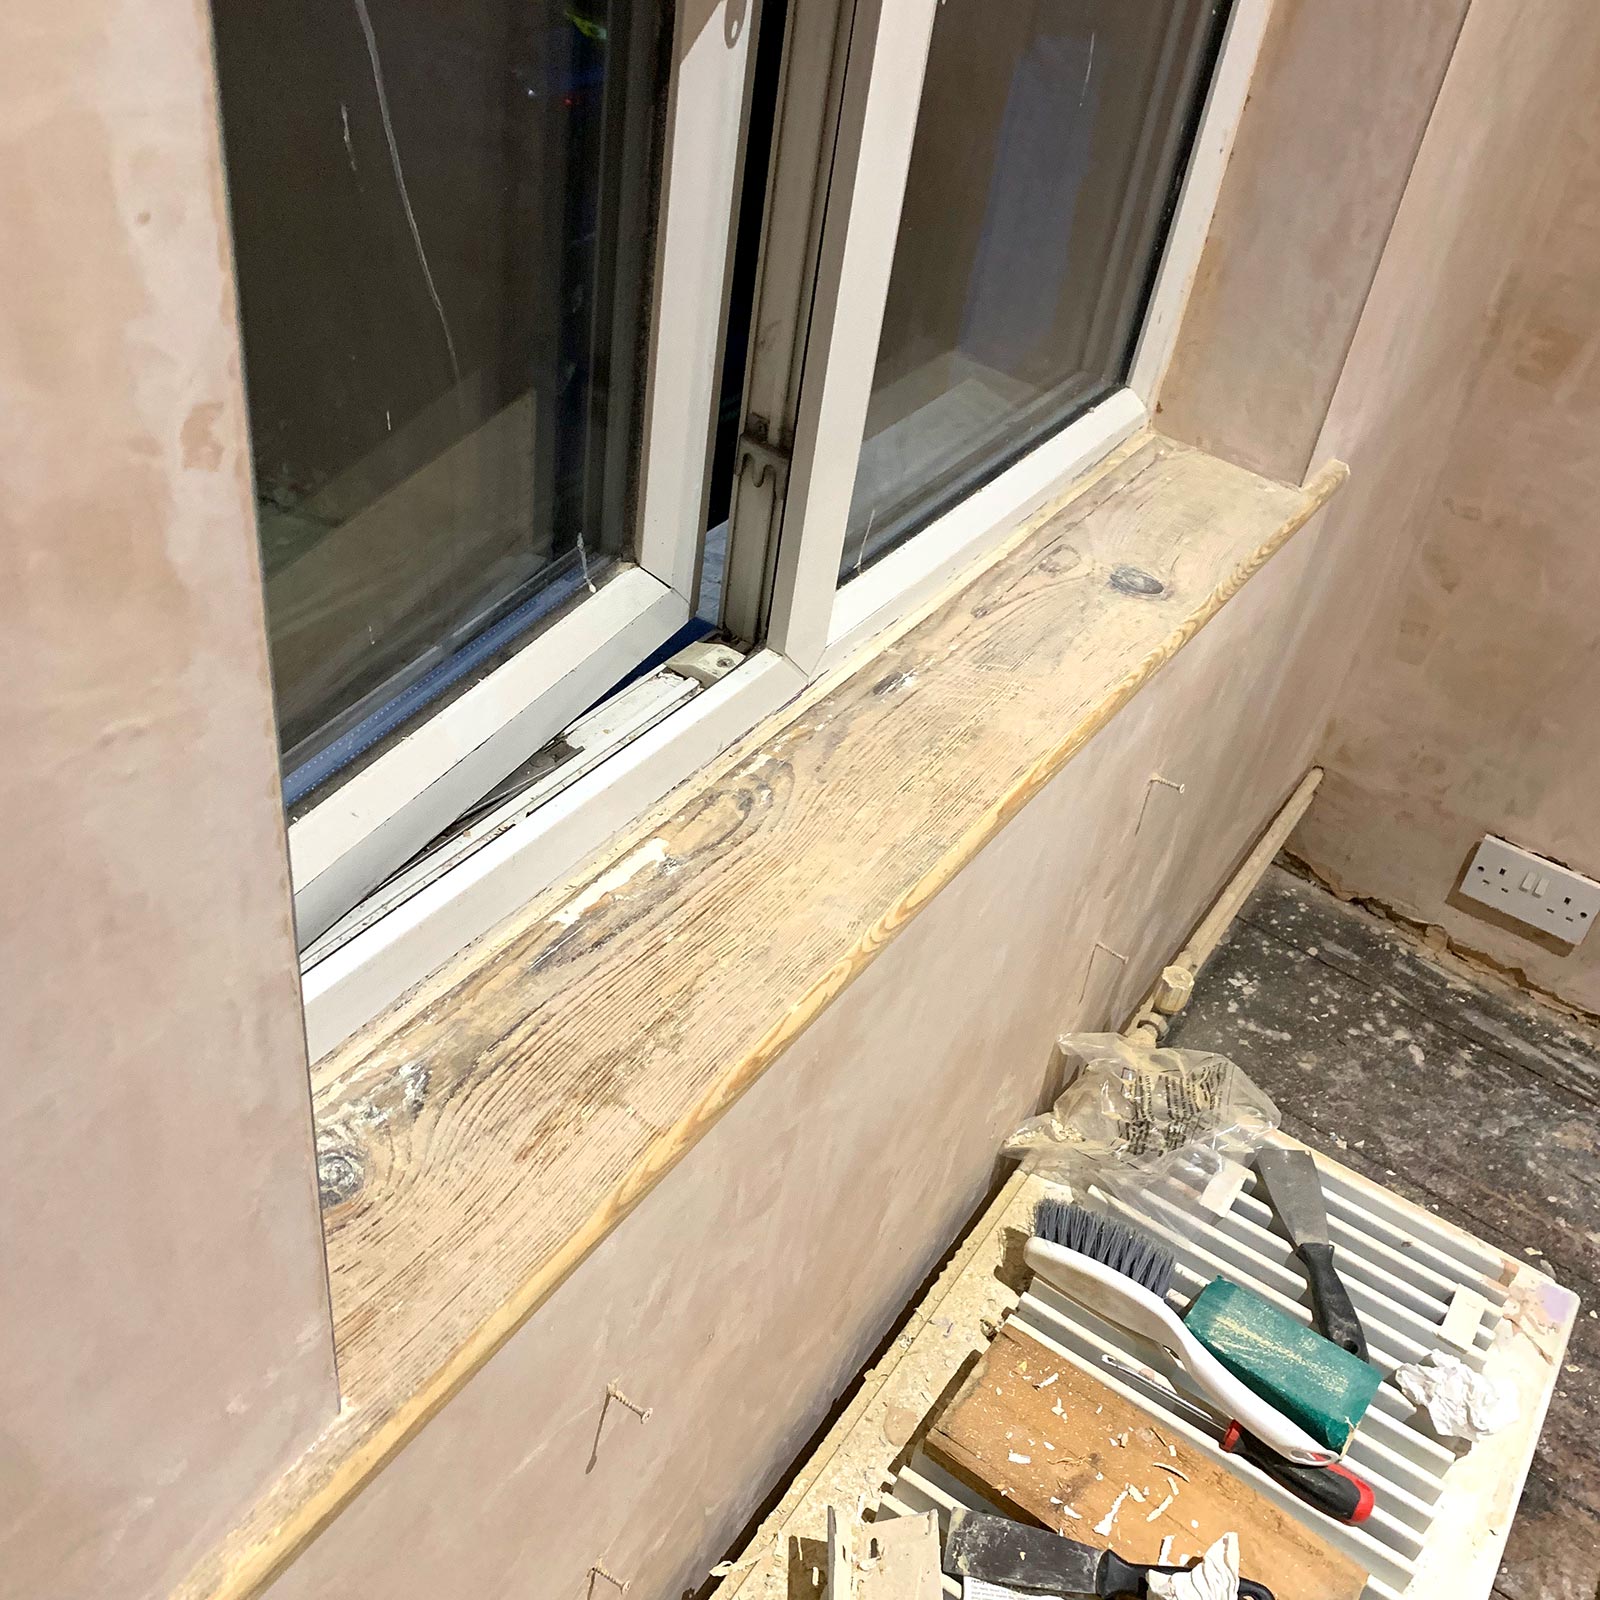
Stripping layers of old gloss took an age!
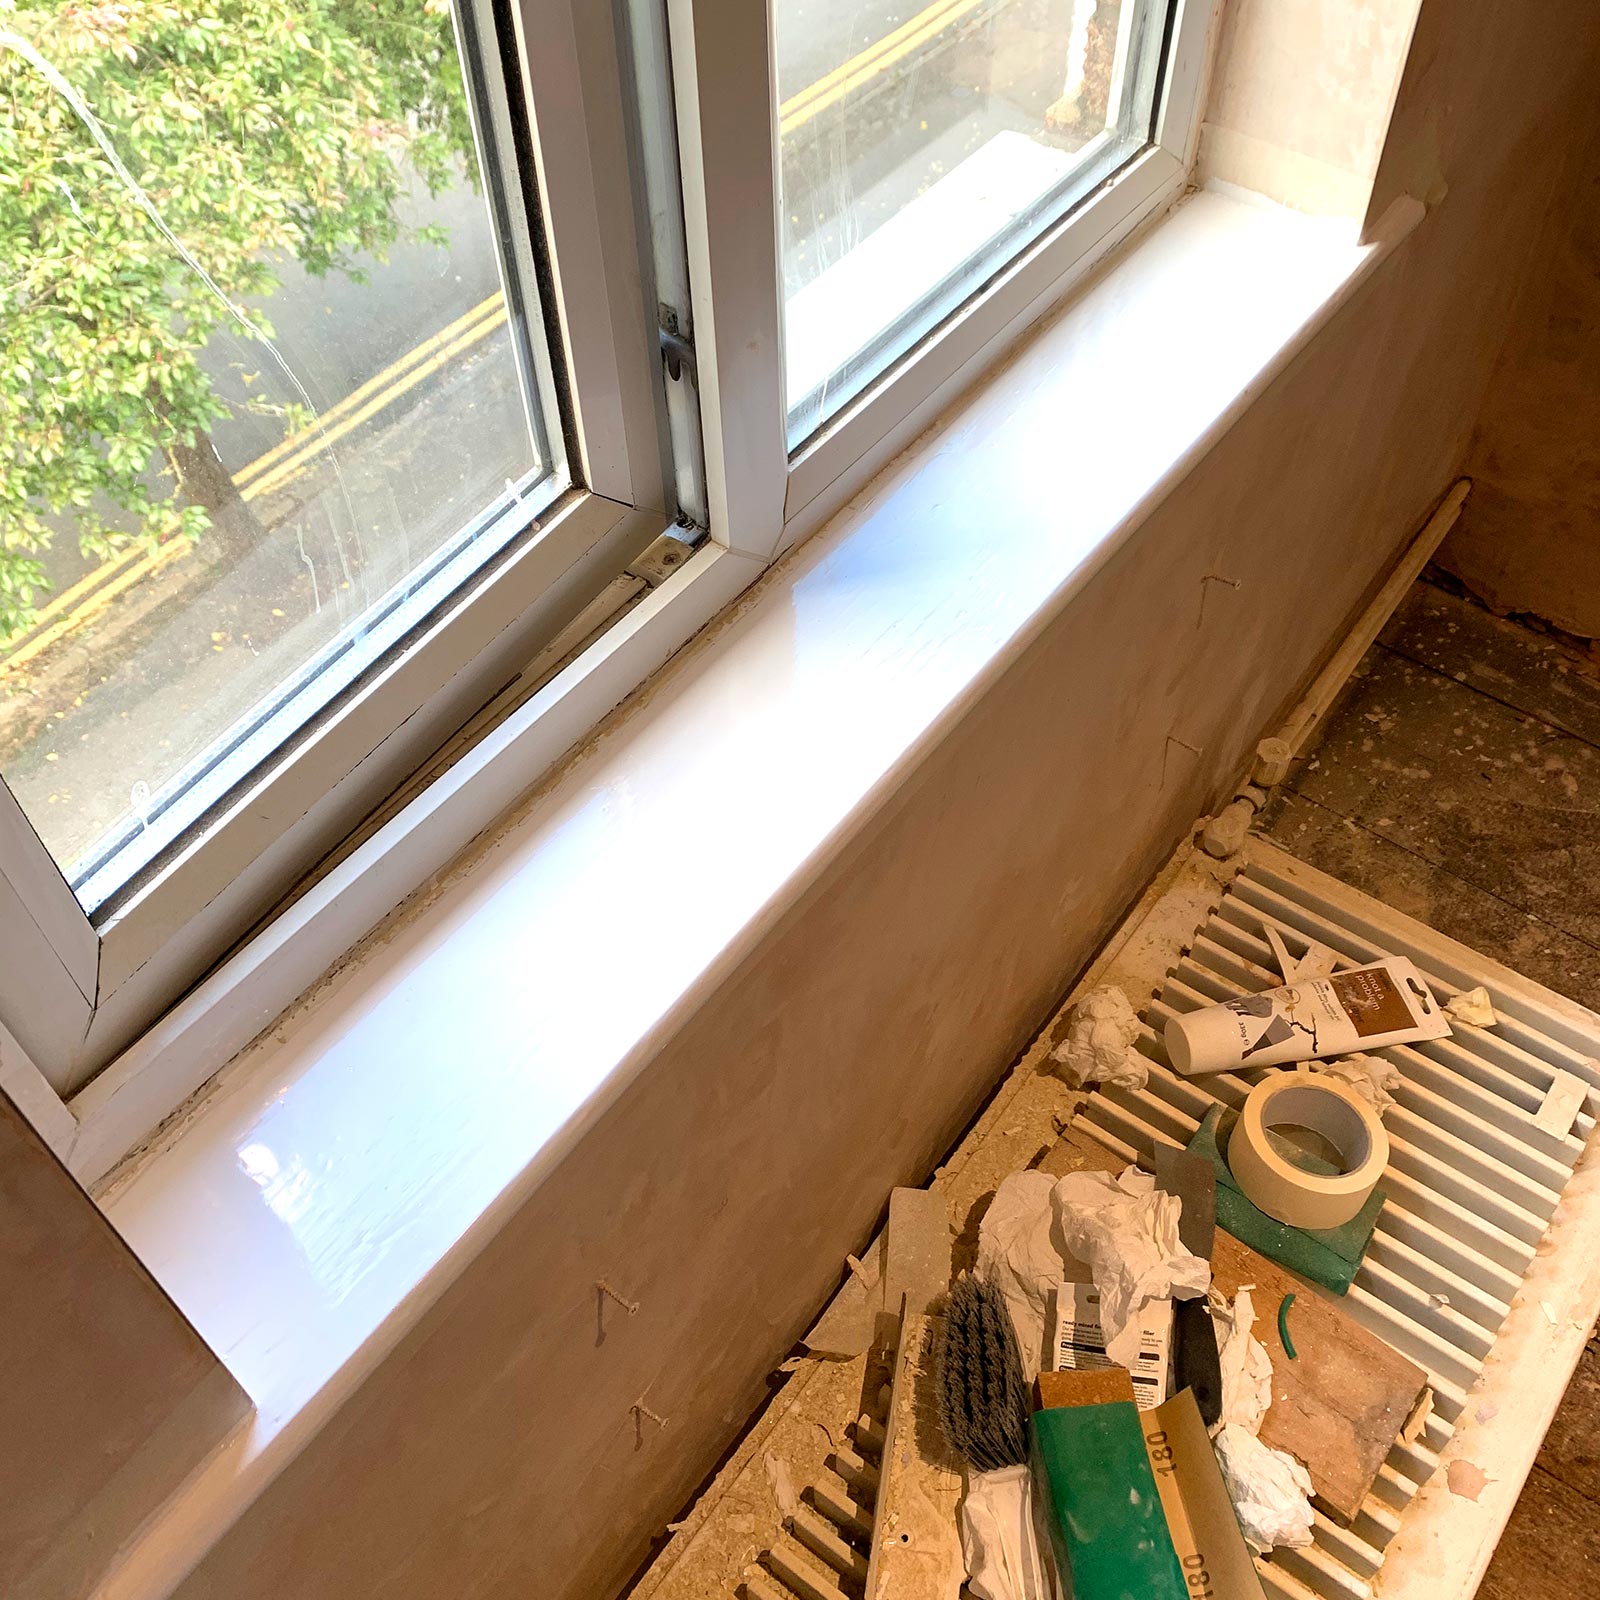
The windowsill looking as good as new!
The plasterer asked if I was going to paint or wallpaper the room and it’s a good job he did otherwise I wouldn’t have known that the first coat on fresh plaster needs to be a ‘miss coat’. For anyone else who doesn’t know this means the first coat needs to be a 50/50 mix of paint and water so that it soaks into and bonds with the plaster (obviously the paint needs to be water based). So one miss coat and two further proper coats did the trick and I used this process throughout the flat with great results.
Being a flat in the middle of the block meant that every room only had one window for light to come through which is the part of the reason why I painted everywhere white because I wanted it to be as light and bright as possible. Regardless of light I would have painted everywhere white anyway as this is then a great backdrop to show off artwork on the walls which is where the splash of colour would come from, this was also partly the reason why printable-art.com was born.
I wanted my boy to be included in some of the decision making processes so that he felt part of the project too, something that I feel was important and beneficial for the both of us. We looked at bedroom furniture together and he decided on having a loft style bed with a desk underneath, a great idea given that the room was quite small. This then led to a decision on the ceiling lights. Because of the height of the loft bed it meant it wouldn’t have been a good idea to have a lampshade hanging from the ceiling, so we decided to have spotlights installed. This was made easier by the flat being top floor and benefiting from having a pitched roof with a loft! Obviously I would need the help of an electrician to do this and again my cousin knew an electrician who was more than happy to help out.
To make his bedroom a little more special I went for the Philips Hue colour changing bulbs, you can change the colour of these bulbs through an app on your phone or through a smart speaker as they are connected via wifi, this means they are slightly bigger than normal bulbs and required a slightly bigger housing to be installed to hold them in the ceiling. Now that my boy could see how his room was shaping up he was smiling again and with him now being able to see my vision this fuelled purpose and drive to get the rest of the flat done…
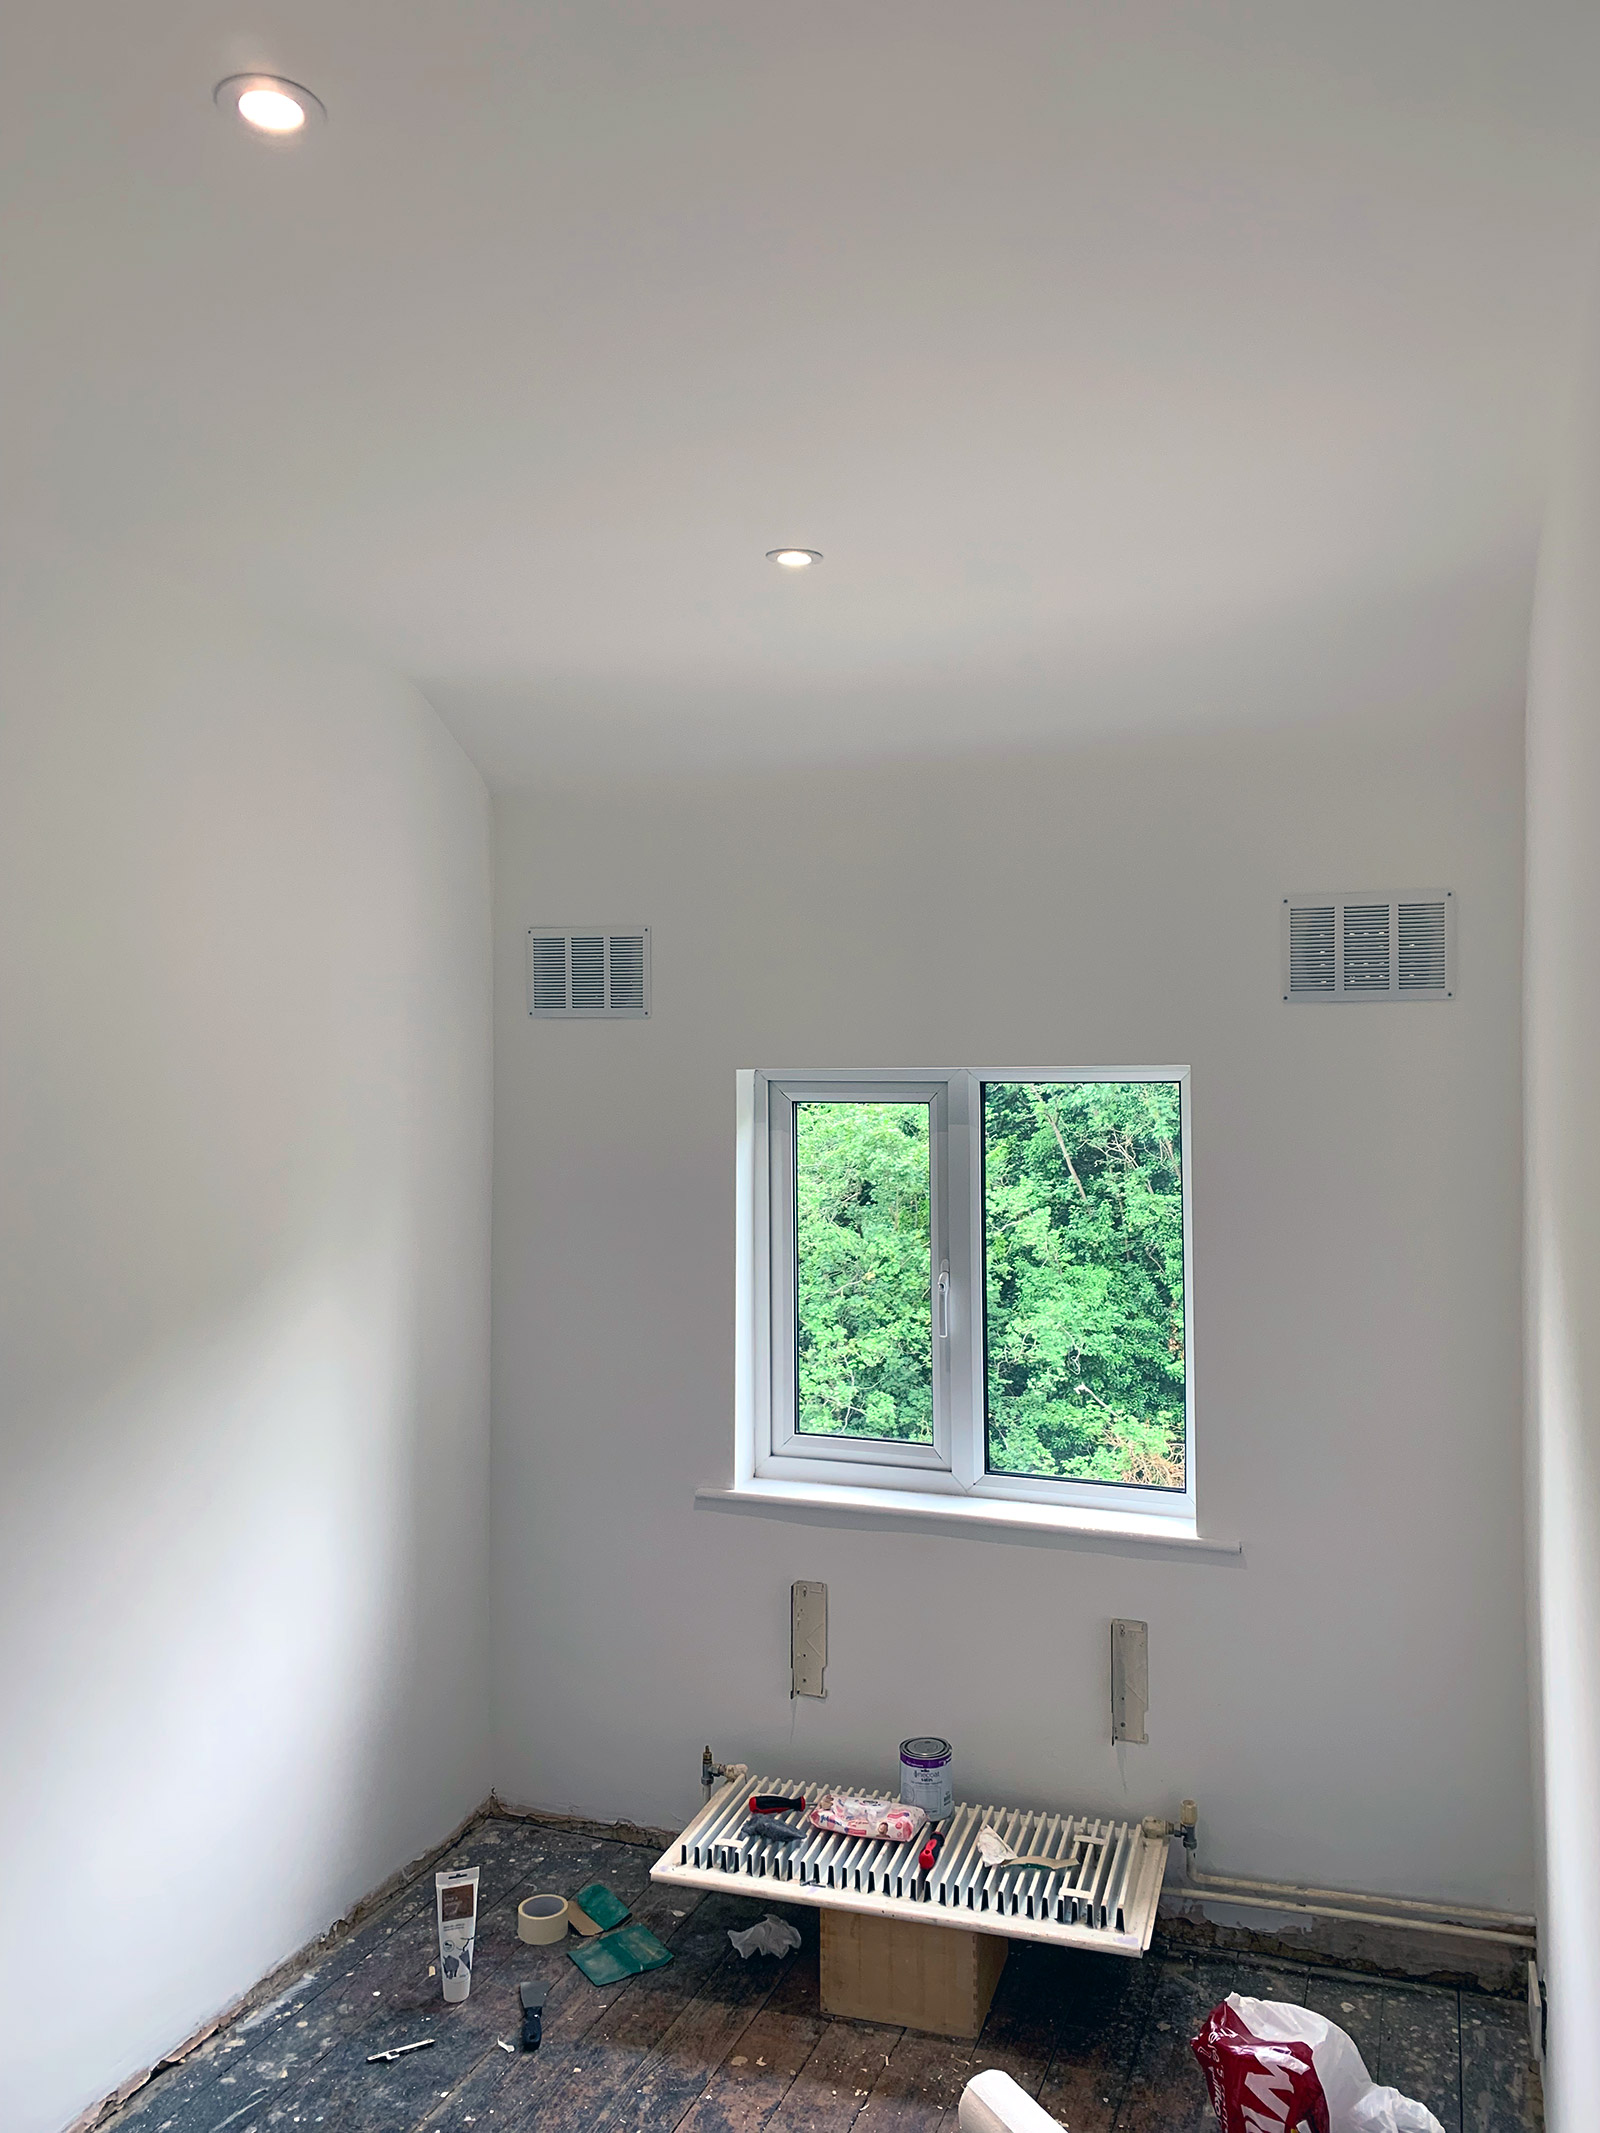
Now it’s painted, they boy is smiling!
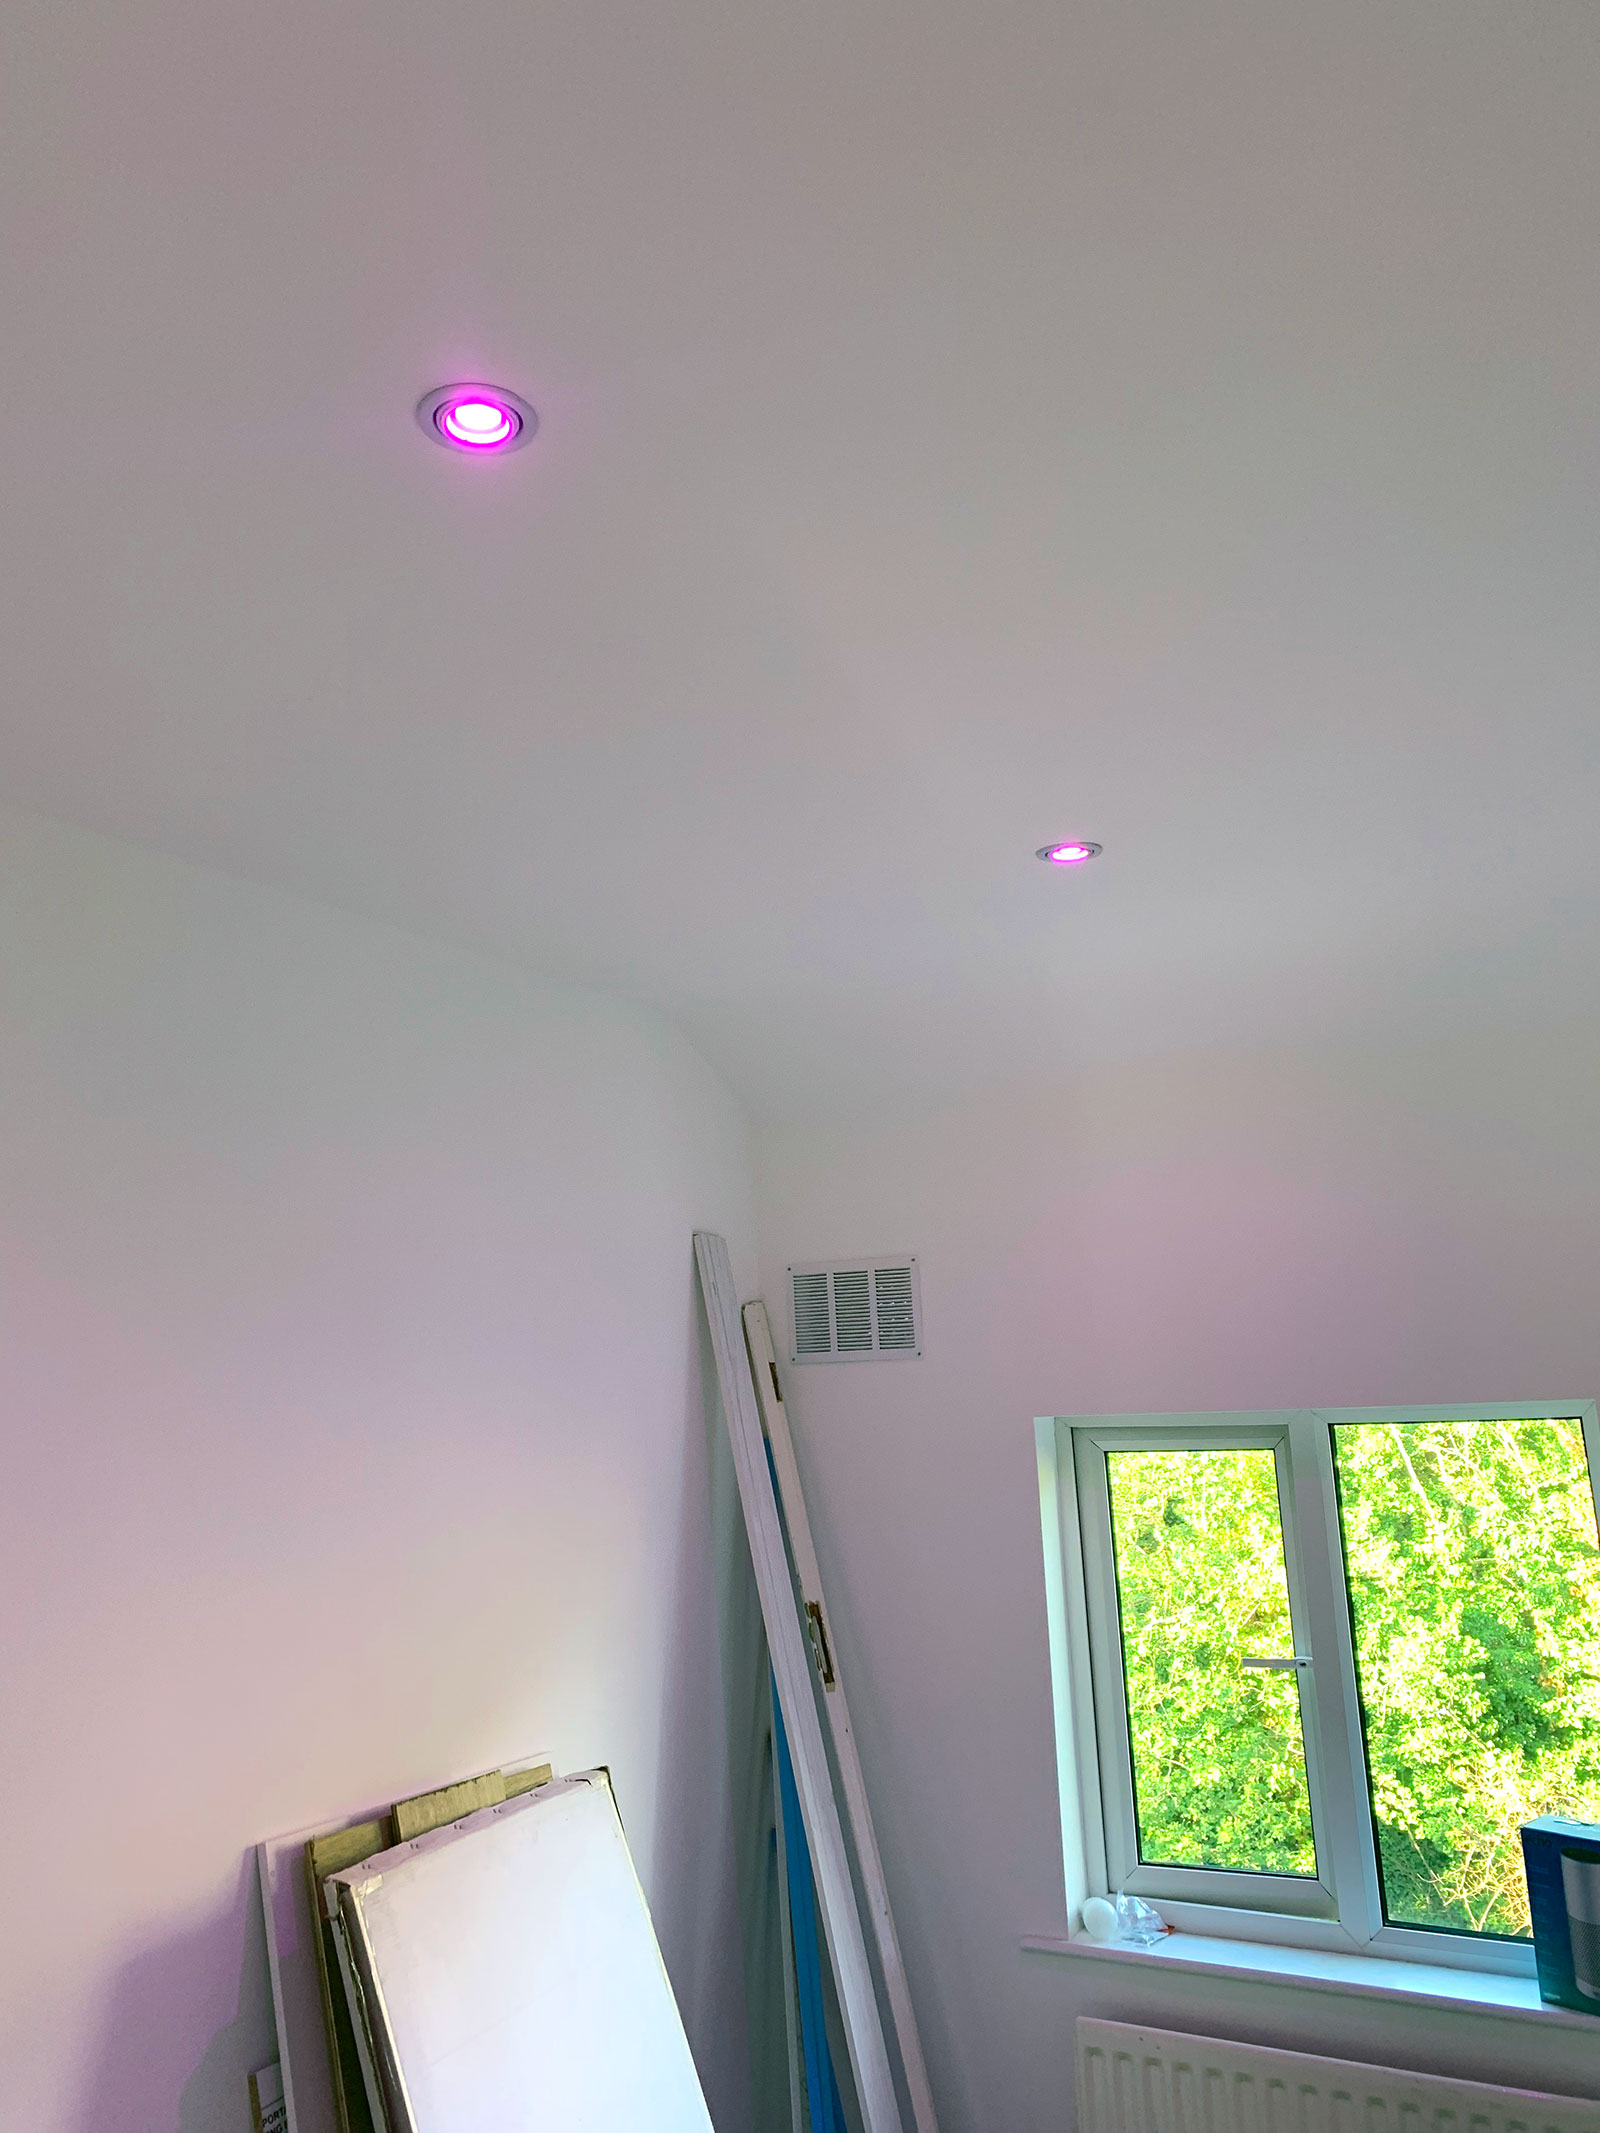
Showing off the new colour changing lights!
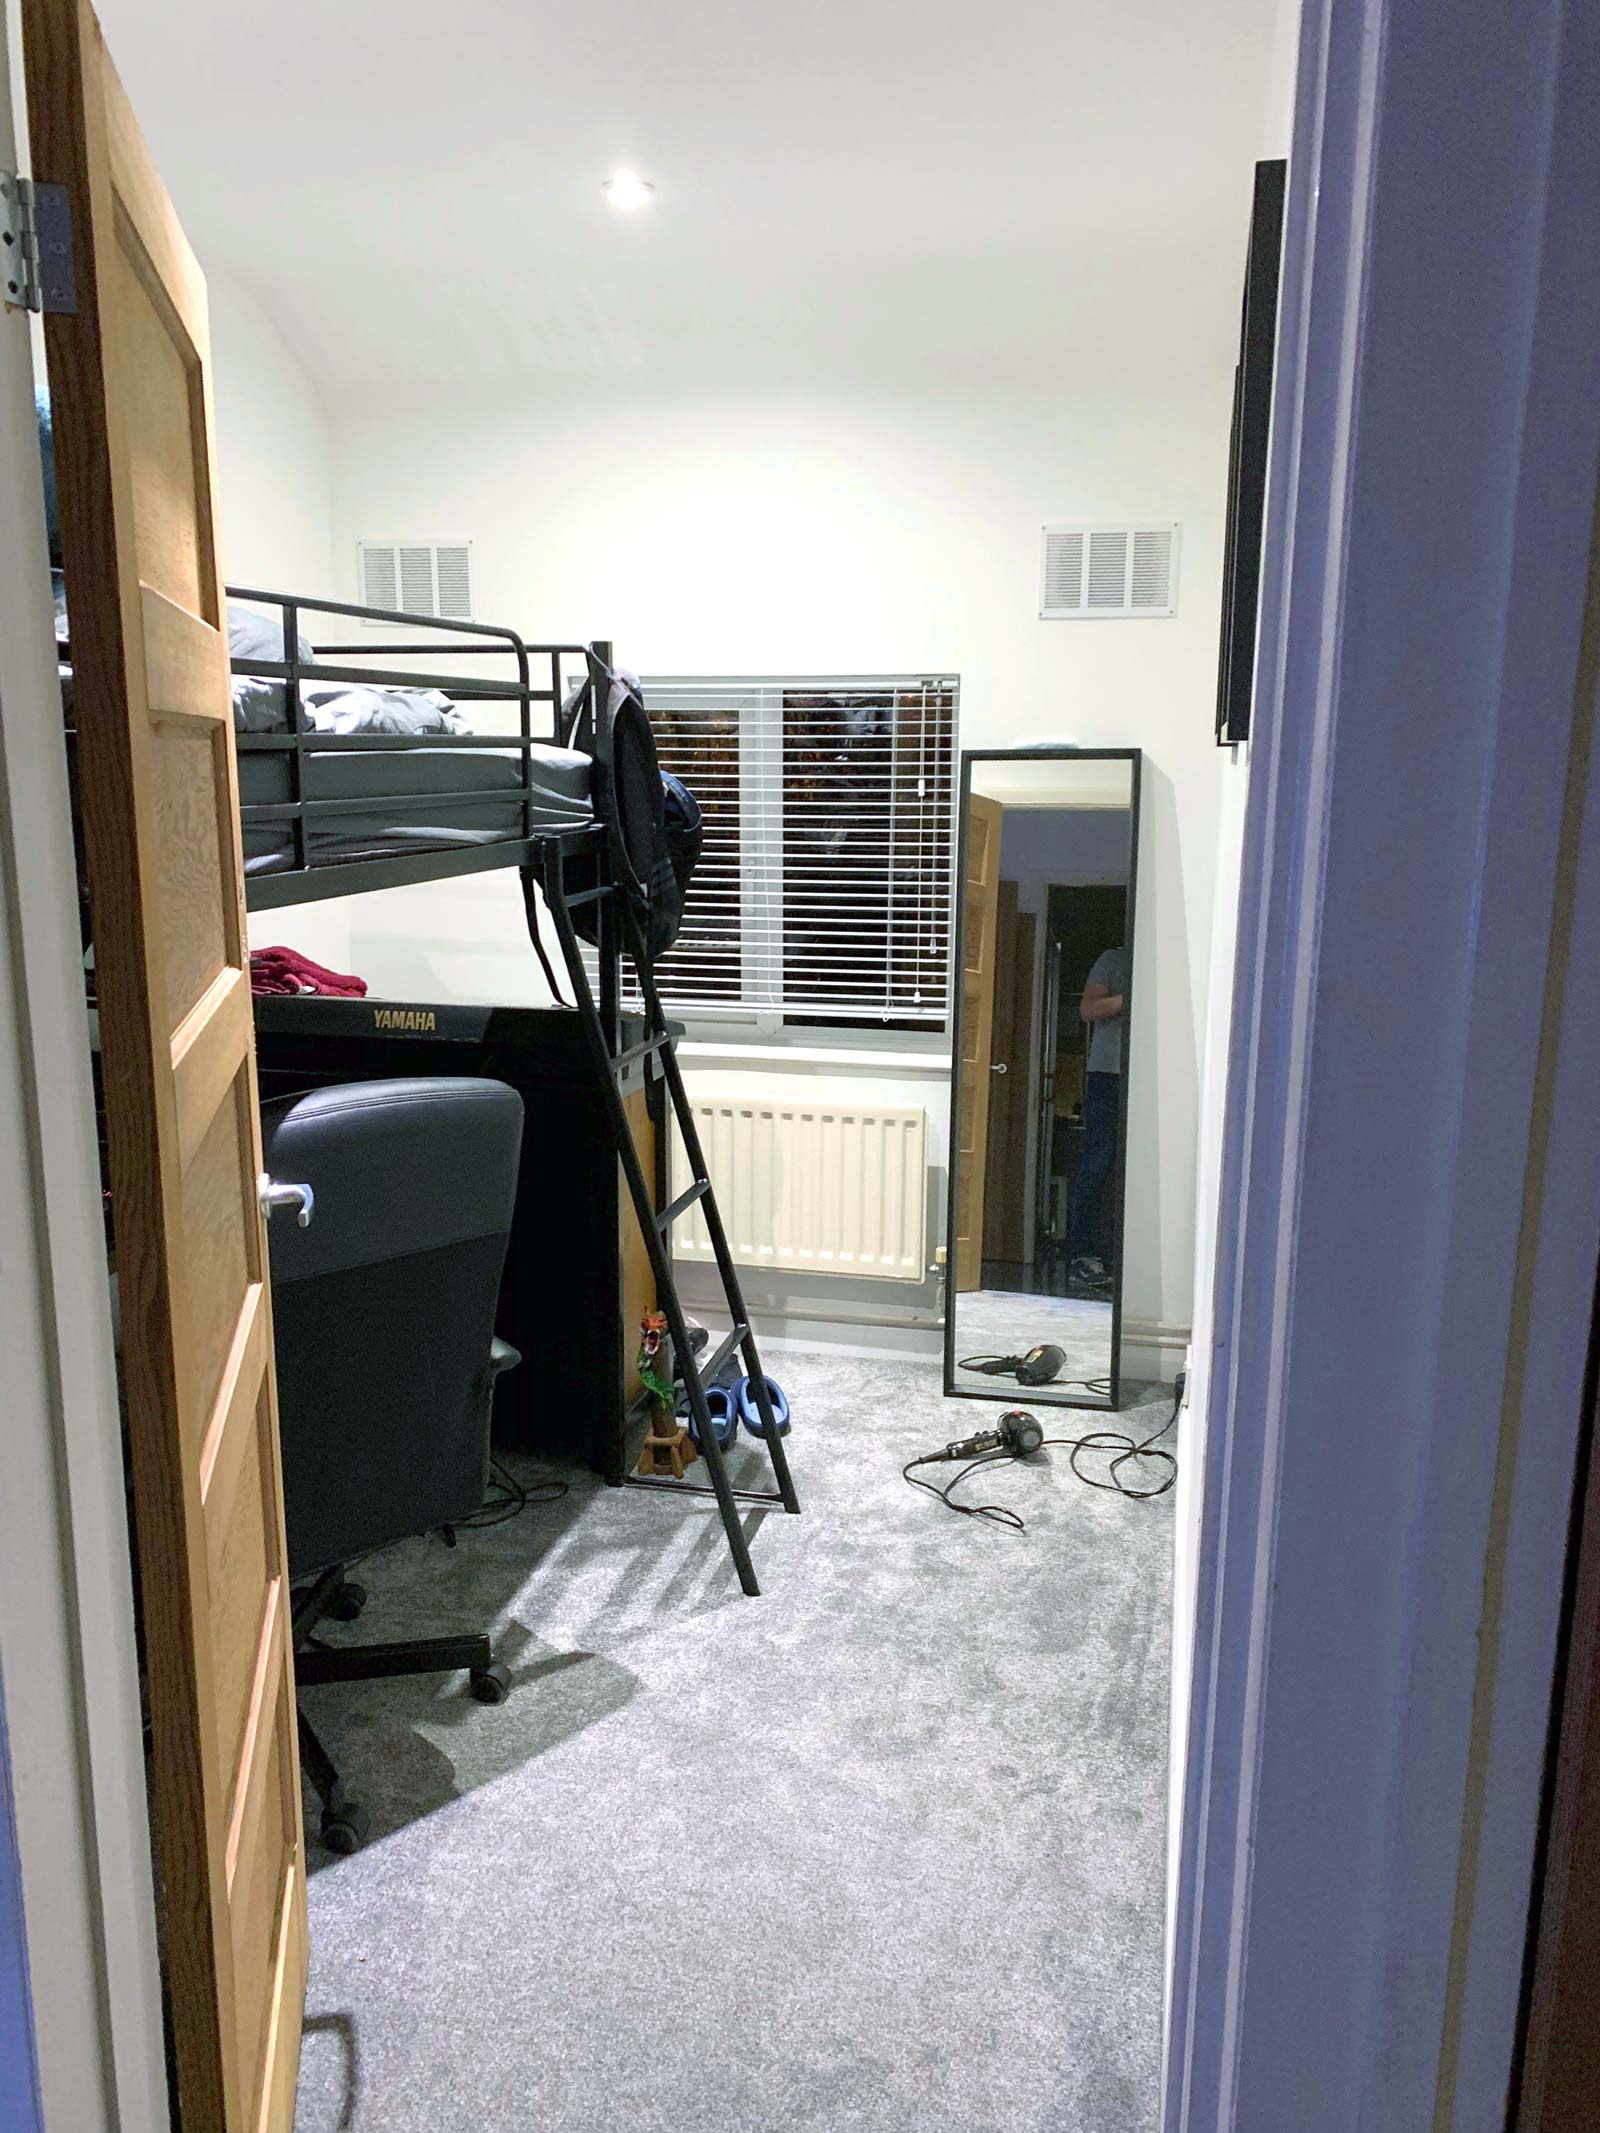
Making good use of limited space!
Flat Refurbishment – Part 1
flat refurbishment – part 1
Back at the beginning of 2019 at the ripe old age of 46 I was lucky enough to find myself in a position to buy my first flat. For the previous 6 years, after separating from the mother of my son, I had been living in shared accommodation. This didn’t really bother me and the people I shared with were great, but my son was getting to the age where he would need his own space. During these years I had been busy saving money in the hope of raising enough for a deposit on place for the two of us and it was slow going.
Then in October 2018 my father sadly passed away, it was a difficult time for many reasons and I went through all sorts of emotions which I won’t go into, but it turned out that dad had left me a bit of money. This, added to my savings, meant I now had enough for a deposit and was in a position start looking for a home for me and my boy.
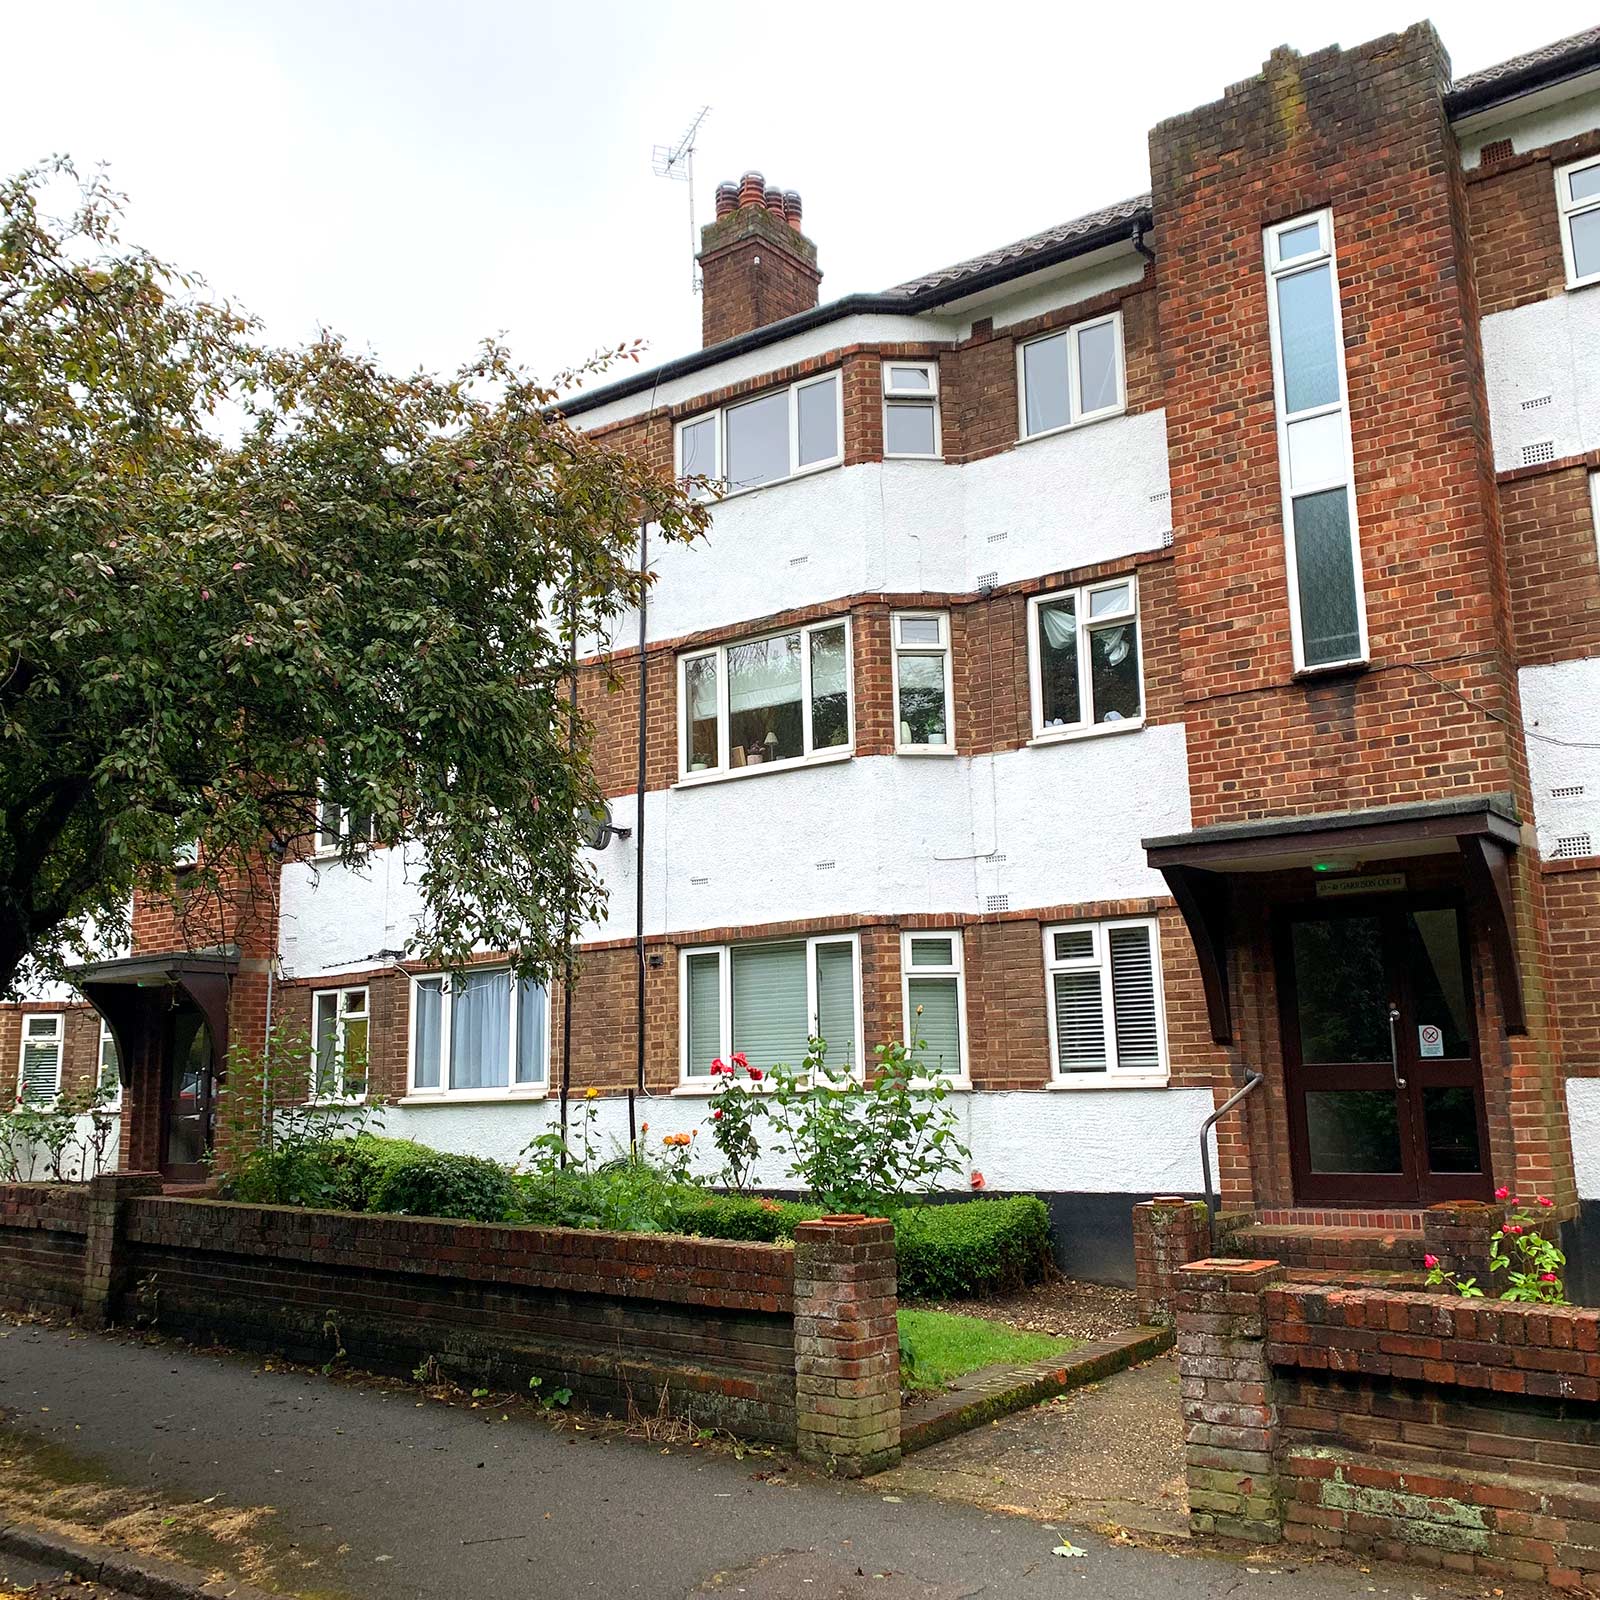
A friend of mine lived in a block of flats that I had lived in years ago, a time in my life I have very fond memories of and he told me that one of the flats above him had just gone on the market. This was in January 2019, quite obviously I was still dealing with all the emotions of losing dad so I was a little apprehensive about making a decision as big as this but there was also something about it that just felt right. I went to view the flat and on first inspection I knew it would need a lot of work and when I say a lot of work, I mean gutting the whole place and starting again kind of work!
So at the end of January I made an offer and with a little bit of haggling and because of the condition of the flat I managed to get it for a very good price. Even then it was at the higher end of my budget, but to be honest this was the only way that I was going to be able to afford a two bed flat in Hitchin as the house prices here are quite expensive with Hitchin being a pretty market town within a half hour train journey from Kings Cross.
You will see that throughout this project I have been lucky enough to benefit from the help and wisdom of friends and family, something I couldn’t put a price on! A friend put me in contact with a mortgage advisor he recommended and with his help I managed to get a pretty good mortgage sorted. Every part of this project was a new experience for me so having to wait 12 weeks for the solicitors to sort everything out seemed like a lifetime, but all credit to them for making it a pretty stress free process.
So on the 29th April 2019 I took the keys to my new flat. Luckily for me the owners let me move the bulk of my stuff in over the weekend so on the day I picked up the keys I was pretty much there. Early that evening I remember being in the flat filled with mixed and overwhelming emotions, but I mainly remember sitting there in this empty mess of a front room, starring at my dad’s guitar (my most prized possession) and thinking “what the hell have I done?”. I actually cried, a lot, I think this was a much needed release, which since dads passing I hadn’t given myself any time to do and in that moment it just all came out. Sitting there it felt like the task ahead was going to be an impossible one, but prepared for it or not, I knew there was no turning back…

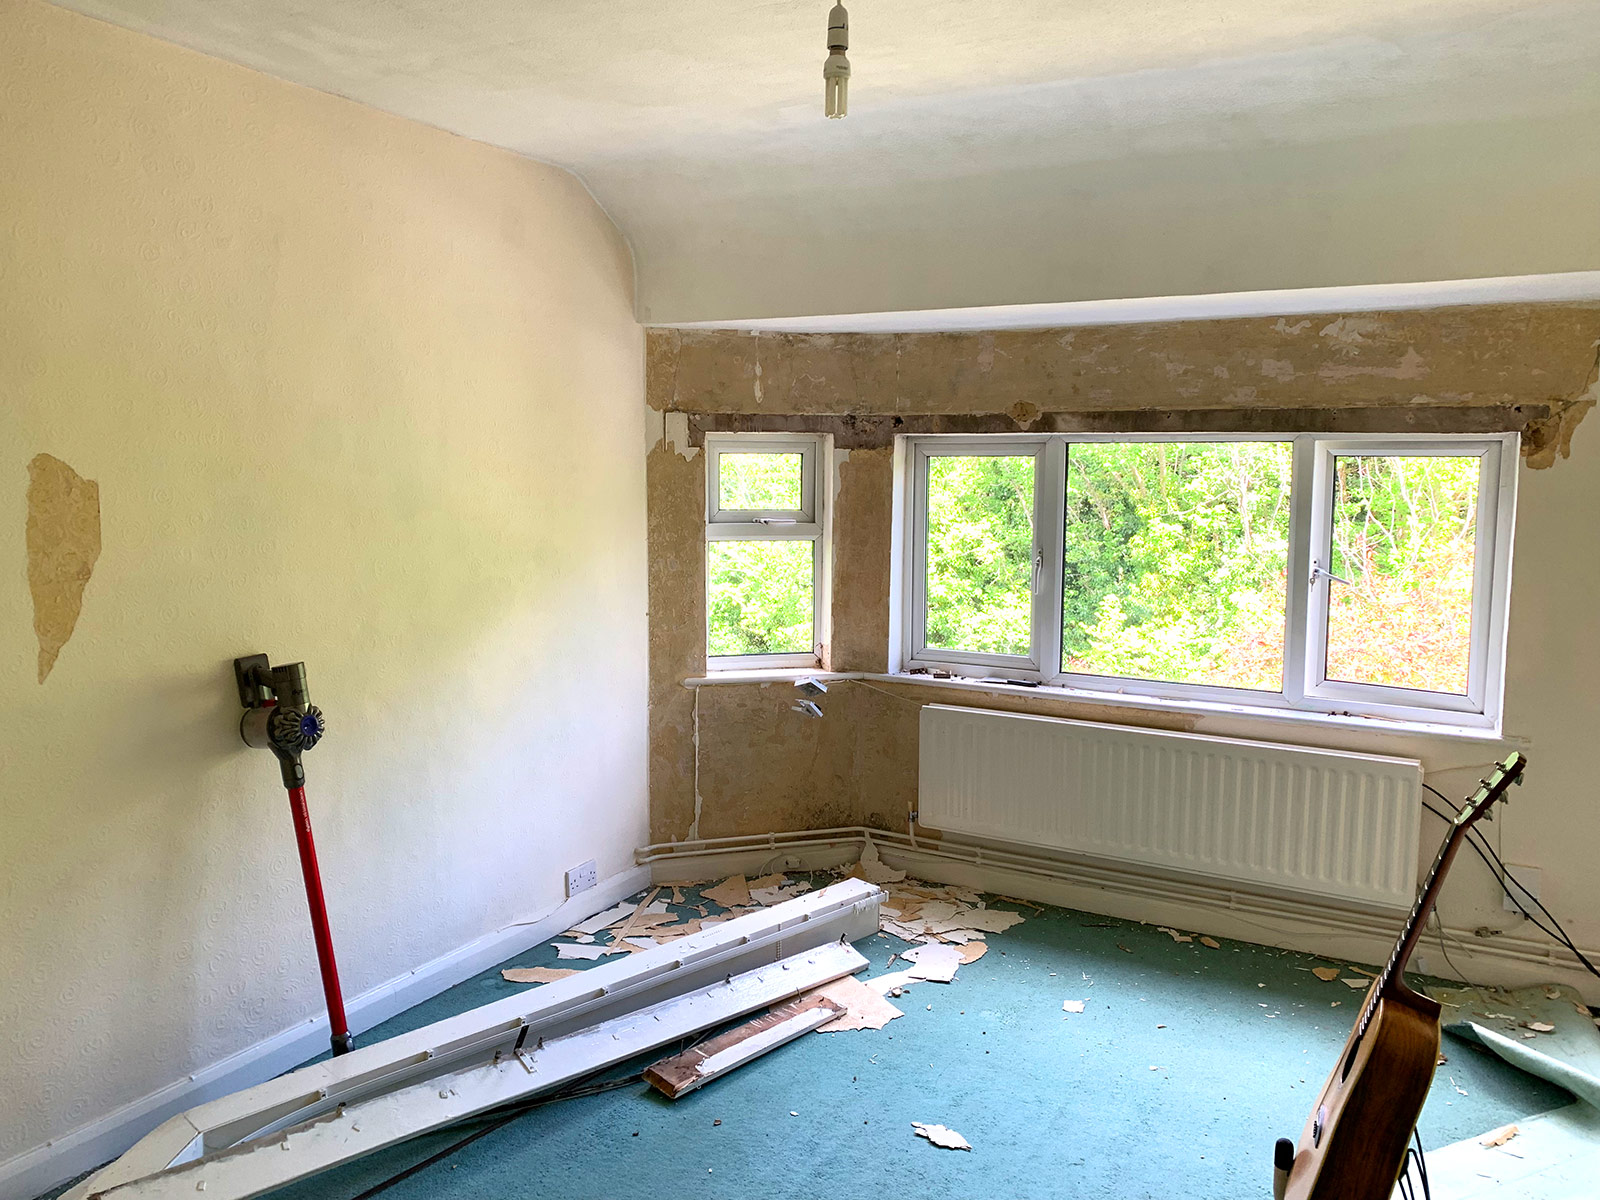
Filled with emotion the curtain rails really had to go!
I wanted to write this blog for a few reasons, partly to share the wealth of experience I have gained by refurbishing the flat, partly as way of documenting a journey which I am incredibly proud of and lastly as a kind of therapy because for me it has been a very emotional part of my life! So, over the coming weeks I will share my journey part by part with images that I took all the way through the process and for whoever reads it I hope it will be of help, inspiration and a confirmation that you can accomplish things that seem impossible!