Category: Home Ideas
The Light Distillery
the light distillery
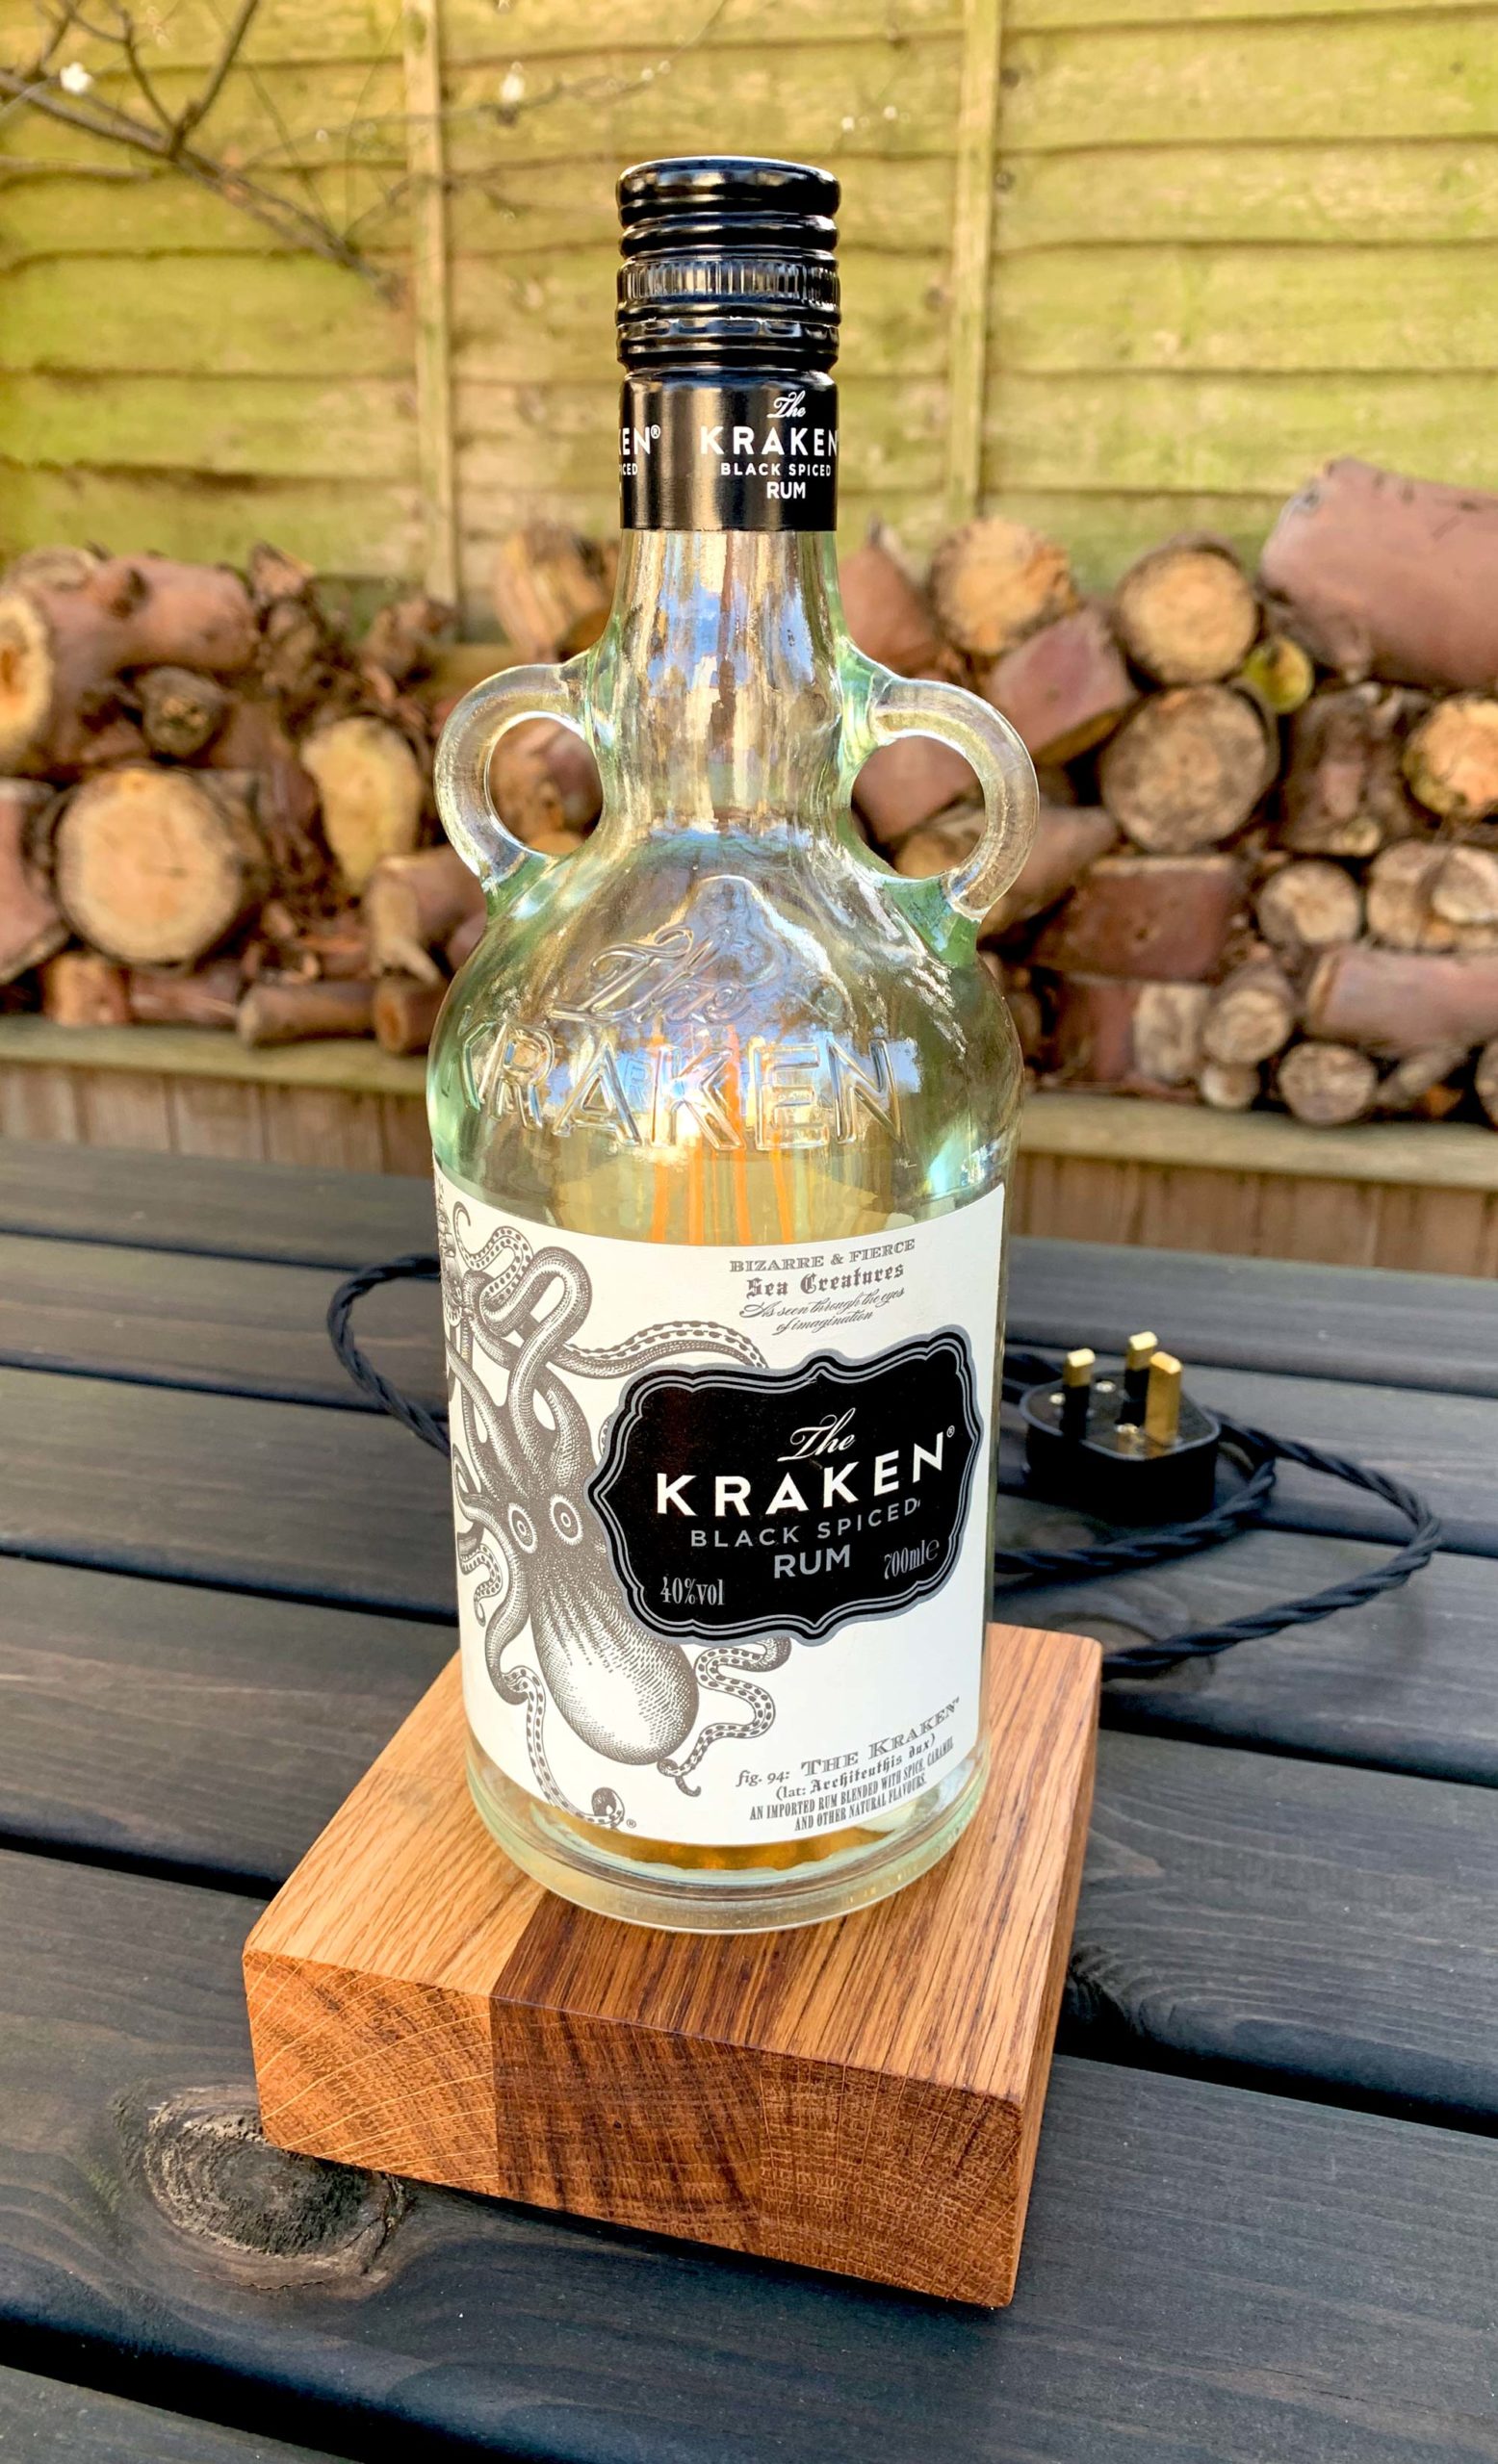
Last year I posted a blog called “Krakin’ Kraken Lights” in which I made some shelf lamps out of old Kraken Rum bottles. They actually turned out better than I had hoped, so I wondered at the time if I might be able to transpose that idea into making some desk lamps. It’s taken me a while to get round to making them but I’m pleased to announce that I have finally completed the lamp project and I think it’s worked out really well!
In the same way as I did with the shelf lamps I cut out the bottoms of the bottles using a ceramic hole cutter which works so, so well. I had a vague idea of how the lamps would work and once I had it set in my head the whole thing came together quite nicely. It’s basically the same principle as the shelf lamp. The remaining wood I had left over from making the shelves I cut down to make the bases for the lamps. After that there was a little extra work needed for wiring the lamp with a plug and a switch.
The sum of all it’s parts!
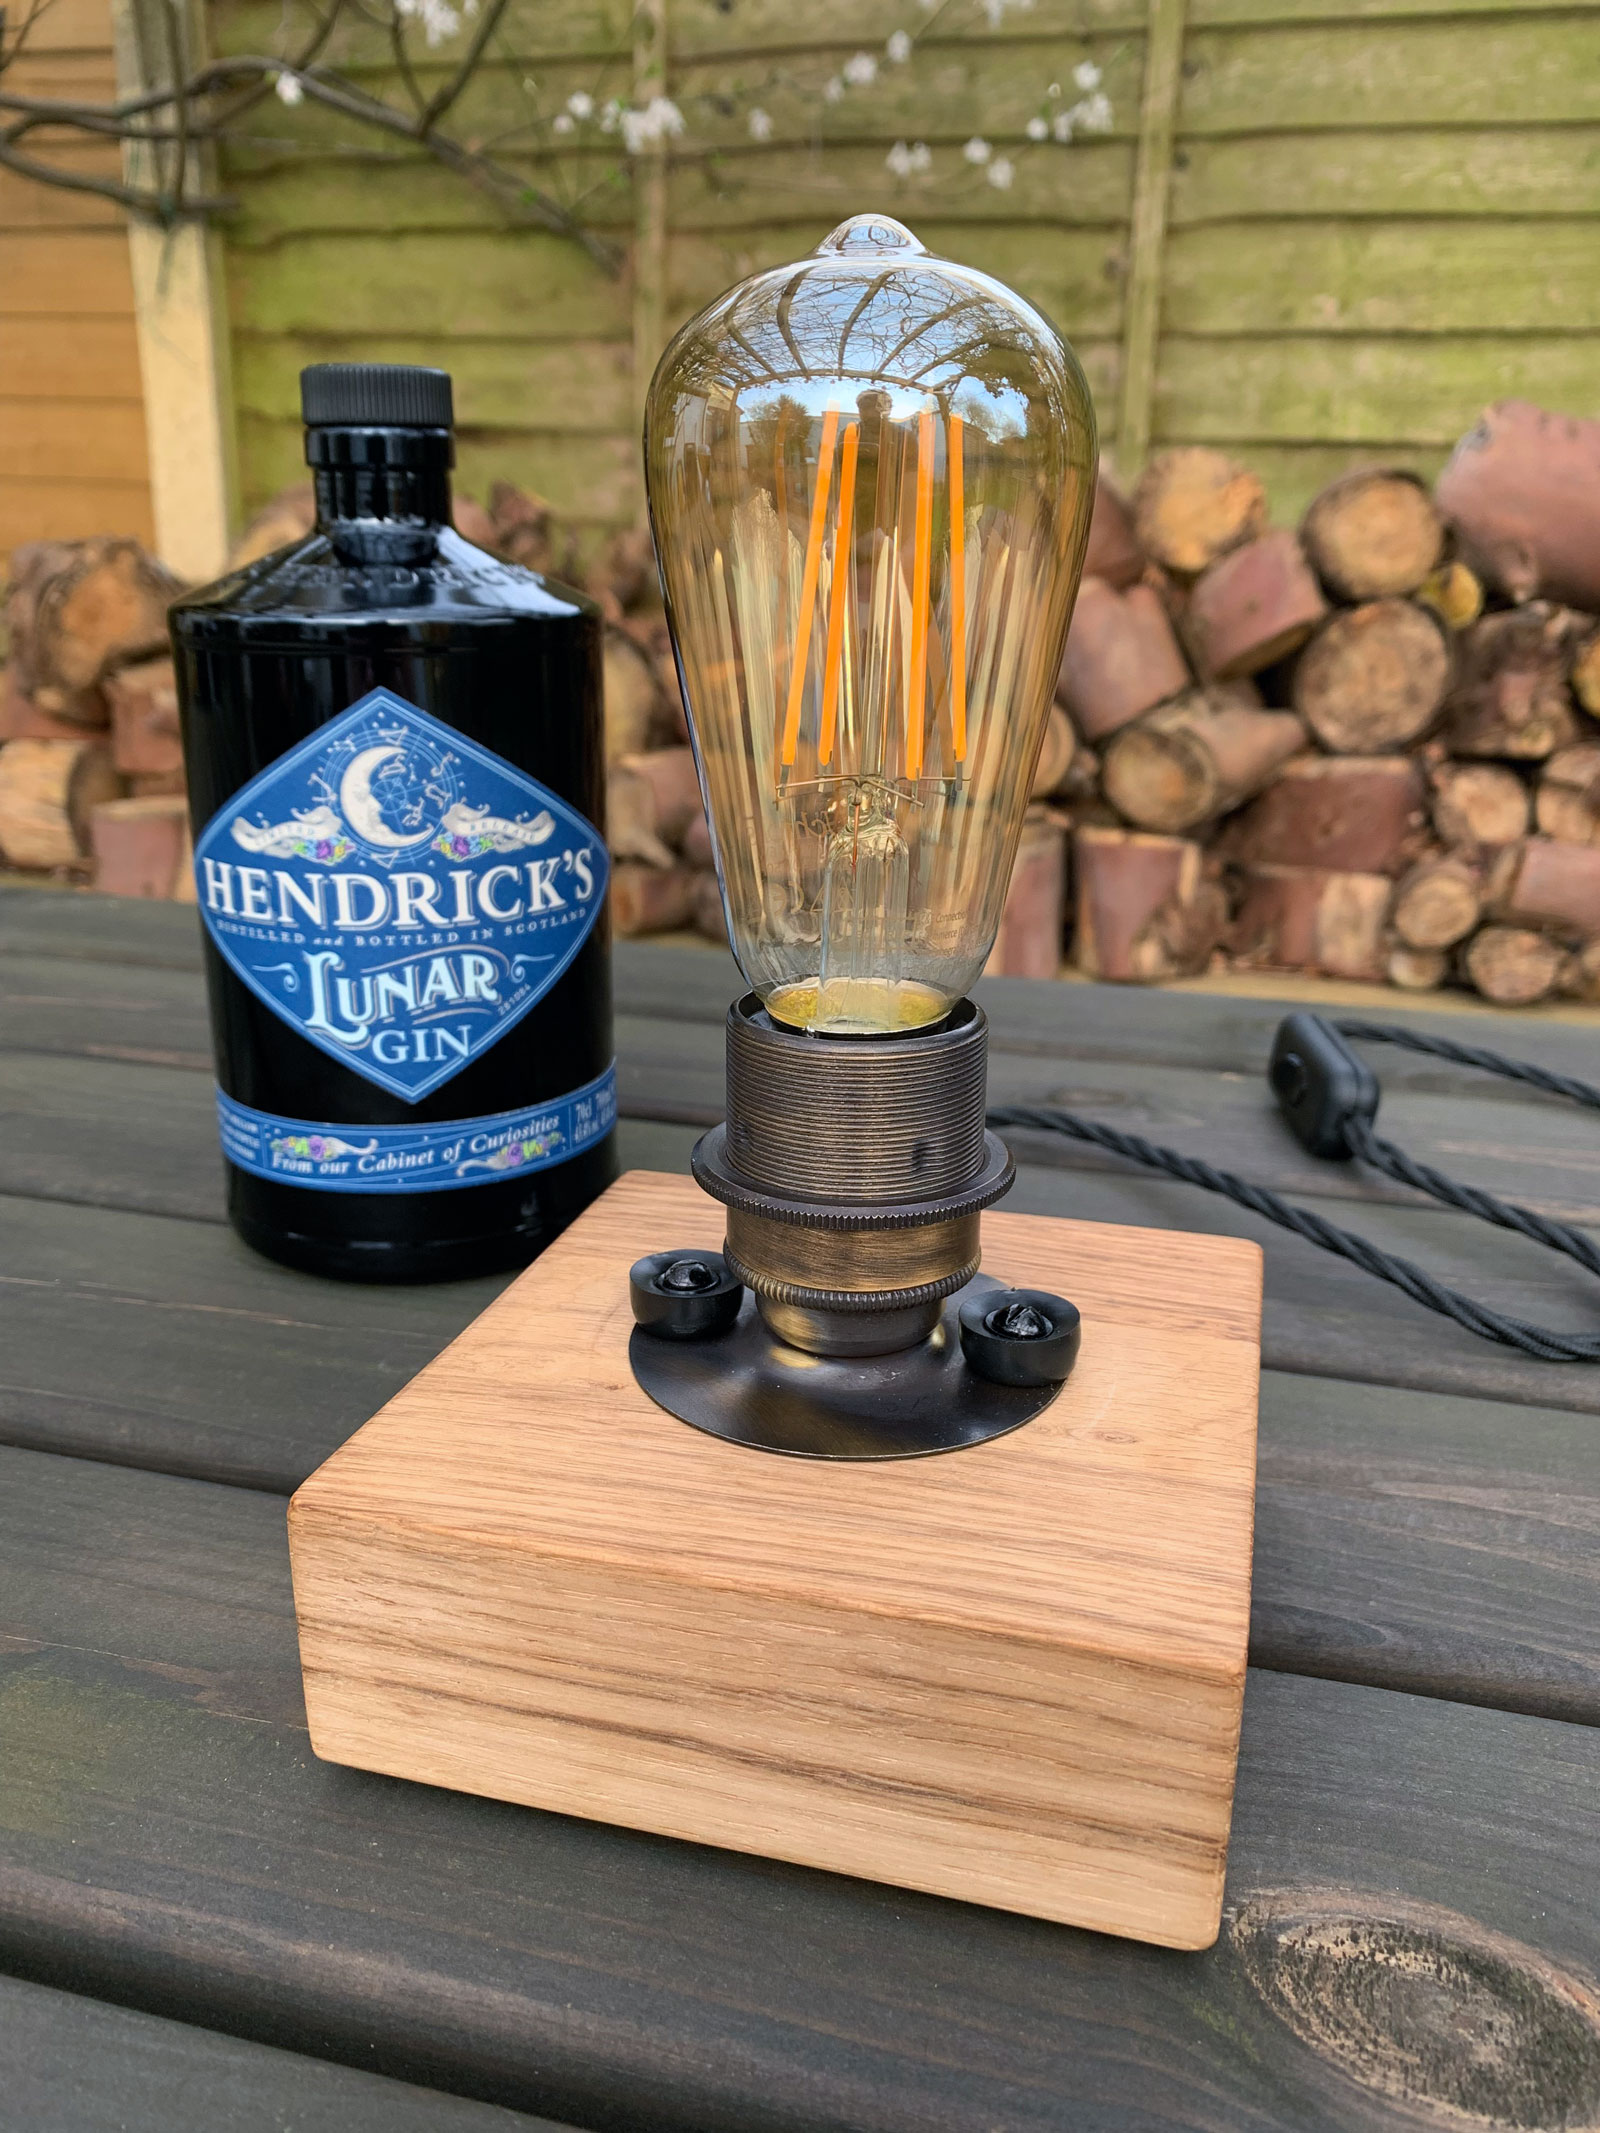
I ordered the plugs, switches, cable and light fittings separately because I wanted to learn about the various parts as I put them together. I wanted to gain a good understanding of how these things worked. The whole process was fairly straight forward and very enjoyable. At the end of the project I had the lamp checked over and tested by a qualified electrician (if you’re reading this Jez, thank you!) just to make sure my handy work was safe! Safety is the reason I used a 3 core wire, because the light fitting is metal it needed to be earthed. I used a braided, twisted fabric 3 core cable to give the lamp a bit more of an authentic vintage feel.
The only problem I had design wise with this lamp was making sure that the bottle was somehow secured to the base. Leaving the bottle loose in a position where it might get knocked over didn’t seem very practical. This left me scratching my head for quite sometime. I thought about various different ways but nothing really seemed like it would work, but then as I was sorting through some old bits in a drawer the answer appeared.
What a Krakin’ looking lamp!
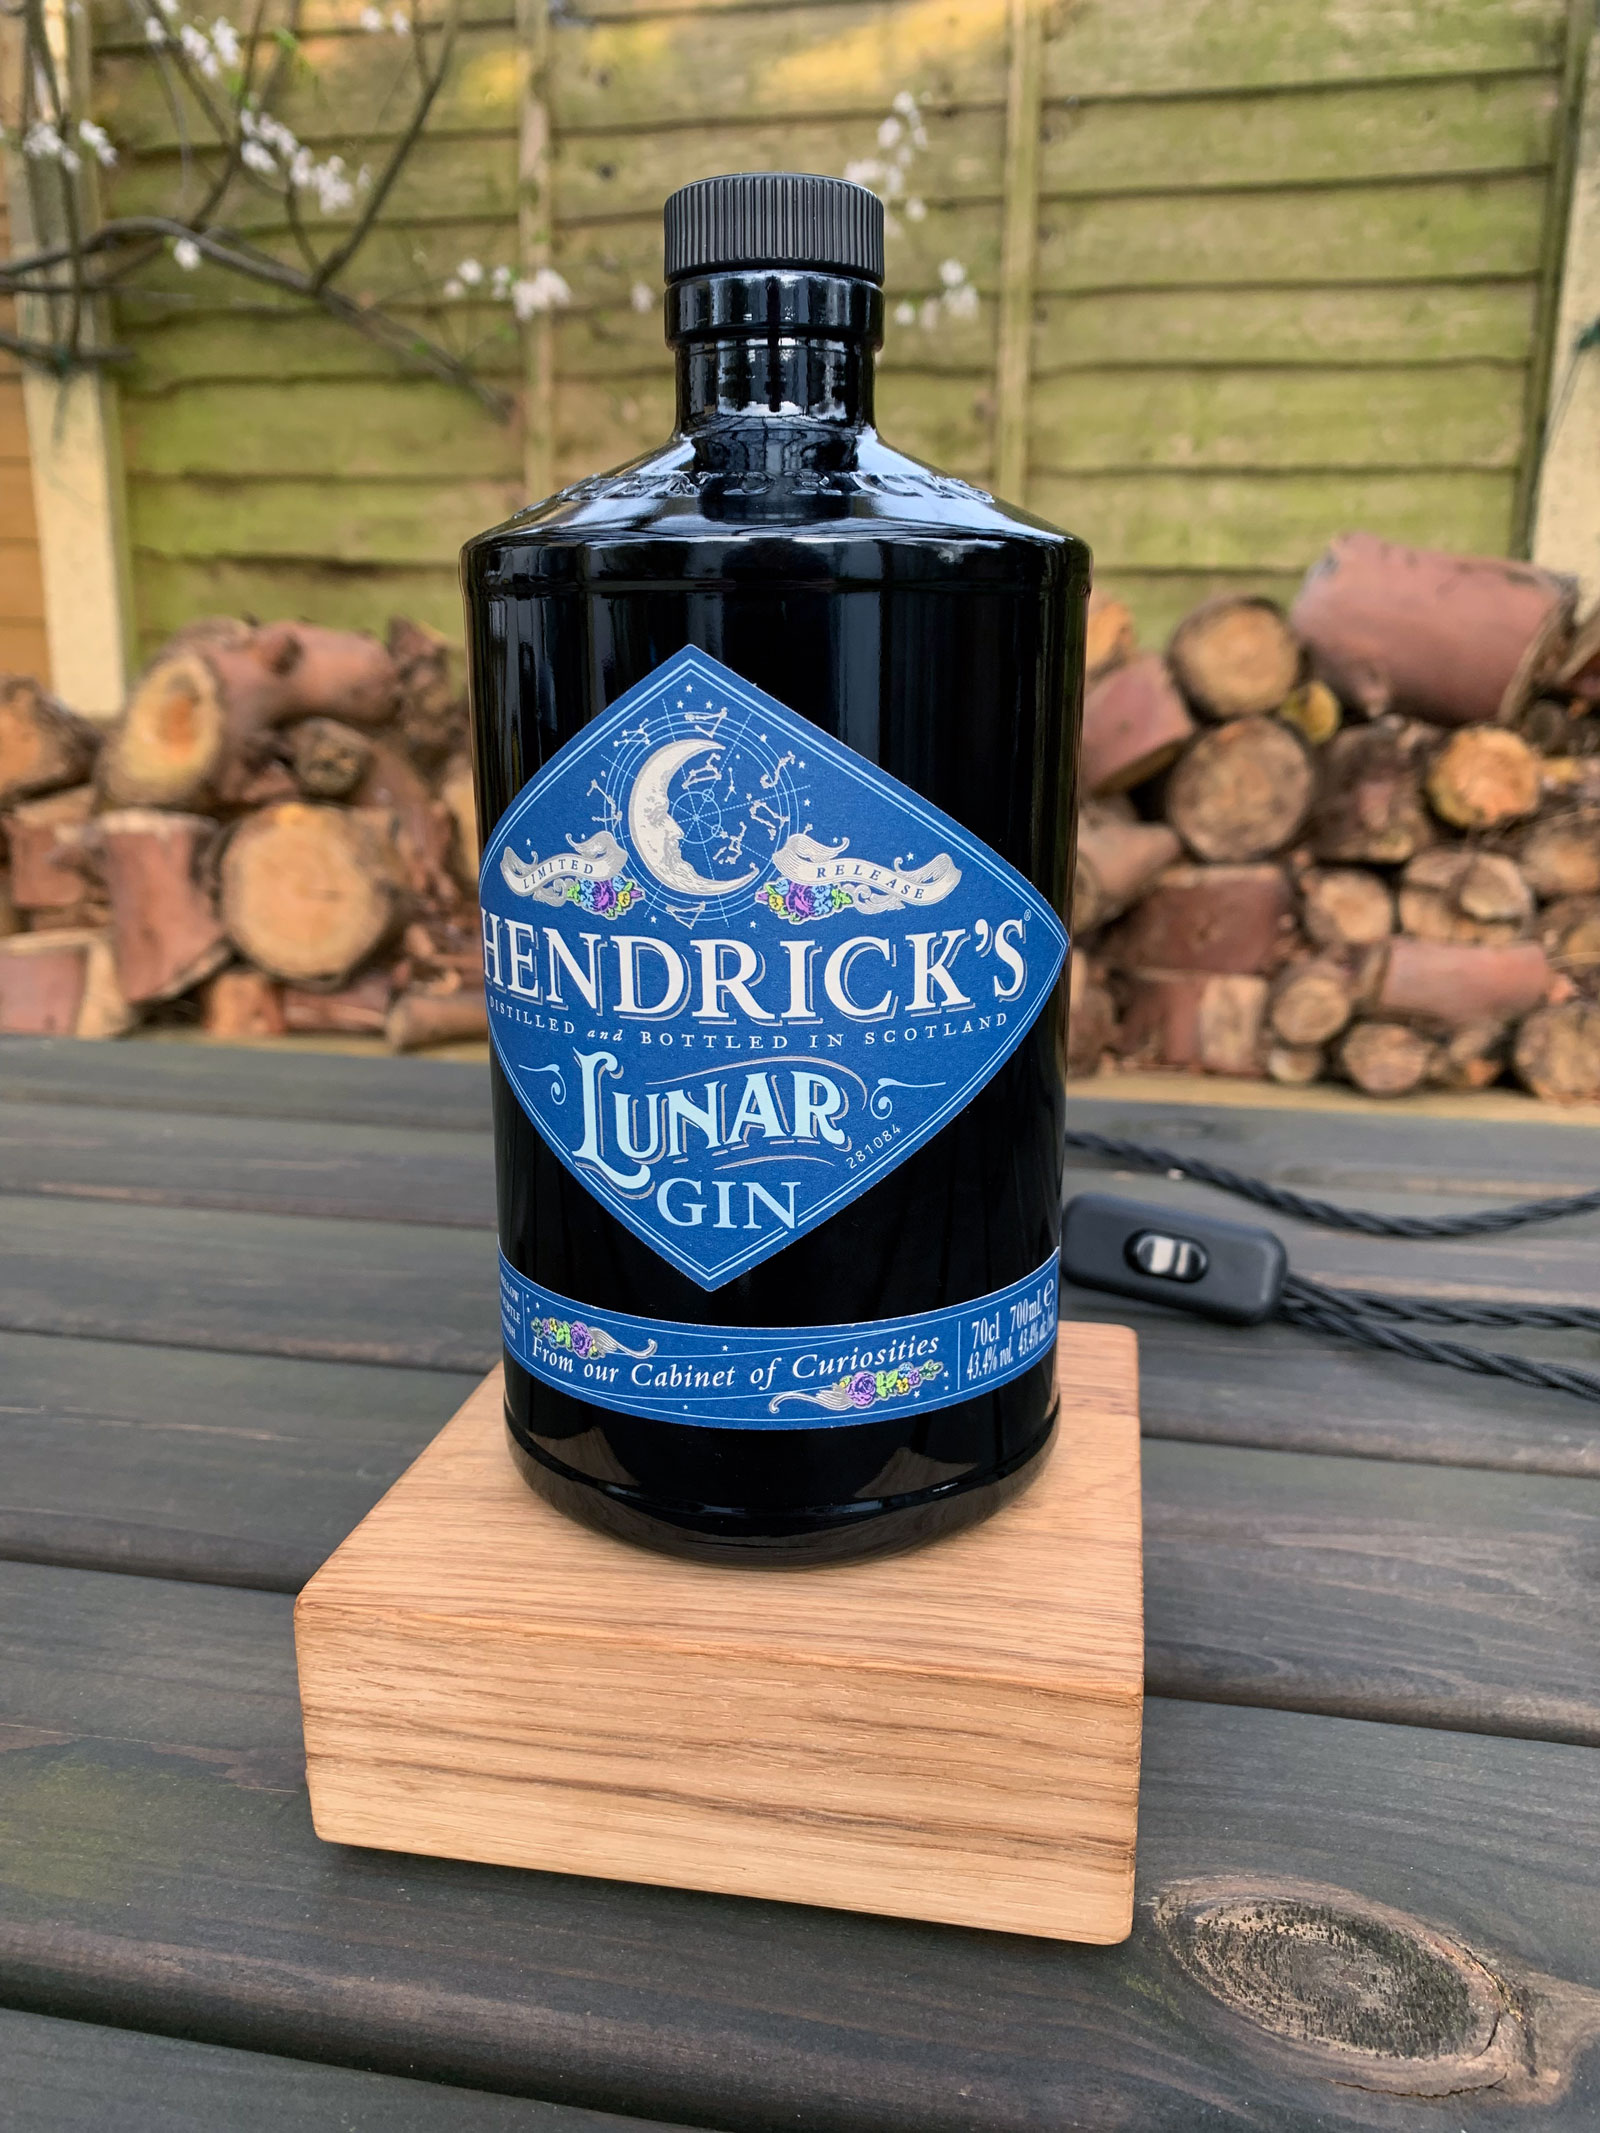
I came across what I think are rubber furniture feet, the kind you would find on the end of the legs on a wooden bar stool or something similar. I found that when I secured them in an inverted position to the base of the light fitting that they were just the right size to grip the bottle as it sat over the light. They gripped so well that you can actually lift the lamp intact by picking it up by the bottle, problem solved! I have used an LED Edison style bulb just so the bottle doesn’t get hot and to keep with that vintage look and feel.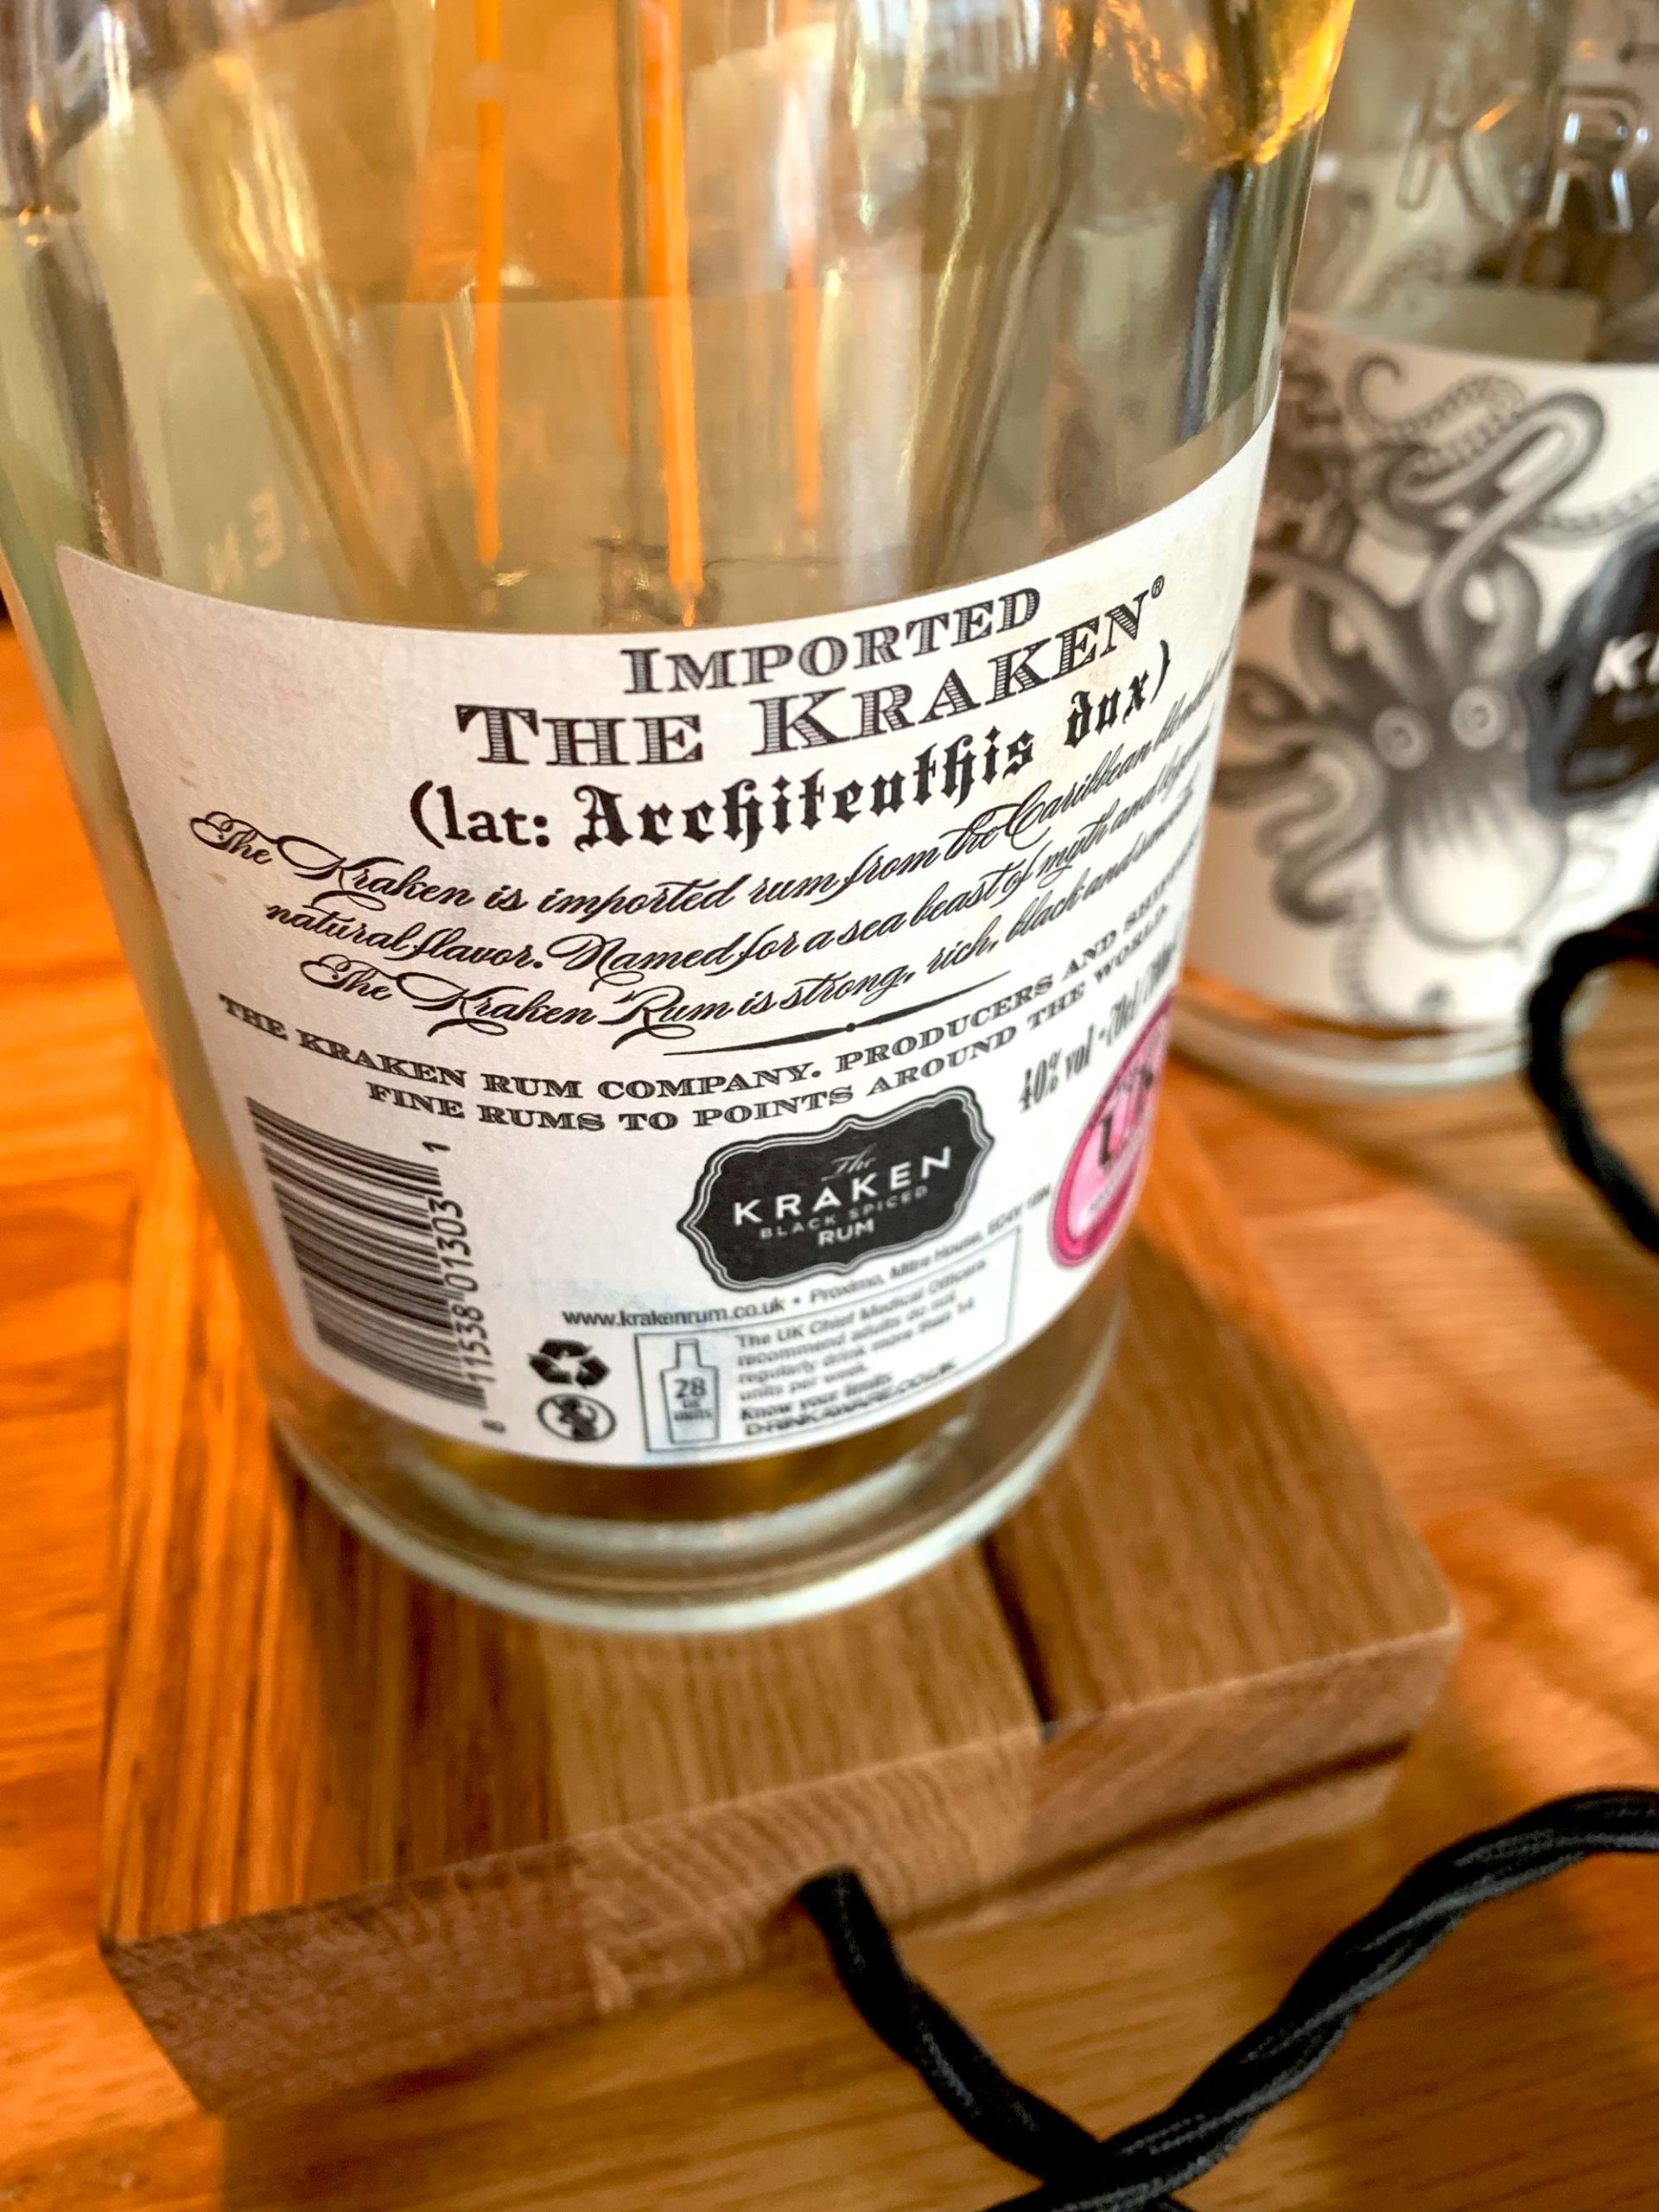
Simple, clean and tidy wiring.
With the lamp complete I felt compelled to create a little brand logo to go with it, to really finish off that authentic vintage feel. Being a graphic designer I do like to set myself little design projects like this now and then, so ‘The Light Distillery’ was born, ‘purveyors of quality luminaires’ no less!![]()
Looking like a proper vintage brand!
Completing this little project has really got me wondering how far I can take it, maybe a bespoke service turning peoples favourite bottles into vintage lamps? I mean, the amount of spirit bottles that can be turned into one of these lamps is endless, Gin, Rum, Vodka, Whiskey… the list goes on. I think some research into selling home made electrical goods is in order!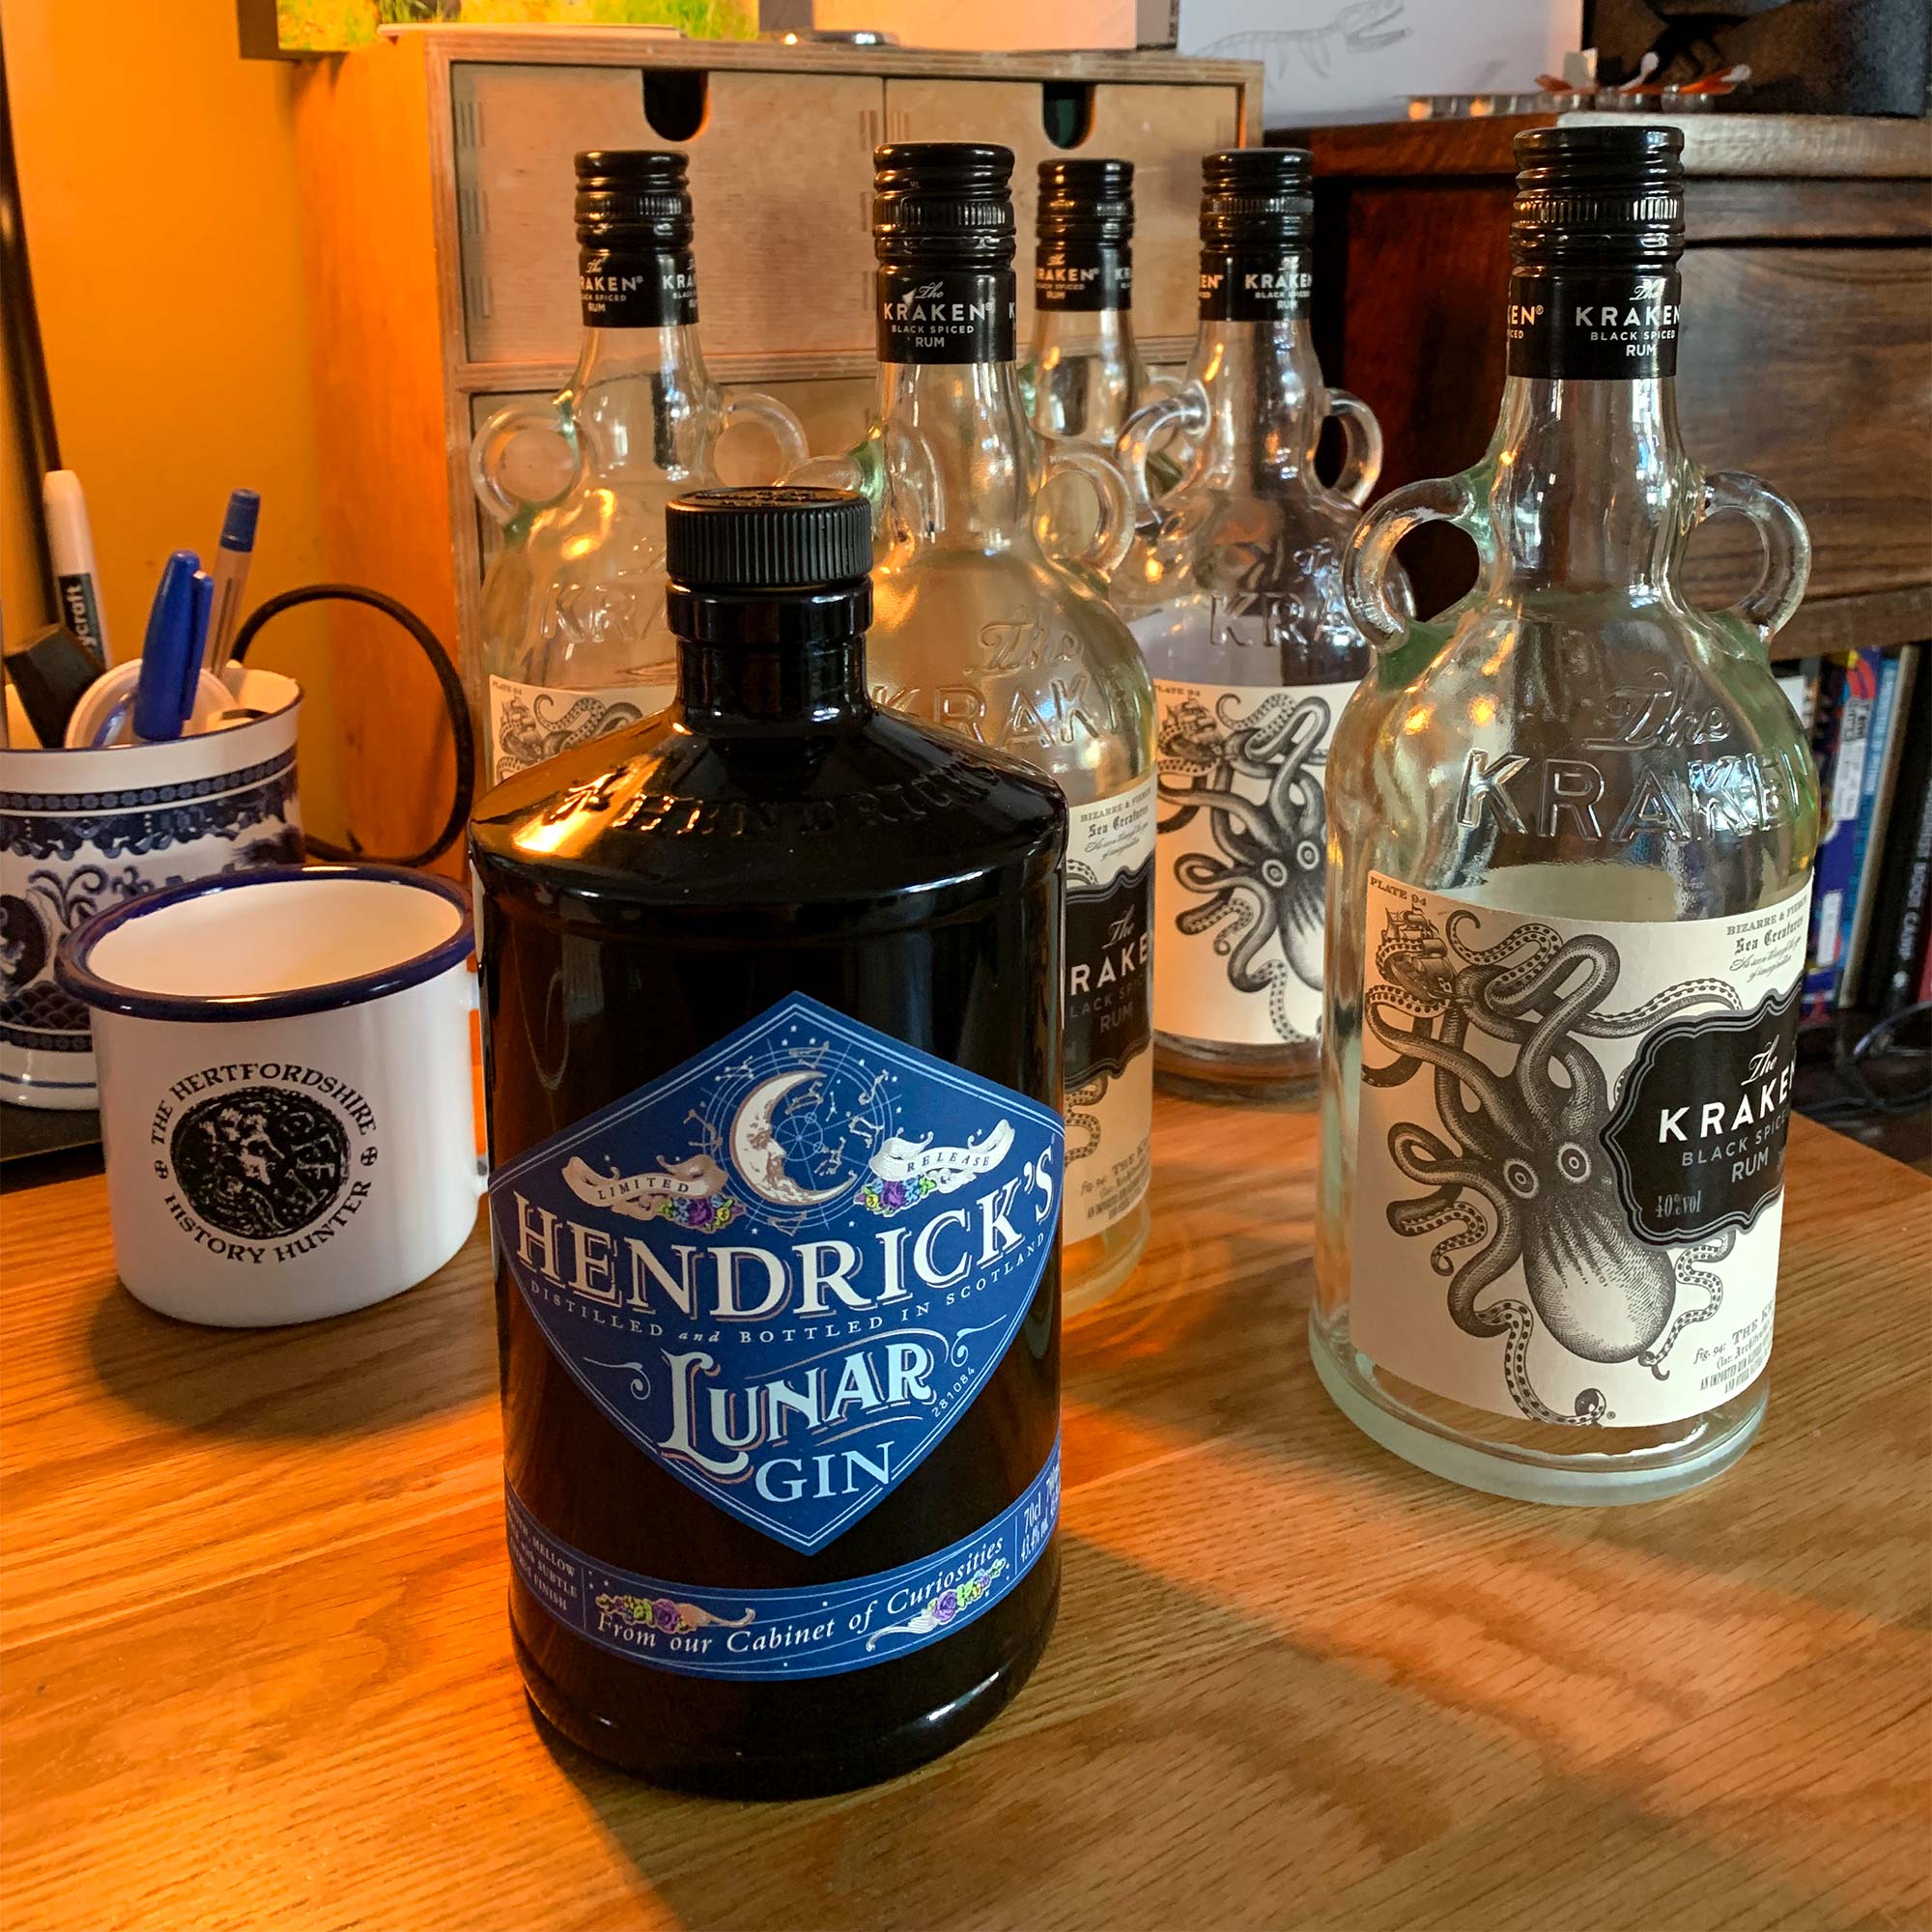
Lunar Gin will make a perfect Night Light.
news update
Above I suggested that the Lunar Gin bottle would make a great night light. Well that idea has come to fruition and it has indeed made a great night light. This was actually a gift for my better half so I had a personalised version of The Light Distillery logo laser etched onto the solid oak base which has turned out really well. Hopefully there will be many more variants on The Light Distillery bottle lamps to come, watch this space!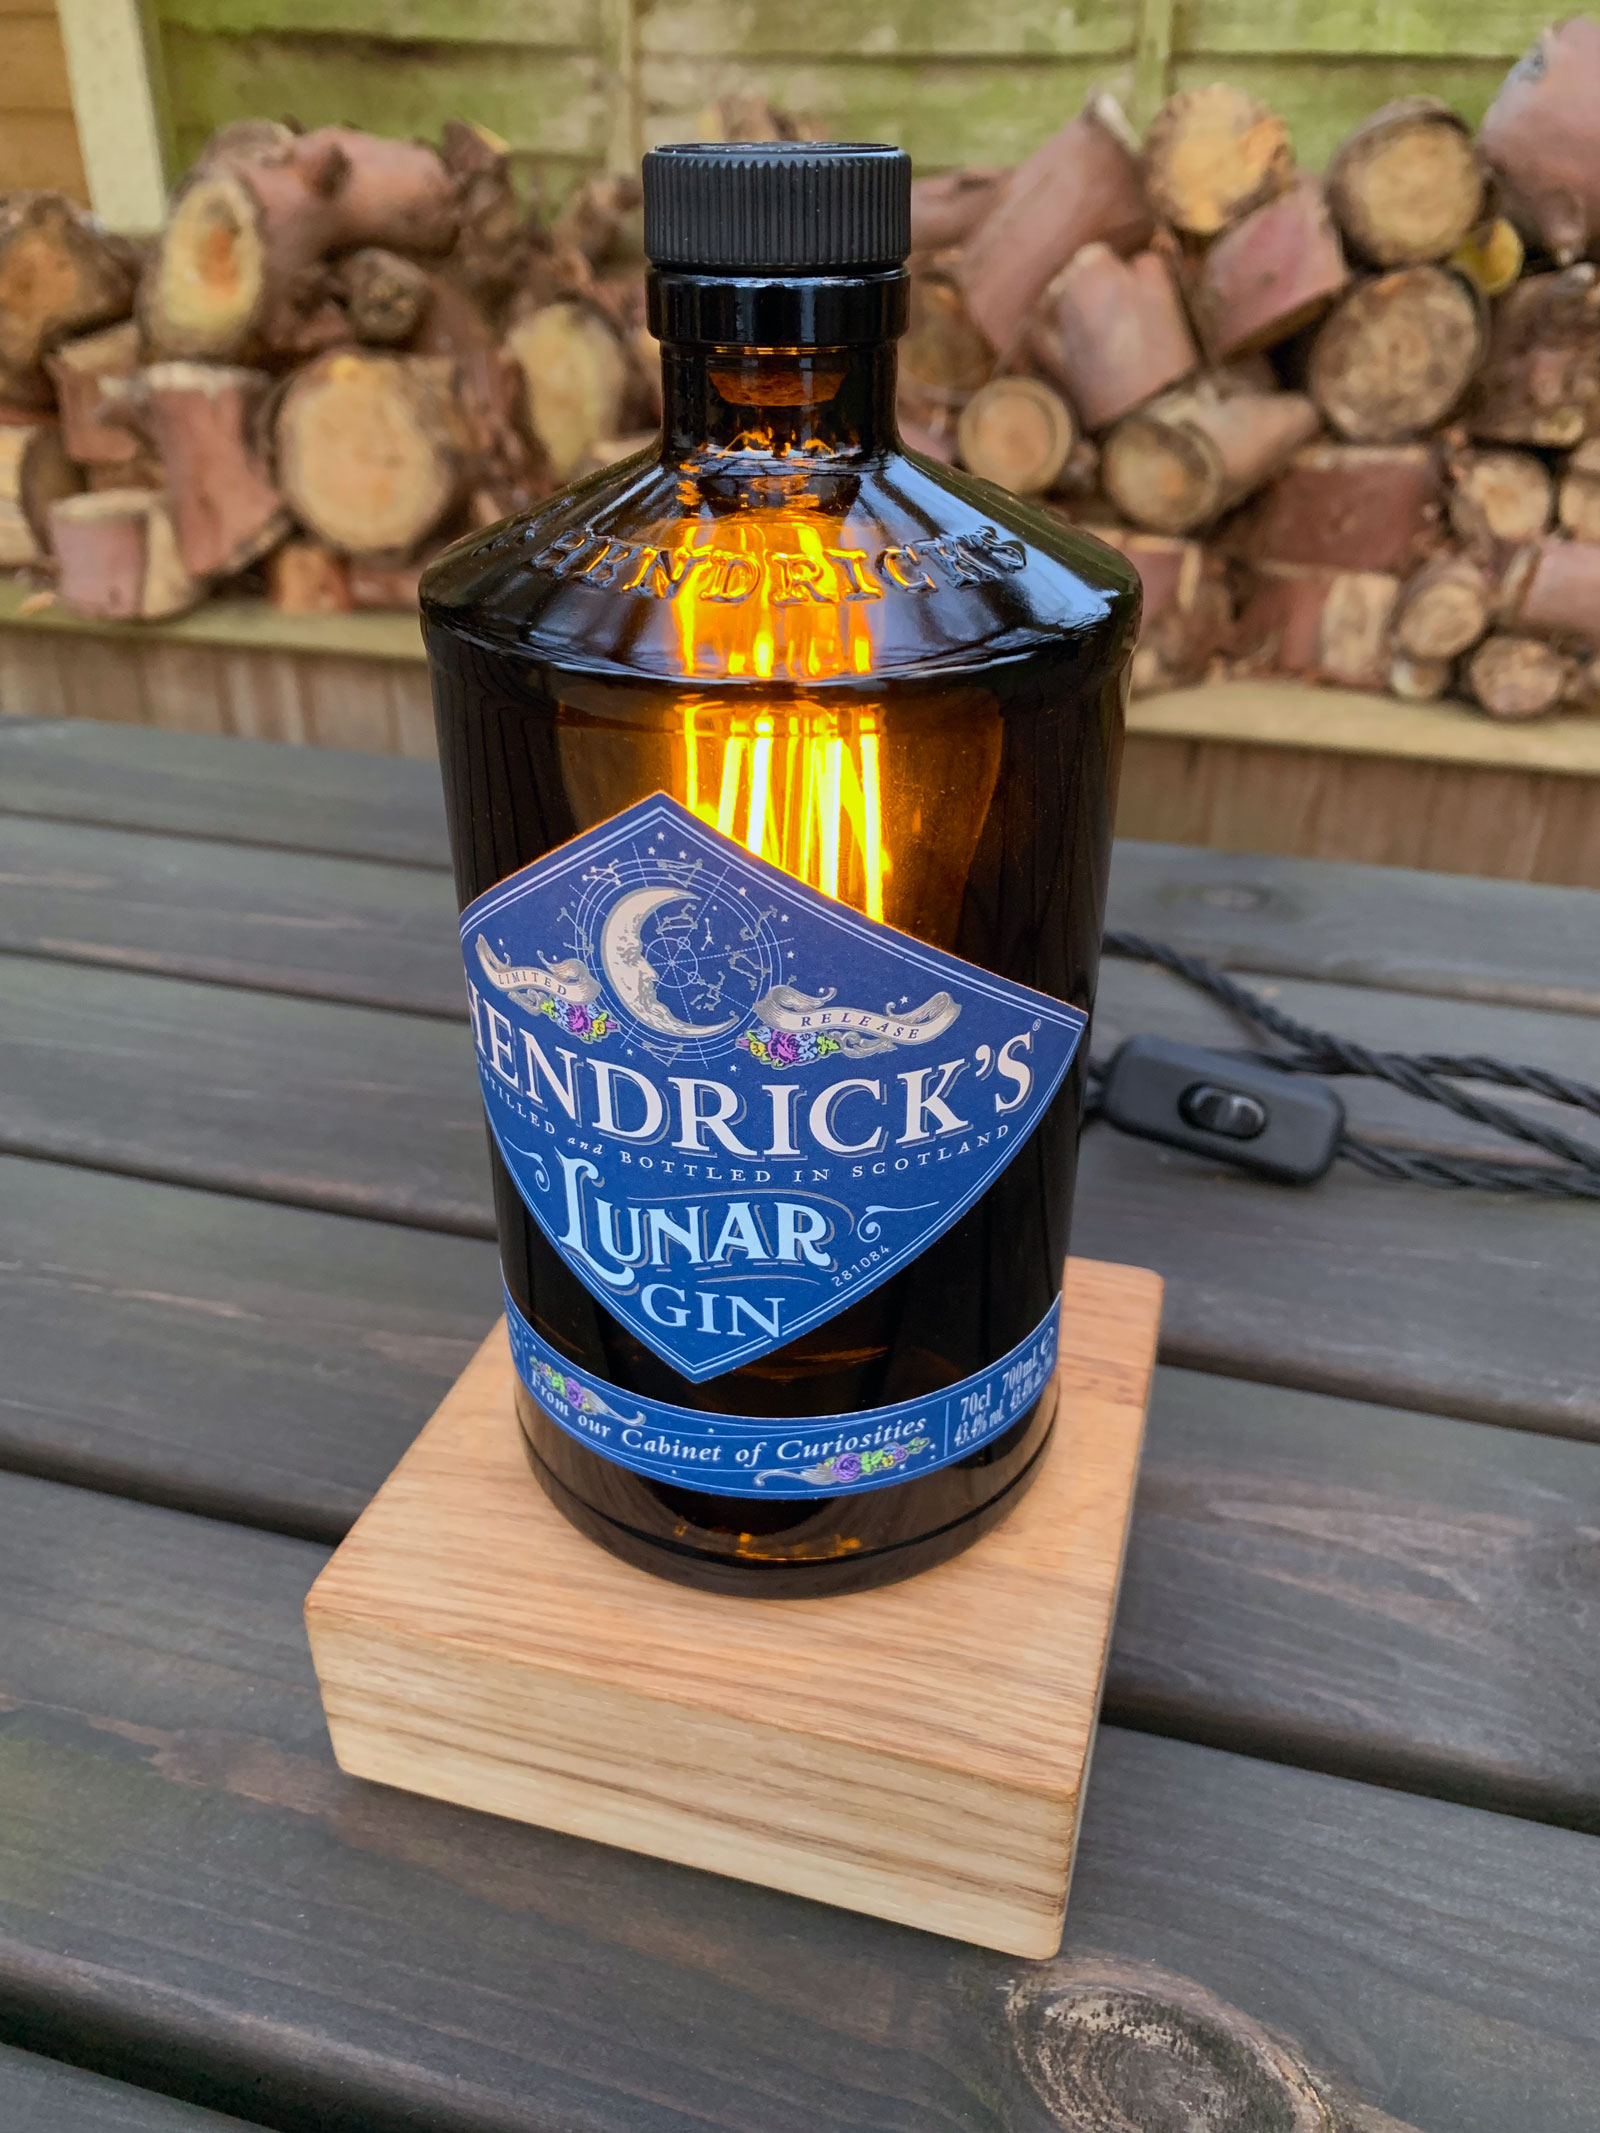
A comfy, warm, orange glow.
The perfect Night Light.
Beautiful, vintage simplicity!

Quality laser etching right there!
krakin’ kraken lights
krakin’ kraken lights
Since the renovation journey I had with the flat, it has left me with a creative DIY confidence that I want to continue to use. Since moving in with my partner we have made a few changes to the house which included re-plastering the front lounge. This has left a blank canvas for the creative DIY juices to get going again!
This time the focus is wall lights. Before the plastering was redone there used to be two wall lights, one either side of the fireplace. The wiring for these lights was left in place but we couldn’t find any lights that we liked to replace them with. We also intended to put some shelves up either side of the fire place which would probably interfere with having lights on the wall, so what to do!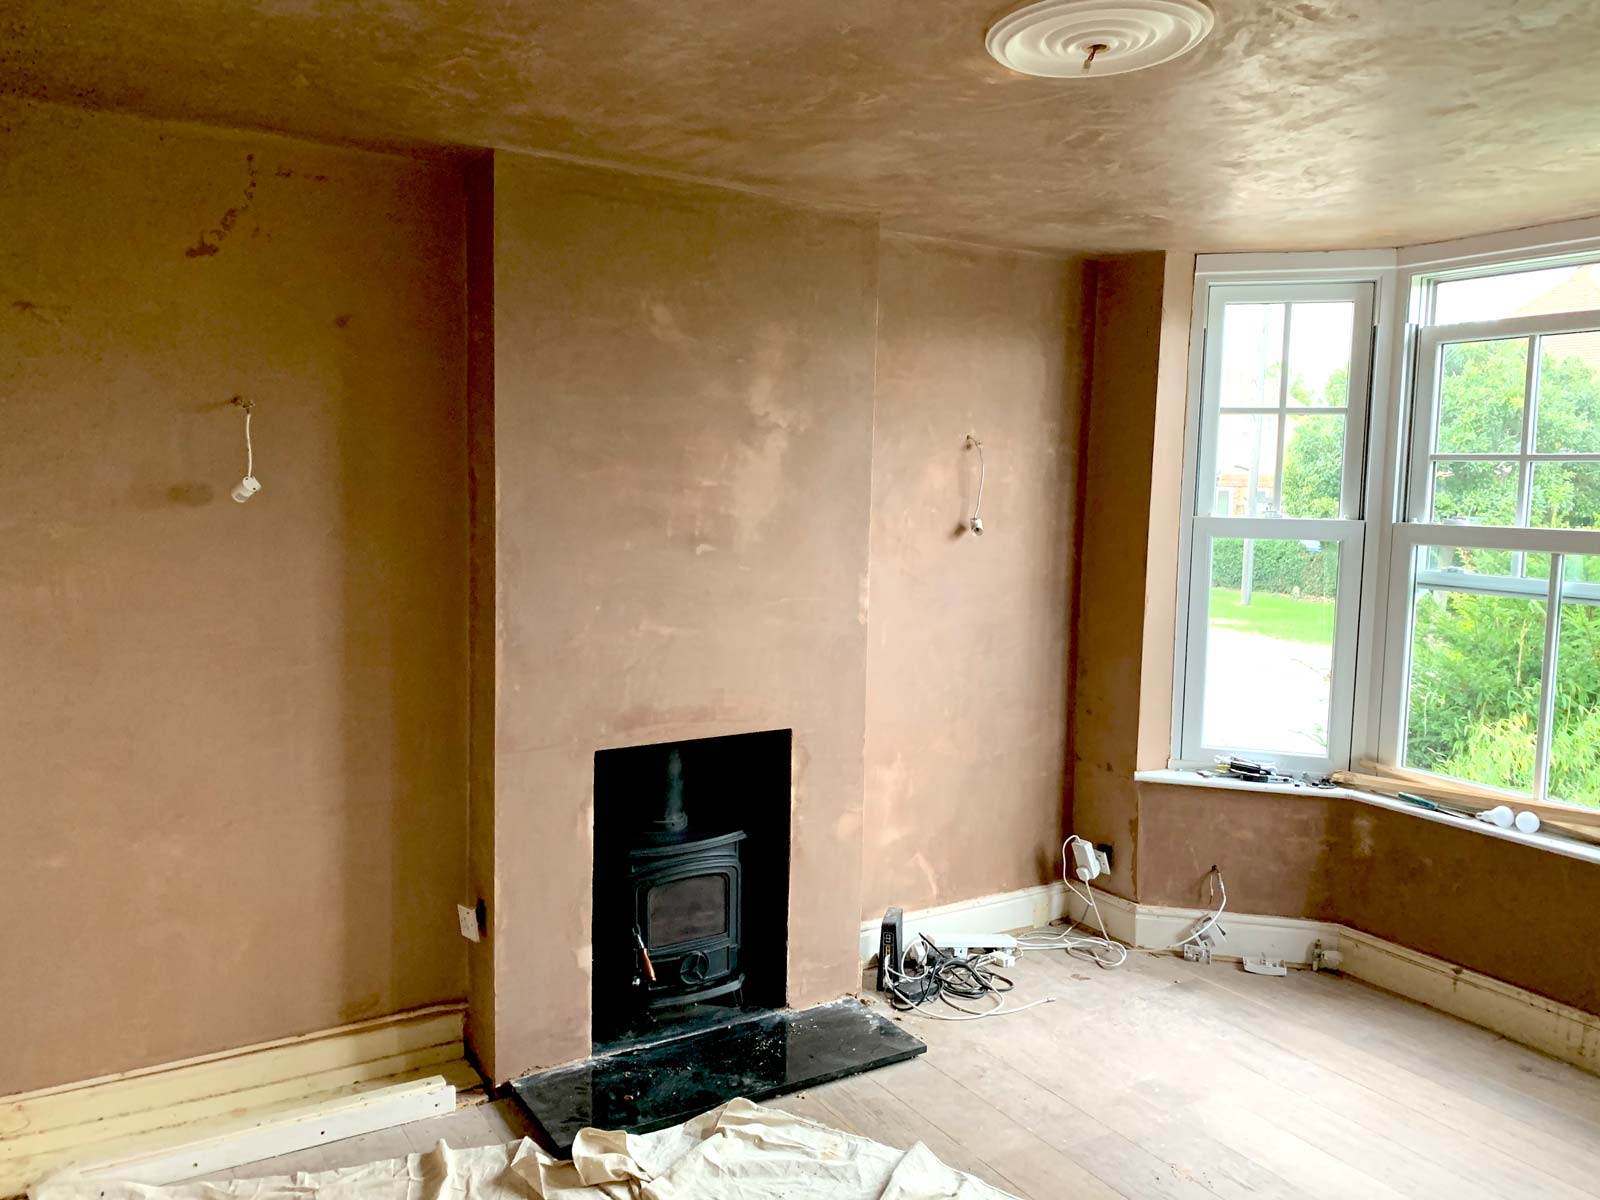
Getting absolutely plastered! lol
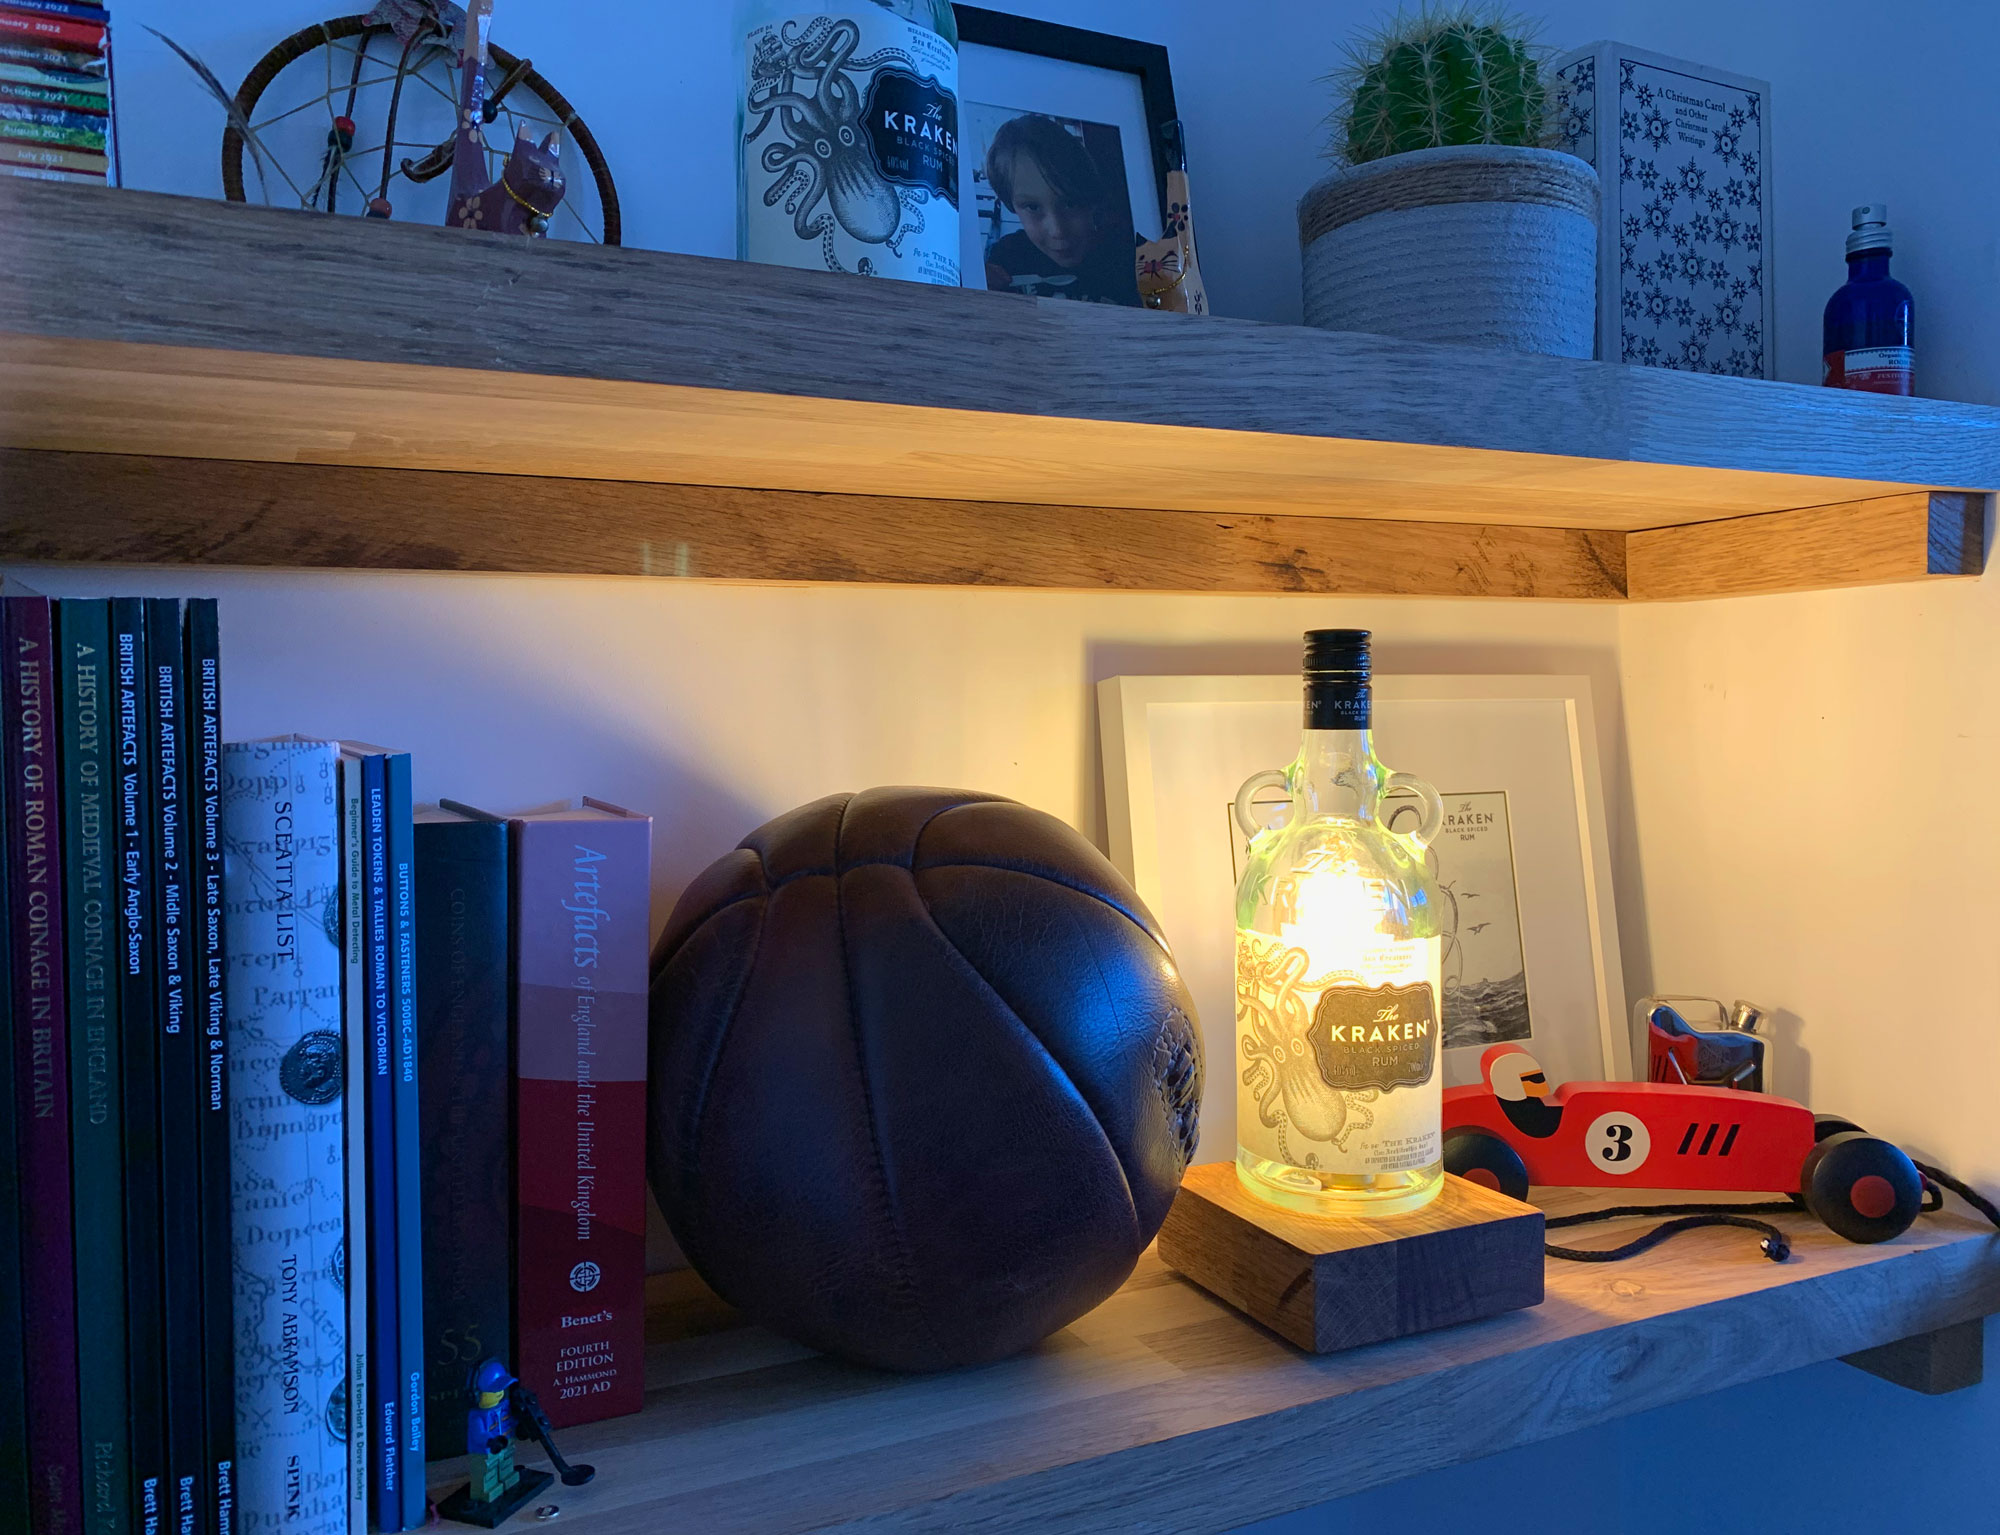
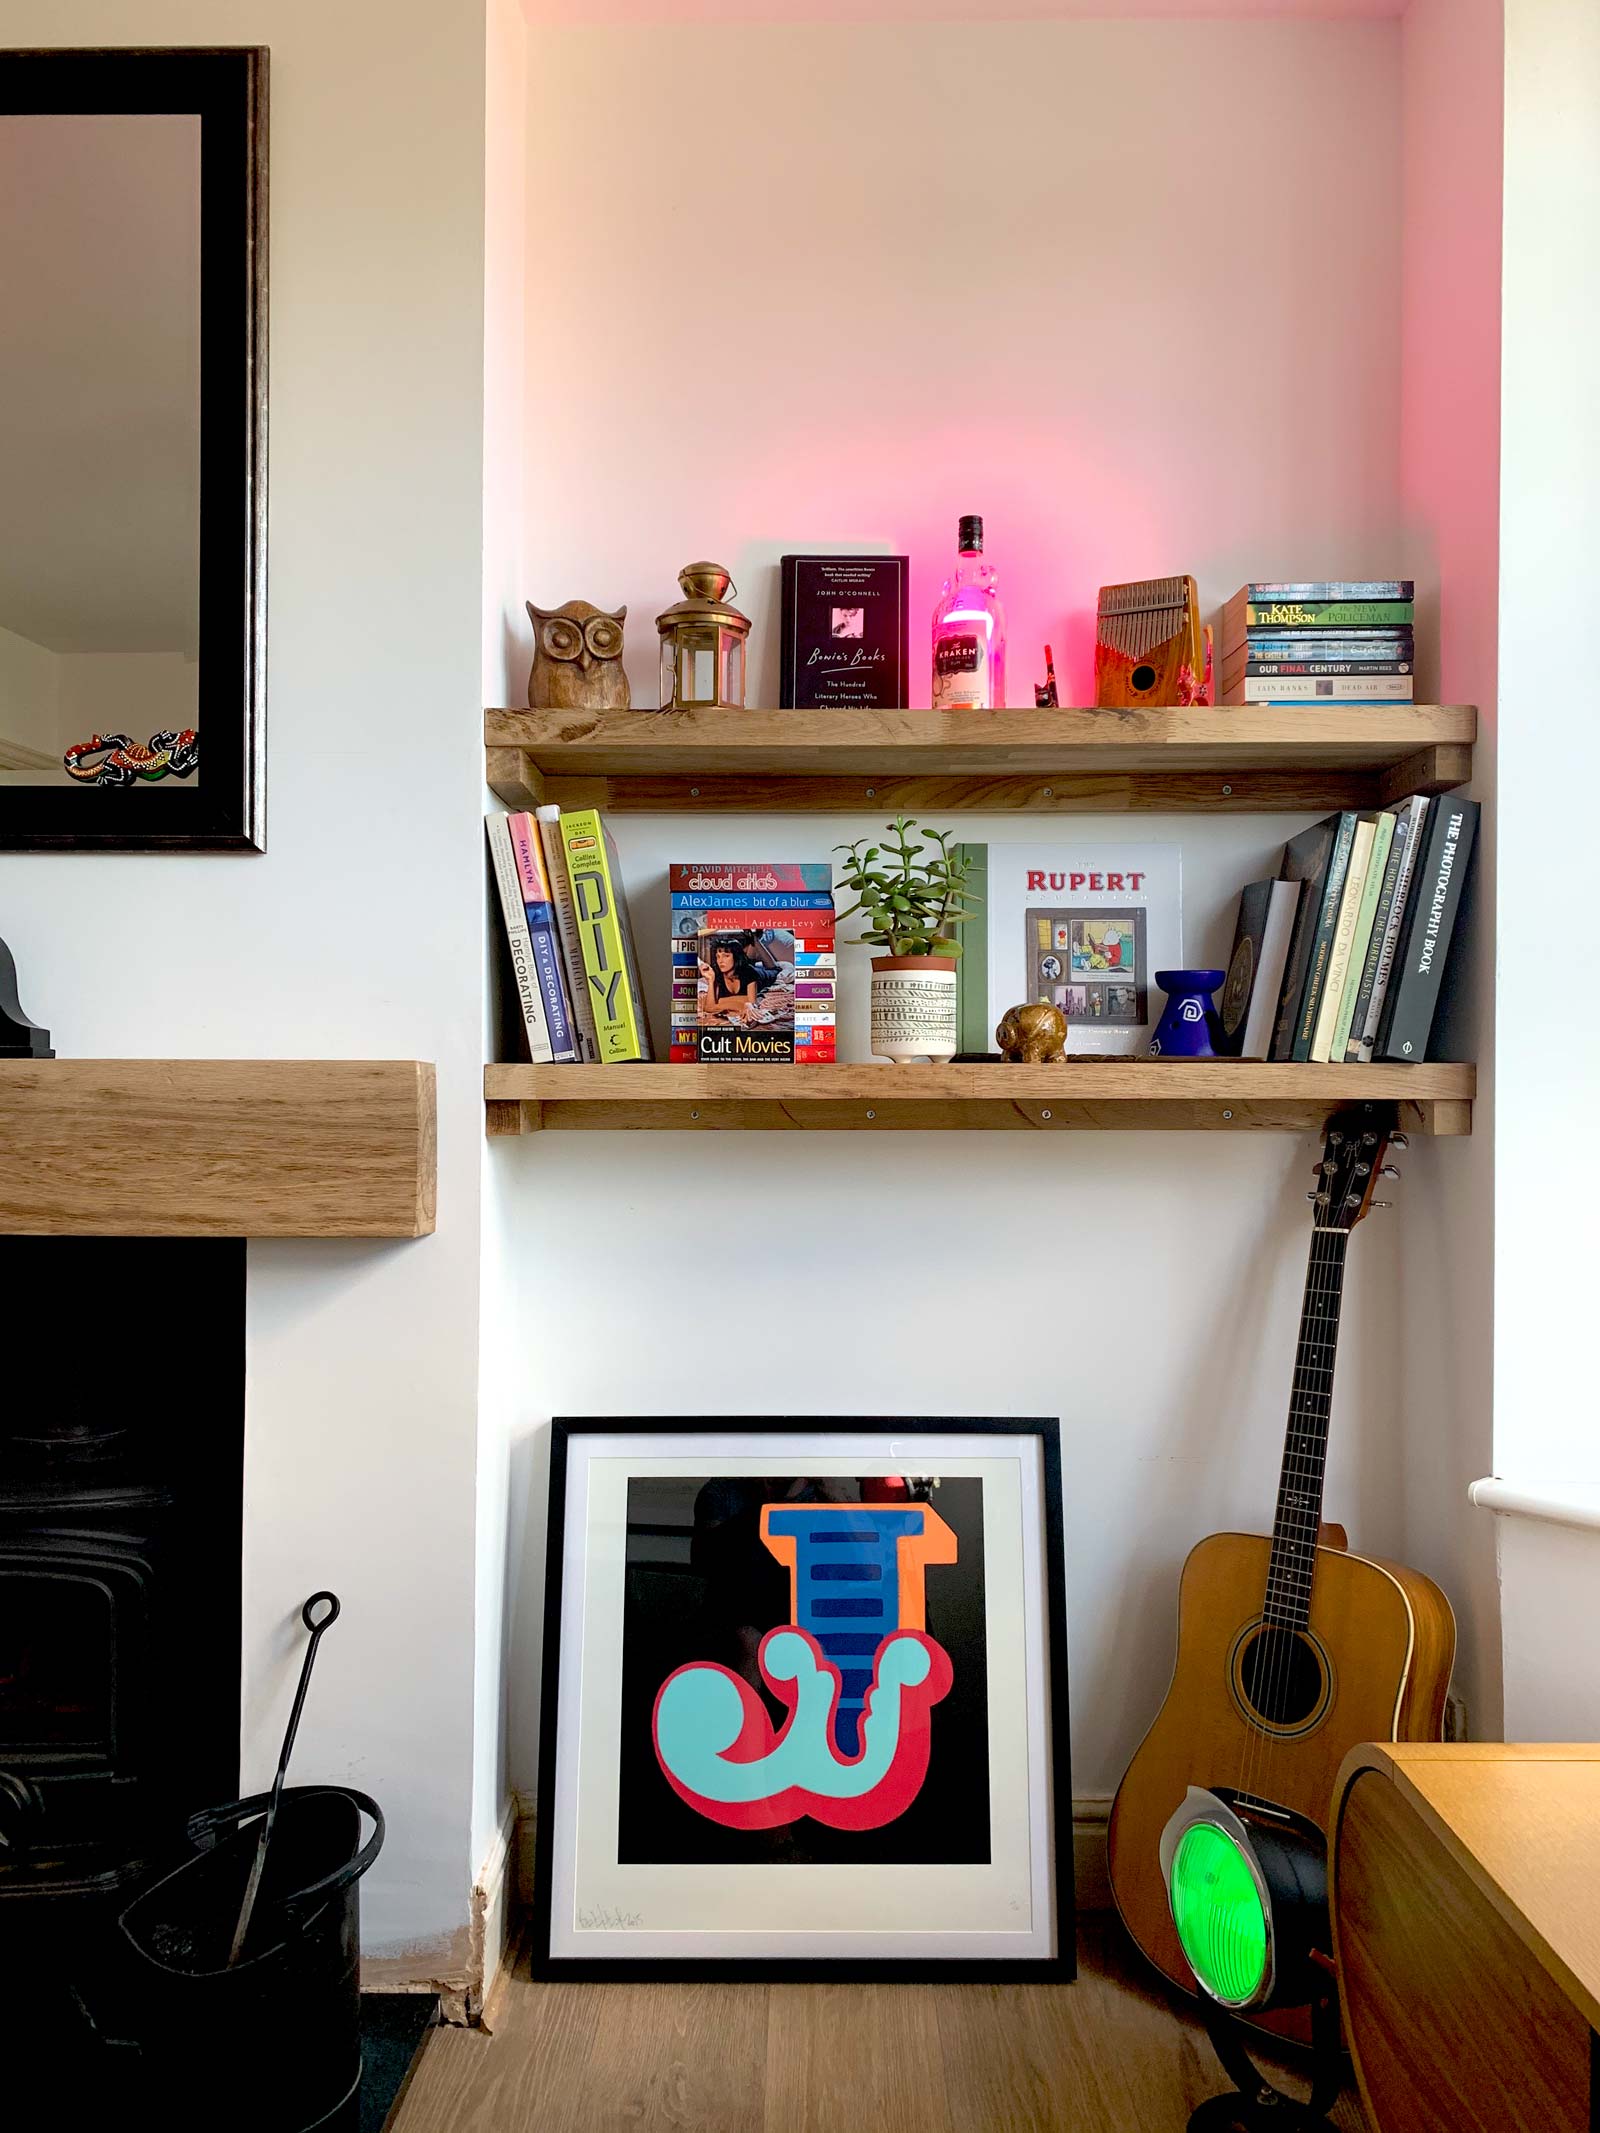
One night whilst finishing the last remains of a bottle of Kraken (I can’t resist a spot of Kraken with ginger ale every now and then) it struck us that the bottle would make a great lamp. We thought it would be really cool if the bulb was actually inside the bottle, but how on earth could we make that work! We knew that the only way to achieve this would be to make a hole in the bottom of the bottle, but it would have to be big enough so the bulb would fit inside.
The solution to this would be to use a hole cutting drill bit used for ceramic tiles and glass. So I ordered one which would cut a hole to a diameter of 65mm which was just big enough to fit the bulb inside. I did a lot of research on the safest way to do this as drilling a large whole in a glass bottle is quite a tricky thing. Glass is obviously a fragile material to drill into but it can be done (as you can see by the pictures!). If you want to attempt it yourself my advice would be to do a lot of research to make sure you are doing it in the safest way possible.
So now the hole was cut and smoothed off with wet and dry sandpaper, how do I mount the light fitting so the bottle sat over the top of it. I had thought of making a plinth which would be perfect for a portable light (and this will come in handy for another project), but I wanted the wiring to be hidden. So the only way around this was to have the wiring plumbed directly into the shelf from the wall. Doing this would mean all the wiring was hidden and the light would form part of the shelf, perfect!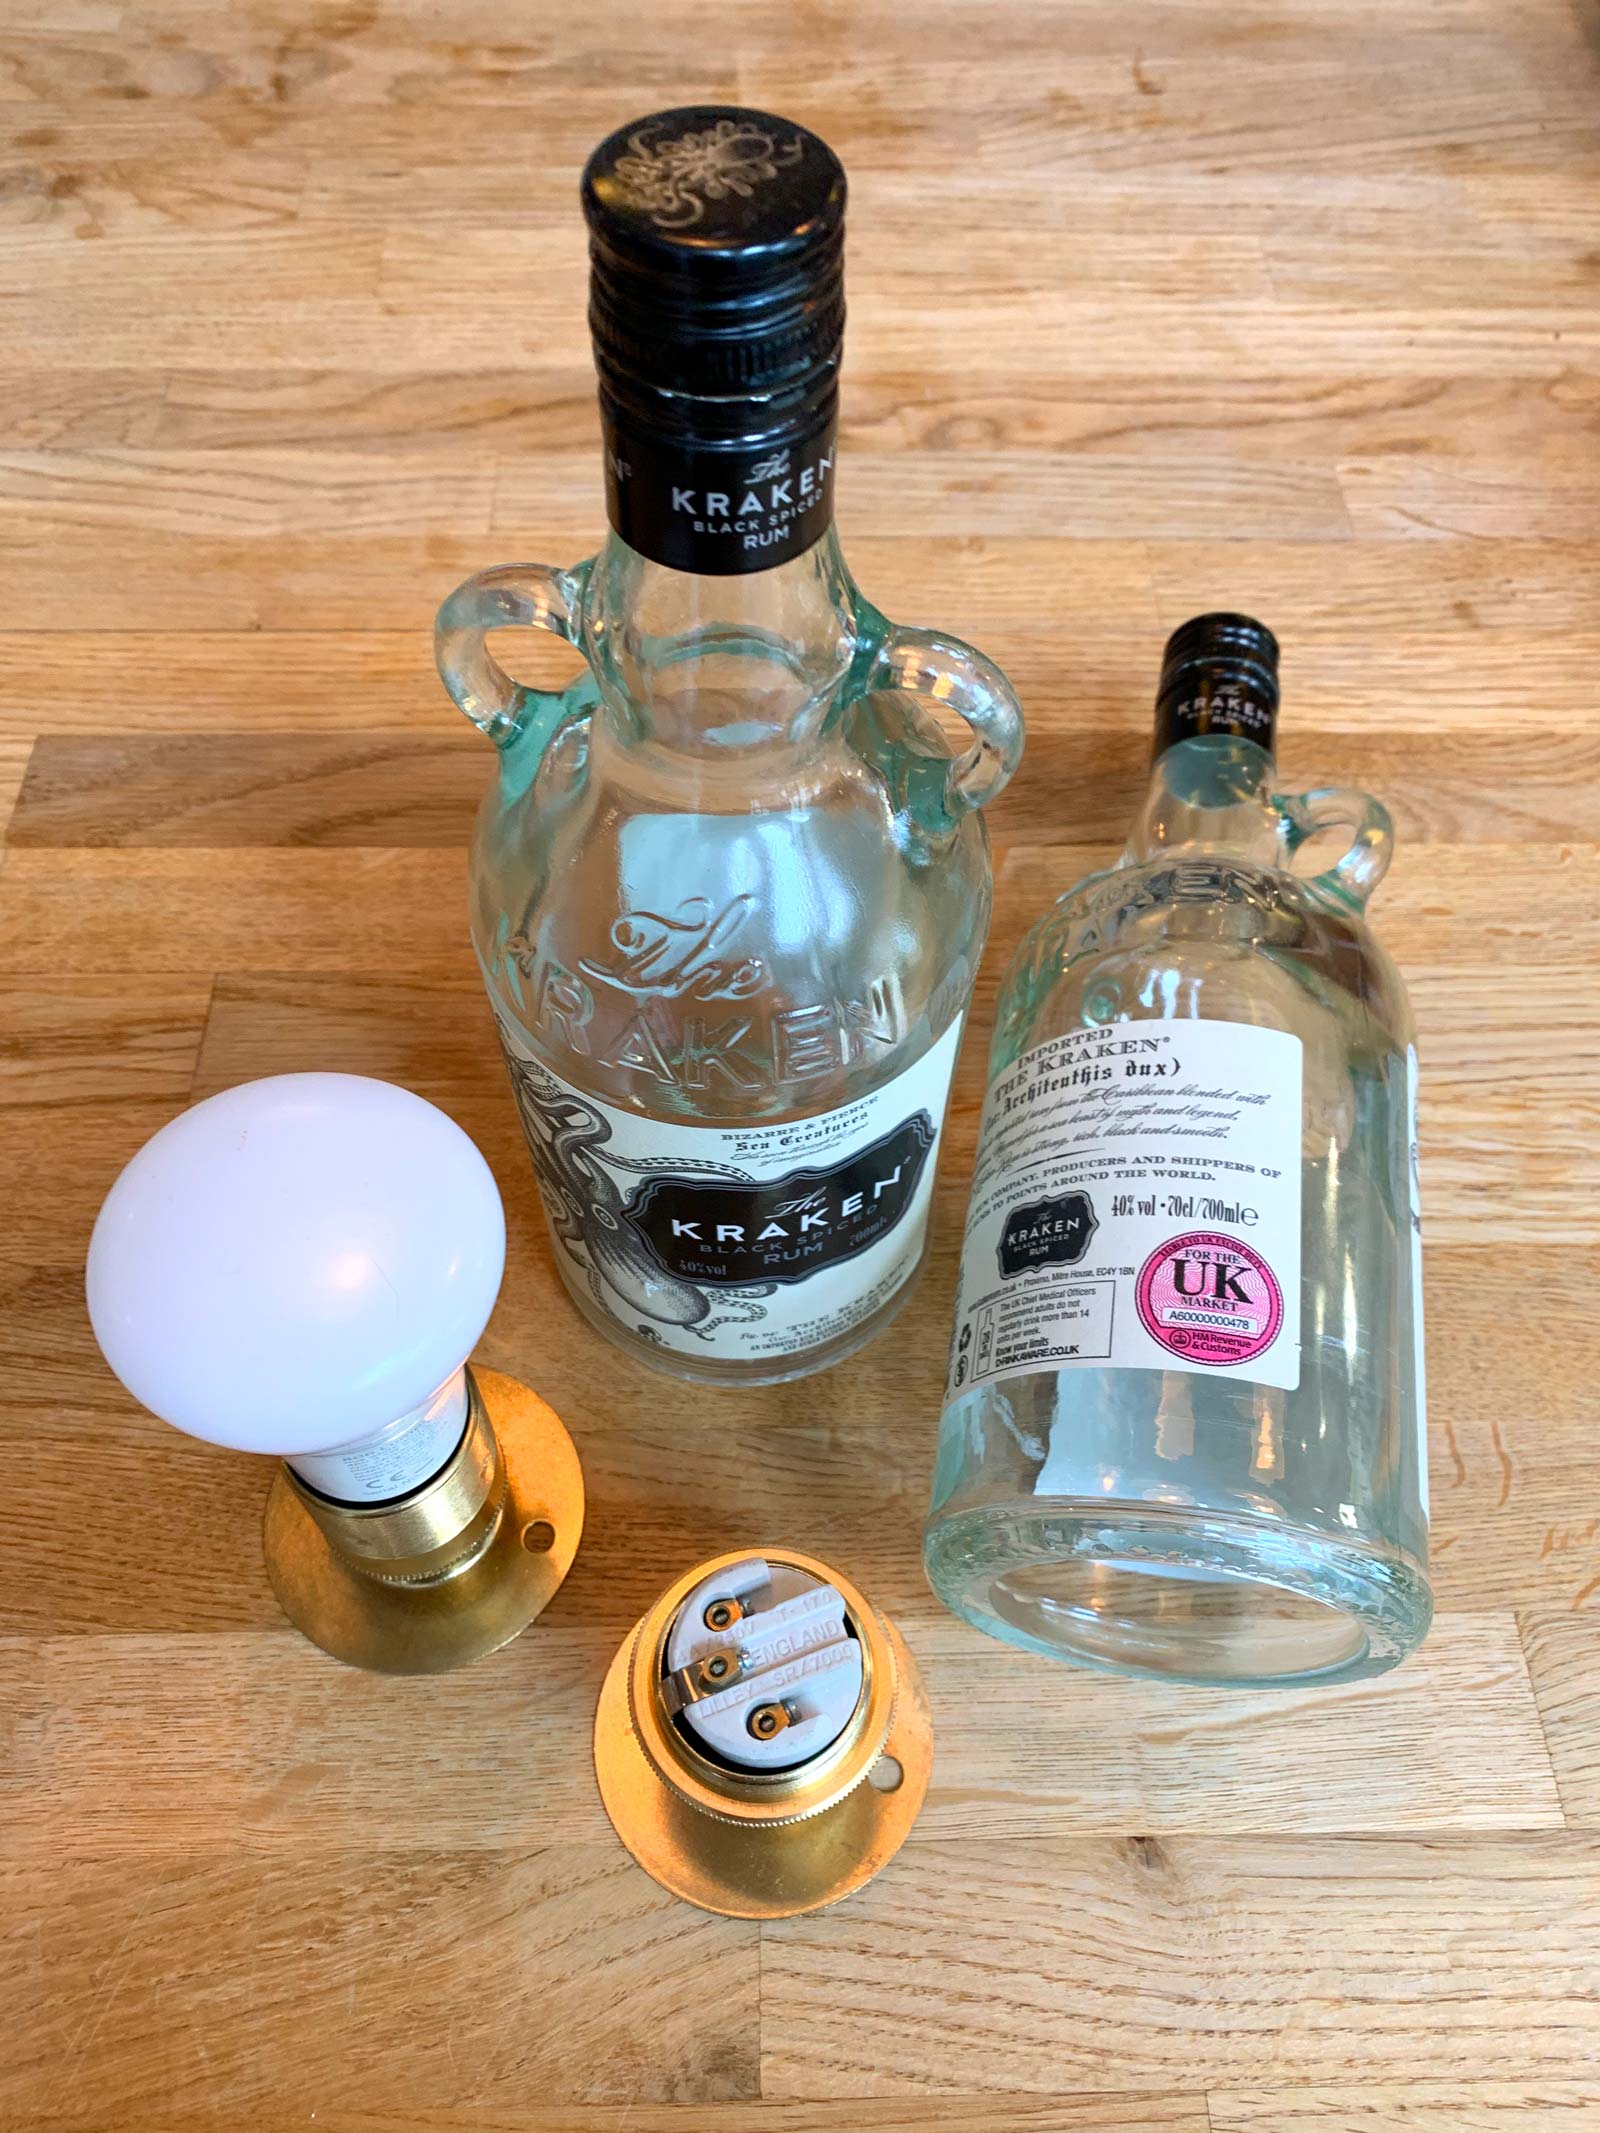
The holes are now cut!

Feeding the wiring through the shelf.
I made the shelves out of a 3 meter length of solid oak kitchen worktop. Once they were cut down to size this gave me 4 solid shelves with enough thickness to run the wiring through. This all took a little time and some precise measurements as drilling the holes in the shelf for the wiring to feed through had to be bang on. I used a spare piece of wood left over from making the shelves to practice on before I did it for real on the shelf. Thankfully the practice paid off and it all worked out really well.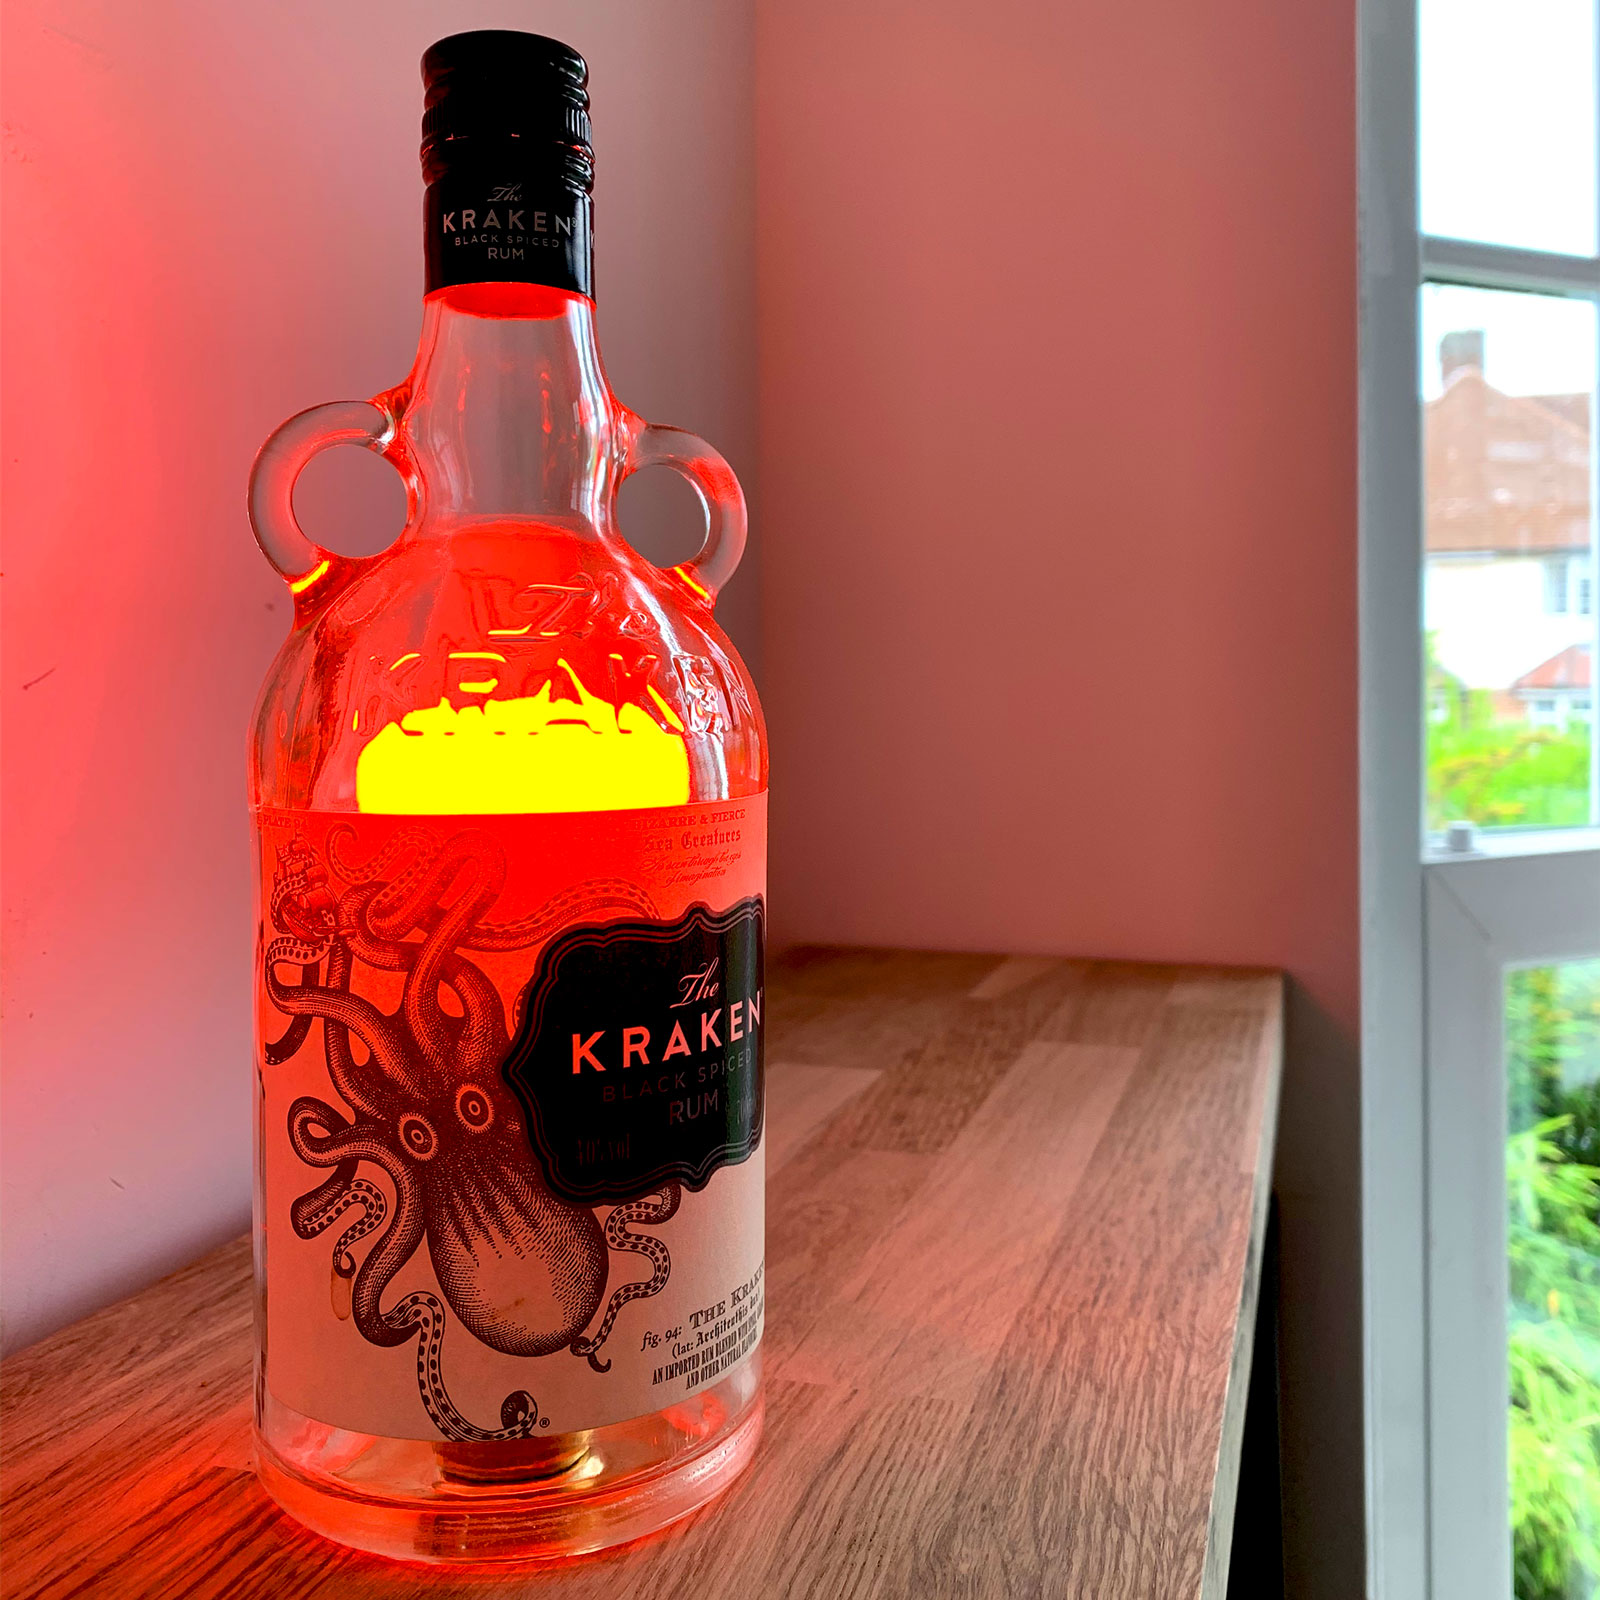
Roxanne was playing in the background. 😉
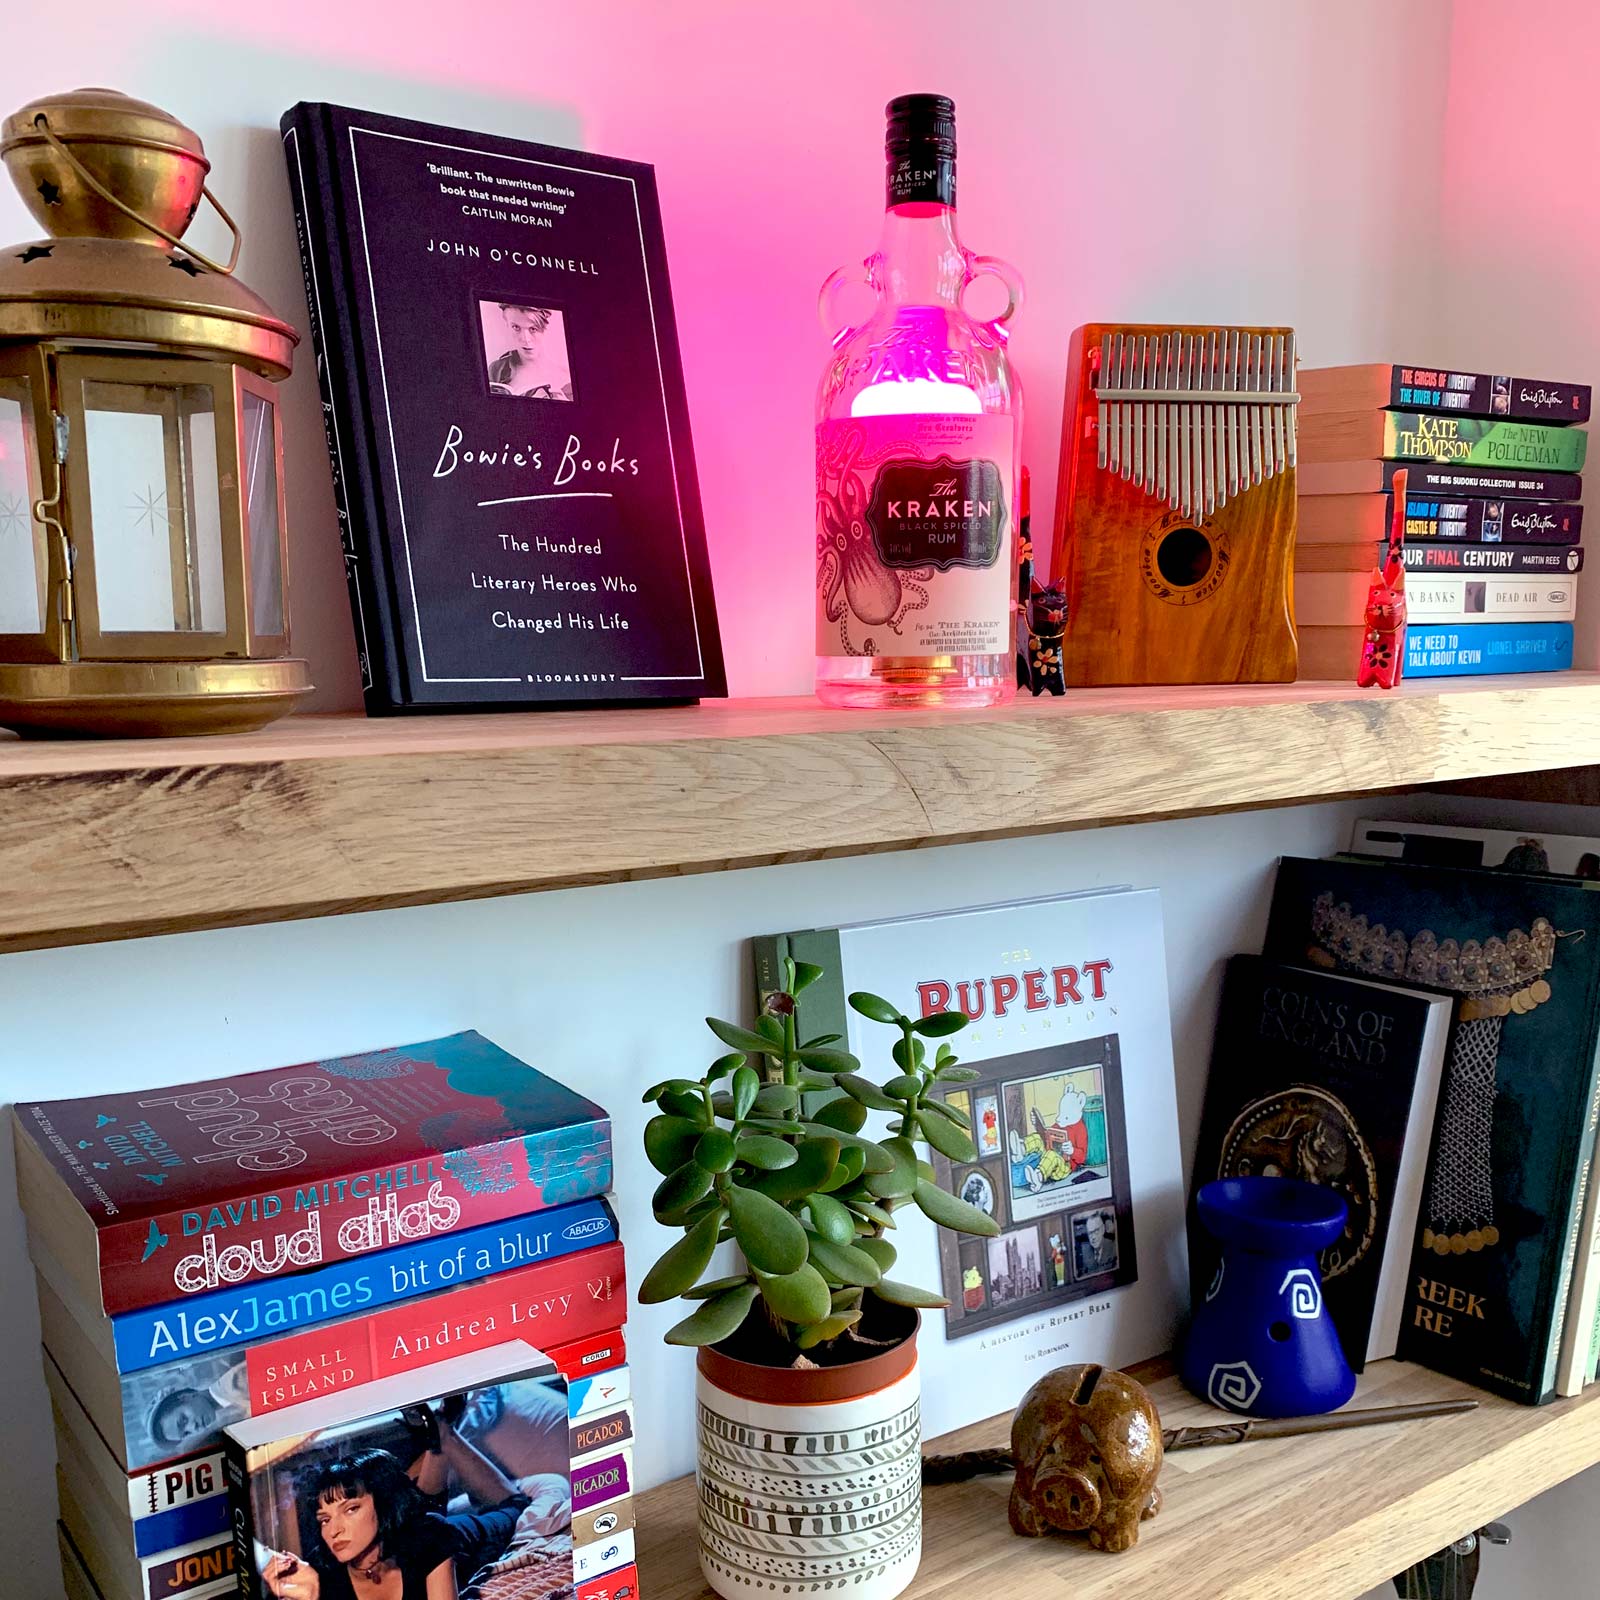
The bulbs I have used for this project are the Philips Hue bulbs that I had in the flat. Because they are LED bulbs they produce a minimal amount of heat so the kraken bottles don’t get hot. I probably wouldn’t advise using filament bulbs for a project like this as they would produce too much heat inside the bottle. Even with the LED bulbs I have cut small holes in the lids of the bottles just so the air can get inside. The great thing about the Philips Hue bulbs is that I can change the colour which does look fantastic shining through these Kraken bottles.
So by day they look like they are part of the eclectic shelf display, but by night they take on a whole new life and add a really cool and colourful dimension to the lounge lighting! I wonder what other bottles I can add to the collection so I can mix them up, any suggestions are more than welcome!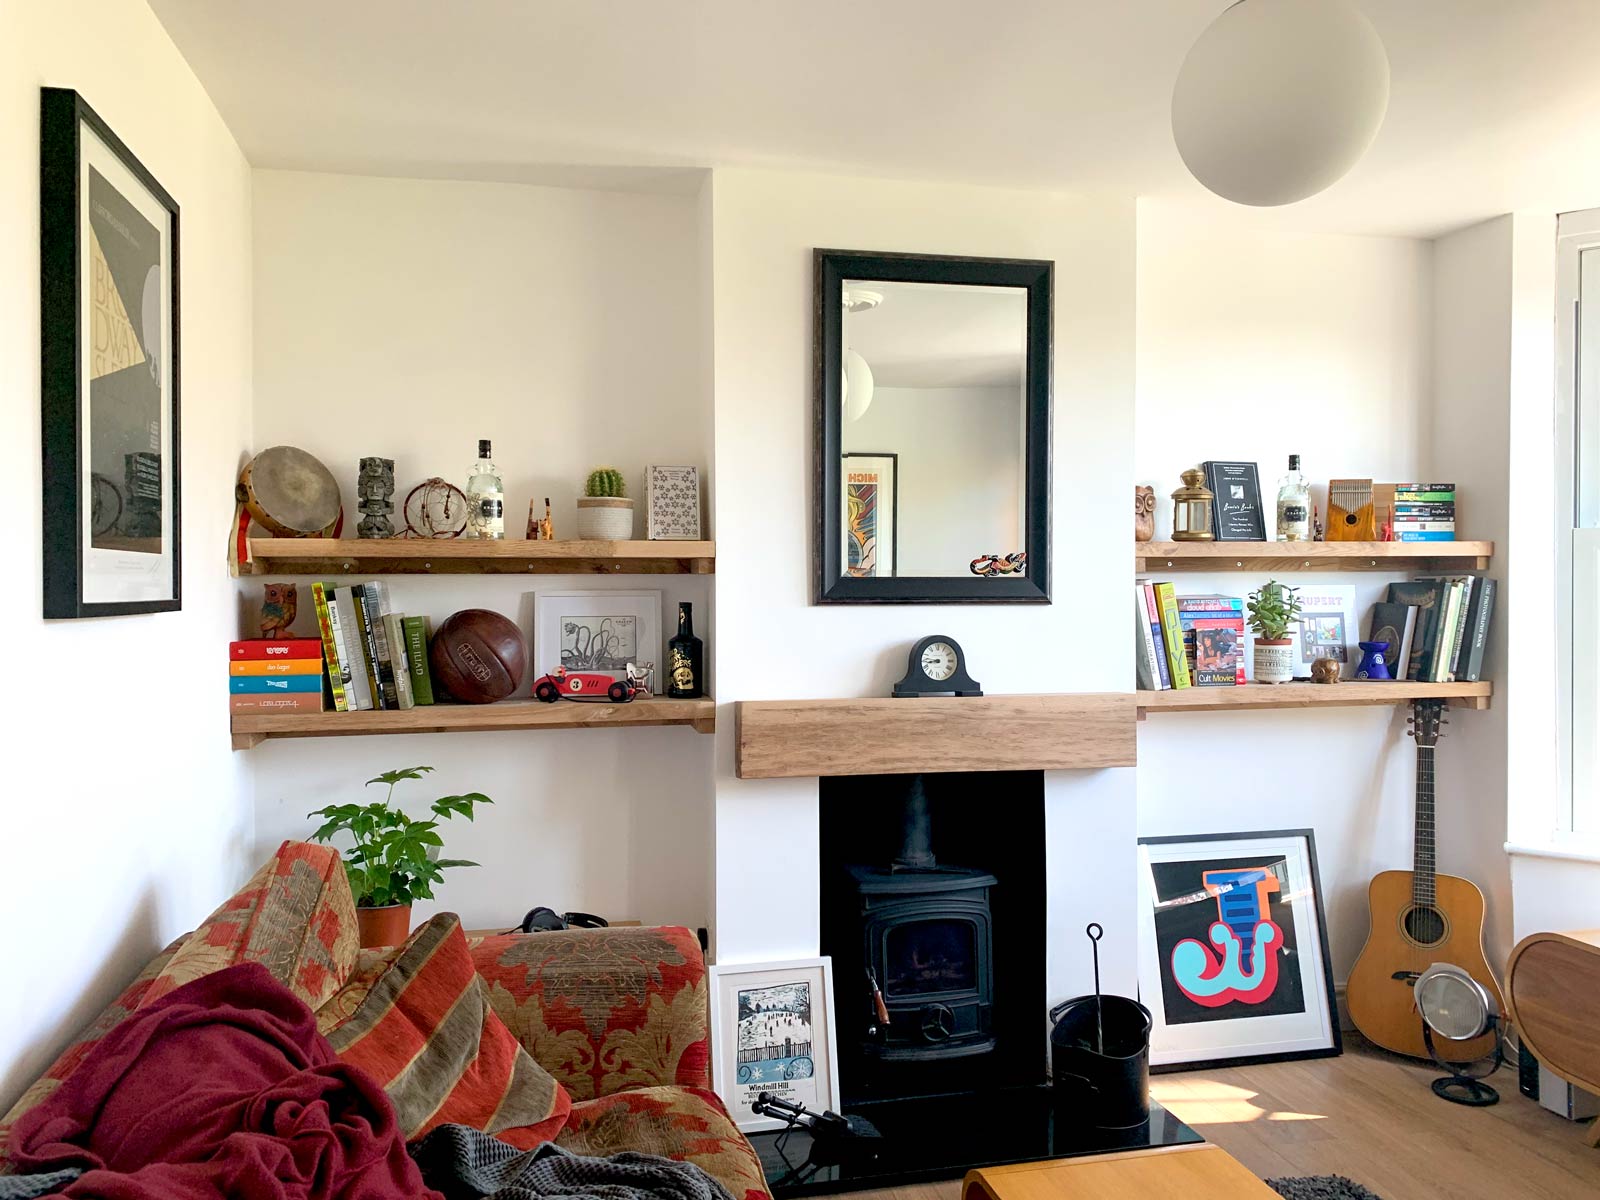
An eclectic mix of things, a bit like my head!
Really must sort that little bit of skirting.
Creating A Gallery Wall
creating a gallery wall
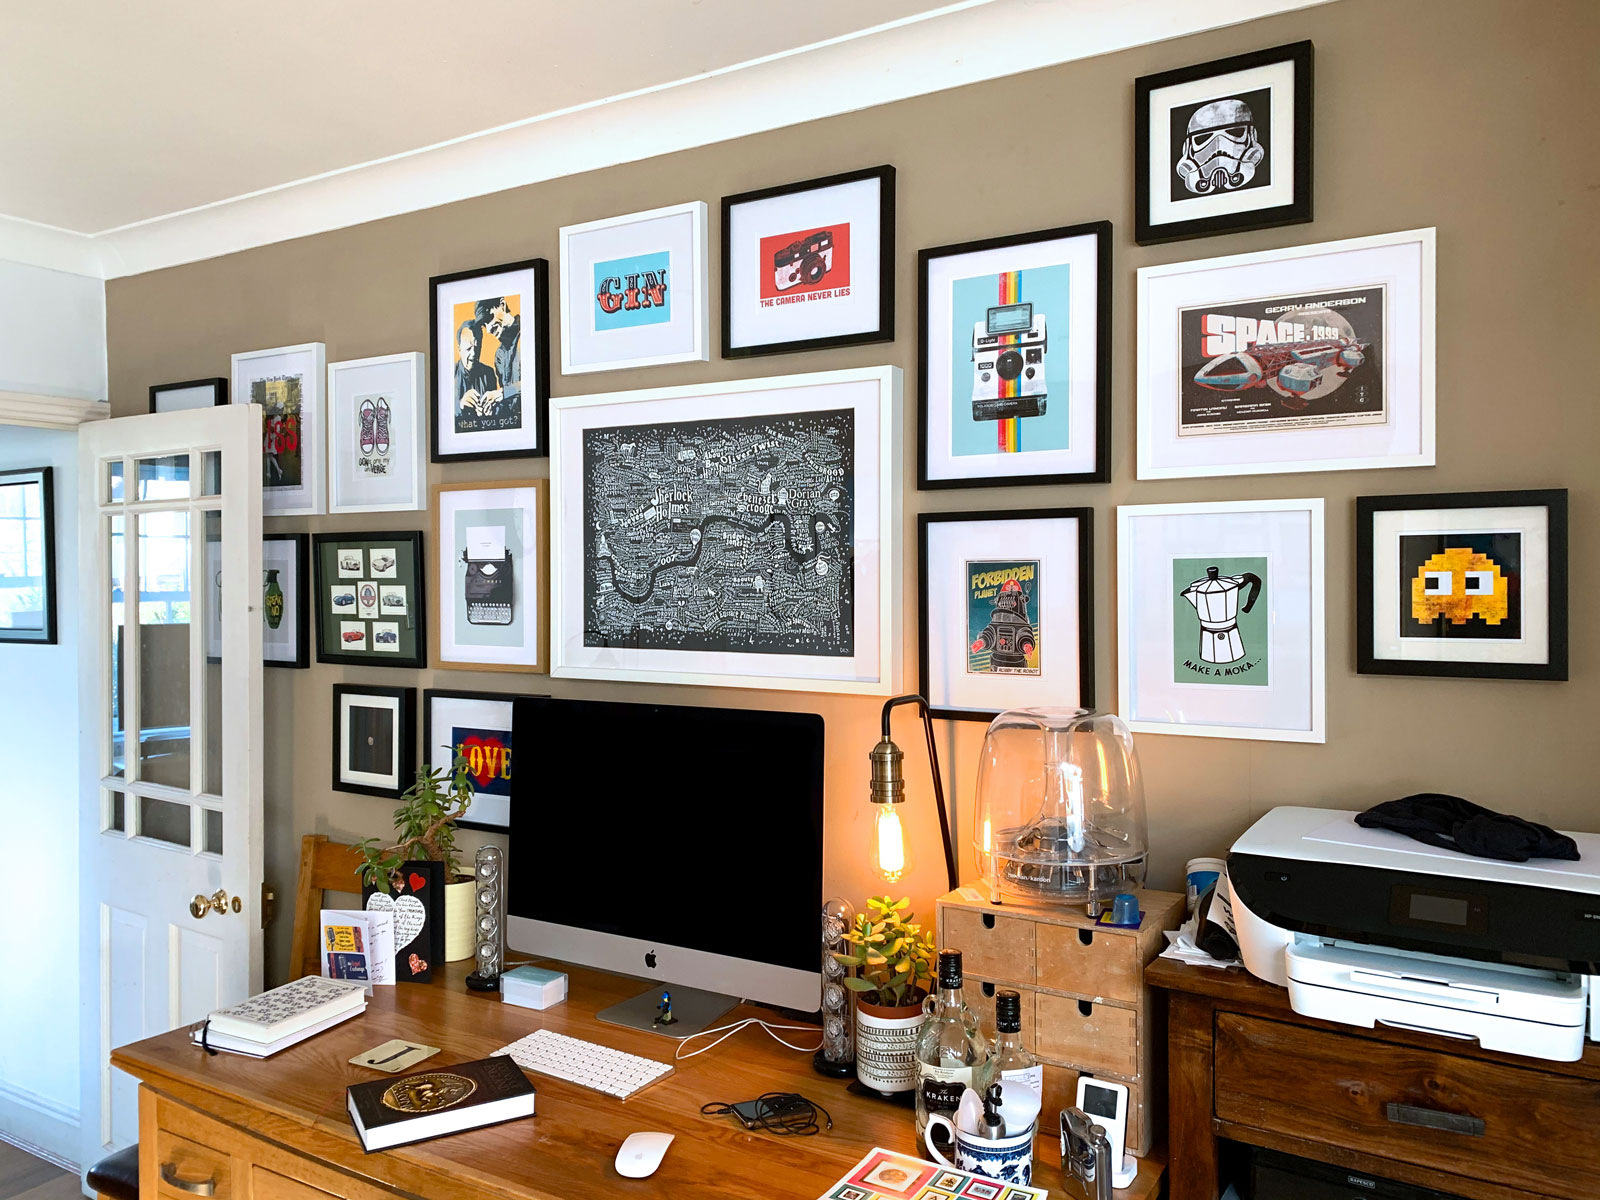
Creating a gallery wall is a great way of making an exciting feature in your home and there is no end to what you can include. It could be limited edition prints, original paintings, photographs of family, friends and holidays, a favourite album cover, beermats, postcards, comic book covers, a collection of concert tickets, pressed flowers, I’ve even framed my first silver hammered coin that I found whilst metal detecting! I think you get the point, creating a galley wall is something you can be very creative with and have a lot of fun doing!
I decided to create a gallery wall above my workspace. This is because it helps to keep me inspired whilst working on printable designs, but it also means I can swap pictures in and out so I can see if the designs I’m working on are looking good!
For this gallery wall I have used a limited edition screen print that I purchased at an art fair a few years back. I’ve used this as the main focal point and then created the rest of the gallery around it which has rather nicely framed my workspace. As well as being good for keeping me inspired it also serves another purpose and this is to show that creating a gallery wall that looks good, doesn’t have to cost the earth!
The limited edition screen print that you can see I picked up for £125 and this is the most expensive part of the gallery wall. The frame for this print is from habitat and cost £38, all the smaller frames came from Wilko and cost between £4.50 – £5.50. So the entire cost for this Gallery wall is just under £310! Most of the prints that you can see in this gallery are available on the printable website.
For me personally I love the contemporary look of the frames that I have chosen, but again this is something that you can mix and match to suit your own tastes. You can find a wide variety of frames in different styles and sizes in all sorts of places, from art markets and car boot sales to charity shops and the internet, you just need to keep your eyes peeled!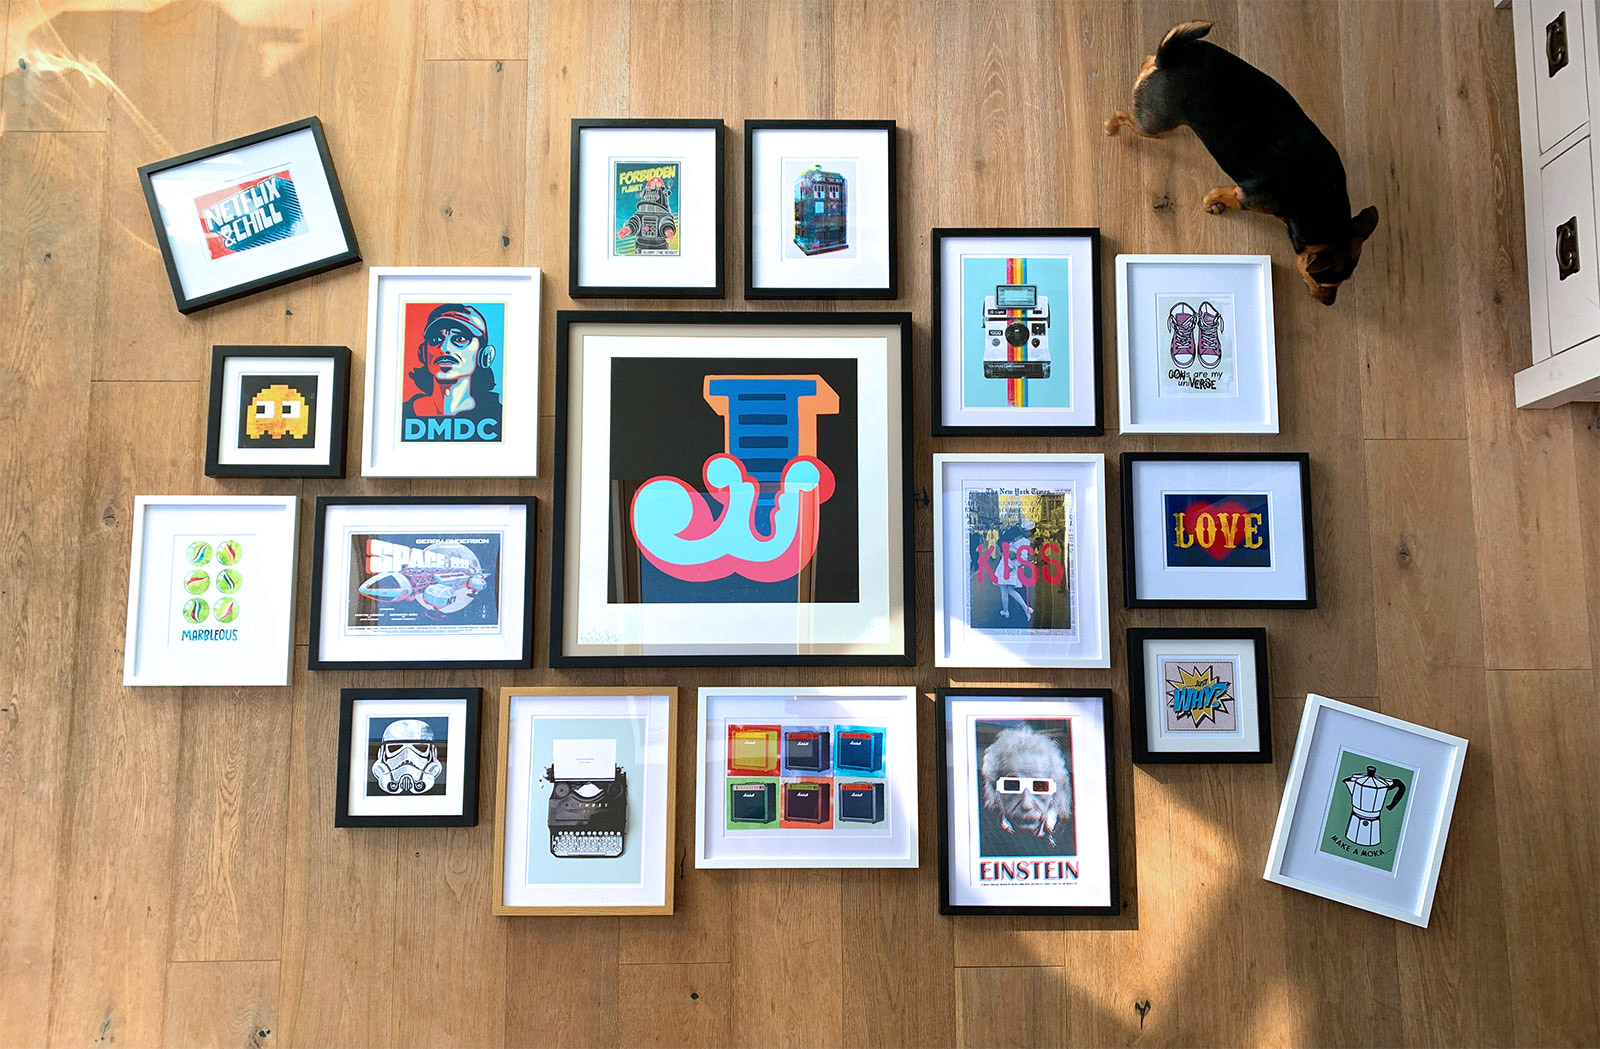
Figuring out a composition on the floor with a little help from Echo!
Another important part of creating a gallery wall and possibly one that puts a lot of people off is the composition. So at this point you have found all the things you want to include in your gallery wall but where in the composition do you put them? There are all kinds of factors that play a part in this, colours, sizes, how much space on the wall you have to play with. When you think about it in those terms I can see why some people would be put off doing it, but don’t be!
Making a gallery wall is a personal experience and because of that there really isn’t a wrong or right way of doing it, just do what looks good to you. The gallery wall I have created above my workspace will be ever changing due to it being a testing ground for my printable prints, so it was never put together as a set piece. But If I were going to create a set gallery wall then my advice would be to place all the items you are going to use on the floor and just move things around until you find a composition that you are happy with. That’s all there is to it!Once you are happy with how it looks on the floor then take a photo so you can use that for reference when committing it to the wall. It’s also a good idea at this stage to do some measuring just to make sure that what you have created will actually fit on the wall. If like me you have decided to use a bigger print as the main focus then place that in the right position on the wall first and build everything else around it.
So if creating a gallery wall is something you want to do then just do it! Enjoy every stage of the process that creating a gallery wall will bring. Create something interesting and amazing that is completely unique to you and your tastes. Something that will be a talking point and inspirational for everyone who is lucky enough to see it!
If this blog inspires you to create a gallery wall of your own then please do post photographs of it on our social media pages, we would love to see them!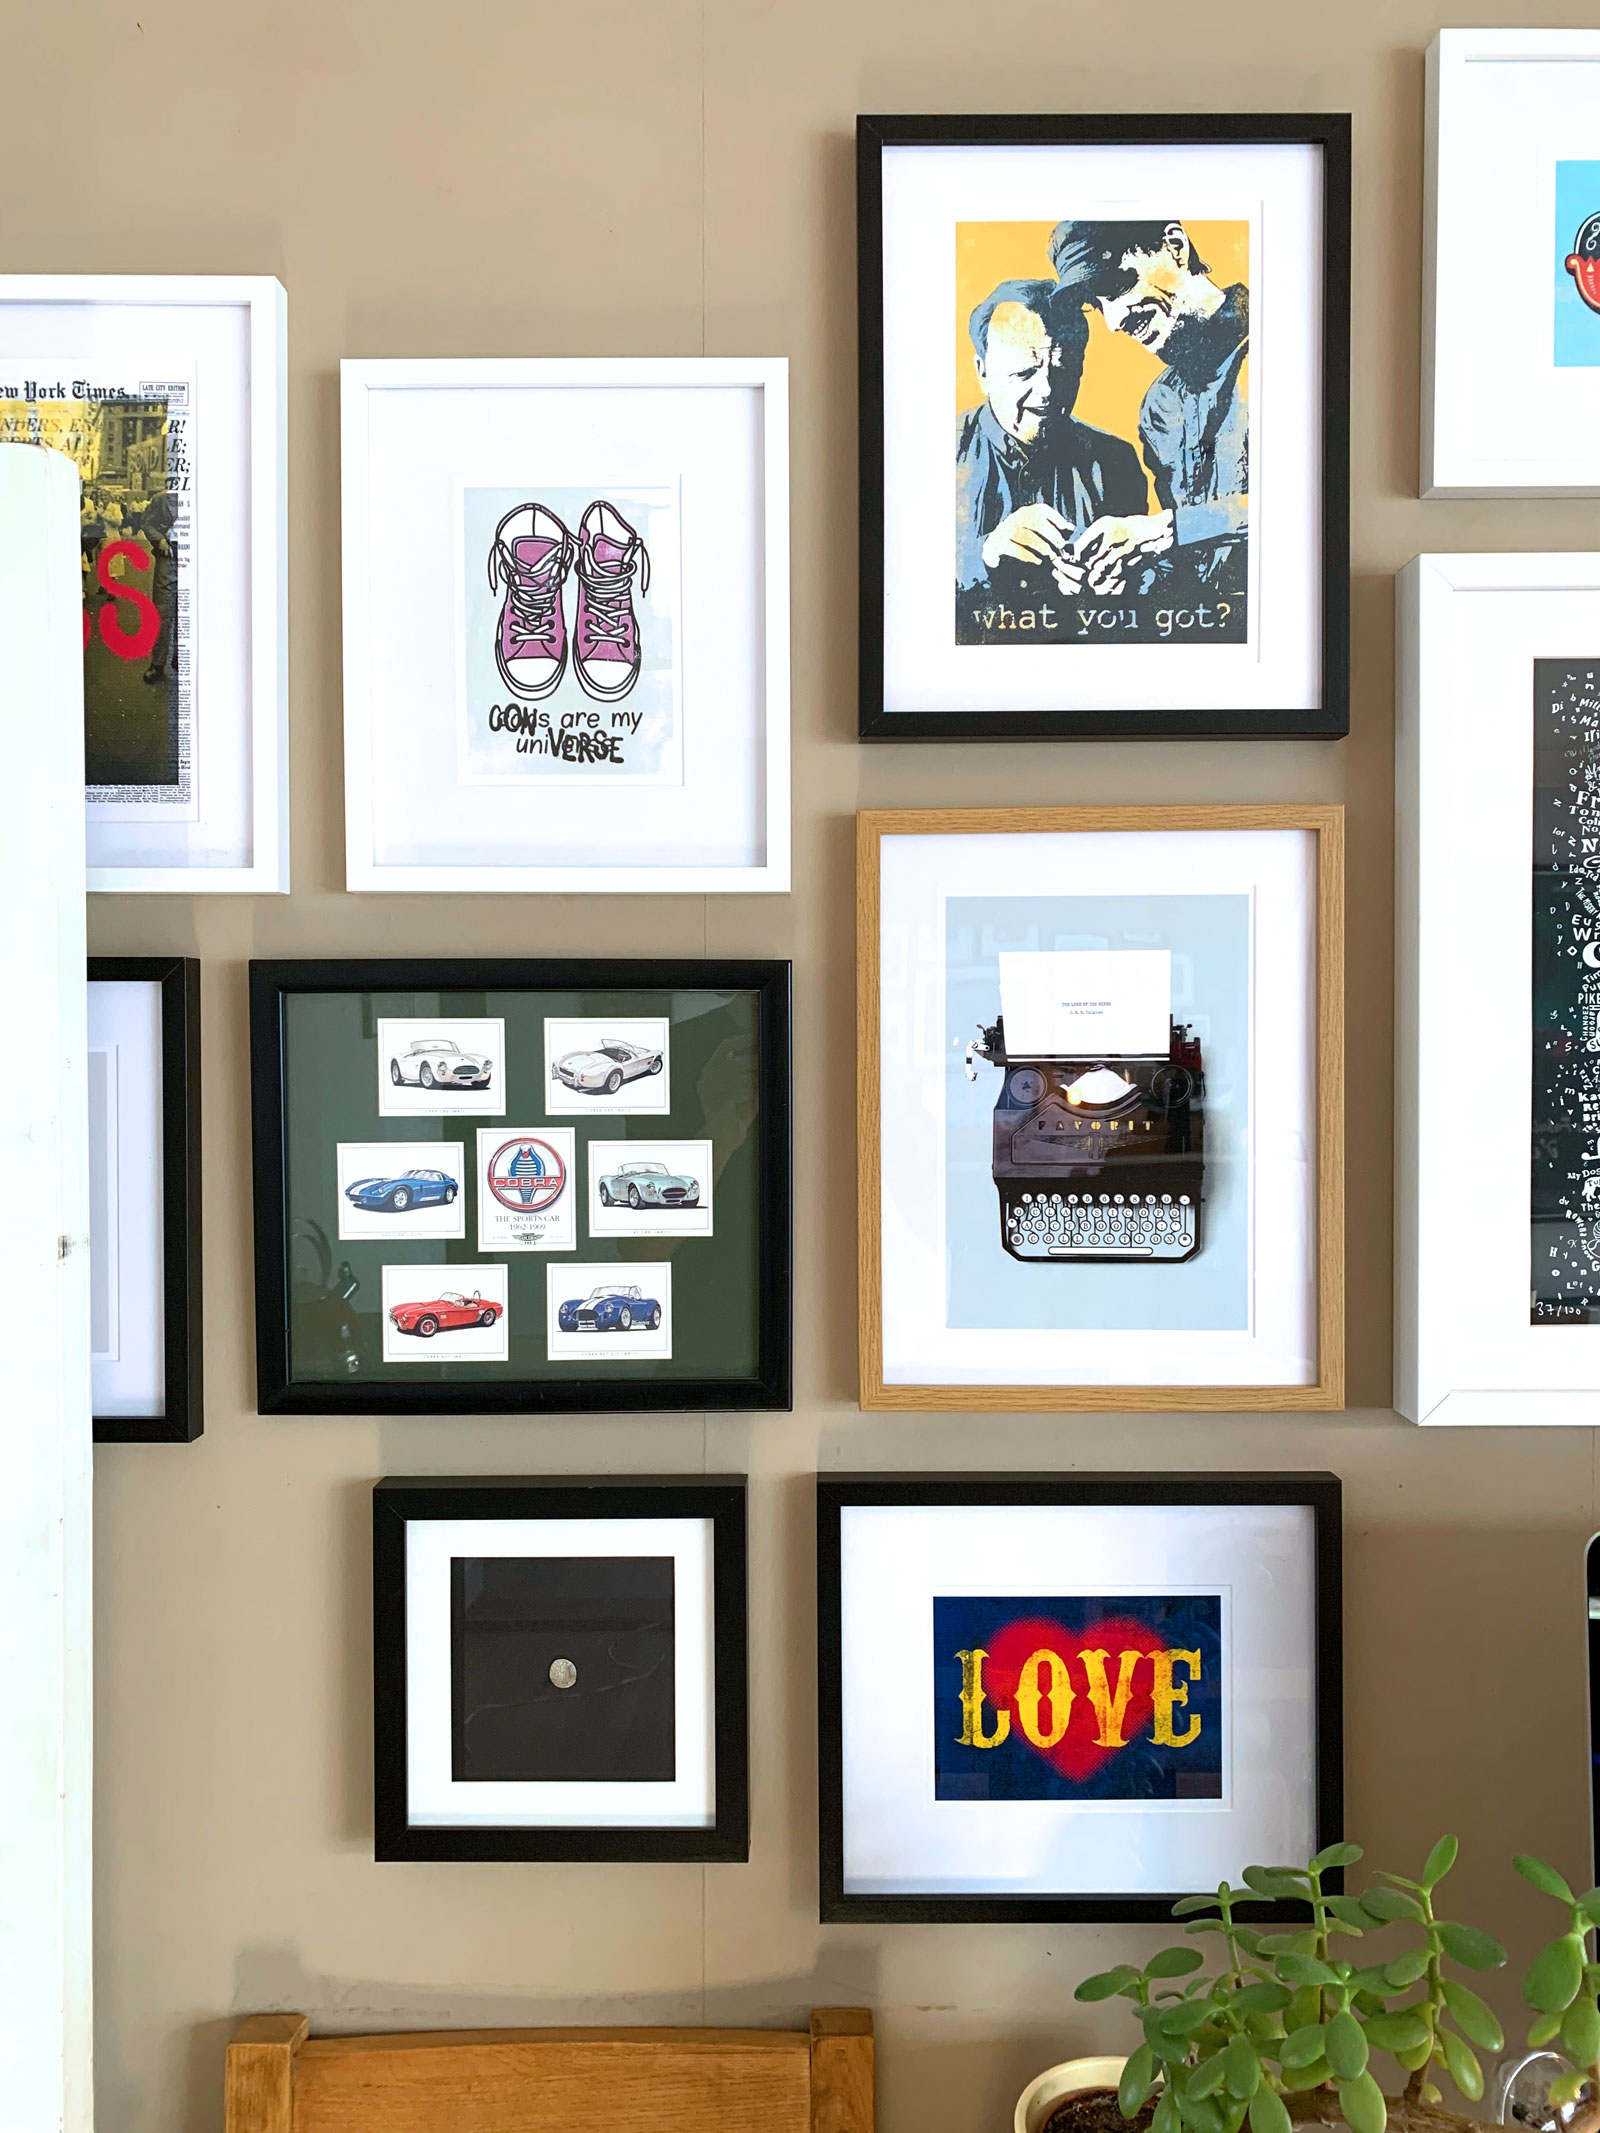
Spot my framed silver hammered coin!
Skateboard Coat Rack
Skateboard Coat Rack
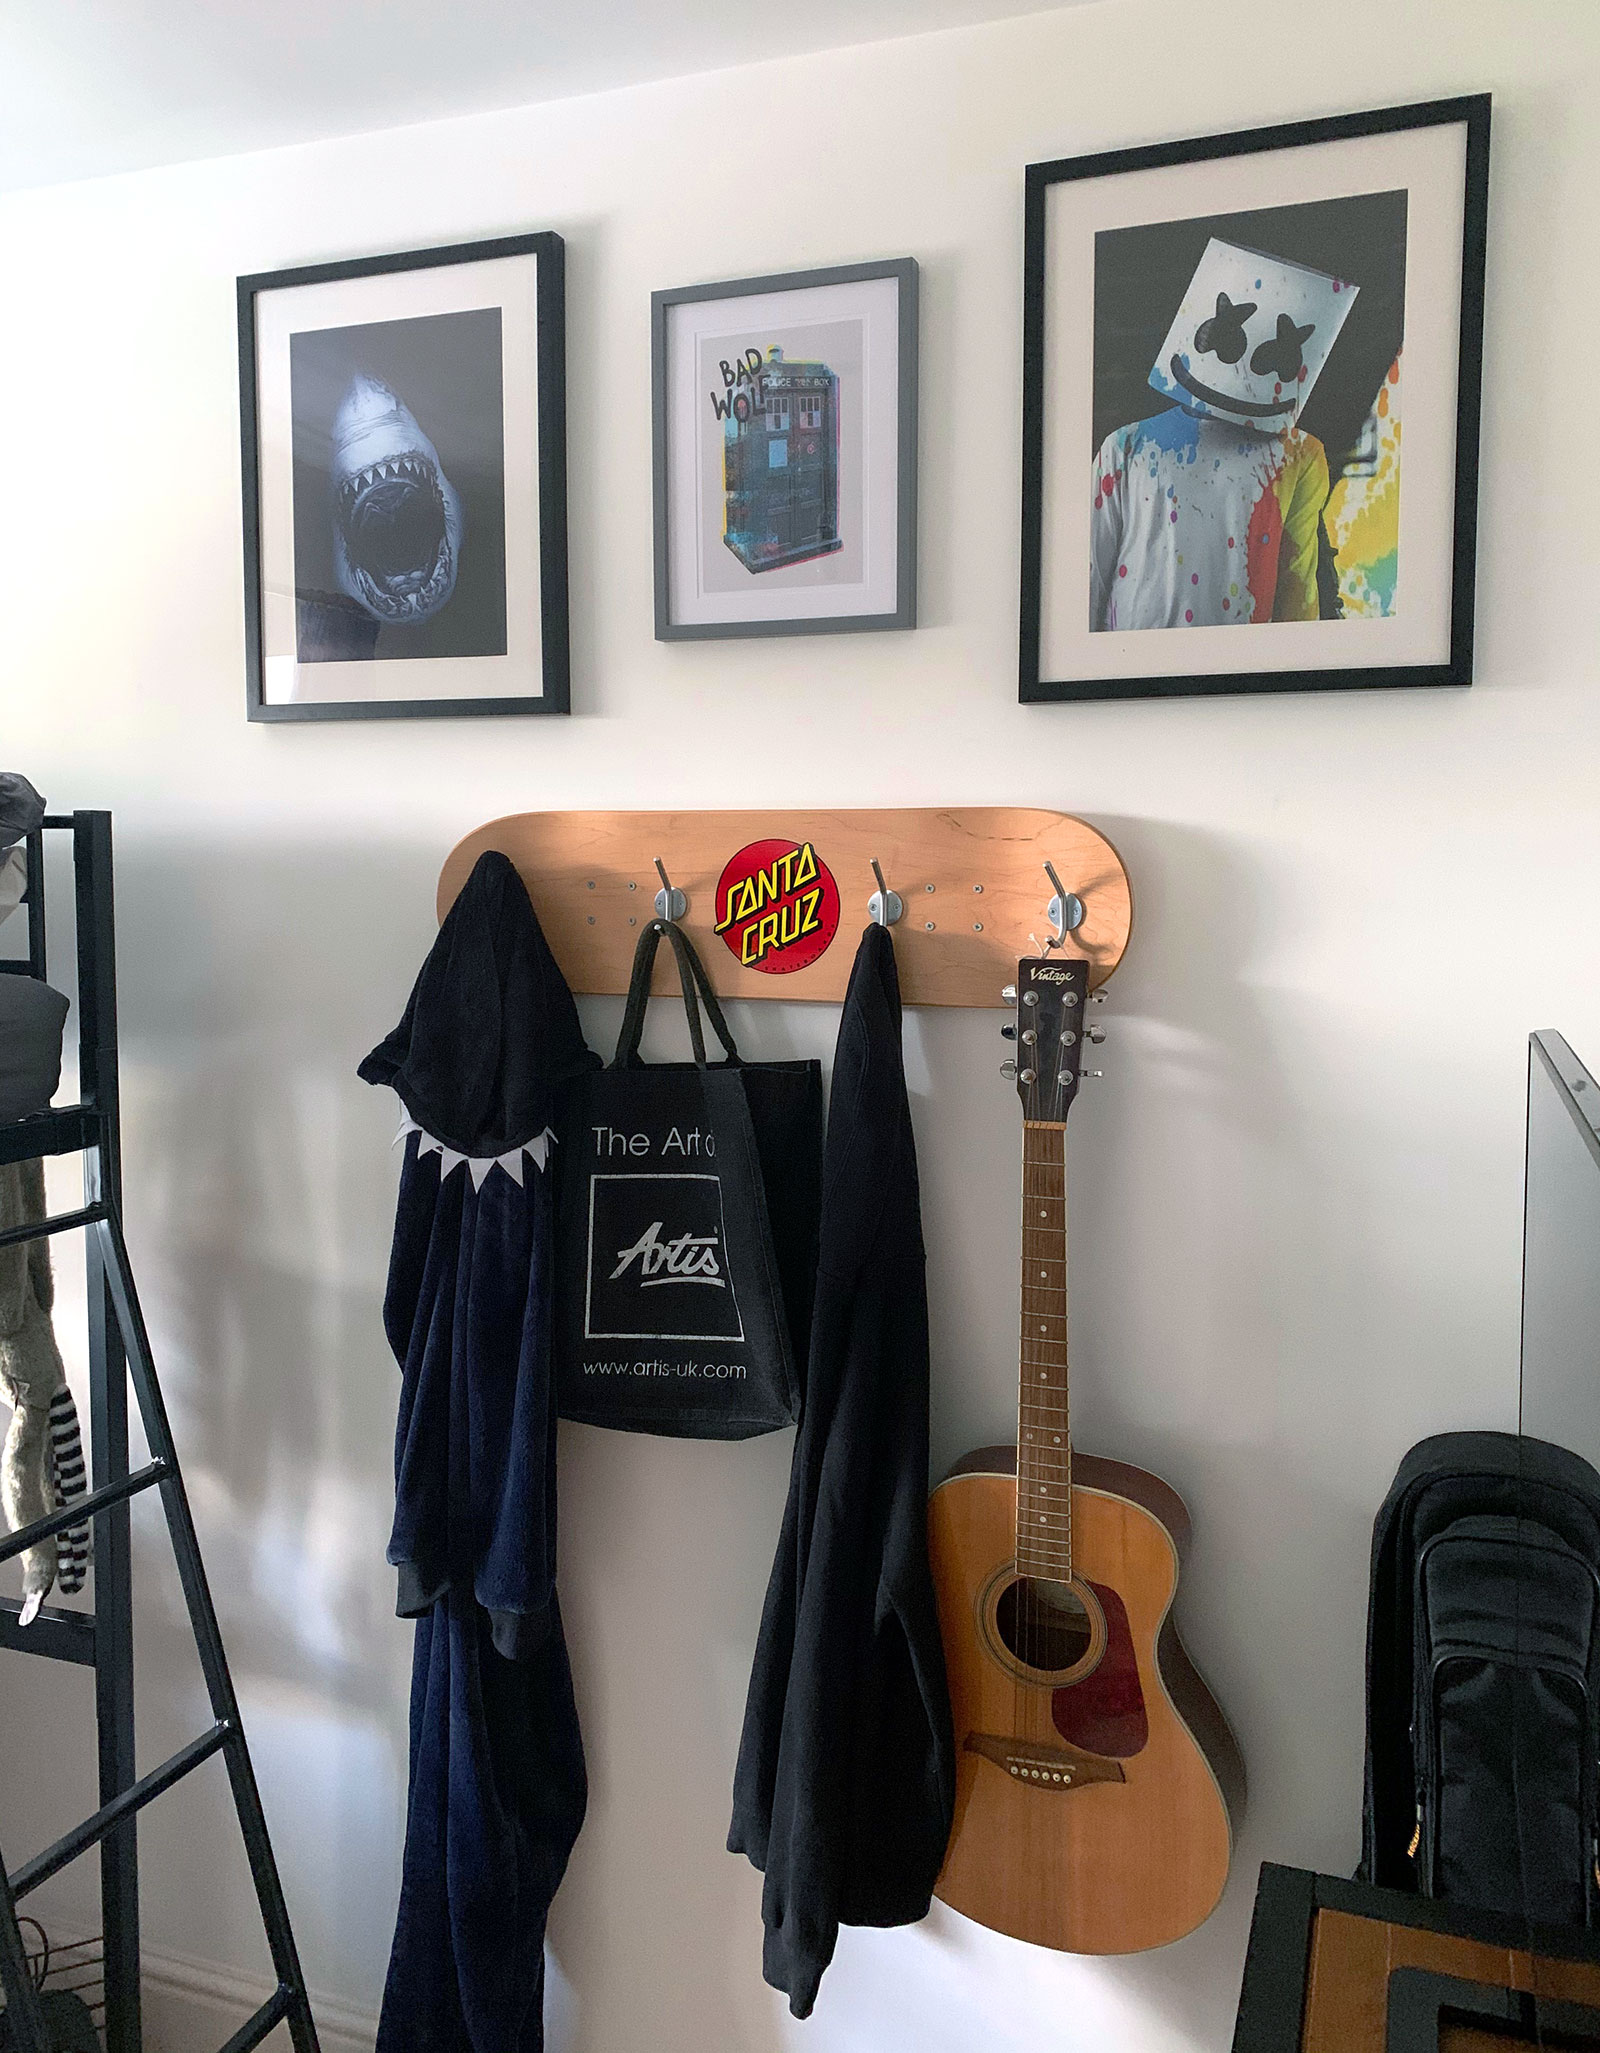
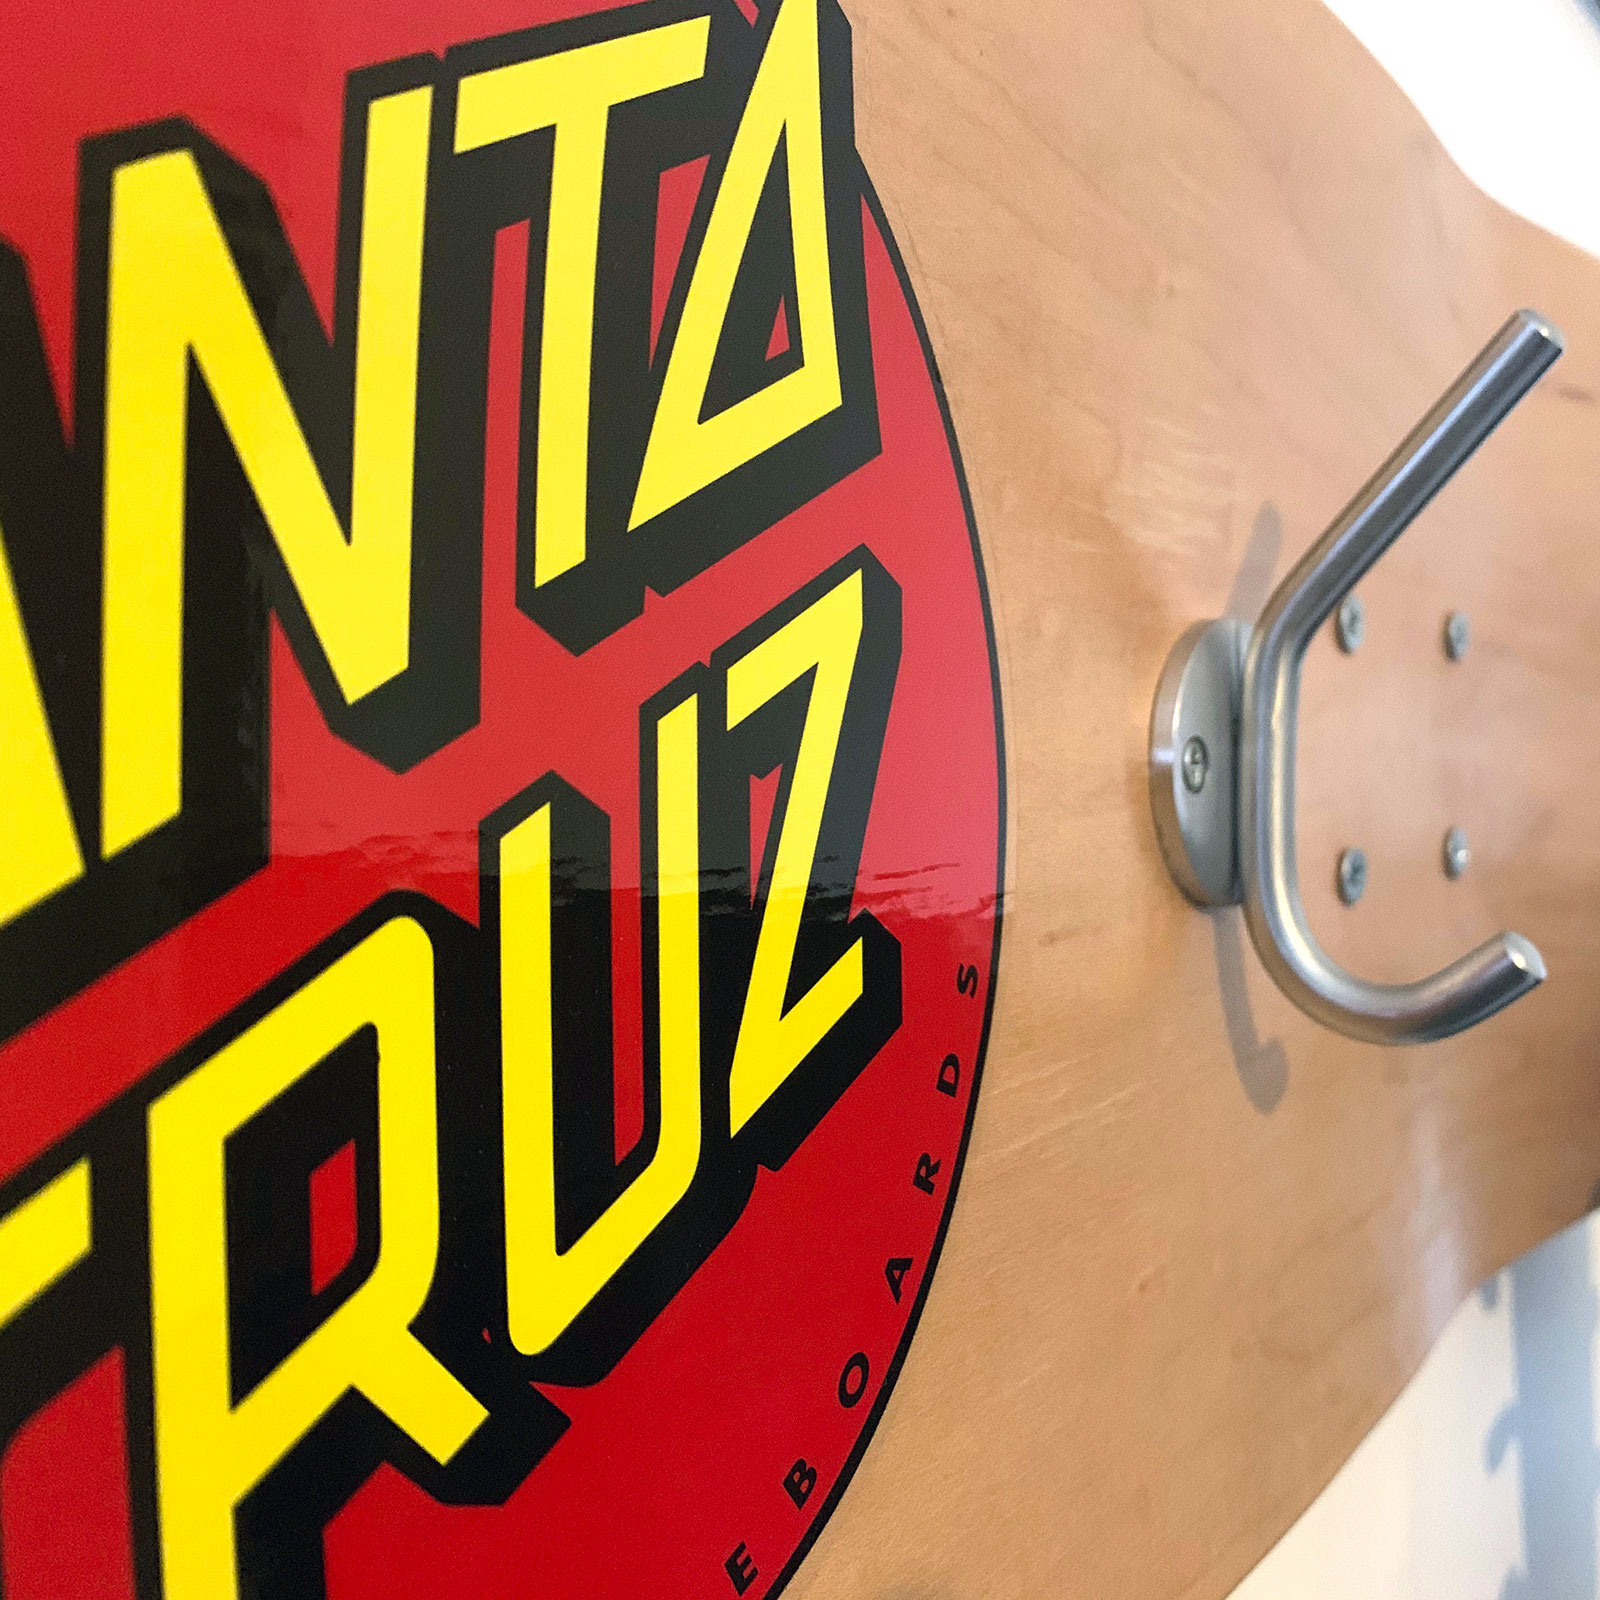
In April 2019 I was lucky enough to take the keys to a new flat that I had just purchased. I say new, it was a 1930’s building and the flat itself was in need of a complete refurb (something I will cover in depth in future blogs) so consequently everything going into the flat needed careful consideration, including the coat rack.
I knew I wanted something contemporary and cool but my searches on the internet weren’t really coming up with anything inspiring and if anything was close to what I was looking for then it would also have a ridiculous price tag!
This got me thinking that if I really wanted something contemporary, cool and unique that fitted well in the flat then I would have to make it myself. Much to my delight the solution I came up with filled my brief perfectly, was easy enough to make and if I do say so myself looks really flippin awesome!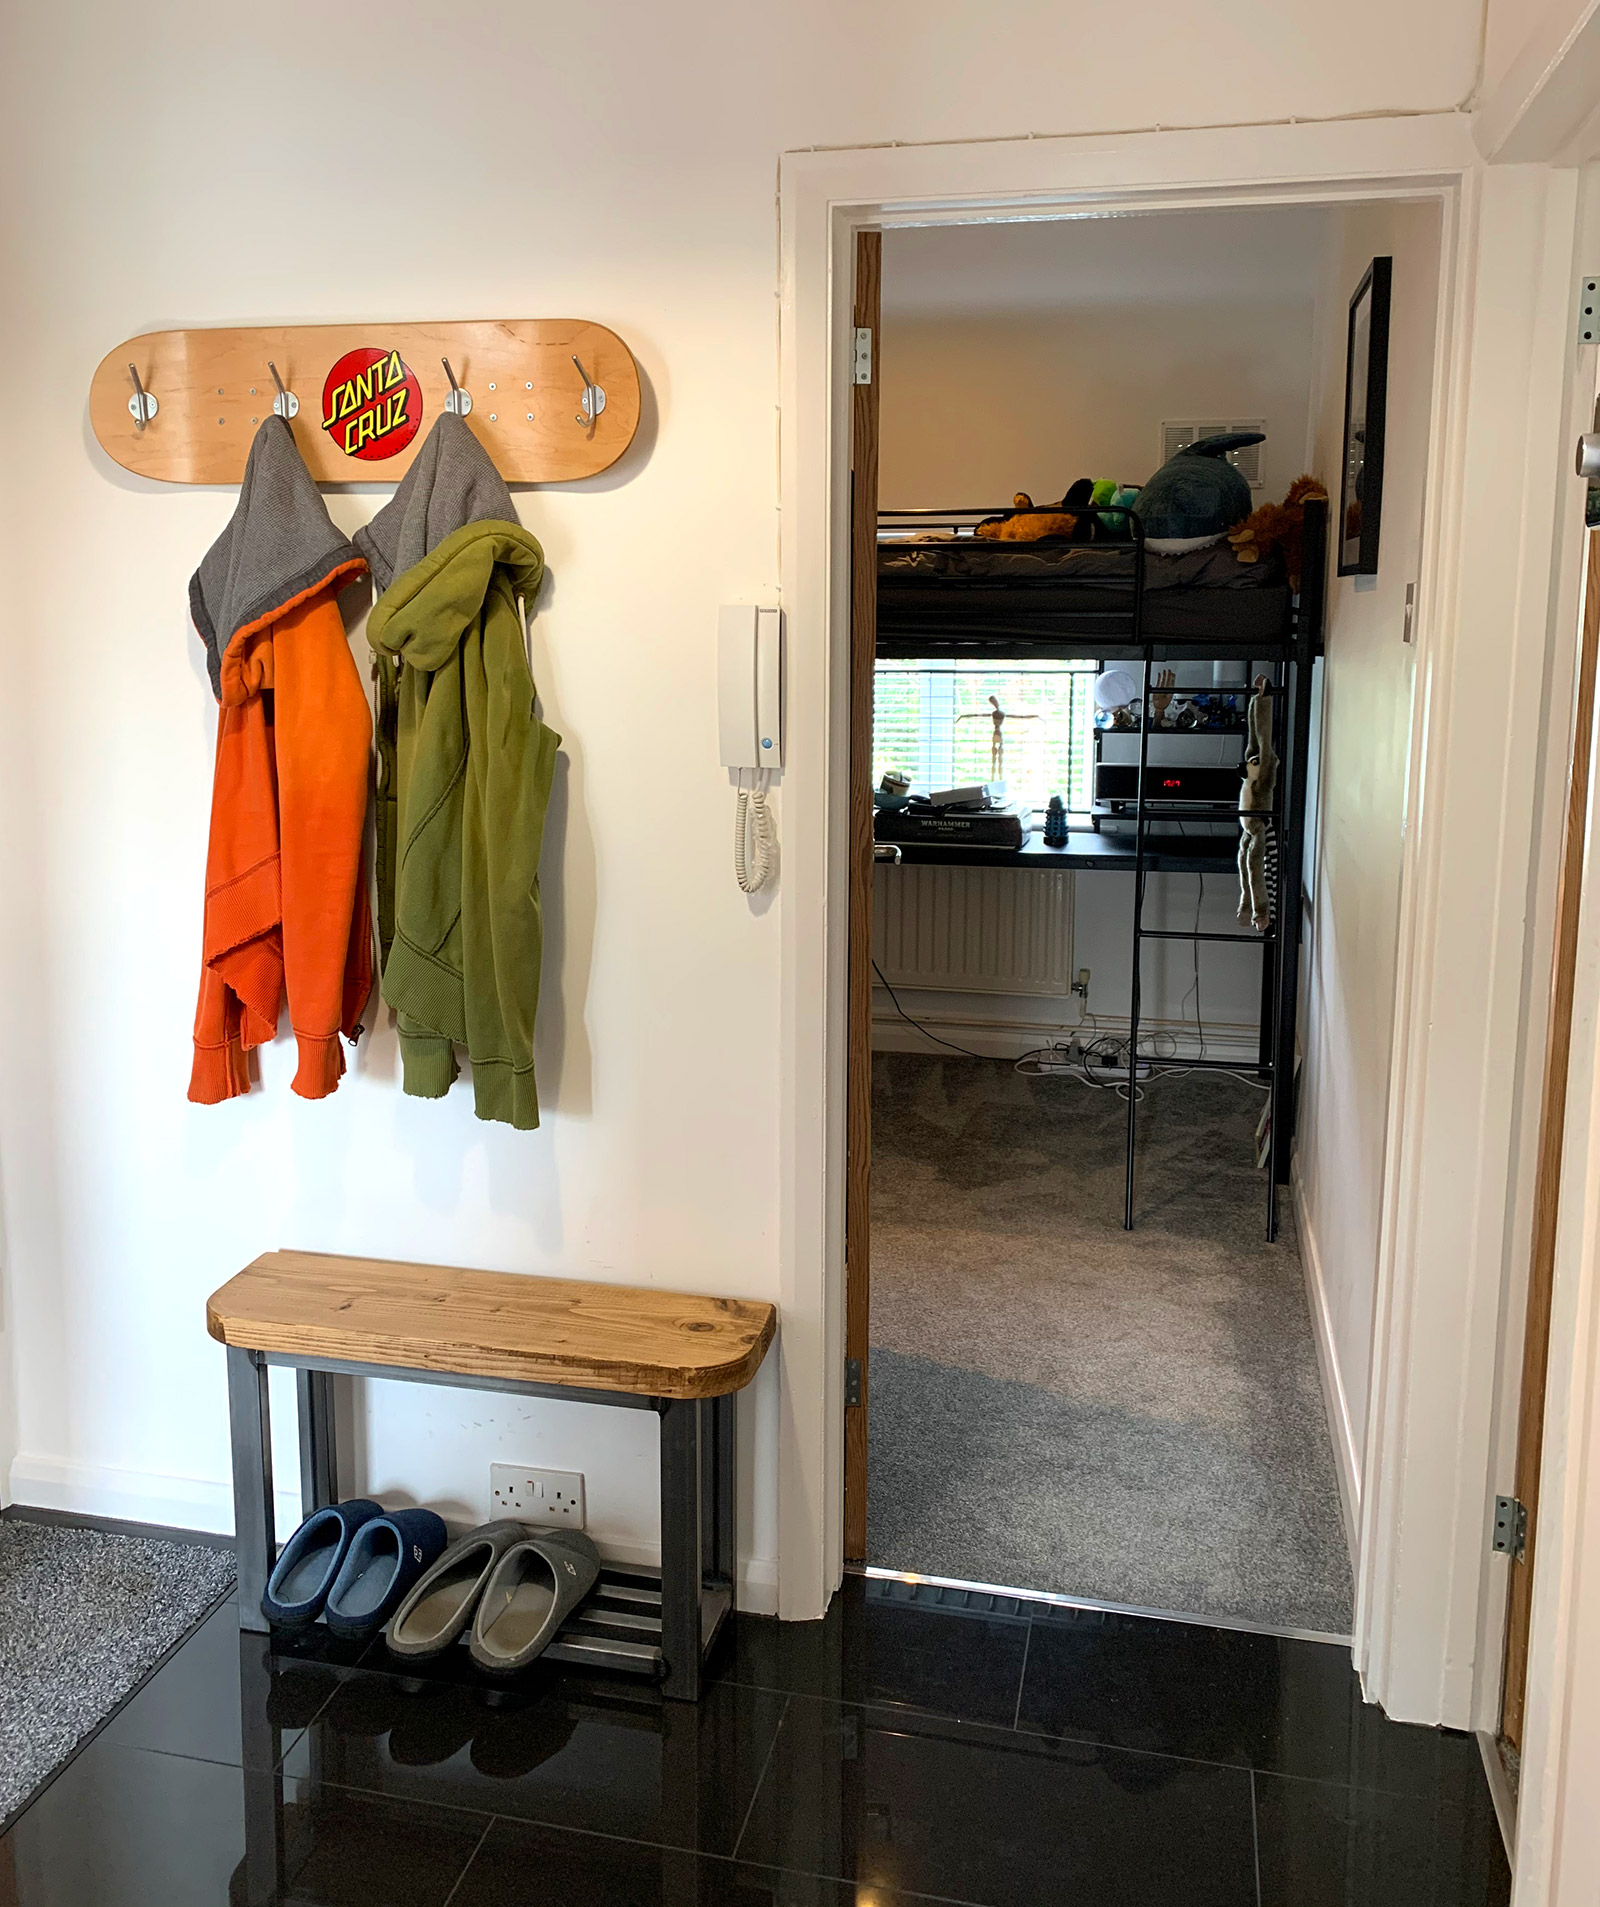 The skateboard coat rack looked great in the hallway of my flat and since moving on and into a new house with my partner it looks equally as good on my sons bedroom wall (it was put there at his request as he loved it more than I did).
If you like the idea of having a customised skateboard coat rack in your home then do get in contact to discuss having one commissioned via our contact form.